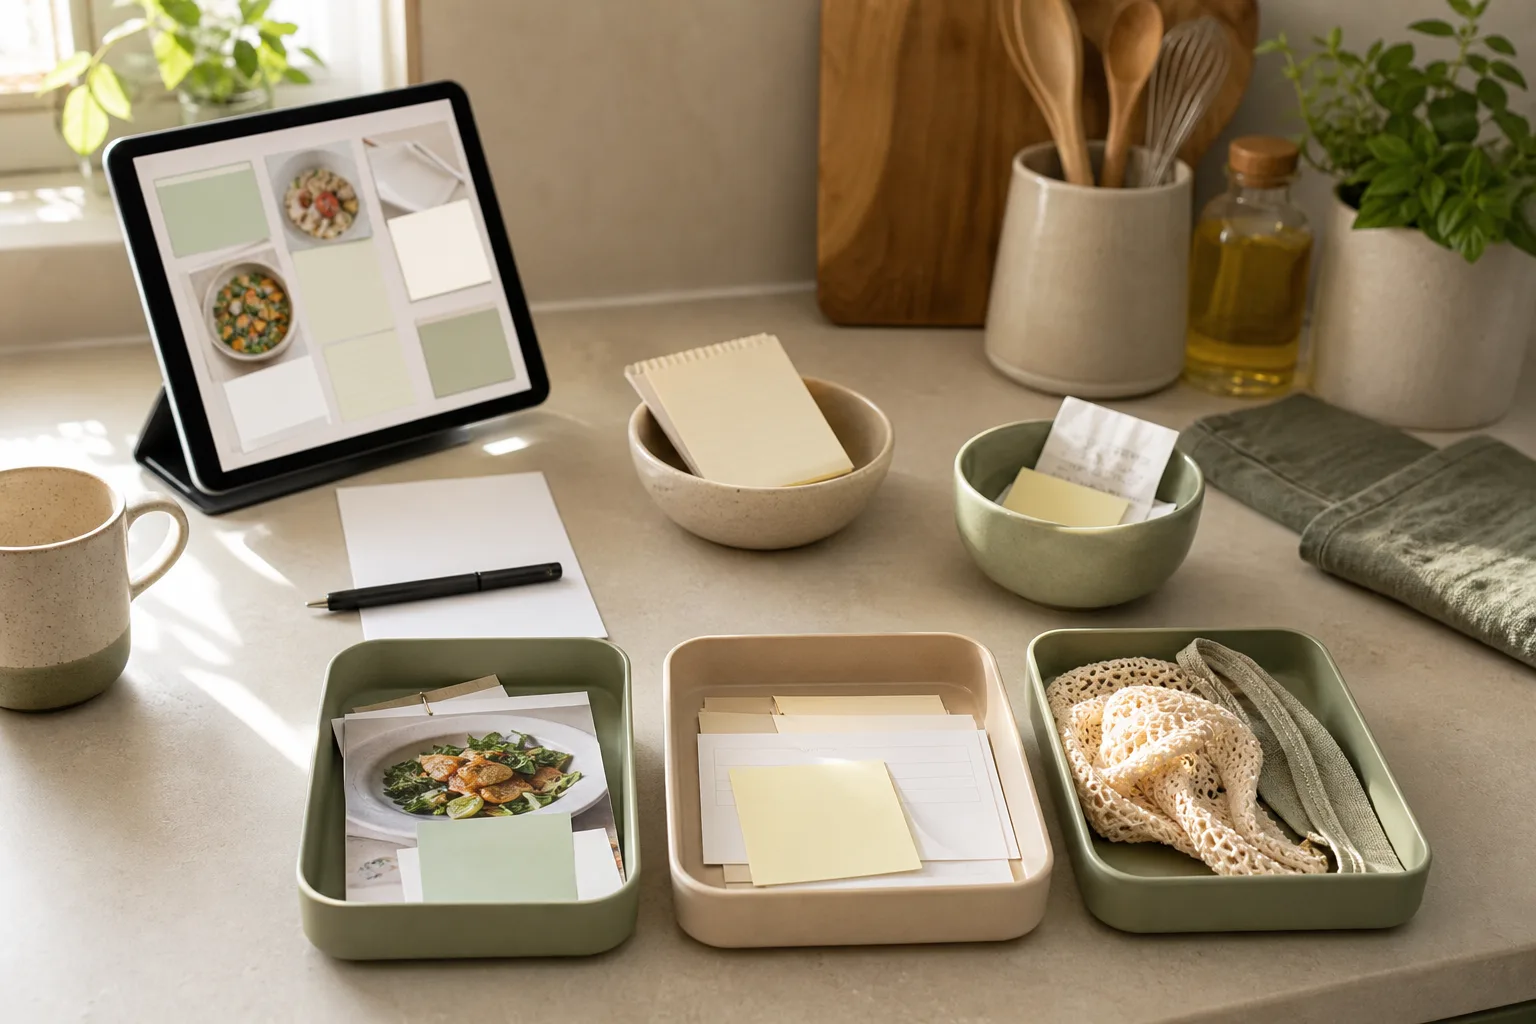
A simpler meal routine can begin with one small kitchen organization task: create a clear worktop zone for the next meal, the shopping list, and the notes you are likely to use. This 15-minute routine uses four steps—prepare, sort, act, and review—so you can reduce visual distractions without reorganizing the whole kitchen.
What the 15-minute routine is designed to do
A worktop often becomes a temporary landing place for several different things: unopened groceries, recipe notes, reusable bags, receipts, appliances, and reminders about meals. When these items share one surface, it can become harder to see the next useful action. The goal of this routine is not to create a showroom-style kitchen. It is to make the next meal-related decision easier to find.
The routine uses three practical zones:
Use now: items connected to the next meal or immediate kitchen task.
Decide later: notes and items that need a decision but do not belong to the current meal.
Move elsewhere: objects that belong in another room, cupboard, recycling area, or shopping bag.
These zones can be represented by three small groups on the worktop, or by temporary containers placed nearby. No special organizer is required. A sheet of paper, a pen, and a timer are enough to begin.
Step 1: Prepare the worktop in 2 minutes
Set a timer for two minutes and remove anything that is clearly unrelated to food planning or kitchen use. Put each item in a temporary location rather than stopping to find its final home. The purpose of this first step is to make sorting easier, not to complete every household task.
Keep the following within reach:
One sheet of paper or a note-taking app for the shopping list.
A pen if you are using paper notes.
The meal note, recipe, or short plan for the next meal.
A small container or defined spot for items that need to move elsewhere.
Choose one reference point for the routine. For example, you might use the next meal that needs preparation, the next grocery trip, or the meal that has created the most notes. Selecting one focus prevents the worktop from becoming a planning board for every possible future meal.
Step 2: Sort items into useful groups in 4 minutes
Now look at each item on the worktop and assign it to one of four groups. The fourth group is useful for information that is not a physical object.
Group
Question to ask
What happens next
Next meal
Will this help with the meal I am focusing on?
Keep it in the active worktop zone.
Shopping
Does this represent something to buy or check?
Add a short entry to the shopping list.
Meal notes
Is this a recipe idea, preference, substitution, or reminder?
Place it with the meal notes or record it digitally.
Elsewhere
Does it belong outside this meal routine?
Move it to a temporary relocation spot.
Keep the labels short. A shopping list entry can be a food or household item name without extra explanation. A meal note can describe the decision you need to remember, such as “try this with rice” or “check what is already available.” The aim is to capture enough information for the next action, rather than writing a complete diary of the meal.
If an item fits more than one group, give it one temporary home and record the other connection in a note. For example, a recipe page may support the next meal and suggest a shopping item. Keep the recipe with the next meal, then add only the needed purchase to the shopping list.
Step 3: Act on the clearest next actions in 6 minutes
Use the next six minutes to turn the sorted groups into visible actions. Start with the worktop because physical movement often reveals which notes are still vague.
Create a small active-meal zone
Select one area for the meal you are focusing on. Place only the related note, ingredient reminder, or utensil-related prompt there. If the area becomes crowded, keep the most useful note and move the rest to the meal-notes group. The active zone is a short-term workspace, not permanent storage.
Write the shopping list as decisions
Review the shopping group and write each item in a way that will make sense when you see it away from the kitchen. If an item depends on a choice, include that choice briefly. For example, “vegetables for soup” may be less useful than a specific item you have already decided to consider. When you have not decided, place the entry in a separate “decide” section instead of treating it as a confirmed purchase.
Buy: items that are already clear.
Check: items you may already have or need to compare.
Decide: items that need a meal or preference decision first.
Reduce meal notes to usable prompts
Meal notes work best when they help with a future decision. Rewrite long or scattered notes into one-line prompts. Useful formats include:
“Make again when planning a quick dinner.”
“Compare with the other lunch option.”
“Use the remaining ingredient in another meal.”
“Ask whether this belongs on the next shopping list.”
These prompts do not need to predict the entire week. They simply preserve the part of the idea that would otherwise be easy to forget.
Move unrelated items without creating a second pile
Take the “elsewhere” group to a temporary relocation point, such as a basket or a nearby shelf. If you cannot complete the relocation now, leave one clear note about its destination. A temporary group is useful only when it has a next step; otherwise it can become another form of clutter.
Step 4: Review the setup in 3 minutes
Use the final three minutes to check whether the worktop communicates the next action at a glance. Review the setup with these questions:
Can I identify the meal or kitchen task I am focusing on?
Is the shopping list separate from general meal ideas?
Are uncertain items marked as decisions rather than purchases?
Does each note have a clear place to return to?
Is there enough open surface to begin the next task comfortably?
If the answer to a question is no, make one small adjustment. Remove one extra note, combine two similar entries, or move a nonessential object. Avoid expanding the routine into a full kitchen clean-up. The review is meant to improve the information flow around meals, not to solve every storage problem in one session.
A copyable 15-minute checklist
Save or copy this checklist for a future worktop reset:
Prepare — 2 minutes: Set a timer, clear unrelated objects, and gather paper or a note app.
Sort — 4 minutes: Separate next-meal items, shopping items, meal notes, and items that belong elsewhere.
Act — 6 minutes: Set up the active-meal zone, write clear shopping entries, shorten meal notes, and move unrelated items.
Review — 3 minutes: Confirm that the next action, shopping list, and open worktop area are easy to identify.
For a more compact version, use this table:
Time
Action
Finished when
0–2 min
Prepare
Unrelated objects are out of the active area.
2–6 min
Sort
Items have a group: next meal, shopping, notes, or elsewhere.
6–12 min
Act
The active zone and shopping list are usable.
12–15 min
Review
The next meal-related action is easy to see.
How to keep the routine manageable
Use the routine when the worktop begins to mix several kinds of information, rather than waiting for a large reset. You can also attach it to an existing moment, such as after making a shopping list or before planning the next meal. The frequency can vary with your household and schedule.
Keep one consistent place for meal notes and one consistent place for shopping information. The physical worktop can change from day to day, but the information destinations are easier to use when they remain familiar. If you prefer digital notes, use headings such as “Next meal,” “Buy,” “Check,” and “Meal ideas.” If you prefer paper, use the same labels on one sheet.
When the routine stops working, look for the point of friction. A list may be too detailed, a note may be too vague, or the active zone may contain too many items. Adjust that part rather than adding more containers or more planning categories.
Conclusion
A practical kitchen organization system can begin with a 15-minute worktop reset. Prepare the area, sort information into four groups, act on the clearest meal and shopping tasks, and review the result. The value comes from making the next decision easier to see, not from maintaining a particular visual style. Repeat the routine when meal notes and shopping reminders start competing for the same space.
FAQ
Do I need a dedicated kitchen organizer?
No. A sheet of paper, a note app, or a temporary container can support the routine. A dedicated organizer may be useful later if it solves a repeated problem, but it is not required to begin.
What if I do not have a meal plan?
Use the next meal decision as the focus. You might choose what to prepare, what to buy, or what ingredient to use. The routine can organize the decision without requiring a complete schedule.
Where should general recipe ideas go?
Keep them separate from the active-meal zone and the confirmed shopping list. A “meal ideas” note or a separate section on paper can hold them until you are ready to review them.
What if I cannot finish in 15 minutes?
Stop at the end of the timer and leave a short continuation note. Record the next action, such as “review decide list” or “move basket items.” The routine can remain useful even when the whole worktop is not fully resolved.
CELINE Doctor pouch in supple natural calfskin brings a polished, quietly distinctive presence to the clutch-bag wardrobe. Its tan colour, smooth calfskin surface and structured doctor-pouch profile create a considered balance between classic elegance and modern ease. Designed with a single handle and a zipper closure, it can be carried by hand or styled as a refined accent within a broader day-to-evening look.
The generous proportions give the silhouette visual substance without relying on excessive decoration. A gold-lettered logo on the front supplies a precise metallic detail, while the spacious interior compartment supports a more organised approach to carrying essentials. With its Italian manufacture and understated finish, this CELINE design is suited to those who value recognisable craftsmanship expressed through clean lines rather than overt embellishment.
For a close view of the shape, colour and detailing, consult the product imagery alongside the listed measurements. The dimensions are 35 cm in width, 18 cm in height and 18 cm in depth, creating a distinctive profile that is easy to make the focal point of an outfit.
Design details that define the silhouette
The appeal of CELINE Doctor pouch in supple natural calfskin lies in the relationship between its practical construction and its refined visual language. Each stated detail contributes to a bag that feels deliberate, versatile and easy to coordinate.
Supple natural calfskin: Smooth leather gives the exterior a clean, composed appearance and allows the tan colour to remain the central styling note.
Doctor-pouch shape: The rounded, substantial profile offers a distinctive alternative to flatter clutch silhouettes, adding presence to simple outfits.
Single handle: The carry handle encourages hand-held styling and makes the bag particularly effective when the rest of the look is kept uncluttered.
Zipper closure: A practical closure preserves the streamlined outline while providing a secure finish for the spacious interior compartment.
Gold-lettered front logo: The logo introduces a measured metallic accent, coordinating naturally with gold jewellery, watches or other warm-toned accessories.
Suede calfskin lining: The stated lining material adds a softly considered interior finish.
Italian manufacture: The country of manufacture is Italy, as specified in the product information.
The result is a bag with enough character to stand alone, yet enough restraint to work across varied wardrobes. Its metal finish and front logo are visible points of distinction, while the smooth leather and tan colour keep the overall impression balanced.
How to style it from day to evening
For a polished daytime combination, pair the tan pouch with a crisp white shirt, softly tailored trousers and understated loafers. The warm leather colour can soften a monochrome outfit while maintaining a professional, composed mood. Keep the jewellery restrained and allow the gold-lettered front logo to act as the principal accent.
For a relaxed weekend look, use the bag to elevate denim, a fine knit and clean leather footwear. The doctor-pouch shape brings structure to more casual pieces, making the outfit feel intentional without appearing formal. Tan also works naturally with cream, camel, chocolate and muted olive, creating an easy palette for seasonal coordination.
When dressing for an evening setting, style it with a fluid black dress, a tailored blazer or a tonal column of neutral separates. Carrying the bag by its single handle highlights its sculptural outline and keeps the look elegant. Gold earrings or a slim gold watch can echo the metal finish without competing with the front logo.
The proportions also make it a useful choice when a smaller accessory would feel visually slight. Before leaving home, consider what you genuinely need to carry and arrange those essentials within the spacious interior compartment. A tidy interior supports the bag’s clean exterior impression and helps preserve the ease of the silhouette.
For visual balance, avoid overloading the outfit with multiple prominent logos or highly ornate accessories. The design already combines a recognisable CELINE signature, a warm leather tone and a defined form. Letting those elements remain clear is the most convincing styling approach.
What to consider before choosing
Begin with the role you want the bag to play. If you are looking for a hand-carried piece with a noticeable profile, the single-handle construction and doctor-pouch shape are central advantages. If your preference is for a very compact, flat clutch, the stated 18 cm depth and spacious interior may feel more substantial than expected.
Next, assess colour compatibility. TAN is a versatile warm neutral, particularly suited to wardrobes built around cream, ivory, black, brown, denim and other softened natural shades. It can also provide a gentle contrast against cooler grey or navy. Consider the accessories you already wear, especially if you prefer the metal finish to coordinate with existing jewellery.
Proportion is another important selection criterion. At 35 cm wide, 18 cm high and 18 cm deep, this is a visually present bag rather than a barely-there evening pouch. These measurements should be compared with your usual carrying habits and with the scale of your outerwear, tailoring or dresses.
Finally, review the product imagery carefully for the exact appearance of the leather, logo placement and finish. A premium leather accessory benefits from thoughtful coordination and careful handling, so choose it for a wardrobe context in which its smooth surface and tan tone can be appreciated.
For care, keep the calfskin away from unnecessary friction, moisture and substances that could mark smooth leather. Store it in a clean, dry setting and avoid placing heavy items on top of its structured form. Follow any care guidance supplied with the product and seek specialist advice if the leather requires attention.
Frequently asked questions
What is the exact product name? It is CELINE Doctor pouch in supple natural calfskin.
What colour is the pouch? The listed colour is TAN.
How can it be carried? The design has a single handle and is described as a shoulder bag with a carry handle. Please review the product images and current product page for the most complete presentation of its carrying options.
What are the measurements? The listed measurements are 35 cm wide, 18 cm high and 18 cm deep.
What materials are specified? The exterior is calfskin, the lining is suede calfskin, and the finish is gold.
Where was it manufactured? The product information states Italy as the country of manufacture.
Please verify current product details, condition, measurements, materials and purchase information on the product page before purchase.
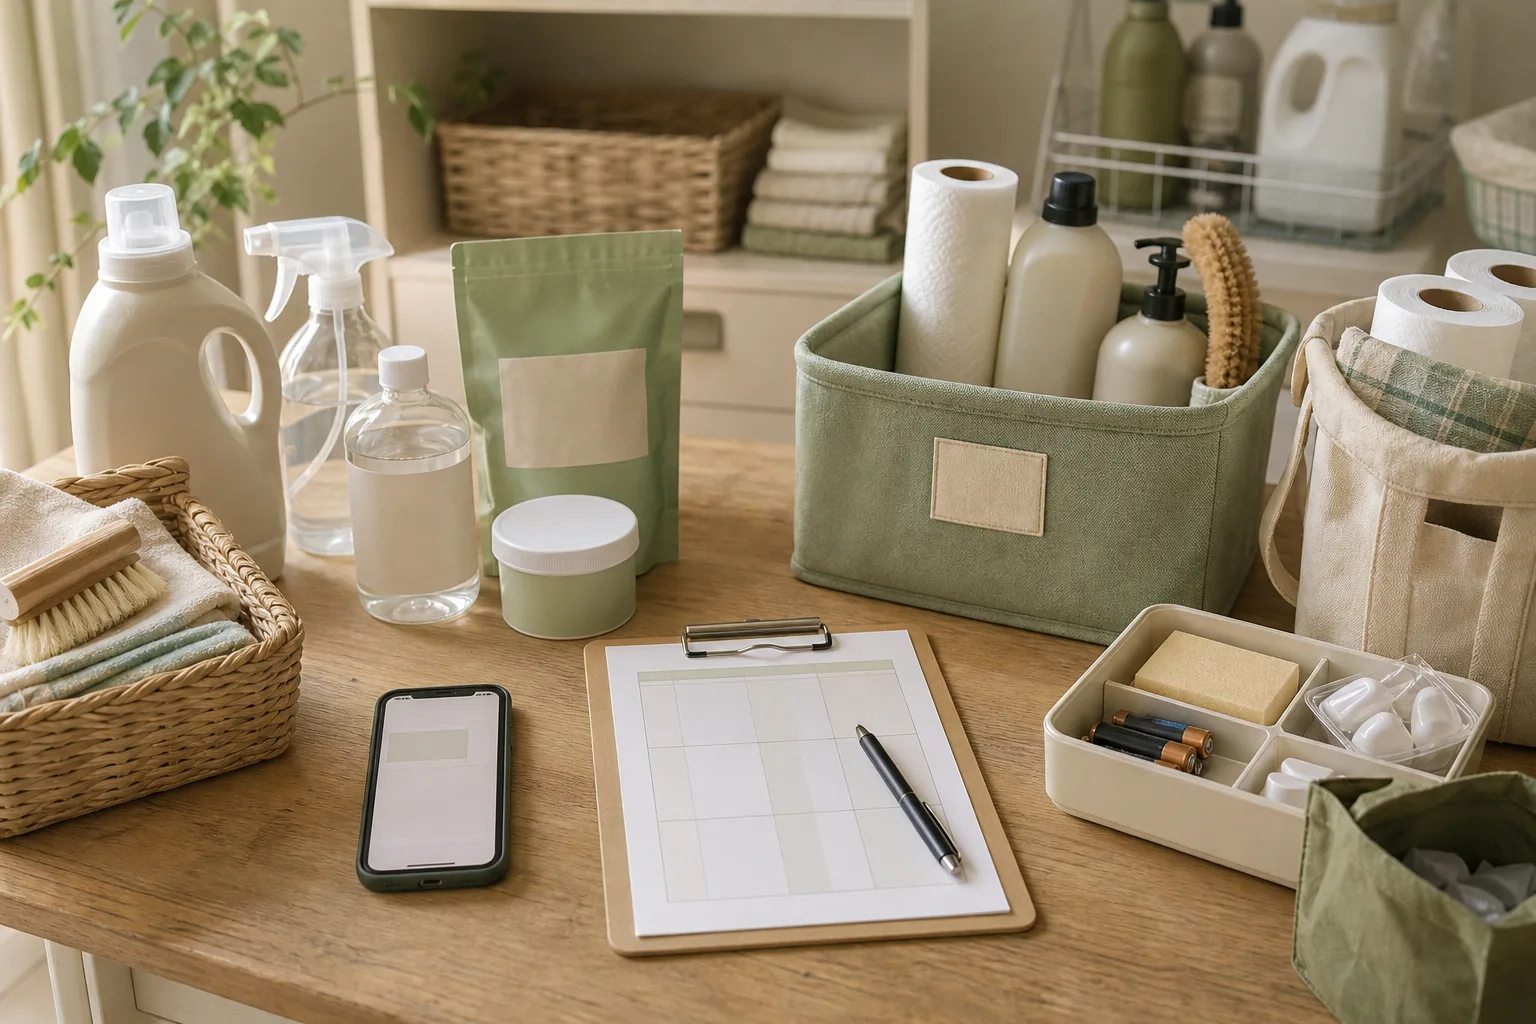
A practical approach to home organization does not require a full-room makeover. For household supplies, a 15-minute check can be enough to see what you have, group similar items, identify what needs attention, and record a short restocking note. The goal is not to create a detailed warehouse inventory. It is to make the next small household decision easier.
What this routine is for
This routine works best for everyday supplies that tend to disappear into cabinets, drawers, closets, or utility areas. Examples include cleaning materials, paper goods, laundry items, light bulbs, batteries, and basic kitchen or bathroom consumables. You can use the same method for any category, but focusing on one category at a time keeps the task within a short session.
For a one- or two-person home, a lightweight note is often more useful than a long spreadsheet. Record only information that helps with the next action:
What is available now?
What is open or partly used?
What is running low?
What belongs somewhere else?
What should be checked again later?
A useful home organization system should fit the way the home is used. If a product is used in the kitchen, storing it far away may create friction even when the storage area looks tidy. The routine below therefore considers both quantity and home flow.
Prepare: set up a small review area
Preparation should take about two minutes. Choose one supply category and a surface where items can be grouped temporarily. You can use a table, a clear section of the floor, or the counter near the storage area.
Gather the basics
A phone note, paper note, or simple spreadsheet
A pen if you are working on paper
A small bag or box for items that belong elsewhere
A recycling or disposal option for empty packaging, following local rules
A timer set for 15 minutes
Do not remove every supply in the home unless the category is very small. Start with one cabinet, shelf, drawer, or storage zone. A defined boundary prevents the tidy-up routine from expanding into an unfinished house-wide project.
Choose one question
Give the session a practical purpose. For example:
“Do I have enough cleaning supplies for the next ordinary use?”
“Which paper goods are duplicated?”
“Where should laundry supplies live?”
“What can I stop storing in the daily-use area?”
A question helps you make decisions quickly without trying to redesign every storage rule at once.
Sort: use four simple groups
Spend about five minutes sorting the items you selected. Use four groups rather than creating many labels. The groups can be physical piles or headings in your note.
1. Ready to use
Place items that are in use or easy to reach in this group. If several similar items are open, consider placing them together so the next-use item is visible. This is not a recommendation to discard usable supplies. It is a way to make the current stock easier to understand.
2. Reserve stock
Place unopened or spare items here. Keep reserve stock in one defined location when possible. A single reserve area reduces the chance of buying a duplicate simply because the spare item was hidden in a different room.
3. Relocate
Place items that are usable but stored in an inconvenient location here. Think about the point of use: bathroom items near the bathroom, cleaning tools near the area where they are used, and frequently handled supplies at a comfortable reach. The best location depends on the layout of your home and the habits of the people who use it.
4. Review
Use this group for items that need a separate decision. This may include damaged packaging, unclear contents, items that belong to another person, or products that need label and safety instructions checked before use. If an item involves a safety concern, follow the product label and relevant local disposal guidance rather than relying on a quick assumption.
Act: make only the decisions that matter today
Spend about five minutes on visible actions. Keep the actions small enough to finish during the session.
Combine the note. Write similar items under one heading instead of listing every individual object. For example, use “cleaning cloths” or “laundry detergent” as a category, with a short note such as “one open, one reserve.”
Move misplaced items. Return the relocate group to a practical storage area. If you cannot decide on a permanent location, place the item in a clearly marked temporary spot and add it to the review line.
Create a low-stock marker. Use a simple phrase such as “check before next shop” or “one remaining.” Avoid complicated quantity thresholds unless your household genuinely needs them.
Make duplicates visible. Keep reserve items together or record them in the note. Visibility can help prevent an unnecessary repeat purchase, but it does not replace checking the item before use.
Remove only clear waste. Deal with empty containers or clearly unusable packaging according to local recycling and disposal instructions. Leave uncertain items in the review group.
Storage rules should be easy to explain. A useful rule might be “daily-use items stay at the point of use, reserve items stay together, and uncertain items get a review note.” You can adapt this to your home rather than copying a rule that does not fit your cabinets or routines.
A copyable 15-minute action plan
Time
Action
Result
0–2 minutes
Choose one category and one storage zone
A clear boundary for the session
2–5 minutes
Gather the note, timer, and temporary bags or boxes
A ready review area
5–10 minutes
Sort items into ready, reserve, relocate, and review
A quick view of what needs attention
10–14 minutes
Move items, record low stock, and group reserves
Small actions completed during the session
14–15 minutes
Choose a follow-up date or next category
A clear stopping point
If the timer ends while a decision is unfinished, record it in the review group and stop at the boundary you set. Stopping on purpose helps keep a tidy-up routine manageable.
Copyable household supplies checklist
Use this checklist in a paper notebook or digital note. Adapt the categories to the supplies your home actually uses.
[ ] Choose one household-supplies category
[ ] Choose one cabinet, shelf, drawer, or storage zone
[ ] Set a 15-minute timer
[ ] Gather a note and a temporary relocation bag or box
[ ] Group items into ready to use, reserve stock, relocate, and review
[ ] Record open items and reserve items in short language
[ ] Move clearly misplaced items
[ ] Mark items that are running low
[ ] Group reserve stock in one practical location
[ ] Separate uncertain items for later checking
[ ] Handle empty packaging according to local guidance
At the end of the session, ask whether the note will be useful the next time you shop or tidy. If it contains too much detail, shorten it. A note that says “one open, one reserve, check next week” may be more useful than a record of brand names, exact measurements, and every storage movement.
Choose a review rhythm that matches consumption. Frequently used supplies may deserve a brief check during a regular household reset. Less frequently used items can be reviewed when the storage zone becomes difficult to navigate. There is no single correct interval because household size, habits, and storage space vary.
Notice repeated friction points. If the same item keeps moving between rooms, the storage rule may need adjustment. If a reserve supply is repeatedly forgotten, its location may be too hidden. If a category takes longer than 15 minutes, divide it into smaller zones rather than treating the longer session as a failure.
FAQ
Should I count every item exactly?
Not for a lightweight review. Exact counts can be useful for a specific household need, but a short note such as “one open and one reserve” may be enough for ordinary planning.
What if I find expired, damaged, or unfamiliar products?
Move them to the review group and check the label, manufacturer guidance, or local disposal instructions. Avoid guessing about safe use or disposal, particularly for chemical products.
Where should reserve supplies be stored?
Choose a location that is dry, practical, and visible to the people who use the supplies, while following product storage directions. Keeping similar reserve items together can make the inventory note easier to maintain.
What if 15 minutes is not enough?
Stop at the timer, write down the unfinished decision, and select a smaller zone for the next session. The purpose of the routine is a repeatable review, not a single large decluttering project.
Conclusion
A lightweight household supplies inventory note can support home organization without becoming another demanding project. Choose one category, sort items into four groups, take a few practical actions, and leave a short note for the next review. Over time, these small decisions can make storage rules and home flow easier to understand, while still allowing the system to change with your household.
BURBERRY Bucket bag with miniature Checks는 버버리의 시그니처 체크를 작은 패턴으로 담아낸 버킷백입니다. 빈티지 체크와 브라이어 브라운 컬러 조합이 클래식한 인상을 주면서도, 간결한 실루엣 덕분에 일상적인 스타일에 자연스럽게 어울립니다.
싱글 핸들과 얇은 스트랩을 갖춘 구조라 손에 들거나 어깨에 걸치는 방식으로 연출할 수 있습니다. 드로스트링 클로저는 입구를 조여 가방의 형태를 정돈하는 디테일이며, 대비 스티칭은 체크 패턴과 함께 디자인의 윤곽을 또렷하게 보여줍니다. 크기와 수납 균형을 함께 살펴보며 데일리백을 선택하고 싶은 분께 어울리는 아이템입니다.
가방의 폭은 16.5cm, 높이는 18.5cm, 깊이는 11cm입니다. 작은 소지품을 중심으로 간결하게 챙기는 스타일에 적합한 비율이며, 구매 전 실제로 휴대하려는 물건과 크기를 비교해 보세요.
디자인과 사양 살펴보기
체크 패턴이 만드는 클래식한 분위기
미니어처 체크 패턴은 BURBERRY Bucket bag with miniature Checks의 중심 요소입니다. 패턴 자체가 충분한 포인트가 되므로 의상은 무지 톱이나 셔츠, 니트처럼 표면이 단정한 아이템과 매치하면 가방의 특징이 잘 드러납니다. 브라이어 브라운 계열의 색감은 블랙, 크림, 데님, 브라운 톤과 조화롭게 연결하기 좋습니다.
두 가지 휴대 방식
가죽 핸들은 손에 들었을 때 구조적인 느낌을 살려주며, 얇은 스트랩은 보다 편안한 크로스바디 또는 숄더 스타일을 구성할 수 있게 합니다. 출근 전후처럼 손에 가방을 들고 싶지 않은 상황에는 스트랩을 활용하고, 약속이나 외출에서는 핸들을 잡아 액세서리처럼 연출해 보세요.
확인해야 할 소재와 구성
코팅: 폴리우레탄 55%, 폴리에스터 25%, 면 20%
안감: 면 100%
마감: 송아지 가죽 100%
컬러: VNTG CHK/BRIAR BROWN
제조국: 이탈리아
크기: 폭 16.5cm, 높이 18.5cm, 깊이 11cm
제품 코드: BURH753NBEIZZZZZ00
이렇게 스타일링해 보세요
단정한 데일리룩에 포인트로
화이트 셔츠와 스트레이트 데님처럼 기본적인 조합에 매치하면 체크 패턴이 룩의 중심을 잡아줍니다. 가방의 브라운 계열과 신발 또는 벨트의 색을 맞추면 전체 스타일이 자연스럽게 이어집니다. 패턴 아이템을 여러 개 겹치기보다 한 가지 포인트로 활용하면 깔끔한 인상을 유지할 수 있습니다.
여유로운 주말 외출에는 크로스바디로
얇은 스트랩을 길이에 맞춰 조절해 크로스바디로 착용하면 양손이 자유로운 외출 스타일을 만들 수 있습니다. 가벼운 재킷, 니트, 데님 재킷과 함께 구성하면 체크 패턴의 클래식함과 캐주얼한 분위기를 균형 있게 살릴 수 있습니다.
손에 들어 실루엣을 강조하는 방법
싱글 핸들을 활용해 손에 들면 버킷백의 구조와 드로스트링 디테일이 더 잘 보입니다. 톤 다운된 원피스나 테일러드 재킷처럼 실루엣이 정돈된 옷과 조합하면 액세서리 중심의 세련된 스타일을 완성할 수 있습니다.
관리할 때는 소재와 마감의 구성을 먼저 확인하고, 사용 후에는 표면에 남은 먼지나 오염을 부드럽게 정리하는 방식으로 다루는 것이 좋습니다. 물, 마찰, 강한 열에 노출되지 않도록 주의하고, 보관 시에는 형태가 눌리지 않게 여유를 두세요. 구체적인 관리 방법은 상품 페이지의 안내를 우선 확인하시기 바랍니다.
구매 전 체크 포인트
휴대할 물건과 크기 비교: 폭 16.5cm, 높이 18.5cm, 깊이 11cm의 소형 비율입니다. 평소 지갑, 휴대전화, 키 등 자주 챙기는 물품이 들어갈지 먼저 확인하세요.
휴대 방식 선택: 손에 드는 핸들 중심의 스타일을 원하는지, 얇은 스트랩을 활용한 숄더 또는 크로스바디가 필요한지 생각해 보세요.
패턴과 색상 조율: 빈티지 체크와 브라이어 브라운은 룩에 존재감을 더합니다. 옷장에 있는 기본 색상과의 조합을 미리 떠올리면 활용도를 판단하기 쉽습니다.
소재와 디테일 확인: 코팅 혼방 소재, 면 안감, 송아지 가죽 마감으로 구성되어 있습니다. 소재별 특성을 확인하고 관리 환경과 맞는지 살펴보세요.
상품 정보 대조: 상세 이미지와 상품 페이지의 최신 정보에서 컬러, 크기, 구성 및 제품 코드를 구매 전에 다시 확인하세요.
이 가방은 큰 수납력보다 체크 패턴과 두 가지 휴대 방식, 컴팩트한 비율을 중요하게 보는 분에게 더 잘 맞습니다. 일상용 가방을 고를 때 필요한 물건의 양과 선호하는 착용법을 기준으로 판단하면 선택이 한층 명확해집니다.
자주 묻는 질문
어떤 방식으로 들 수 있나요?
싱글 핸들로 손에 들 수 있으며, 얇은 스트랩을 활용해 어깨에 걸거나 크로스바디로 연출할 수 있습니다.
가방의 크기는 어떻게 되나요?
폭 16.5cm, 높이 18.5cm, 깊이 11cm입니다. 수납할 물품의 실제 크기와 비교해 보세요.
ISABEL MARANT Oskan Hobo Soft Zip shoulder bag in suede brings a softly structured hobo silhouette into a versatile taupe palette. Its appeal lies in the balance between relaxed shape and considered detail: a single handle, a slim adjustable and detachable strap, studded accents, a zip closure and gold-tone metallic details. The result is a bag that can shift naturally between shoulder and crossbody styling while retaining a distinctly polished presence.
Made with a main material described as 100% calf velvet leather, complemented by cow leather and a 100% cotton lining, this design has a tactile character suited to elevated everyday dressing. Its single compartment and interior pocket keep the layout clear, while the proportions offer enough visual presence to anchor an outfit without overwhelming it.
In taupe, the bag works as a quiet neutral rather than a purely basic accessory. It can soften darker tailoring, complement warm tones and provide an understated finish to casual denim. For anyone selecting a handbag that can move across different wardrobes and styling moods, this design offers a compelling combination of adaptable wear and distinctive texture.
Design Details That Shape the Look
Soft hobo profile: The silhouette gives relaxed character to the design while maintaining a clean, wearable outline.
Two carrying options: A single handle allows a classic hand or shoulder presentation, while the thin strap is adjustable and detachable for crossbody wear when preferred.
Suede-led texture: The main material is listed as 100% calf velvet leather, giving the taupe colour a rich, tactile appearance.
Practical closure: A zipper closure helps define the opening and keeps the single-compartment format visually streamlined.
Organised interior: An interior pocket provides a dedicated place for smaller essentials within the main compartment.
Decorative finishing: Studded details and gold-tone metallic details add contrast to the soft surface without changing its understated character.
Balanced proportions: The listed measurements are 34.5 cm wide, 23.5 cm high and 6.5 cm deep, creating a compact yet noticeable profile.
The design is particularly effective when its contrasting qualities are allowed to remain visible: soft suede against sharper tailoring, a relaxed hobo shape beside clean trousers, or warm taupe paired with cooler neutrals. Rather than relying on excessive ornament, it uses texture, hardware and proportion to make the finish feel considered.
How to Style and Wear It
For an understated daytime look, pair ISABEL MARANT Oskan Hobo Soft Zip shoulder bag in suede with straight-leg denim, a fine knit and simple leather footwear. The taupe colour introduces warmth while remaining easy to coordinate, and the single handle can be used when the outfit benefits from a more refined, hand-carried finish.
When commuting between casual and polished settings, attach the adjustable strap and wear the bag crossbody. This keeps the styling relaxed and allows the hobo shape to sit close to the body. A tailored blazer or long coat can sharpen the overall effect, creating a useful contrast with the softness of the suede.
For evening-leaning occasions, use the bag as a shoulder piece with a fluid blouse, tonal trousers or a simple dark dress. The studded details and gold-tone metallic elements add a subtle point of interest, while the taupe shade keeps the outfit composed rather than overly formal.
Colour coordination can follow several directions:
Pair taupe with cream, oatmeal or camel for a tonal, softly layered palette.
Use black, charcoal or navy to make the texture and gold-tone details more visible.
Combine it with olive, burgundy or muted denim for a richer seasonal contrast.
Because the strap is detachable, the styling can be adjusted according to the occasion. Keep it attached for hands-free wear, or remove it when the single handle better suits a more structured outfit. The interior pocket is also useful for separating smaller items from the main compartment, helping preserve an orderly daily arrangement.
What to Consider Before Choosing
Begin with the silhouette. A hobo bag is well suited to those who prefer a softer outline over a rigid, highly structured shape. The listed width of 34.5 cm and height of 23.5 cm give the design a visible presence, while its 6.5 cm depth keeps the profile relatively slim. Consider the items you normally carry and compare them with these measurements before purchase.
Next, think about how you intend to wear it. The single handle supports a classic presentation, while the thin adjustable and detachable strap introduces shoulder and crossbody flexibility. If you value the option to change the bag’s styling from one outfit to another, this convertible carrying arrangement is an important part of the selection.
Material care should also inform your decision. Suede and other velvet-textured leathers have a distinctive surface that benefits from thoughtful handling. Store the bag in a clean, dry place and avoid unnecessary contact with moisture, oils, rough surfaces and strongly contrasting dyes. When not in use, keep its shape supported without compressing the suede, and follow any care guidance supplied with the product.
Finally, review the visual balance of the details. The taupe shade is versatile, but the studded accents and gold-tone metallic details give the bag a more expressive finish than a plain neutral. Choose it if you want a daily accessory that remains easy to coordinate while adding texture and a discreet decorative element to your wardrobe.
Frequently Asked Questions
Can it be worn crossbody?
Yes. The product description specifies a thin strap that is adjustable and detachable, allowing crossbody wear as well as shoulder or hand carrying.
What is the colour?
The listed colour is TAUPE, a versatile neutral that can be styled with light, dark and tonal wardrobes.
What materials are listed?
The main material is listed as 100% calf velvet leather, with 100% cow leather and a 100% cotton lining also specified.
Does it have internal organisation?
It has a single compartment with an interior pocket.
How should the suede surface be cared for?
Protect it from moisture, oils and abrasive contact, store it carefully and consult the product’s supplied care guidance for specific recommendations.
Please verify the current product details, measurements, condition and purchase information on the product page before purchase.
다음 주에 여유 시간을 만들고 싶다면 주말에 15분만 정해 고정 일정과 회복이 필요한 시간을 먼저 확인한 뒤, 실행 가능한 셀프케어 루틴 한 가지를 일정에 넣어보세요. 핵심은 할 일을 더 많이 적는 것이 아니라 이미 정해진 약속 사이에서 무리 없이 쓸 수 있는 시간을 발견하고 보호하는 데 있습니다.
왜 주말 15분 계획이 필요한가
휴식은 시간이 남을 때 저절로 생기지 않는 경우가 많습니다. 출퇴근, 업무, 집안일, 약속처럼 먼저 떠오르는 일정이 빈칸을 채우기 때문입니다. 그렇다고 주말에 다음 주 전체를 세밀하게 통제하려 하면 계획 자체가 부담이 될 수 있습니다.
15분 계획은 모든 일을 관리하는 방법이 아닙니다. 다음 주에 꼭 지켜야 할 일정과 미뤄도 되는 일을 구분하고, 짧은 회복 시간을 한두 곳에 배치하는 최소한의 정리입니다. 일정이 갑자기 바뀌거나 컨디션이 달라질 수 있으므로 계획에는 여유와 수정 가능성도 남겨두는 편이 좋습니다.
15분 셀프케어 루틴: 준비·분류·실행·점검
1단계: 준비하기, 2분
종이 한 장이나 평소 사용하는 메모 도구를 준비합니다. 여러 앱을 동시에 열기보다 한 곳에만 기록하면 시작할 때의 마찰을 줄일 수 있습니다. 다음 질문 세 가지만 적어보세요.
다음 주에 시간이 고정되는 일정은 무엇인가?
이미 예정된 일 중 피로가 커질 가능성이 있는 것은 무엇인가?
몸과 마음을 회복하기 위해 짧게라도 필요한 행동은 무엇인가?
이 단계에서는 해결책을 바로 찾지 않아도 됩니다. 먼저 눈앞의 일정을 한곳에 모으는 것이 목적입니다.
2단계: 분류하기, 5분
기록한 내용을 다음 네 가지로 나눕니다. 분류 기준은 완벽한 우선순위가 아니라 다음 주의 에너지 흐름을 보기 위한 것입니다.
분류
확인할 내용
예시
고정 일정
시간을 옮기기 어려운 약속
회의, 병원 방문, 가족 일정
필수 할 일
기한이나 생활 유지를 위해 필요한 일
식사 준비, 세탁, 업무 마감
에너지 소모
긴장이나 피로가 커질 수 있는 일
연속된 약속, 장시간 이동
회복 행동
짧게 실행할 수 있는 휴식 또는 정리
산책, 조용한 차 시간, 일찍 화면 끄기
‘에너지 소모’는 부정적인 일정이라는 뜻이 아닙니다. 좋아하는 약속이라도 이동이나 준비 때문에 피로가 생길 수 있습니다. 이 항목을 따로 표시하면 일정 뒤에 바로 또 다른 일을 붙이는 실수를 줄이는 데 도움이 됩니다.
3단계: 실행 시간 넣기, 5분
이제 회복 행동을 실제 시간대에 넣습니다. 처음부터 긴 시간을 확보하려 하지 말고 10~30분 안에서 선택하세요. 중요한 것은 이상적인 행동이 아니라 다음 주의 생활 속에서 실행할 가능성이 있는 행동입니다.
아침이 바쁘다면 취침 전 10분 동안 조명을 낮추고 기록을 멈추기
퇴근 뒤 바로 집안일을 해야 한다면 귀가 후 15분 동안 아무 일도 추가하지 않기
연속 약속이 있다면 약속 사이 이동 시간을 서두르지 않는 완충 시간으로 보기
주중 저녁이 불규칙하다면 비교적 변동이 적은 하루에 짧은 휴식 한 가지 배치하기
휴식 시간을 정할 때 ‘시간이 남으면 한다’라고 쓰기보다 ‘화요일 21시 이후 15분처럼’ 조건을 구체적으로 적어보세요. 다만 실제 일정이 바뀌면 해당 시간을 옮겨도 됩니다. 계획을 지키는 것보다 자신의 상태와 현실에 맞게 조정하는 것이 우선입니다.
4단계: 점검하기, 3분
마지막으로 계획이 과하지 않은지 확인합니다. 다음 세 질문에 모두 답해보세요.
회복 행동이 한 주에 지나치게 많이 들어가 있지 않은가?
실행 장소와 시작 조건이 분명한가?
일정이 바뀌었을 때 옮길 수 있는 대체 시간이 있는가?
답하기 어렵다면 회복 행동을 하나만 남기고 나머지는 선택 항목으로 바꿉니다. 예를 들어 ‘매일 저녁 운동하기’ 대신 ‘수요일 저녁 15분 산책, 여력이 없으면 창가에서 스트레칭’처럼 기본안과 대체안을 함께 적을 수 있습니다.
복사해서 쓰는 15분 실행표
아래 표를 메모장에 복사한 뒤 주말마다 필요한 부분만 채워보세요. 모든 칸을 채우는 것이 목표는 아닙니다.
항목
이번 주 기록
고정 일정
가장 피로할 가능성이 있는 일정
비워두고 싶은 시간대
15분 안에 가능한 회복 행동
실행 조건
언제 / 어디서 / 무엇을 시작할지
일정 변경 시 대체안
다음 주말 점검할 한 가지
저녁 루틴에 휴식을 넣는 방법
저녁 루틴은 한꺼번에 많은 습관을 추가할수록 유지가 어려워질 수 있습니다. 다음 주에는 기존 행동 뒤에 작은 회복 행동 하나만 연결해보세요. 예를 들어 양치 후 휴대전화를 다른 곳에 두기, 설거지 후 10분 동안 앉아 있기, 다음 날 준비를 마친 뒤 짧게 음악을 듣기처럼 이미 있는 행동을 시작 신호로 활용할 수 있습니다.
밤에 해야 할 일이 많은 사람은 ‘완전한 휴식’을 목표로 삼지 않아도 됩니다. 씻기 전 5분 동안 조용히 있기, 이동 중 화면을 보지 않는 구간 만들기, 잠들기 전에 내일의 걱정 한 가지를 메모하기처럼 부담이 낮은 형태도 괜찮습니다. 다만 수면 문제나 지속적인 피로처럼 건강상 우려가 있는 경우에는 이 계획법으로 해결하려 하지 말고 적절한 전문가 상담을 고려해야 합니다.
실행을 방해하는 상황과 조정법
일정이 자주 바뀌는 경우: 특정 시각 하나만 정하지 말고 ‘퇴근 후와 저녁 식사 사이’처럼 범위를 정합니다.
휴식에도 죄책감이 드는 경우: 휴식을 보상이나 사치로 표현하기보다 다음 일정을 확인하기 위한 회복 구간으로 기록합니다.
계획을 자주 잊는 경우: 새로운 알림을 여러 개 만들기보다 이미 확인하는 캘린더나 메모에 한 줄만 추가합니다.
주말에 계획할 힘이 없는 경우: 15분을 한 번에 쓰지 않고 5분씩 나누어 고정 일정, 회복 행동, 점검을 따로 진행합니다.
계획을 지키지 못한 경우: 실패로 결론 내리기보다 시간대, 행동의 크기, 주변 조건 중 무엇이 맞지 않았는지 하나만 기록합니다.
주말 점검 체크리스트
다음 주의 고정 일정을 한곳에 모았는가?
피로가 커질 수 있는 일정 뒤에 완충 시간을 확인했는가?
실행할 셀프케어 루틴을 한 가지 또는 소수로 줄였는가?
행동의 시간, 장소, 시작 조건을 적었는가?
일정이 바뀌었을 때 사용할 대체안을 남겼는가?
다음 주말에 확인할 기록 항목을 하나 정했는가?
자주 묻는 질문
15분이 부족하면 어떻게 하나요?
5분 단위로 나누어도 됩니다. 고정 일정만 확인하는 날과 회복 행동을 고르는 날을 분리할 수 있습니다. 계획의 길이보다 실제로 다시 확인할 수 있는 형식인지가 더 중요합니다.
셀프케어 루틴은 매일 해야 하나요?
매일 할 필요는 없습니다. 주중 일정과 체력에 따라 한두 번의 짧은 회복 행동부터 시작할 수 있습니다. 빈도보다 행동의 크기와 실행 조건이 현실적인지 먼저 살펴보세요.
휴식 시간에 아무것도 하지 않아도 되나요?
그럴 수 있습니다. 산책이나 독서처럼 활동이 있는 휴식도 있고, 조용히 앉아 있거나 화면을 보지 않는 시간처럼 자극을 줄이는 휴식도 있습니다. 자신에게 부담이 적고 실제로 회복감을 확인할 수 있는 방식을 선택하세요.
결론: 여유 시간은 작은 빈칸에서 시작됩니다
주말의 15분은 다음 주를 완벽하게 통제하기 위한 시간이 아니라, 이미 있는 일정 사이에 숨을 고를 공간을 확인하는 시간입니다. 준비·분류·실행·점검의 순서로 진행하고, 회복 행동은 작게 정한 뒤 일정 변화에 맞춰 조정해보세요. 처음부터 많은 습관을 만들기보다 다음 주에 실제로 시도할 수 있는 셀프케어 루틴 하나를 남기는 것이 부담을 낮추는 출발점이 될 수 있습니다.
FERRAGAMO Loafers with Gancini ornament는 단정한 로퍼 실루엣에 골드 로고 버클 스트랩을 더한 여성용 슈즈입니다. 매끈한 페이턴트 레더 표면과 둥근 앞코, 낮은 플랫 힐이 함께 구성되어 포멀한 인상과 일상적인 활용도를 한 번에 살펴볼 수 있습니다.
짙은 브라운 계열인 T MORO, T.MORO, TESTA DI MORO 컬러는 블랙보다 부드럽고 베이지나 데님과도 조화롭게 어울립니다. 출근용 팬츠부터 주말의 단정한 데일리룩까지 폭넓게 연결하고 싶다면, 장식과 기본 실루엣의 균형을 기준으로 이 로퍼를 살펴보세요.
혀 부분의 로고와 로고 프린트 인솔, 골드 로고 버클 스트랩은 가까이에서 보았을 때 디자인의 중심을 만들어 줍니다. 외형은 깔끔하게 유지하면서도 신발 자체에 포인트를 주고 싶은 스타일에 적합한 선택지입니다.
디자인과 디테일 살펴보기
페이턴트 레더 마감 제품 설명에 기재된 페이턴트 레더 마감은 표면의 매끈한 인상을 강조합니다. 의상에 장식이 많지 않아도 신발의 표면감과 골드 디테일이 룩에 또렷한 포인트를 더할 수 있습니다.
균형 잡힌 로퍼 실루엣 둥근 앞코와 닫힌 형태, 낮은 플랫 힐이 특징입니다. 지나치게 장식적인 디자인보다 클래식한 구성을 선호하면서도, 평범한 기본 로퍼보다 분명한 인상을 원하는 경우 비교해 볼 만합니다.
상징적인 장식 요소 골드 로고 버클 스트랩과 혀 부분의 로고가 디자인의 핵심입니다. 로고 프린트 인솔과 눈에 보이는 스티칭까지 더해져 앞면과 측면, 착화 시 보이는 부분을 세심하게 구성했습니다.
소재: 100% 송아지 가죽
힐 높이: 2cm
색상: T MORO || T.MORO || TESTA DI MORO
제조국: 이탈리아
제품 코드: FERBEUKSBRW4361100
이렇게 스타일링해 보세요
1. 테일러드 팬츠와 출근 룩 발목이 드러나는 스트레이트 또는 슬림한 팬츠에 매치하면 둥근 앞코와 낮은 힐의 단정한 비율이 잘 보입니다. 상의와 재킷을 차분한 톤으로 맞추고 로퍼의 골드 버클을 작은 포인트로 두면 과하지 않은 오피스 스타일을 완성할 수 있습니다.
2. 데님과 함께하는 데일리룩 중청이나 진청 데님에 셔츠, 니트, 재킷을 더하면 로퍼의 클래식한 분위기를 자연스럽게 낮출 수 있습니다. 짙은 브라운 컬러는 데님과 대비를 만들면서도 블랙 슈즈보다 부드러운 느낌을 줄 수 있어, 주말 외출이나 일상적인 OOTD에 활용하기 좋습니다.
3. 스커트와 양말 조합 미디 스커트나 단정한 플리츠 스커트에 양말을 더하면 로퍼의 둥근 앞코와 장식이 강조됩니다. 양말은 의상과 비슷한 색으로 맞추거나, 로퍼와 가까운 짙은 색을 선택해 신발과 다리 선이 자연스럽게 이어지도록 연출해 보세요.
4. 컬러를 고를 때 짙은 브라운 계열은 브라운, 크림, 네이비, 데님처럼 차분한 색과 연결하기 쉽습니다. 옷에 이미 패턴이나 액세서리가 많다면 로퍼 외의 장식을 줄이고, 심플한 옷차림이라면 골드 버클이 보이도록 팬츠 밑단이나 스커트 길이를 조정하는 방식이 좋습니다.
구매 전 확인할 기준
사이즈 제공된 정보에 따르면 정사이즈에 맞는 핏으로 안내되며, 평소 사이즈를 선택하도록 되어 있습니다. 다만 발볼, 양말 착용 여부, 선호하는 여유감에 따라 체감이 달라질 수 있으므로 구매 전 상품 페이지의 사이즈 가이드를 함께 확인하세요.
실루엣과 활용도 이 제품은 2cm의 낮은 힐과 둥근 앞코를 갖춘 로퍼입니다. 높은 굽이나 날렵한 포인티드 토를 원하는지, 아니면 낮은 굽과 클래식한 앞코를 선호하는지 먼저 정하면 선택이 쉬워집니다.
소재와 표면감 100% 송아지 가죽과 페이턴트 레더 마감이 기재되어 있습니다. 매끈하고 빛을 반사하는 표면을 선호하는지, 관리 방식과 보관 환경까지 고려해 본인의 착화 습관에 맞는지 확인해 보세요.
옷장과의 조화 보유한 팬츠와 스커트의 색을 먼저 떠올려 보세요. 짙은 브라운 로퍼는 뉴트럴 컬러와 데님 중심의 옷장에 자연스럽게 들어가며, 골드 버클이 이미 착용하는 주얼리나 가방 하드웨어와 어울리는지도 함께 살피면 활용 계획을 세우기 좋습니다.
관리 아이디어 페이턴트 레더 표면의 인상을 오래 유지하고 싶다면 착용 후 표면 상태를 확인하고, 보관할 때 다른 액세서리나 신발과 장식 부분이 부딪히지 않도록 분리해 두는 방식을 고려할 수 있습니다. 구체적인 관리 방법은 소재에 맞는 전문 안내를 확인하세요.
자주 묻는 질문
정사이즈로 선택하면 되나요?
상품 정보에는 정사이즈에 맞으며 평소 사이즈를 선택하라고 안내되어 있습니다. 발볼과 양말 착용 여부까지 고려해 상품 페이지의 사이즈 가이드를 확인하세요.
힐 높이는 얼마인가요?
힐 높이는 2cm로 기재되어 있습니다. 낮은 플랫 힐을 선호하는지 확인한 뒤 선택하면 됩니다.
어떤 색상인가요?
T MORO, T.MORO, TESTA DI MORO로 표기된 짙은 브라운 계열입니다. 화면에 따라 색감이 다르게 보일 수 있으므로 상품 이미지를 함께 확인하세요.
어떤 옷과 잘 어울리나요?
테일러드 팬츠, 데님, 미디 스커트처럼 단정한 기본 아이템과 조합하기 좋습니다. 골드 버클이 보이도록 밑단과 길이를 조절하면 디자인 포인트가 살아납니다.
구매 전 상품 페이지에서 현재 제품 정보, 사이즈 안내, 소재 및 구매 관련 정보를 반드시 확인해 주세요.
생활비 정리를 꾸준히 하려면 모든 지출을 완벽하게 기록하려 하기보다, 구매 전 15분 동안 ‘왜 필요한가, 언제 필요한가, 다른 방법은 없는가’를 짧게 메모하는 편이 실천하기 쉽습니다. 이 루틴은 준비·분류·실행·점검의 네 단계로 구성되며, 정기 결제와 예정된 구매를 함께 확인할 때 특히 유용합니다. 다만 실제 가계 상황과 구매 목적에 따라 기록 항목은 줄이거나 늘려야 합니다.
생활비 기록이 자주 끊기는 이유부터 살펴보기
생활비 기록이 중단되는 이유는 의지가 부족해서라기보다 기록 방식이 생활 흐름과 맞지 않기 때문인 경우가 많습니다. 영수증을 모아 한꺼번에 정리하거나 모든 지출에 같은 수준의 설명을 붙이려 하면 시작 자체가 부담스러워집니다.
구매 전 메모는 이 문제를 다르게 다룹니다. 결제가 끝난 뒤 기억을 복원하는 대신, 아직 선택할 수 있는 시점에 판단 기준을 남깁니다. 기록의 목적도 ‘잘 샀는지 평가하기’가 아니라 다음과 같이 좁게 잡습니다.
이번 지출의 목적을 한 문장으로 확인하기
지금 필요한 지출인지 예정해도 되는지 구분하기
이미 있는 물건이나 다른 방법으로 대체할 수 있는지 살펴보기
한 번의 구매인지 반복 지출로 이어지는지 표시하기
이 메모는 금융상품 선택, 세금, 대출, 투자 판단을 다루는 자료가 아닙니다. 일상적인 구매와 가구의 정기 지출을 정리하기 위한 생활 기록 도구로 사용하세요.
4단계 생활비 정리 프레임워크
1단계: 준비 — 기록할 범위를 좁히기
먼저 오늘 확인할 범위를 정합니다. 하루에 모든 소비를 분석하지 말고, 구매 예정 항목과 정기 결제처럼 반복되거나 놓치기 쉬운 항목을 우선 적습니다. 메모 앱, 종이 수첩, 공동 가계 문서 중 이미 자주 쓰는 도구 하나만 선택하는 것이 좋습니다.
준비 단계에서 사용할 기본 항목은 다음과 같습니다.
확인 날짜
구매 또는 결제 항목
예상 금액 또는 금액을 확인할 위치
기록을 함께 확인할 가족 구성원
금액을 바로 확인하기 어려우면 숫자를 억지로 채우지 말고 ‘확인 필요’라고 적습니다. 빈칸을 정확하지 않은 추정치로 채우면 이후 비교가 흐려질 수 있습니다.
2단계: 분류 — 지출의 성격을 나누기
다음으로 각 항목을 성격에 따라 나눕니다. 분류는 정답을 찾는 과정이 아니라, 비슷한 지출을 같은 기준으로 다시 볼 수 있게 하는 과정입니다.
분류
확인 질문
메모 예시
필수
지금 미루면 생활에 바로 불편이 생기는가?
이번 주 안에 필요한 소모품
예정
필요하지만 날짜를 조정할 수 있는가?
다음 점검일에 다시 확인
선택
원하는 이유와 미루기 어려운 이유가 같은가?
필요성과 기분 전환을 구분
반복
다음 달 또는 정해진 주기로 다시 결제되는가?
정기 결제 확인 목록에 이동
하나의 항목이 두 분류에 걸칠 수도 있습니다. 예를 들어 처음에는 선택 지출처럼 보여도 매달 자동으로 결제된다면 ‘선택·반복’으로 표시할 수 있습니다. 이런 경우 분류를 억지로 하나로 줄이기보다 짧은 메모를 덧붙이는 편이 현실적입니다.
3단계: 실행 — 구매 전 15분 안에 판단하기
분류가 끝나면 실제 구매 여부를 결정합니다. 중요한 점은 일률적으로 구매를 미루는 것이 아니라, 구매 전 생각을 기록한 뒤 선택하는 것입니다. 필요한 물건이라면 구매 시점과 확인 사항을 남기고, 보류할 항목이라면 다시 볼 날짜를 정합니다.
다음 비교표를 복사해 메모 앱이나 가계 기록장에 사용할 수 있습니다.
항목
내 메모
무엇을 사려는가?
사용 목적은 무엇인가?
언제까지 필요한가?
이미 가진 것 또는 대체 방법은?
한 번의 지출인가, 반복 지출인가?
오늘 결정할 이유가 있는가?
다시 확인할 날짜는?
‘오늘 결정할 이유가 있는가?’라는 질문은 구매를 막기 위한 문장이 아닙니다. 사용 시점이 분명하거나 이미 정해 둔 일정이 있다면 그 이유를 적으면 됩니다. 반대로 이유가 ‘놓칠까 봐’처럼 불안에만 연결되어 있다면, 확인 날짜를 정한 뒤 잠시 보류하는 선택도 기록할 수 있습니다.
4단계: 점검 — 결제 후 한 줄만 남기기
구매 후에는 긴 후기를 쓸 필요가 없습니다. 실제 사용 여부, 예상과 달랐던 점, 다음에 다시 확인할 기준 중 하나만 한 줄로 남깁니다. 이 기록은 과거 소비를 비난하기 위한 것이 아니라 다음 구매의 질문을 다듬기 위한 자료입니다.
예를 들어 ‘자주 사용함’, ‘비슷한 물건이 집에 있었음’, ‘정기 결제 여부를 다시 확인할 것’처럼 짧게 적을 수 있습니다. 사용 전이라면 결과를 단정하지 말고 ‘다음 점검일에 확인’이라고 표시합니다.
하루 15분 실행표
시간을 정해 두면 생활비 기록이 특정한 의지에만 의존하지 않게 됩니다. 아래 표는 하루 한 번 진행하는 기본형입니다. 가족의 지출 구조에 따라 각 시간을 조정해도 됩니다.
시간
할 일
남길 결과
0~3분
오늘의 구매 예정과 최근 정기 결제를 모으기
확인할 항목 목록
3~7분
필수·예정·선택·반복으로 표시하기
항목별 분류
7~12분
목적, 시급성, 대체 가능성, 반복 여부를 적기
구매 전 판단 메모
12~15분
구매·보류·확인 필요로 다음 행동 정하기
다시 볼 날짜와 담당자
가구 구성원이 함께 관리한다면 ‘담당자’ 항목을 추가하세요. 누가 결제했는지를 따지기보다, 누가 정기 결제 내역을 확인하고 누가 구매 전 질문을 남길지 정하는 방식이 편리합니다. 한 사람이 모든 기록을 맡으면 그 사람이 바쁜 날 루틴 전체가 멈출 수 있기 때문입니다.
복사 가능한 생활비 기록 체크리스트
아래 목록은 매일 전부 작성해야 하는 양식이 아닙니다. 오늘 확인할 항목만 골라 사용하세요.
준비: 오늘 확인할 구매와 정기 결제를 한곳에 모았는가?
분류: 각 항목을 필수·예정·선택·반복 중 하나 이상으로 표시했는가?
목적: 무엇을 위해 필요한지 한 문장으로 적었는가?
시점: 오늘 꼭 결정해야 하는 이유가 있는지 확인했는가?
대체: 이미 가진 것, 빌리기, 수리, 일정 조정 등 다른 방법을 떠올렸는가?
반복: 다음에도 자동 또는 정기적으로 나갈 가능성을 표시했는가?
실행: 구매·보류·확인 필요 중 다음 행동을 정했는가?
점검: 다음에 다시 볼 날짜와 확인할 내용을 남겼는가?
체크하지 못한 항목이 있어도 기록을 폐기하지 마세요. 이 루틴의 목적은 완성도 높은 장부를 만드는 것이 아니라, 구매 전 생각을 일정한 형식으로 꺼내 보는 데 있습니다.
정기 결제와 비교표를 함께 관리하는 방법
정기 결제는 한 번의 구매보다 기억에서 빠지기 쉽습니다. 별도의 정기 결제 표를 만들어 서비스명, 결제 주기, 다음 확인일, 사용 여부, 해지 또는 변경 검토 여부만 기록해 보세요. 실제 결제일이나 금액을 확인하지 못했다면 추정하지 말고 해당 결제 내역을 확인할 위치를 적습니다.
항목
확인 내용
다음 행동
서비스 또는 항목
무엇에 대한 반복 지출인가?
결제 내역 위치 확인
주기
매월, 매년 등 확인 가능한 주기
다음 확인일 설정
사용 여부
최근 사용 사실을 알고 있는가?
사용 여부 기록
가구 내 공유 여부
다른 구성원도 알고 있는가?
공동 기록에 반영
비교표를 사용할 때는 항목 수를 지나치게 늘리지 않는 것이 좋습니다. 생활비 정리의 비교 기준은 ‘가장 좋은 선택’을 찾기 위한 것이 아니라, 내 목적에 필요한 차이를 확인하기 위한 것입니다. 예를 들어 사용 빈도, 보관 공간, 반복 여부처럼 현재 가구의 문제와 직접 연결된 항목만 남기면 표를 다시 보기 쉽습니다.
실행 전에 확인할 예외와 주의점
식료품이나 긴급한 생활용품처럼 시간이 중요한 구매는 15분 기록을 짧게 줄이고 필요한 정보만 확인합니다.
가족 구성원마다 필요한 기준이 다르면 하나의 결론을 강요하기보다 각자의 목적을 먼저 적습니다.
정기 결제를 검토할 때는 실제 약관, 결제 내역, 해지 절차를 직접 확인해야 합니다.
기록에 없는 금액이나 사용 사실을 기억만으로 확정하지 않습니다.
보류가 항상 절약을 뜻하는 것은 아니며, 필요한 구매를 지나치게 미루지 않도록 사용 시점을 함께 적습니다.
FAQ
매일 15분을 확보하기 어렵다면 어떻게 하나요?
처음에는 15분 전체를 지키기보다 3분짜리 준비 단계만 시작할 수 있습니다. 구매 예정 항목 한 개의 목적과 다시 볼 날짜만 적어도 루틴의 출발점이 됩니다. 익숙해진 뒤 정기 결제 점검이나 구매 후 한 줄 기록을 추가하세요.
금액을 기록하지 않아도 생활비 정리가 되나요?
금액 기록은 중요한 정보지만, 정확히 확인할 수 없는 숫자를 추정해 적는 것은 피해야 합니다. 먼저 목적, 시점, 반복 여부를 기록하고 실제 결제 내역을 확인한 뒤 금액을 보완하는 방식이 적절합니다.
구매를 보류하면 일률적으로 잘한 선택인가요?
그렇지 않습니다. 보류는 하나의 선택일 뿐이며, 필요한 시기를 놓치거나 다른 비용을 만들 수도 있습니다. 보류할 때는 다시 확인할 날짜와 필요한 조건을 함께 적어야 합니다.
가족과 기록을 공유할 때 가장 먼저 정할 것은 무엇인가요?
누가 어떤 항목을 확인할지 정하는 것이 먼저입니다. 기록 형식보다 역할이 모호하면 같은 지출을 중복 확인하거나 아무도 확인하지 않는 일이 생길 수 있습니다. 공동 문서에는 담당자와 다음 확인일을 함께 표시해 보세요.
결론: 구매 전 한 줄이 생활비 기록을 이어가게 한다
생활비 정리는 모든 지출을 완벽하게 분석하는 작업이 아닙니다. 구매 전 목적과 시점, 대체 가능성, 반복 여부를 짧게 확인하고 구매·보류·확인 필요 중 하나를 정하는 과정에 가깝습니다. 오늘은 구매 예정 항목 하나와 정기 결제 하나만 골라 15분 실행표를 적용해 보세요. 기록이 쌓이면 어떤 지출을 자주 놓치는지, 어떤 질문이 가족에게 필요한지 점검할 수 있습니다. 다만 실제 금액과 결제 조건은 해당 내역을 직접 확인하고, 가구의 상황에 맞게 기록 항목을 조정해야 합니다.
MONCLER Monaco2 low top sneakers bring a polished, understated character to everyday footwear. In beige, the pair offers a versatile foundation for relaxed wardrobes while retaining the considered details associated with a premium sneaker design. The silhouette is defined by a round toe, visible stitching and a closed construction, creating a clean profile with a subtle sporty edge.
Brand detailing is present without overwhelming the shape. A logo appears on the side, while a second logo at the back reinforces the identity of the design from more than one angle. The result is a sneaker that can move easily between casual outfits, weekend dressing and smartly composed off-duty looks.
Made in Italy, the shoe combines a leather outer with a polyamide lining, leather lining and an elastodiene sole. Its listed heel height is 3.5 cm. For selection, the supplied sizing information states that the model fits true to size, with the recommendation to take your normal size and consult the size guide.
Design Details That Shape the Look
The appeal of MONCLER Monaco2 low top sneakers lies in the balance between familiar sneaker proportions and precise visual accents. The round toe keeps the front of the shoe soft and wearable in appearance, while visible stitching adds definition across the upper. These details give the beige colour more depth, allowing the construction to remain noticeable even when styled with similarly neutral clothing.
Beige colour: an adaptable tone that works naturally with black, white, navy, grey, denim and other understated shades.
Low-top profile: a versatile shape suited to trousers, denim and casual tailoring.
Side logo: a distinctive detail that gives the upper a recognisable finish.
Back logo: branding that remains visible as the silhouette is viewed from behind.
Visible stitching: a structural accent that supports the sporty character.
Round toe and closed construction: classic elements that keep the overall design clean and easy to coordinate.
The listed composition is specific: the outer is 100% leather, the first lining is 100% polyamide, the leather lining is 100% leather and the sole is 100% elastodiene. These details are useful when comparing the pair with other sneakers and when considering how its texture may sit alongside garments in a wardrobe.
Styling Scenarios for Everyday Dressing
For a simple daytime look, pair MONCLER Monaco2 low top sneakers with straight-leg denim and a crisp shirt. Beige softens the contrast of darker denim and creates a more composed finish than a stark white sneaker. Add a lightweight jacket in navy, charcoal or olive for a practical palette that keeps the shoes central without making the outfit feel overly coordinated.
The low-top shape also works well with tapered trousers. Choose a relaxed knit or a clean sweatshirt to highlight the sneaker’s sporty appeal, then keep accessories restrained so the side and back logos remain considered details rather than competing elements. This is an effective approach for casual errands, informal meetings or travel days where a neat appearance is preferred.
For a more elevated interpretation, style the pair with cropped tailored trousers and a fine-gauge top. The 3.5 cm heel height adds a defined base to the silhouette, while the leather outer maintains a refined visual presence. Shades such as cream, stone and grey can create a tonal outfit; black trousers can provide a sharper contrast.
In warmer months, the same beige palette can be coordinated with relaxed cotton separates in white, ecru or muted blue. The closed sneaker construction keeps the look grounded and understated. When building an outfit around the shoes, consider repeating one quiet neutral elsewhere in the look to make the colour feel intentional.
How to Assess the Pair Before Purchase
Begin with the intended role in your wardrobe. This design is described as suitable for casual outings, so it is best considered as an everyday lifestyle sneaker rather than selected for a formal footwear setting. Its beige colour is particularly useful if you want one pair to sit comfortably with several neutral and denim-based combinations.
Check the fit guidance. The supplied information states that the model fits true to size and recommends taking your normal size. Use the available size guide before ordering, especially if you are between sizes or comparing with another brand.
Review the construction. Consider whether a leather outer, leather lining and closed low-top profile match your wardrobe preferences and intended styling.
Look at the design language. The visible stitching, round toe and two logo placements create a recognisable sporty appearance. Select this pair if you appreciate branding that is present but integrated into the silhouette.
Compare the colour with your existing clothing. Beige is flexible, but the final effect will depend on your usual trouser and outerwear shades. Dark denim, navy, grey, white and other neutrals are natural starting points.
Review current product information. Confirm the listed colour, measurements, product code and other purchase details on the product page before completing your decision.
For care and coordination, keep the shoe’s leather construction in mind and consult the product page for the most appropriate current care guidance. Store and maintain the pair according to that guidance, and avoid assuming that a routine suitable for another material will be suitable here.
Frequently Asked Questions
What colour are MONCLER Monaco2 low top sneakers?
The listed colour is beige, making the pair easy to coordinate with denim, white, grey, navy and other neutral clothing.
What materials are listed?
The outer is 100% leather. The lining is listed as 100% polyamide, with a 100% leather lining component, and the sole is 100% elastodiene.
How does the sizing run?
The supplied information says the model fits true to size and recommends taking your normal size. Consult the size guide for the current product-page guidance.
What design details define the shoe?
It has a low-top, closed sneaker construction with a round toe, visible stitching, a logo on the side and a logo at the back.
Where was it manufactured?
The listed country of manufacture is Italy.
What is the heel height?
The listed heel height is 3.5 cm, or 1.38 inches.
Please verify the current product details, sizing guidance, measurements and purchase information on the product page before purchase.