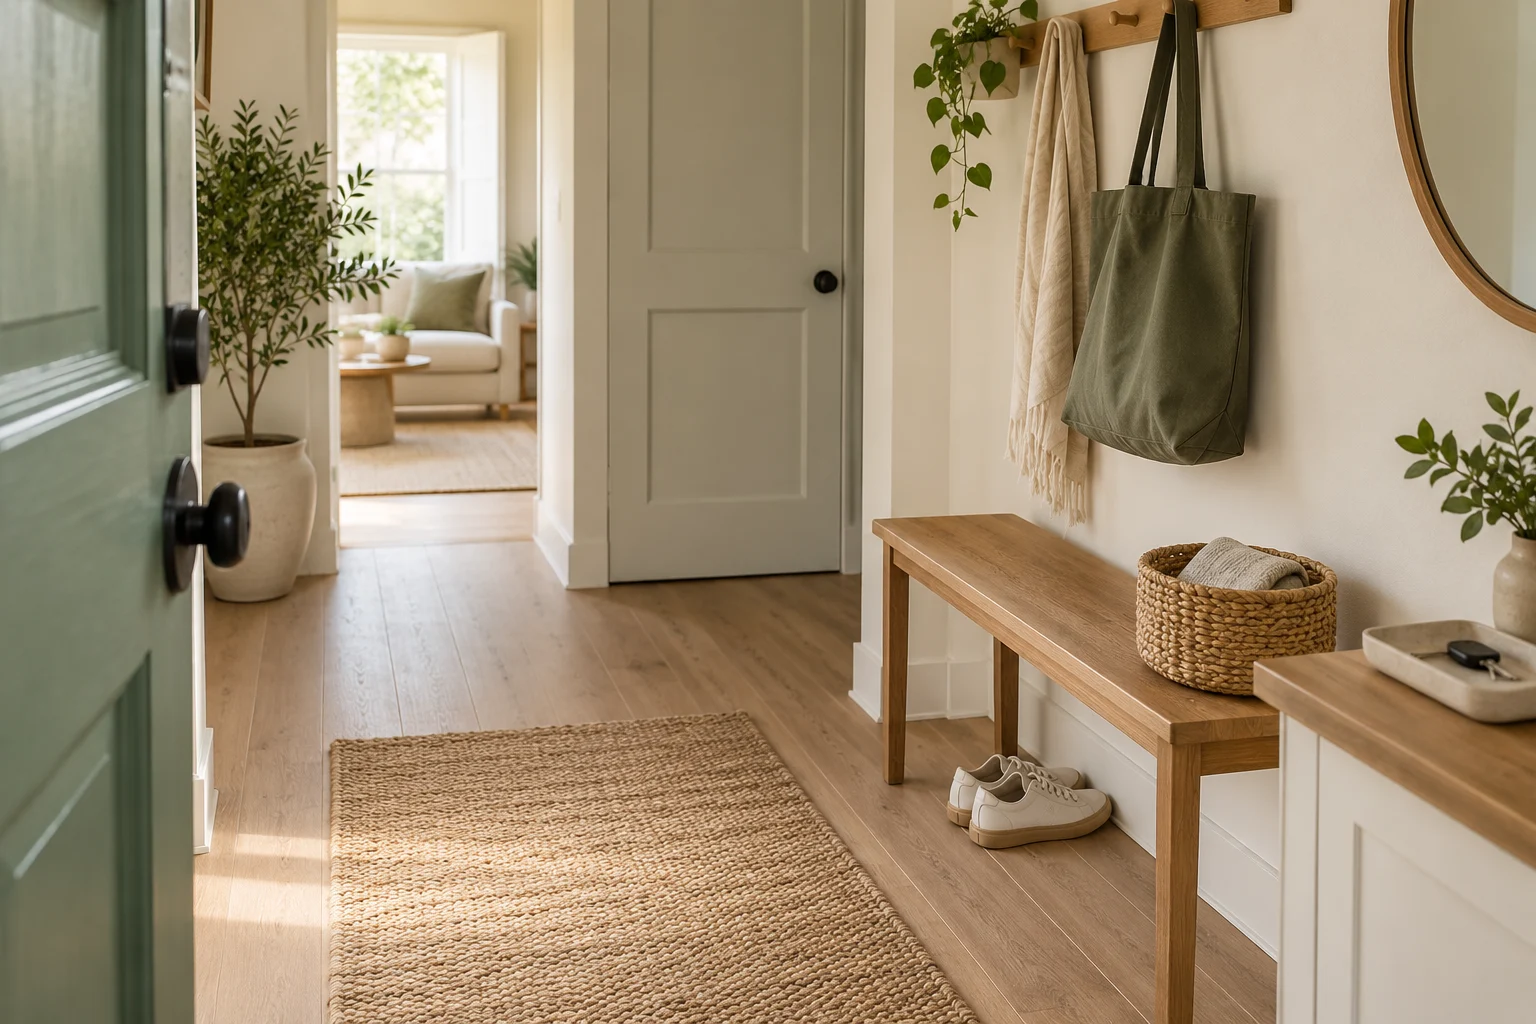
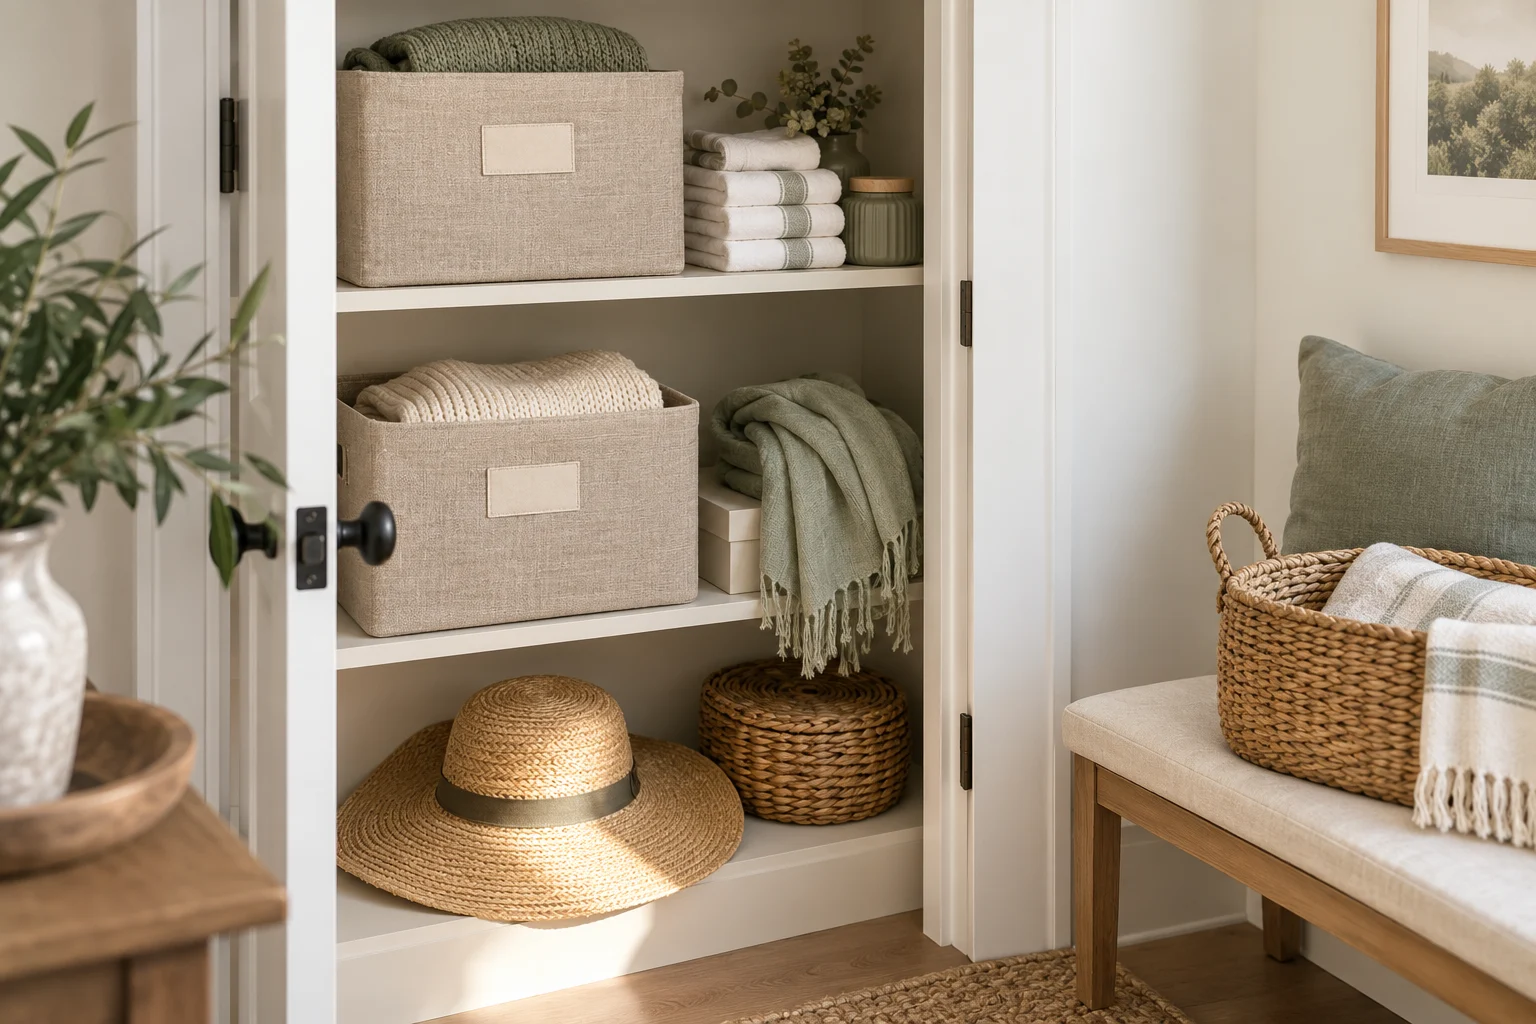
Home & Living

정리·청소·생활 공간을 더 편안하게 만드는 방법
Practical ways to organize, clean, and make your living space more comfortable.

  • Small Home Organization: Store Everyday Items Where You Use Them

    Small Home Organization: Store Everyday Items Where You Use Them

    By Kai Life Editorial Team

    For a small home, begin with one repeated activity and keep the items it needs near the point of use. Then test whether those items are just as easy to put back. This approach helps you evaluate a storage layout before buying organisers or rearranging an entire room.
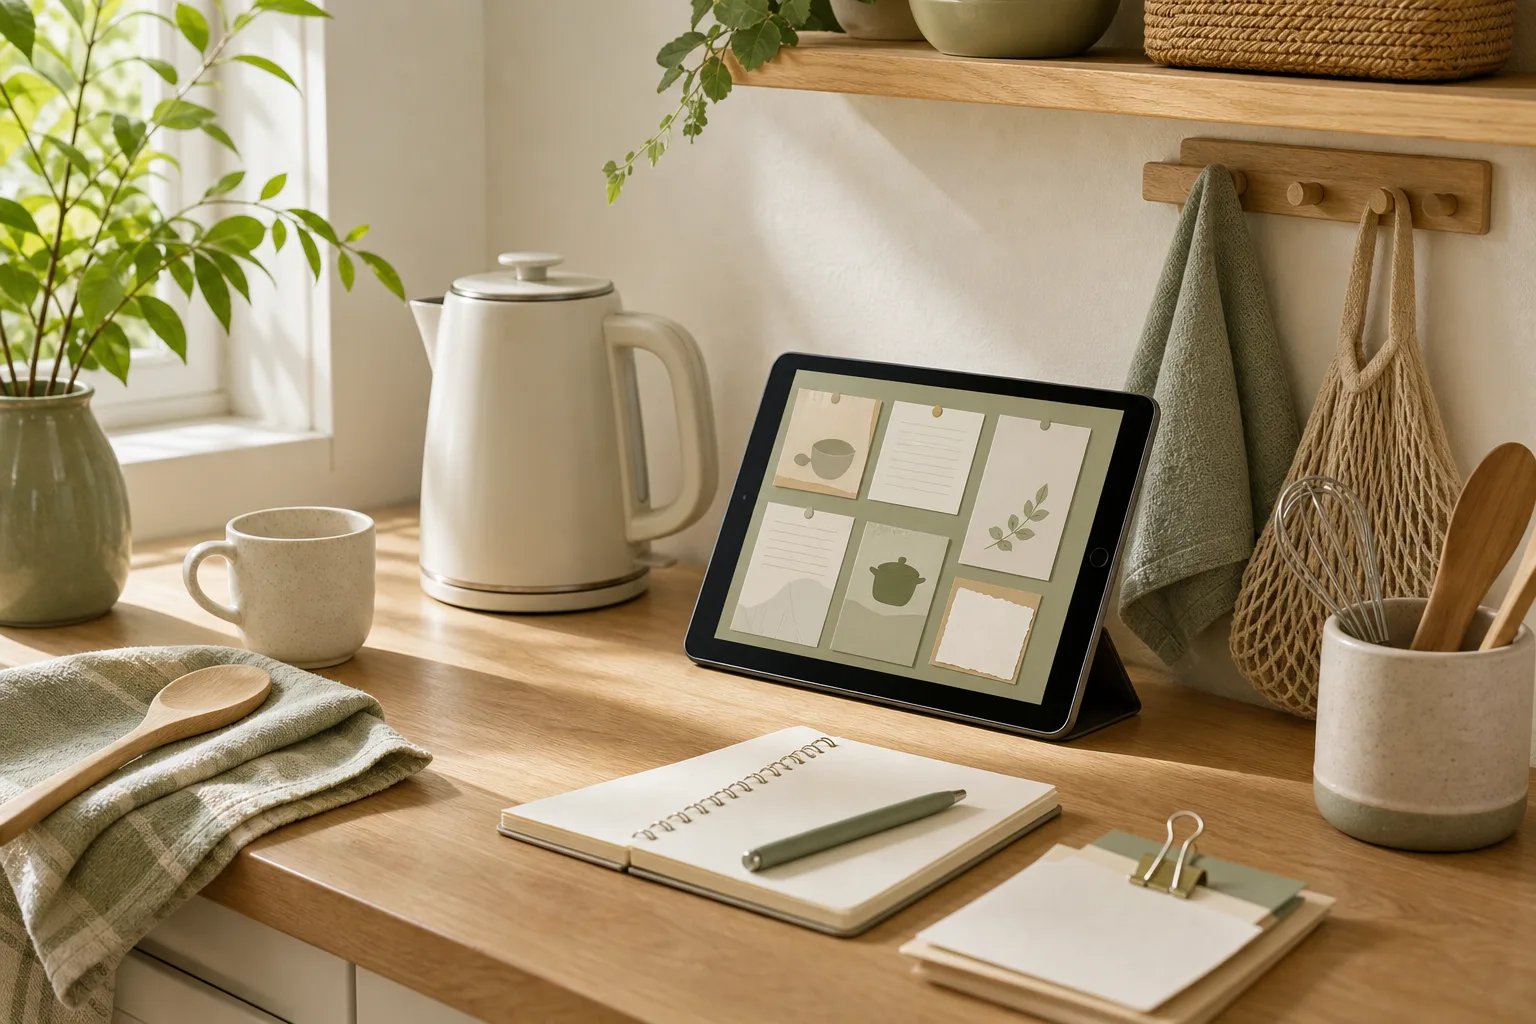
    A Four-Step Home Organization Rule for Shorter Paths — topic illustration

    Worked example: an entryway without a return point

    Imagine that a bag lands on a chair, keys travel between two surfaces and outgoing items are forgotten in another room. The layout may look tidy after a clean-up but still provide no obvious return point. The example below is fictional and does not claim a measured reduction in time or walking distance.

    Item First placement idea Test during normal use
    Keys One clearly designated place near the normal arrival point Can each person who uses it find and return the keys consistently?
    Everyday bag An existing suitable surface or storage spot Does putting it away keep the route and other necessary access clear?
    Items leaving the home A small, defined departure area Are unrelated items accumulating there, or does it still mean “take this out”?

    Run the take-out and put-back test

    1. Do the ordinary activity once without first staging the space for the test.
    2. Notice where an item is left when it is no longer needed.
    3. If the planned return point is repeatedly bypassed, reconsider its position, accessibility or capacity.
    4. Change one thing and observe again rather than adding several new containers at once.

    Before buying storage: measure the available space, identify the specific item group, and check that the proposed placement does not obstruct a walkway, exit or necessary access. An attractive container cannot resolve an unclear purpose by itself.

    Why placement affects home flow

    A room can look tidy and still create unnecessary movement. For example, mugs may be stored far from the kettle, cleaning cloths may be kept in another room, or everyday bags may have no clear landing spot near the entrance. These small gaps make ordinary tasks include extra walks, temporary piles, or items left in convenient but unsuitable places.

    The aim is not to make every item equally accessible. A more useful approach is to match storage distance with how often an item is used and where the action happens. Items used several times a day deserve a short return path. Items used occasionally can occupy less convenient storage, provided that their location remains clear and safe.

    Think of each area as having three practical zones:

    • Action zone: the surface or location where an activity takes place.
    • Near zone: storage within a short reach or a few steps of that activity.
    • Reserve zone: storage for occasional, seasonal, spare, or backup items.

    This zoning method supports home organization while leaving room for different layouts and household habits. It also avoids assuming that one storage arrangement works for every home.

    Step 1: Prepare by observing one short route

    Choose one repeated activity rather than trying to reorganize the entire home. Suitable examples include making a drink, leaving for work, preparing a simple meal, doing laundry, or cleaning the bathroom. Observe the route from beginning to end.

    Write down the points where you stop, turn back, open several cabinets, or place an item temporarily. The goal is not to judge the route. It is to identify where the current storage rule does not match the activity.

    Use these preparation questions:

    • Where does the activity begin?
    • Which items are handled during the activity?
    • Where is each item currently stored?
    • Which item is commonly left out after use?
    • Is the problem distance, limited capacity, unclear ownership, or difficult access?

    Limit the first review to one cabinet, shelf, drawer, or landing area. A narrow scope makes the action easier to complete and gives you a clear result to review.

    Step 2: Sort items by use and return difficulty

    Take out only the items connected with the selected activity. Sort them into four groups. These groups are storage decisions, not permanent judgments about whether an item should remain in the home.

    Group Placement idea Question to ask
    Frequent use Keep in the action zone or near zone Is the item used during most repetitions of the activity?
    Occasional use Keep in a reserve zone Would a short delay be acceptable when it is needed?
    Backup or duplicate Store together and label the location Does the duplicate need to be available in the action zone?
    Unresolved Set aside for later review Is the item’s use or storage purpose clear?

    Next, consider return difficulty. An item may be physically close but still inconvenient if it requires stacking, moving another object, opening a tight container, or reaching an unsafe height. Storage rules work better when both access and return are simple.

    For shared homes, add an ownership check. If two people use the same item differently, choose a location that both can identify and reach. If an item belongs mainly to one person, that person’s routine can guide the placement, while shared access and safety remain relevant.

    Step 3: Act with a shorter-path placement rule

    Now place the highest-frequency items closest to the action zone. Move occasional items outward, upward, or into a clearly marked reserve location. Keep related items together when separating them would create additional searching or walking.

    Use this placement rule:

    1. Place the item where the activity begins or happens if it is used repeatedly during that activity.
    2. Place supporting items in the nearest practical storage location.
    3. Move backups and seasonal items away from the main working area.
    4. Give unresolved items a temporary holding location instead of returning them randomly.
    5. Test whether the item can be taken out and put back without shifting several other items.

    Do not treat every empty space as storage capacity. Keep walkways, exits, work surfaces, vents, heat sources, and frequently opened doors usable. Heavy or awkward items may need a lower, more stable location. Household safety and accessibility take priority over a shorter route.

    When no location seems suitable, the issue may be capacity rather than placement. In that case, reduce duplicates, group similar items, or postpone a purchase until the actual gap is clear. New containers can support a storage rule, but they do not replace one.

    Step 4: Review the route after one normal use

    Use the adjusted area once under ordinary conditions. Notice whether you still walk back for an item, leave something on a nearby surface, or hesitate because the storage location is unclear.

    Review the result with three questions:

    • Path: Did the activity require fewer unnecessary trips?
    • Return: Could each item go back without extra rearranging?
    • Clarity: Could another household member identify the intended location?

    If one answer is no, make one small change rather than redesigning the entire area. Move the item closer, separate frequent and occasional items, or create a clearer return point. A storage rule should support real behavior, including rushed moments and incomplete tidying.

    A focused 15-minute tidy-up plan

    Use this sequence when you want a short, contained reset.

    1. Minutes 1–3: Choose one activity and observe its route.
    2. Minutes 4–6: Gather the connected items and remove obvious unrelated objects.
    3. Minutes 7–10: Sort items into frequent, occasional, backup, and unresolved groups.
    4. Minutes 11–13: Place frequent items near the action zone and group the remaining items.
    5. Minutes 14–15: Test one normal use and record the next adjustment.

    Stopping after one area is acceptable. The purpose of a short tidy-up routine is to create a manageable decision, not to turn a small task into a full-home project.

    Copyable home organization checklist

    Check Task
    □ I selected one repeated activity.
    □ I identified the starting point and action zone.
    □ I gathered only the items connected to that activity.
    □ I sorted items by frequency, backup status, and uncertainty.
    □ I placed frequent-use items in the nearest practical location.
    □ I moved occasional and seasonal items to a reserve zone.
    □ I kept walkways, exits, and work surfaces usable.
    □ I tested taking items out and returning them.
    □ I noted one adjustment for the next review.

    Conclusion: organize around repeated movement

    Effective home organization can begin with one question: “Where does this item need to be when this activity happens?” Place frequent-use items near their action zone, keep occasional items in a reserve zone, and make returning items as clear as taking them out. The prepare, sort, act, and review framework turns that idea into a small experiment that can fit into a 15-minute tidy-up routine.

    FAQ

    Should every item be stored close to where it is used?

    No. Close storage is most useful for frequently repeated activities. Occasional, seasonal, spare, or rarely used items can be placed farther away when the location remains identifiable and practical.

    What if two activities need the same item?

    Compare how often each activity uses it and how difficult it is to return. A shared location near the more frequent activity may be suitable, or a neutral location may work better when both routines are similar.

    What if the home still feels crowded after sorting?

    The issue may be capacity rather than path length. Review duplicates, unclear categories, and items without a defined storage purpose. Consider additional storage only after identifying the specific gap it would address.

    How often should the arrangement be reviewed?

    Review it after a few normal uses or whenever the activity, household, or season changes. Small adjustments can be more useful than a large reset when the problem is limited to one route.
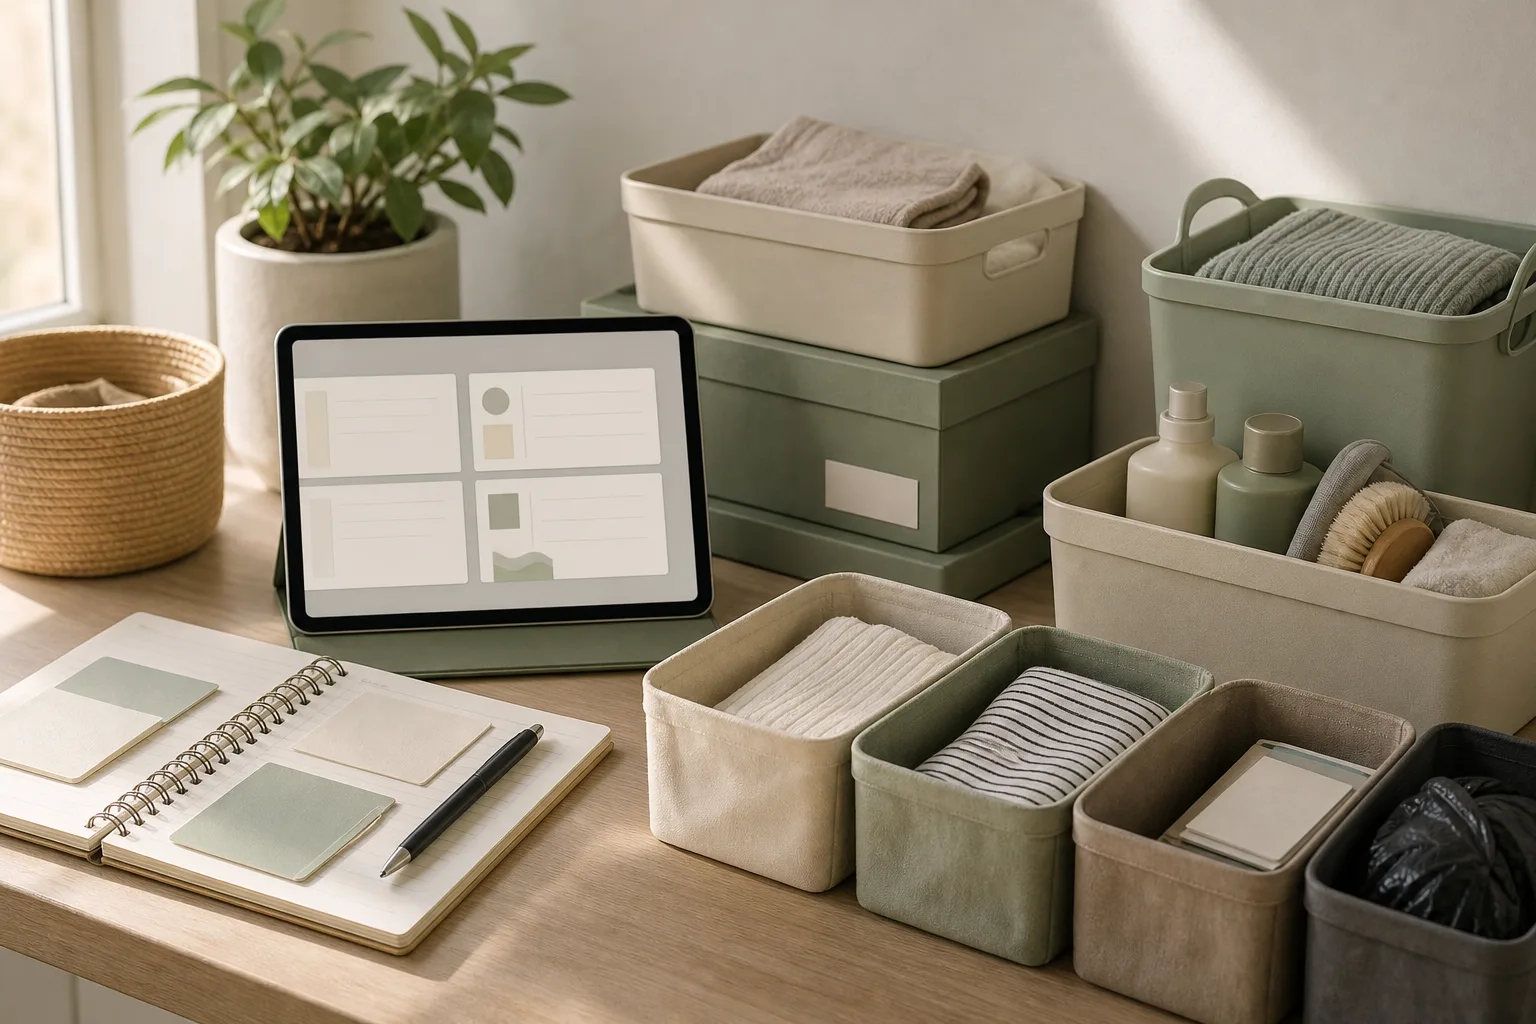
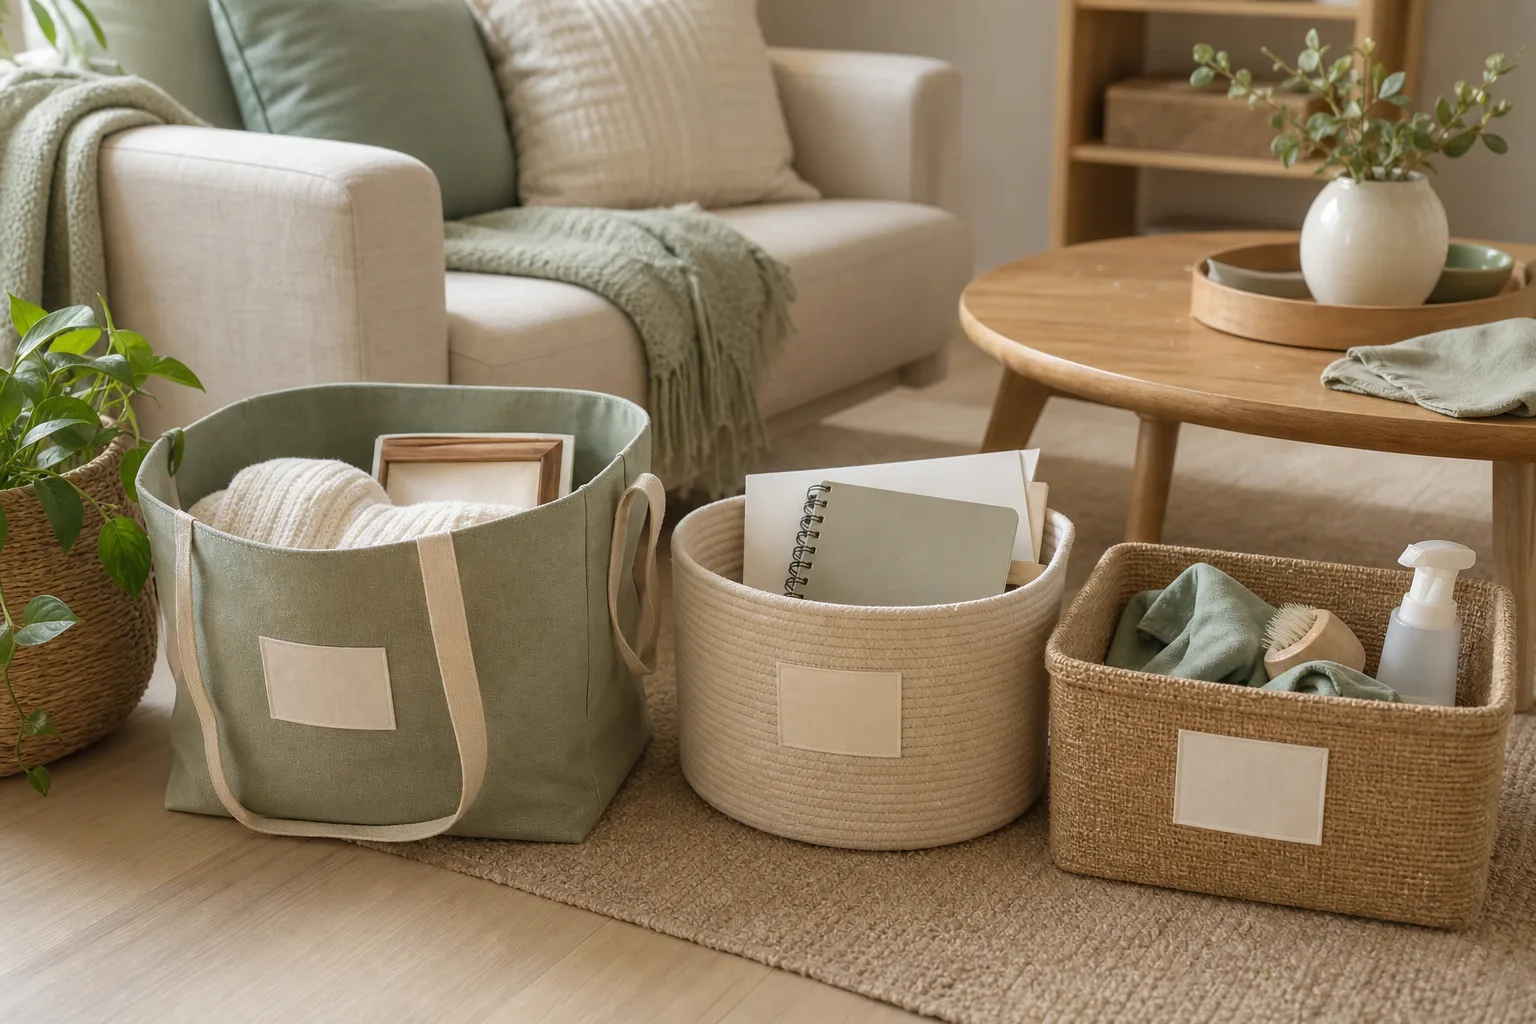
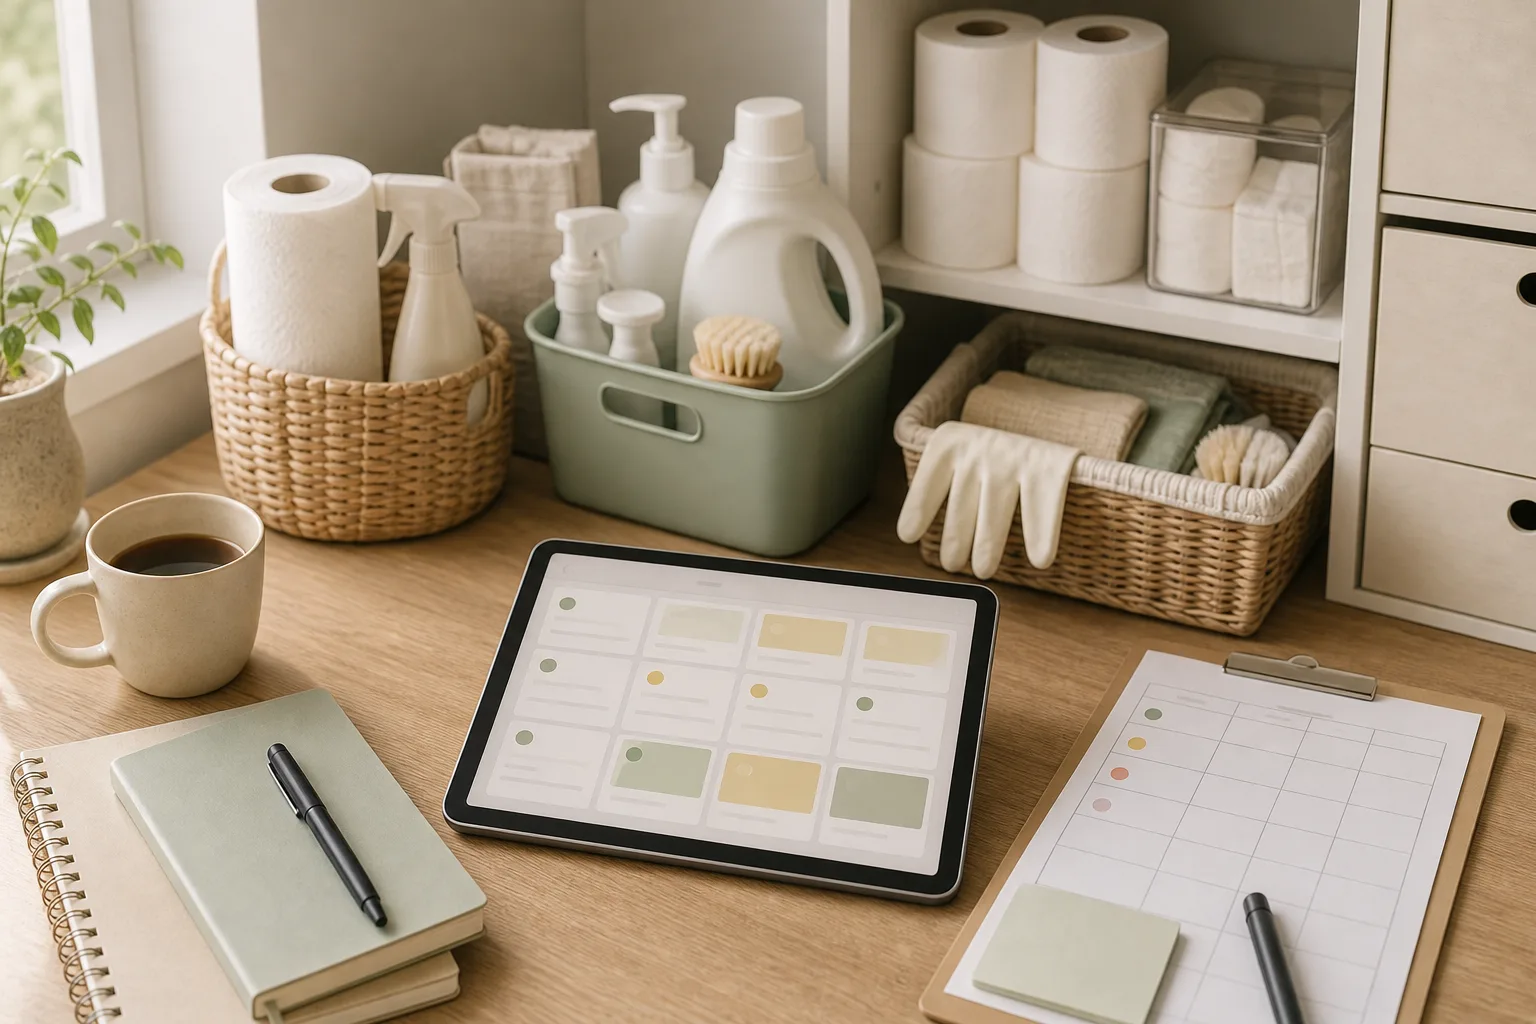
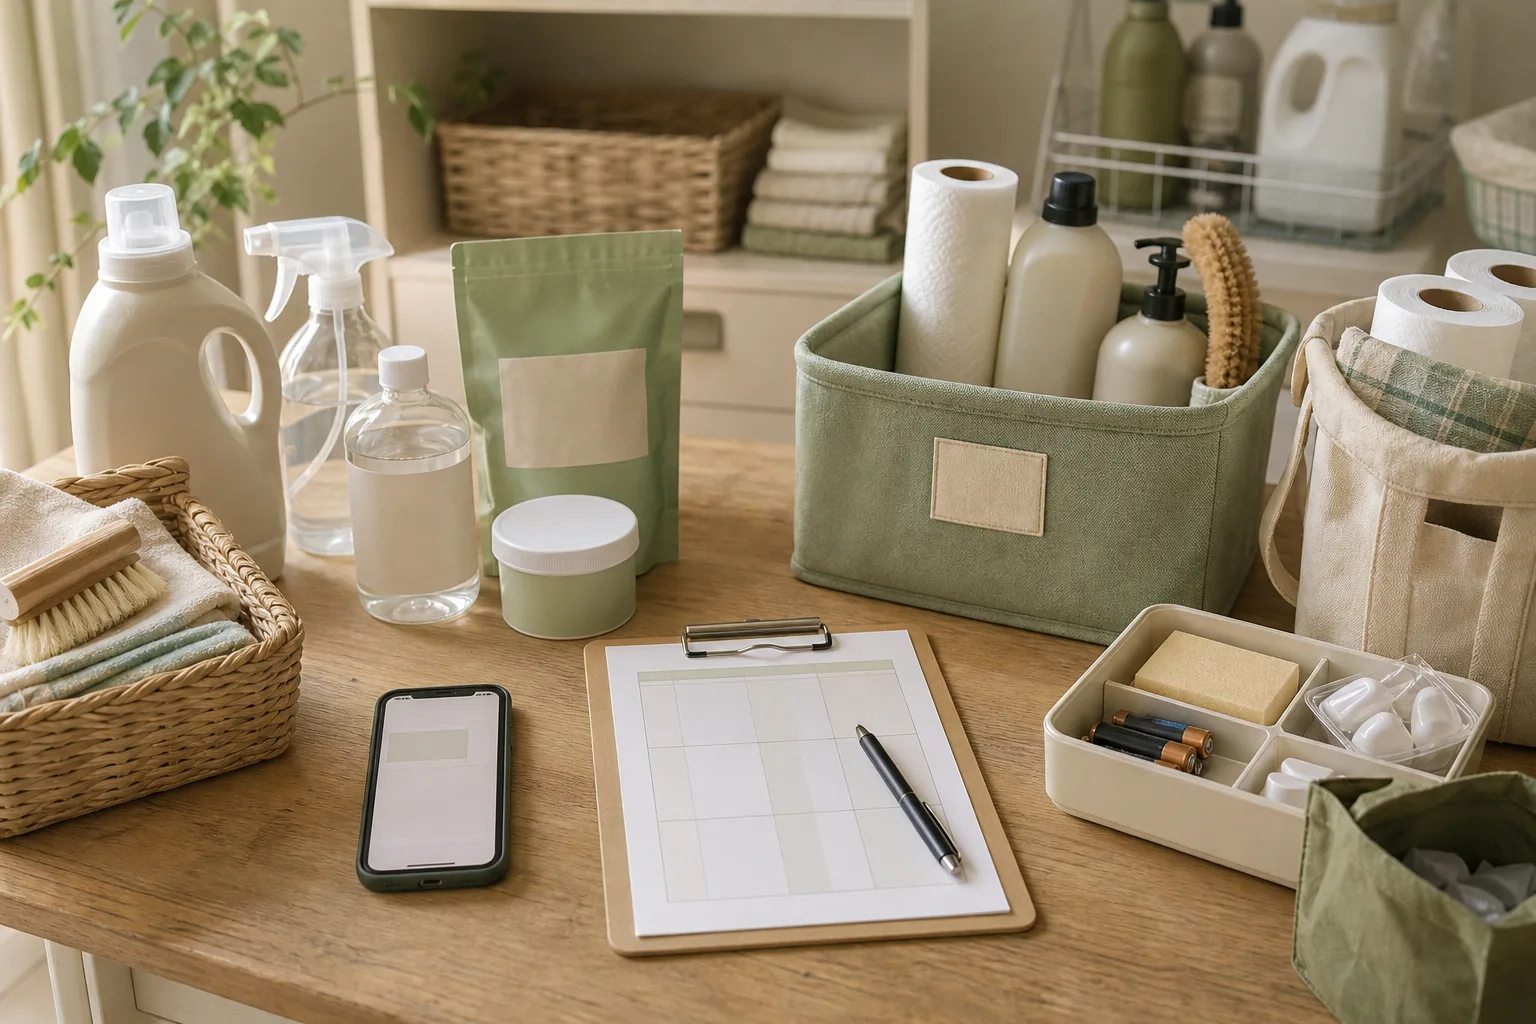
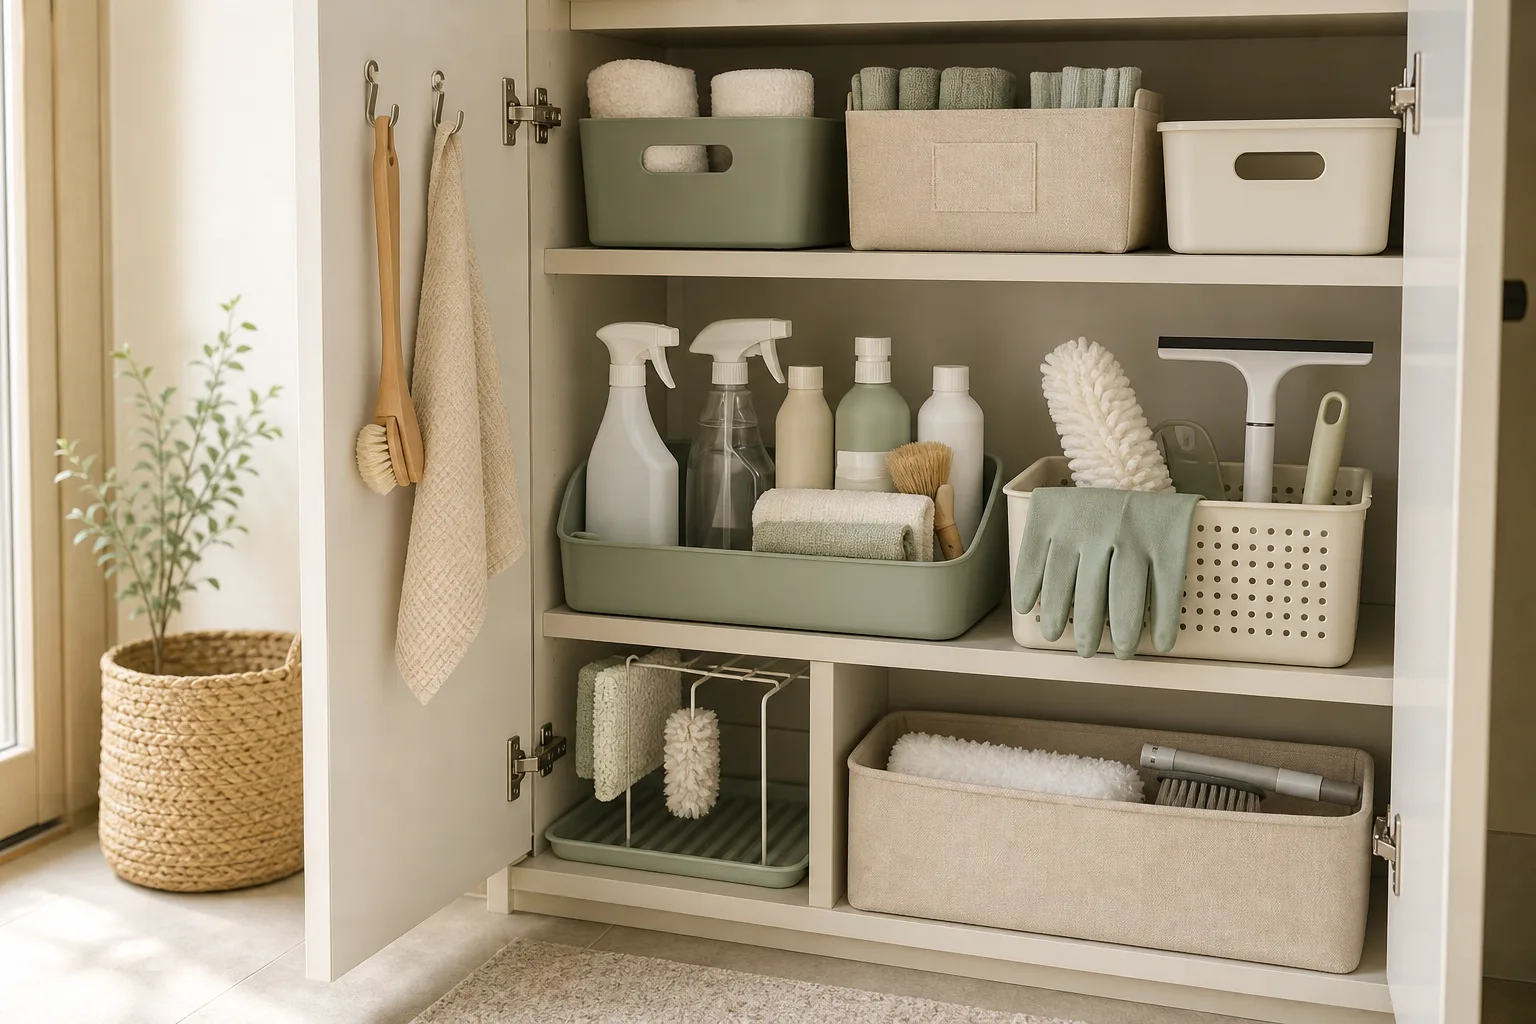
  • 방별 정리 순서를 정하는 체크리스트와 15분 실행 루틴

    방별 정리 순서를 정하는 체크리스트와 15분 실행 루틴

    작성자: Kai Life 편집팀

    생활 공간 정리는 가장 지저분해 보이는 방부터가 아니라, 매일 사용하면서 가장 자주 멈추거나 물건을 되돌려 놓기 어려운 공간부터 시작하는 편이 실용적입니다. 먼저 현관·주방·침실·욕실·거실을 1분씩 살펴보고 불편함, 사용 빈도, 정리 후 효과를 기준으로 우선순위를 정한 뒤 15분 단위로 한 구역만 처리해 보세요.

    방별 정리 순서를 정하는 체크리스트와 15분 실행 루틴 — 주제 설명 이미지

    방별 정리 순서를 정하는 기준

    정리 순서는 집의 크기보다 현재 생활에서 발생하는 마찰을 기준으로 정합니다. 다음 세 가지 질문에 답하면 첫 공간을 고르기 쉽습니다.

    • 불편함: 외출 전 물건을 찾느라 시간이 걸리거나, 조리·세면·취침 전에 주변을 치워야 하는가?
    • 사용 빈도: 하루에 여러 번 드나들거나 자주 꺼내는 물건이 모여 있는가?
    • 연결 효과: 이 공간을 정리하면 다른 공간에 쌓이는 물건도 줄어드는가?

    세 기준에서 모두 높은 점수를 받는 곳이 첫 번째 정리 대상입니다. 일반적으로 현관은 외출과 귀가 물건의 흐름을 바꾸기 쉽고, 주방은 사용 빈도가 높으며, 침실은 휴식과 의류 정리에 영향을 줍니다. 다만 집마다 생활 패턴이 다르므로 실제로 가장 자주 막히는 공간을 우선하세요.

    방별 우선순위 체크표

    공간 먼저 볼 문제 우선 정리할 대상 완료 기준
    현관 나갈 때 물건을 찾는가 열쇠, 가방, 신발, 택배 포장 외출용 물건이 한 동선에 놓임
    주방 조리대가 자주 막히는가 조리대 위 물건, 중복 식기, 유통기한 확인이 필요한 식품 자주 쓰는 작업면이 비어 있음
    침실 옷과 침구가 섞이는가 입은 옷, 세탁물, 계절이 지난 의류 잠자리 주변에 임시 적치물이 없음
    욕실 사용 후 되돌려 놓기 어려운가 세면대 주변, 빈 용기, 자주 쓰지 않는 용품 매일 쓰는 용품만 손이 닿는 곳에 있음
    거실 공용 물건이 각자 흩어지는가 충전기, 리모컨, 우편물, 임시 보관품 공용 물건의 임시 바구니나 지정 위치가 있음

    15분 정리 루틴: 준비·분류·실행·점검

    15분 동안 집 전체를 완성하려고 하지 말고, 하나의 표면이나 하나의 물건군만 끝냅니다. 정리 도구를 고르는 데 시간을 쓰기보다 먼저 바닥이나 작업면을 확보하는 것이 좋습니다.

    1단계: 준비 2분

    • 타이머를 15분으로 설정합니다.
    • 정리할 구역을 한 곳으로 제한합니다. 예를 들어 ‘주방 전체’보다 ‘조리대 오른쪽’처럼 정합니다.
    • 분류용으로 유지, 다른 곳으로 이동, 보류, 내보내기 네 구역을 정합니다.
    • 버릴 물건을 바로 밖으로 내보낼 수 없다면 출구 가까이에 임시 봉투를 둡니다.

    보류 구역은 판단을 미루는 곳이지 물건을 다시 섞어 놓는 곳이 아닙니다. 보류 물건에는 확인할 날짜나 질문을 적어 두어야 다음 정리 때 같은 판단을 반복하지 않습니다.

    2단계: 분류 4분

    한 번에 하나씩 집어 들고 다음 순서로 판단합니다. ‘오늘 또는 이번 주에 쓰는가’, ‘이 공간에서 쓰는가’, ‘같은 기능의 물건이 이미 있는가’를 차례로 확인하세요. 세 질문에 모두 답하기 어렵다면 즉시 폐기하지 말고 보류로 옮깁니다. 사용 여부가 불분명한 물건을 무리하게 버리는 방식은 생활 패턴에 맞지 않을 수 있습니다.

    • 유지: 이 공간에서 자주 사용하고 위치를 정할 수 있는 물건
    • 이동: 물건 자체는 필요하지만 현재 방이나 표면이 맞지 않는 물건
    • 보류: 계절성, 수리 여부, 사용 가능성을 추가 확인해야 하는 물건
    • 내보내기: 비어 있거나 고장 났거나 현재 생활에서 역할이 끝난 물건

    3단계: 실행 6분

    유지할 물건을 사용 순서와 손이 닿는 거리로 배치합니다. 자주 쓰는 물건은 꺼내기 쉬운 곳에, 가끔 쓰는 물건은 뒤쪽이나 높은 곳에, 함께 사용하는 물건은 한 묶음으로 둡니다. 단, 무거운 물건이나 깨지기 쉬운 물건은 안전을 우선해 안정적인 위치를 선택해야 합니다.

    수납함을 추가하기 전에 먼저 물건 수를 줄이고 기존 공간을 비워 보세요. 수납용품은 남은 물건의 종류와 크기를 확인한 뒤 필요한 경우에만 선택하는 편이 공간 낭비를 줄이는 데 도움이 됩니다. ‘빈 공간이 보이는가’보다 ‘꺼낸 뒤 제자리로 돌아가는가’를 완료 기준으로 삼습니다.

    4단계: 점검 3분

    정리한 구역을 실제 동작으로 확인합니다. 현관이라면 가방을 내려놓고 열쇠를 두는 동작을, 주방이라면 조리대를 사용하고 도구를 되돌리는 동작을 해 봅니다. 동선이 막히거나 손이 닿지 않으면 물건의 종류보다 위치가 문제일 수 있습니다.

    복사해서 쓰는 15분 실행 체크리스트

    1. 오늘 정리할 방과 구역을 한 문장으로 정했다.
    2. 타이머와 분류용 네 구역을 준비했다.
    3. 바닥, 조리대, 세면대처럼 작업할 표면을 먼저 확보했다.
    4. 물건을 유지·이동·보류·내보내기로 나눴다.
    5. 자주 쓰는 물건을 사용 지점 가까이에 배치했다.
    6. 같은 기능의 물건을 한곳에 모아 중복 여부를 확인했다.
    7. 보류 물건에 확인 시점이나 판단 질문을 남겼다.
    8. 내보낼 물건을 출구 또는 지정된 처리 장소로 옮겼다.
    9. 정리한 구역에서 실제 사용 동작을 한 번 해 봤다.
    10. 다음 15분에 이어서 할 작은 구역을 하나만 적었다.

    정리 순서가 막힐 때 적용하는 예외 기준

    모든 공간을 같은 방식으로 다룰 필요는 없습니다. 방문객이 곧 올 예정이라면 거실 전체보다 눈에 잘 보이는 통로와 앉는 자리를 먼저 정리합니다. 요리를 자주 한다면 주방의 조리대와 손잡이 주변을 우선하고, 재택근무를 한다면 책상 표면과 충전기 동선을 먼저 확인합니다.

    물건을 가족이나 동거인과 함께 사용하는 경우에는 임의로 위치를 바꾸기보다 공용 위치를 먼저 합의하세요. 개인 물건은 각자의 기준을 존중하고, 공용 물건만 공통 수납 기준을 적용하는 편이 마찰을 줄일 수 있습니다. 안전과 관련된 물건, 보관 의무가 있을 수 있는 서류, 수리나 반품을 기다리는 물건은 처리 방법을 확인하기 전까지 보류로 두는 것이 적절합니다.

    정리 후 유지하는 생활 동선 점검

    정리의 끝은 물건을 옮기는 순간이 아니라 다시 제자리로 돌아오는 경로를 정하는 순간입니다. 하루가 끝날 때 3분 동안 현관, 주방, 거실 중 한 곳만 되돌리는 루틴을 만들고, 물건이 계속 다른 곳에 놓이면 보관 위치가 실제 사용 지점과 맞지 않는지 살펴보세요.

    • 하루 한 번: 눈에 띄는 임시 적치물 세 개만 제자리로 돌려놓기
    • 일주일에 한 번: 보류 구역의 물건을 다시 판단하기
    • 계절이 바뀔 때: 사용 빈도가 달라진 물건의 위치 조정하기
    • 수납이 넘칠 때: 새 수납용품보다 중복·미사용 물건부터 확인하기

    FAQ

    집이 너무 어지러우면 어느 방부터 시작해야 하나요?

    가장 불편한 곳 중에서도 15분 안에 표면 하나를 비울 수 있는 구역을 고르세요. 전체 방을 목표로 잡으면 범위가 커져 중단하기 쉽습니다. 현관 바닥 일부, 주방 조리대 한쪽, 침실의 의자처럼 경계를 분명히 정하면 시작하기 수월합니다.

    버릴 물건을 바로 결정하기 어렵습니다. 어떻게 하나요?

    버림을 강요하기보다 보류 구역을 따로 만들고 판단 기준과 확인 시점을 남기세요. 다만 보류 구역이 계속 커진다면 보관 공간의 한도를 정하고, 같은 기능의 물건부터 비교하는 방식으로 다시 검토할 수 있습니다.

    수납용품을 먼저 사도 될까요?

    먼저 물건을 분류하고 남은 물건의 수와 크기를 확인하는 편이 안전합니다. 수납용품을 먼저 사면 필요 이상의 공간을 채우거나 사용하지 않는 물건을 유지하게 될 수 있습니다.

    15분 안에 끝나지 않으면 어떻게 해야 하나요?

    완료 기준을 ‘방 전체’가 아니라 ‘정한 구역의 사용 동선이 개선된 상태’로 확인하세요. 시간이 끝나면 사진이나 메모로 현재 상태를 남기고, 다음 15분에는 같은 구역의 마무리 또는 바로 옆 구역만 이어서 진행합니다.

    마무리

    생활 공간 정리는 많이 치우는 순서보다 자주 사용하는 동선을 덜 막히게 만드는 순서가 중요합니다. 불편함이 큰 방을 고르고, 한 구역을 네 가지로 분류한 뒤, 자주 쓰는 물건의 위치를 조정하고, 실제 동작으로 점검해 보세요. 오늘은 15분 동안 한 표면만 정리하고 다음 구역은 생활 중 반복되는 불편을 관찰한 뒤 정하면 됩니다.


  • A 15-Minute Room-by-Room Home Organization Routine

    A 15-Minute Room-by-Room Home Organization Routine

    작성자: Kai Life Editorial Team

    If you have only 15 minutes, begin with the room that affects your next useful activity, not necessarily the room that looks worst. Use this order: prepare your collection points, sort visible items, act on one category, and review what should happen next. A short room-by-room routine can reduce decision fatigue and give your home organization efforts a clear direction without turning the session into a full-house cleaning project.

    A 15-Minute Room-by-Room Home Organization Routine — topic illustration

    The four-part method: prepare, sort, act, review

    A tidy-up becomes easier to start when each stage has a narrow purpose. The aim is not to finish every room in one session. The aim is to create a small, visible improvement and leave a clear next action.

    1. Prepare

    Choose a 15-minute window and collect three temporary destinations:

    • Return: items that belong in another room or another area.
    • Decide: items that need a later decision, such as whether to keep, donate, recycle, or discard them.
    • Action: items that need a simple next step, such as laundry, washing, filing, or charging.

    You can use bags, boxes, or clearly marked floor areas. These containers are temporary sorting tools, not new storage. Keep the number of categories small so that sorting does not become a separate organizing project.

    2. Sort

    Work from visible surfaces and walkways. Pick up one item at a time and give it a destination. If you are uncertain, place it in the Decide group rather than interrupting the routine with a long judgment.

    For a short session, avoid opening every drawer or cupboard. Hidden storage can wait until the visible flow of the room is easier to use.

    3. Act

    Choose one category that will make the next part of the day easier. Return items to their homes, take rubbish or recycling to the appropriate place, start a small laundry action, or clear one useful surface. Acting on one category creates a concrete finish line for the session.

    4. Review

    Use the last minute to return containers, identify items that need a later decision, and write down the next starting point. A review prevents temporary piles from becoming permanent features of the room.

    Which room should you start with?

    Use the following room order when you do not know where to begin. It follows daily function rather than visual drama.

    Order Room or area Reason to begin there Useful first target
    1 Entryway It controls the movement of items into and out of the home. Shoes, bags, keys, mail, and outerwear
    2 Kitchen It supports frequent daily tasks and benefits from clear working space. One counter section or the sink area
    3 Living area It often collects items from several activities. One table, sofa zone, or walking path
    4 Bathroom Small visible surfaces can be sorted quickly. Countertop items or used towels
    5 Bedroom It supports the next rest period and often has recurring clothing clutter. Floor, bedside area, or one clothing group

    This is a starting order, not a rule for every home. If your next important task happens in the kitchen, begin there. If the entryway is blocked, clearing it may improve the home flow before you work elsewhere.

    The 15-minute action plan

    Use a timer if it helps you keep the session contained. The following plan gives each stage a defined role.

    1. Minutes 0–2: Prepare. Choose one room or one zone. Place three bags, boxes, or baskets nearby and remove obvious rubbish if doing so is quick.
    2. Minutes 2–7: Sort. Move through visible surfaces and walkways. Sort items into Return, Decide, and Action. Do not reorganize closed storage during this stage.
    3. Minutes 7–13: Act. Complete one practical category. For example, return items to their homes, clear one counter, or take a collection to its next destination.
    4. Minutes 13–15: Review. Empty the temporary containers where possible, label unresolved items mentally or on a note, and choose the next zone.

    If one category is larger than expected, stop at the end of the time block rather than expanding the session by default. You can record the unfinished category as the next starting point.

    Storage rules that support home flow

    Storage works best when it reflects how people use an item. Consider these simple rules while returning belongings:

    • Store frequent-use items near the point of use. Keep daily entry items near the entrance and cooking tools near the preparation area.
    • Give recurring items a visible home. If keys, chargers, or bags regularly land in the same place, consider whether that location can become their designated home.
    • Group by activity. Keep items used together together where practical, such as a small set of cleaning supplies or a work-from-home group.
    • Protect useful surfaces. A clear section of a counter, table, or bedside surface can serve as a landing area for the next activity.
    • Use temporary containers only for sorting. If a basket repeatedly holds unresolved items, schedule a separate decision session or reduce the number of items entering it.

    These rules do not require new products. They are ways to test whether an existing home can support the actions you already perform.

    A copyable 15-minute tidy-up checklist

    Copy this checklist into a note, print it, or adapt it for your home:

    • Choose one room or zone.
    • Set a 15-minute limit.
    • Prepare Return, Decide, and Action containers.
    • Clear visible rubbish or recycling.
    • Sort items from one surface or walkway.
    • Return items that already have a home.
    • Complete one Action category.
    • Keep uncertain items in Decide instead of stopping to research or debate.
    • Remove temporary containers from the active area.
    • Write down the next room, surface, or category.

    How to handle common sticking points

    When every room needs attention

    Choose the room connected to the next activity or the main movement path. A small improvement in a functional area can be more useful than a larger change in a room you will not use soon.

    When an item has no home

    Place it in Decide and continue. During a later session, ask where the item is used, how often it is used, and whether its current storage location makes retrieval and return reasonably easy. If no location supports those actions, the item may need a separate keep, move, donate, recycle, or discard decision.

    When sorting creates more piles

    Reduce the number of categories. Return, Action, and Decide are enough for a short session. More detailed categories can be useful during a dedicated organizing project, but they may slow down a quick tidy-up.

    When another person shares the home

    Start with shared surfaces and common paths rather than personal storage. If an item belongs to someone else, place it in a clearly identified Return area instead of deciding on that person’s behalf.

    FAQ

    Should I clean or organize first?

    For a 15-minute tidy-up, begin with basic sorting and movement. Once items are off the chosen surface, you can decide whether a quick wipe or another cleaning task fits the remaining time. Separating sorting from detailed cleaning helps keep the session focused.

    What if I cannot finish a room?

    Stop at the planned time and leave a short note about the next visible target. Finishing a defined zone, category, or step is enough for one session. The next routine can continue from that note.

    How often should I use this routine?

    Use it when a short reset would help, such as before a busy part of the day or after several activities have accumulated. The useful frequency depends on your home, schedule, and the amount of shared activity.

    Do I need special storage products?

    No. The routine can begin with existing bags, boxes, baskets, or clearly separated areas. Consider storage products only after you understand what needs to be stored and where it is used.

    Conclusion

    A practical home organization routine can start with one room, three temporary categories, and 15 minutes. Begin where the next activity or the main home flow will benefit, sort visible items, act on one category, and review the next step. Repeating this small framework can make tidying easier to resume without requiring a full-home project every time.


  • 생활 공간 정리, 자주 쓰는 물품 재고를 15분에 메모하는 법

    생활 공간 정리, 자주 쓰는 물품 재고를 15분에 메모하는 법

    작성자: Kai Life 편집팀

    자주 쓰는 생활용품 재고는 집 안을 전부 뒤지기보다 생활 동선을 따라 필요한 품목만 확인하면 짧은 시간에 메모할 수 있습니다. 이 글에서는 준비 2분, 분류 4분, 기록 6분, 점검 3분으로 나누어 총 15분 동안 실행하는 생활 공간 정리 루틴을 소개합니다. 목표는 완벽한 수납이 아니라, 무엇이 어디에 있고 무엇을 보충할지 한눈에 알 수 있는 상태를 만드는 것입니다.

    생활 공간 정리, 자주 쓰는 물품 재고를 15분에 메모하는 법 — 주제 설명 이미지

    1. 시작 전: 재고 메모의 범위를 좁히기

    재고 확인이 오래 걸리는 이유는 집 안의 모든 물건을 한꺼번에 정리하려 하기 때문입니다. 먼저 자주 쓰는 생활용품만 대상으로 정합니다. 매일 또는 일주일에 여러 번 사용하는 물품, 떨어지면 바로 불편해지는 물품, 같은 종류를 여러 곳에 나누어 보관하는 물품이 우선입니다.

    우선 확인할 품목

    • 주방: 키친타월, 위생용품, 세제, 쓰레기봉투처럼 반복 사용되는 물품
    • 욕실: 화장지, 비누, 샴푸, 치약, 청소용품
    • 세탁·청소: 세탁세제, 수세미, 청소포, 고무장갑
    • 현관·생활 보조: 마스크, 건전지, 우산 관리용품처럼 필요할 때 바로 찾는 물품

    품목 수는 처음부터 많이 잡지 않는 편이 좋습니다. 1~2인 가구라면 한 번의 루틴에서 주방·욕실·청소 중 한 구역만 선택하거나, 자주 쓰는 품목 10~15개 정도로 시작할 수 있습니다. 품목 수는 집의 크기와 소비 습관에 따라 조절하세요.

    메모에 사용할 기준 정하기

    수량을 정확히 세기 어려운 물품은 개수 대신 상태를 기록해도 됩니다. 예를 들어 낱개 물품은 ‘남은 개수’, 묶음 제품은 ‘미개봉 묶음 수’, 액체류는 ‘충분·확인 필요·보충 필요’처럼 정합니다. 중요한 것은 모든 물품에 같은 기준을 적용하는 것입니다.

    품목 유형 기록 기준 예시 보충 판단
    낱개 생활용품 남은 개수 정한 최소 수량보다 적으면 확인
    묶음 제품 미개봉 묶음 수 마지막 묶음을 사용하기 시작하면 메모
    액체·분말 제품 충분·확인 필요·보충 필요 사용 빈도와 보관 여유를 함께 고려
    여분이 없는 물품 있음·없음 없음 상태만 별도 표시

    2. 15분 실행표: 준비·분류·기록·점검

    타이머를 15분으로 설정하고, 물품을 모두 꺼내는 대신 보관 장소 앞에서 확인합니다. 꺼내서 다시 넣는 과정이 많아지면 정리 시간이 늘어나므로, 위치를 바꾸는 일은 기록이 끝난 뒤 꼭 필요한 경우에만 합니다.

    0~2분: 준비

    1. 메모 앱이나 종이 한 장을 준비합니다.
    2. 이번에 확인할 구역을 하나 정합니다.
    3. 기록할 품목을 10~15개 안팎으로 적습니다.
    4. 보충이 필요한 물품을 임시로 표시할 기호를 정합니다. 예: 별표 또는 ‘확인’.

    메모 앱을 사용한다면 제목에 날짜와 구역을 함께 적습니다. 예를 들어 ‘주방 재고 확인 – 3월’처럼 작성하면 다음 점검 때 비교하기 쉽습니다. 날짜는 실제 확인일을 기준으로 기록하세요.

    2~6분: 생활 동선을 따라 분류

    보관 장소를 수납장 이름으로 나누기보다 사용하는 순서로 살펴봅니다. 주방이라면 싱크대 주변, 조리대 아래, 식탁 주변처럼 실제로 손이 가는 순서를 따릅니다. 욕실은 세면대, 샤워 공간, 세면대 아래 순서로 볼 수 있습니다.

    • 사용 중: 현재 꺼내 놓았거나 사용 중인 물품
    • 여분: 같은 종류의 미개봉 또는 예비 물품
    • 다른 위치: 원래 자리가 아닌 곳에서 발견한 물품
    • 확인 필요: 내용물이나 사용 가능 여부를 바로 판단하기 어려운 물품

    이 단계의 목적은 물품을 예쁘게 배열하는 것이 아니라 흩어진 위치를 파악하는 것입니다. 같은 종류가 여러 장소에 있으면 일단 위치를 메모하고, 한곳으로 모을지는 점검 단계에서 결정합니다.

    6~12분: 메모에 기록하기

    각 품목은 이름, 위치, 상태, 다음 행동 네 가지로 기록하면 충분합니다. 수량을 세는 데 시간이 많이 걸리는 물품은 앞서 정한 상태 기준을 사용하세요.

    품목 현재 위치 상태·수량 다음 행동
    예: 주방 세제 싱크대 아래 사용 중 1개 다음 점검 때 확인
    예: 쓰레기봉투 현관 수납함 여분 적음 보충 여부 확인
    예: 치약 욕실 선반 미개봉 없음 구매 목록에 표시

    구매 목록을 작성할 때는 곧바로 구매를 결정하지 않고 ‘보충 검토’로 적어도 됩니다. 이미 다른 장소에 여분이 있거나 사용 빈도가 낮은 경우가 있기 때문입니다. 재고 메모의 목적은 구매를 많이 하는 것이 아니라 중복 구매와 갑작스러운 부족을 줄일 기준을 만드는 데 있습니다.

    12~15분: 위치와 기준 점검

    마지막 3분에는 기록을 다시 읽으며 다음 세 가지를 확인합니다.

    • 같은 품목이 두 곳 이상에 나뉘어 있는가?
    • 다음에 찾을 사람이 위치를 이해할 수 있는가?
    • 보충이 필요한 품목과 단순히 위치가 어수선한 품목을 구분했는가?

    위치를 바꿀 때는 사용 빈도가 높은 물품을 손이 잘 닿는 곳에 둡니다. 무거운 물품은 꺼내기 쉬운 낮은 위치, 자주 쓰지 않는 여분은 생활 동선을 방해하지 않는 안쪽이나 위쪽에 두는 식으로 기준을 세울 수 있습니다. 다만 어린이나 반려동물이 있는 집에서는 안전을 우선해 세제와 작은 물품의 위치를 별도로 검토해야 합니다.

    3. 복사해서 쓰는 생활용품 재고 체크리스트

    아래 표를 메모 앱에 복사한 뒤, 집에서 실제로 사용하는 품목만 남기면 됩니다. 날짜와 구역을 먼저 적으면 다음 점검 때 기록을 갱신하기 편합니다.

    [재고 확인 날짜]
    [확인 구역]
    
    □ 품목명:
      위치:
      상태 또는 수량:
      다음 행동:
    
    □ 품목명:
      위치:
      상태 또는 수량:
      다음 행동:
    
    □ 품목명:
      위치:
      상태 또는 수량:
      다음 행동:
    
    [보충 검토 목록]
    □
    □
    □
    
    [위치 변경이 필요한 물품]
    □
    □

    품목별 간단 체크리스트

    • 주방: 세제, 수세미, 키친타월, 쓰레기봉투, 위생용품
    • 욕실: 화장지, 비누, 치약, 샴푸, 욕실 청소용품
    • 세탁: 세탁세제, 얼룩 제거용품, 세탁망, 빨래 관련 소모품
    • 청소: 청소포, 먼지 제거용품, 장갑, 일반 청소용품
    • 예비품: 건전지, 전구, 마스크 등 집에서 반복적으로 사용하는 물품

    이 목록은 예시이므로 모든 품목을 반드시 포함할 필요는 없습니다. 실제 사용하지 않는 물품을 목록에 넣으면 확인 대상만 늘어납니다. 반대로 특정 물품을 자주 사용하는 집이라면 해당 품목을 추가해 개인용 목록으로 바꾸세요.

    4. 재고 메모가 유지되는 수납 기준

    재고 메모가 다음 달에도 의미 있으려면 보관 위치가 자주 바뀌지 않아야 합니다. 자주 쓰는 물품은 사용 장소와 가까운 곳에 두고, 여분은 한곳에 모으는 기준을 우선 적용합니다. 같은 종류를 여러 곳에 분산하면 남은 수량을 다시 확인하는 시간이 늘어날 수 있습니다.

    수납 위치를 정할 때의 세 가지 질문

    1. 어디에서 사용하는가? 사용 장소와 가까우면 되돌려 놓기 쉽습니다.
    2. 얼마나 자주 사용하는가? 빈도가 높을수록 손이 닿는 위치가 적합합니다.
    3. 누가 사용하는가? 함께 사는 사람이 위치를 알 수 있도록 표시를 단순하게 정합니다.

    라벨을 붙일 때는 세부 품목을 지나치게 많이 나누기보다 ‘욕실 여분’, ‘주방 소모품’, ‘청소용품’처럼 실제로 찾을 수 있는 범위를 사용하세요. 라벨이 복잡하면 수납 기준을 지키기 어려울 수 있습니다.

    5. 점검 주기와 예외 상황

    점검 주기는 사용량에 맞춰 정합니다. 매일 쓰고 소비 속도가 빠른 품목은 짧은 간격으로, 사용 빈도가 낮은 품목은 필요할 때 확인해도 됩니다. 모든 집에 같은 주기가 맞는 것은 아니므로 처음에는 15분 루틴을 한 번 실행한 뒤, 기록이 실제 생활에 도움이 되는지 살펴보세요.

    다음 상황에서는 평소보다 범위를 좁히거나 별도 확인이 필요합니다.

    • 이사나 가구 배치 변경 직후: 위치 기록을 새로 작성합니다.
    • 공동생활을 시작하거나 가족 구성원이 바뀐 경우: 함께 사용하는 물품의 기준을 맞춥니다.
    • 유통기한이나 사용기한이 중요한 제품: 수량뿐 아니라 날짜와 보관 상태를 확인합니다.
    • 세제·살균제 등 주의가 필요한 제품: 안전한 보관을 우선하고 제품 표시를 따릅니다.
    • 소비량이 일정하지 않은 물품: 최소 수량을 고정하기보다 ‘다음 사용 전 확인’으로 기록합니다.

    결론: 정리의 목표를 ‘기억’에서 ‘기록’으로 바꾸기

    생활 공간 정리는 물건을 모두 버리거나 수납장을 새로 사는 일에서 시작하지 않습니다. 자주 쓰는 물품의 위치와 상태를 짧게 기록하고, 필요한 것만 다음 행동으로 연결하는 것부터 시작할 수 있습니다. 오늘은 한 구역과 10~15개 품목만 골라 15분 루틴을 실행해 보세요. 기록이 번거롭다면 수량을 상태 표현으로 줄이고, 보충 목록과 위치 변경 목록을 분리하면 유지하기 쉽습니다.

    자주 묻는 질문

    Q1. 수량을 꼭 정확히 세야 하나요?

    아닙니다. 정확한 개수가 필요한 품목만 세고, 나머지는 ‘충분’, ‘여분 적음’, ‘없음’처럼 같은 기준으로 기록해도 됩니다. 중요한 것은 다음 점검 때 비교할 수 있는 표현을 사용하는 것입니다.

    Q2. 모든 생활용품을 한 번에 정리해야 하나요?

    그럴 필요는 없습니다. 주방이나 욕실처럼 한 구역을 선택하고, 자주 사용하는 품목부터 시작하세요. 범위를 좁혀야 15분 안에 기록을 끝내고 다음 루틴으로 이어가기 쉽습니다.

    Q3. 같은 물품이 여러 곳에 있으면 모두 한곳에 모아야 하나요?

    반드시 모을 필요는 없습니다. 사용 장소가 달라 각각의 위치에 두는 편이 편리할 수 있습니다. 다만 여분의 위치만큼은 메모에 남겨, 보충 전에 다른 장소를 확인할 수 있도록 하세요.

    Q4. 메모를 얼마나 자주 갱신해야 하나요?

    사용량과 생활 변화에 따라 달라집니다. 물품이 자주 바뀌거나 수납 위치를 옮긴 뒤에는 다시 확인하고, 변화가 적다면 필요할 때 갱신해도 됩니다. 정해진 주기를 지키는 것보다 실제로 다시 볼 수 있는 간단한 형식을 유지하는 편이 중요합니다.


  • A 15-Minute Home Organization Routine for Household Supplies

    A 15-Minute Home Organization Routine for Household Supplies

    작성자: Kai Life Editorial Team

    A practical approach to home organization does not require a full-room makeover. For household supplies, a 15-minute check can be enough to see what you have, group similar items, identify what needs attention, and record a short restocking note. The goal is not to create a detailed warehouse inventory. It is to make the next small household decision easier.

    A 15-Minute Home Organization Routine for Household Supplies — topic illustration

    What this routine is for

    This routine works best for everyday supplies that tend to disappear into cabinets, drawers, closets, or utility areas. Examples include cleaning materials, paper goods, laundry items, light bulbs, batteries, and basic kitchen or bathroom consumables. You can use the same method for any category, but focusing on one category at a time keeps the task within a short session.

    For a one- or two-person home, a lightweight note is often more useful than a long spreadsheet. Record only information that helps with the next action:

    • What is available now?
    • What is open or partly used?
    • What is running low?
    • What belongs somewhere else?
    • What should be checked again later?

    A useful home organization system should fit the way the home is used. If a product is used in the kitchen, storing it far away may create friction even when the storage area looks tidy. The routine below therefore considers both quantity and home flow.

    Prepare: set up a small review area

    Preparation should take about two minutes. Choose one supply category and a surface where items can be grouped temporarily. You can use a table, a clear section of the floor, or the counter near the storage area.

    Gather the basics

    • A phone note, paper note, or simple spreadsheet
    • A pen if you are working on paper
    • A small bag or box for items that belong elsewhere
    • A recycling or disposal option for empty packaging, following local rules
    • A timer set for 15 minutes

    Do not remove every supply in the home unless the category is very small. Start with one cabinet, shelf, drawer, or storage zone. A defined boundary prevents the tidy-up routine from expanding into an unfinished house-wide project.

    Choose one question

    Give the session a practical purpose. For example:

    • “Do I have enough cleaning supplies for the next ordinary use?”
    • “Which paper goods are duplicated?”
    • “Where should laundry supplies live?”
    • “What can I stop storing in the daily-use area?”

    A question helps you make decisions quickly without trying to redesign every storage rule at once.

    Sort: use four simple groups

    Spend about five minutes sorting the items you selected. Use four groups rather than creating many labels. The groups can be physical piles or headings in your note.

    1. Ready to use

    Place items that are in use or easy to reach in this group. If several similar items are open, consider placing them together so the next-use item is visible. This is not a recommendation to discard usable supplies. It is a way to make the current stock easier to understand.

    2. Reserve stock

    Place unopened or spare items here. Keep reserve stock in one defined location when possible. A single reserve area reduces the chance of buying a duplicate simply because the spare item was hidden in a different room.

    3. Relocate

    Place items that are usable but stored in an inconvenient location here. Think about the point of use: bathroom items near the bathroom, cleaning tools near the area where they are used, and frequently handled supplies at a comfortable reach. The best location depends on the layout of your home and the habits of the people who use it.

    4. Review

    Use this group for items that need a separate decision. This may include damaged packaging, unclear contents, items that belong to another person, or products that need label and safety instructions checked before use. If an item involves a safety concern, follow the product label and relevant local disposal guidance rather than relying on a quick assumption.

    Act: make only the decisions that matter today

    Spend about five minutes on visible actions. Keep the actions small enough to finish during the session.

    1. Combine the note. Write similar items under one heading instead of listing every individual object. For example, use “cleaning cloths” or “laundry detergent” as a category, with a short note such as “one open, one reserve.”
    2. Move misplaced items. Return the relocate group to a practical storage area. If you cannot decide on a permanent location, place the item in a clearly marked temporary spot and add it to the review line.
    3. Create a low-stock marker. Use a simple phrase such as “check before next shop” or “one remaining.” Avoid complicated quantity thresholds unless your household genuinely needs them.
    4. Make duplicates visible. Keep reserve items together or record them in the note. Visibility can help prevent an unnecessary repeat purchase, but it does not replace checking the item before use.
    5. Remove only clear waste. Deal with empty containers or clearly unusable packaging according to local recycling and disposal instructions. Leave uncertain items in the review group.

    Storage rules should be easy to explain. A useful rule might be “daily-use items stay at the point of use, reserve items stay together, and uncertain items get a review note.” You can adapt this to your home rather than copying a rule that does not fit your cabinets or routines.

    A copyable 15-minute action plan

    Time Action Result
    0–2 minutes Choose one category and one storage zone A clear boundary for the session
    2–5 minutes Gather the note, timer, and temporary bags or boxes A ready review area
    5–10 minutes Sort items into ready, reserve, relocate, and review A quick view of what needs attention
    10–14 minutes Move items, record low stock, and group reserves Small actions completed during the session
    14–15 minutes Choose a follow-up date or next category A clear stopping point

    If the timer ends while a decision is unfinished, record it in the review group and stop at the boundary you set. Stopping on purpose helps keep a tidy-up routine manageable.

    Copyable household supplies checklist

    Use this checklist in a paper notebook or digital note. Adapt the categories to the supplies your home actually uses.

    • [ ] Choose one household-supplies category
    • [ ] Choose one cabinet, shelf, drawer, or storage zone
    • [ ] Set a 15-minute timer
    • [ ] Gather a note and a temporary relocation bag or box
    • [ ] Group items into ready to use, reserve stock, relocate, and review
    • [ ] Record open items and reserve items in short language
    • [ ] Move clearly misplaced items
    • [ ] Mark items that are running low
    • [ ] Group reserve stock in one practical location
    • [ ] Separate uncertain items for later checking
    • [ ] Handle empty packaging according to local guidance
    • [ ] Write the next review date or next category

    Simple note template

    Category: ____________________
    Review date: _________________
    
    Ready to use: ________________
    Reserve stock: _______________
    Running low: _________________
    Relocate: ____________________
    Review later: _________________
    Next action: _________________

    Review: keep the system light

    At the end of the session, ask whether the note will be useful the next time you shop or tidy. If it contains too much detail, shorten it. A note that says “one open, one reserve, check next week” may be more useful than a record of brand names, exact measurements, and every storage movement.

    Choose a review rhythm that matches consumption. Frequently used supplies may deserve a brief check during a regular household reset. Less frequently used items can be reviewed when the storage zone becomes difficult to navigate. There is no single correct interval because household size, habits, and storage space vary.

    Notice repeated friction points. If the same item keeps moving between rooms, the storage rule may need adjustment. If a reserve supply is repeatedly forgotten, its location may be too hidden. If a category takes longer than 15 minutes, divide it into smaller zones rather than treating the longer session as a failure.

    FAQ

    Should I count every item exactly?

    Not for a lightweight review. Exact counts can be useful for a specific household need, but a short note such as “one open and one reserve” may be enough for ordinary planning.

    What if I find expired, damaged, or unfamiliar products?

    Move them to the review group and check the label, manufacturer guidance, or local disposal instructions. Avoid guessing about safe use or disposal, particularly for chemical products.

    Where should reserve supplies be stored?

    Choose a location that is dry, practical, and visible to the people who use the supplies, while following product storage directions. Keeping similar reserve items together can make the inventory note easier to maintain.

    What if 15 minutes is not enough?

    Stop at the timer, write down the unfinished decision, and select a smaller zone for the next session. The purpose of the routine is a repeatable review, not a single large decluttering project.

    Conclusion

    A lightweight household supplies inventory note can support home organization without becoming another demanding project. Choose one category, sort items into four groups, take a few practical actions, and leave a short note for the next review. Over time, these small decisions can make storage rules and home flow easier to understand, while still allowing the system to change with your household.


  • 청소 도구를 한곳에 모으는 생활 공간 정리 15분 루틴

    청소 도구를 한곳에 모으는 생활 공간 정리 15분 루틴

    작성자: Kai Life 편집팀

    청소 도구를 한곳에 모으려면 먼저 모든 물건을 한 장소에 밀어 넣기보다 사용 빈도, 사용 장소, 건조 필요 여부를 기준으로 나누는 것이 좋습니다. 자주 쓰는 도구는 꺼내기 쉬운 위치에, 가끔 쓰는 도구는 위쪽이나 안쪽에 두고, 젖은 도구는 다른 물건과 분리해 말릴 자리를 남겨 두세요. 아래의 15분 루틴은 복잡한 생활 공간 정리를 한 번에 끝내려 하기보다 작은 범위부터 정리하는 방법입니다.

    청소 도구를 한곳에 모으는 생활 공간 정리 15분 루틴 — 주제 설명 이미지

    청소 도구 수납 전에 세울 3가지 기준

    정리 장소를 먼저 정하면 물건에 맞지 않는 수납을 만들기 쉽습니다. 다음 세 가지 질문에 답한 뒤 수납 위치를 정해 보세요.

    1. 어디에서 가장 자주 사용하는가

    욕실에서 주로 쓰는 브러시와 세정 도구, 주방에서 쓰는 행주와 작은 솔, 바닥 청소에 사용하는 도구는 사용 장소가 다릅니다. 모든 도구를 한 바구니에 넣는 방식이 편할 수도 있지만, 사용 장소가 멀리 떨어져 있다면 꺼내고 되돌리는 과정이 번거로워질 수 있습니다.

    기본 원칙은 청소 도구의 중심 보관 장소는 하나로 정하되, 사용 빈도가 높고 특정 공간에서만 쓰는 물건은 예외를 둔다는 것입니다. 예를 들어 전체 도구는 현관 수납장에 두고, 매일 쓰는 작은 솔만 욕실 선반에 둘 수 있습니다.

    2. 얼마나 자주 사용하는가

    • 자주 사용하는 도구: 손이 바로 닿고 내용물을 한눈에 확인할 수 있는 곳
    • 가끔 사용하는 도구: 같은 종류끼리 묶어 수납장 안쪽이나 위쪽
    • 계절·특정 상황용 도구: 사용 시기를 표시하거나 별도 상자에 분류

    자주 쓰는 물건을 여러 겹으로 쌓으면 정리된 것처럼 보여도 꺼내는 과정이 늘어납니다. 빈도에 따라 앞뒤 또는 위아래를 나누면 수납량보다 사용 편의성을 먼저 확보할 수 있습니다.

    3. 말려야 하는가

    물기가 남는 걸레, 브러시, 고무장갑 등은 밀폐된 상자에 바로 넣지 않는 편이 안전합니다. 물기를 털어낼 장소와 완전히 마른 뒤 보관할 장소를 구분하세요. 수납장 안에 넣어야 한다면 통풍이 가능한 바구니나 구획을 사용하고, 바닥에 물이 고이지 않는지 확인합니다.

    15분 실행 루틴: 준비·분류·실행·점검

    타이머를 15분에 맞추고 청소 도구가 있는 장소만 정리합니다. 집 전체를 동시에 건드리지 말고 현관 수납장, 세탁기 주변, 욕실 한 칸처럼 범위를 좁히는 것이 핵심입니다.

    시간 단계 실행 내용
    0~3분 준비 정리할 범위를 정하고 임시 분류용 봉투 또는 상자 3개를 준비합니다.
    3~7분 분류 자주 사용, 가끔 사용, 다른 장소로 이동할 물건으로 나눕니다.
    7~12분 실행 한곳에 모을 물건을 빈도와 크기에 따라 배치하고 젖은 물건은 건조 구역에 둡니다.
    12~15분 점검 꺼내기와 되돌리기가 쉬운지 확인하고 위치를 한 줄로 기록합니다.

    0~3분: 준비 범위를 고정하기

    첫 단계에서는 정리함을 새로 사기보다 현재 있는 수납 공간을 확인합니다. 바닥에 흩어진 도구, 다른 방에 놓인 도구, 이미 수납된 도구를 모두 꺼내지 않아도 됩니다. 이번 15분에 다룰 구역과 종료 기준을 먼저 정하세요. 예를 들어 “세탁기 옆 선반의 청소 도구만 분류한다”처럼 범위를 구체화합니다.

    3~7분: 3개 그룹으로 빠르게 나누기

    다음 세 그룹을 임시로 만듭니다.

    1. 매일 또는 자주 쓰는 도구: 꺼내기 쉬운 앞쪽에 둘 물건
    2. 가끔 쓰는 도구: 같은 목적이나 종류끼리 묶어 안쪽에 둘 물건
    3. 이동·확인할 물건: 다른 방으로 돌려보내거나 상태를 확인할 물건

    용도가 겹치거나 상태를 바로 판단하기 어려운 물건은 버릴지 즉시 결정하지 않아도 됩니다. 다만 정리 공간에 다시 넣기 전에 “이번 주에 사용할 가능성이 있는가”, “같은 용도의 물건이 이미 있는가”를 확인해 별도 검토 그룹으로 남겨 두세요.

    7~12분: 사용 순서대로 배치하기

    수납 기준은 종류만이 아니라 사용 순서에도 맞출 수 있습니다. 바닥 청소를 할 때 함께 꺼내는 도구는 같은 바구니에 넣고, 물걸레처럼 사용 후 건조가 필요한 물건은 바구니 밖의 건조 위치를 정합니다. 작은 도구는 큰 도구 아래에 묻히지 않도록 낮은 용기나 칸막이에 배치합니다.

    손잡이가 긴 도구는 넘어지지 않도록 세워 둘 위치를 정하고, 걸어 두는 방식이라면 꺼냈다가 다시 걸기 쉬운지 확인합니다. 수납함 안에 빈 공간을 조금 남겨 두면 새 물건이 들어왔을 때 기존 구획이 무너지지 않습니다.

    12~15분: 되돌리기 테스트하기

    실제로 도구 하나를 꺼냈다가 원래 위치에 되돌려 보세요. 문을 열어야 하는지, 다른 물건을 먼저 옮겨야 하는지, 젖은 물건과 마른 물건이 섞이는지 확인합니다. 불편한 지점이 있으면 수납함을 추가하기보다 자주 쓰는 물건을 앞으로 옮기거나 구역을 나누는 방식부터 시도합니다.

    수납이 흐트러지지 않게 하는 생활 동선 점검

    정리 직후의 모습보다 중요한 것은 사용 후 원래 위치로 돌아가는 과정입니다. 다음 질문에 “아니요”가 나오면 수납 기준을 한 단계 조정할 수 있습니다.

    • 청소 도구의 중심 보관 장소를 가족이나 동거인이 알 수 있는가?
    • 자주 쓰는 물건을 한 손으로 꺼낼 수 있는가?
    • 젖은 물건을 바로 밀폐하지 않고 말릴 수 있는가?
    • 수납장 안에서 물건이 겹쳐 용도를 확인하기 어려워지지 않는가?
    • 사용 후 1분 안에 제자리로 되돌릴 수 있는가?

    정리 후에는 위치를 길게 설명하기보다 “욕실용은 오른쪽 바구니, 바닥용은 세워 둔 구역”처럼 짧게 이름 붙여 보세요. 라벨을 붙일 때도 도구 이름보다 사용 목적을 적으면 대체품이 바뀌어도 기준을 유지하기 쉽습니다.

    복사해서 쓰는 청소 도구 정리 체크리스트

    아래 목록은 한 번에 전부 완료해야 하는 과제가 아니라, 15분 정리의 종료 여부를 확인하는 점검표입니다.

    • [ ] 이번에 정리할 공간을 한 곳으로 제한했다.
    • [ ] 청소 도구를 자주 사용, 가끔 사용, 이동·확인으로 나눴다.
    • [ ] 자주 쓰는 도구를 꺼내기 쉬운 위치에 배치했다.
    • [ ] 같은 장소에서 쓰는 도구를 필요한 만큼 묶었다.
    • [ ] 젖은 도구를 말릴 위치와 마른 도구의 보관 위치를 구분했다.
    • [ ] 손잡이가 긴 도구가 넘어지지 않도록 고정했다.
    • [ ] 사용 후 제자리로 되돌리는 동작을 시험했다.
    • [ ] 수납 위치를 짧은 문장으로 기록하거나 공유했다.
    • [ ] 버릴지 판단하지 못한 물건은 별도 검토 그룹에 남겼다.

    자주 묻는 질문

    청소 도구는 반드시 한 장소에 모두 모아야 하나요?

    반드시 그럴 필요는 없습니다. 집 구조와 사용 장소가 다르면 중심 보관 장소 하나와 소량의 사용 지점 보관을 함께 운영할 수 있습니다. 다만 같은 용도의 도구가 여러 장소에 중복되면 수량을 파악하기 어려우므로, 어디에 무엇을 두는지 기준을 간단히 정해 두는 편이 좋습니다.

    수납함을 먼저 사야 하나요?

    먼저 현재 도구의 수량과 크기, 젖은 상태에서의 보관 필요 여부를 확인하는 것이 좋습니다. 기존 바구니나 상자로 임시 배치를 해 본 뒤 부족한 점이 분명해졌을 때 수납 도구를 검토하면 공간에 맞지 않는 구매를 줄이는 데 도움이 됩니다.

    15분 안에 끝내지 못하면 어떻게 하나요?

    15분은 전체 집을 완성하는 시간이 아니라 한 구역의 기준을 세우는 시간입니다. 시간이 끝나면 분류 중인 물건을 한곳에 모아 두고, 다음 정리 때 이어갈 범위를 기록하세요. 다음 실행에서는 다른 공간으로 넓히기보다 같은 기준이 유지되는지 먼저 점검합니다.

    마무리: 수납량보다 되돌리기 쉬운 기준부터

    생활 공간 정리는 물건을 많이 넣는 기술보다 사용 후 제자리로 돌아가기 쉬운 구조를 만드는 일에 가깝습니다. 청소 도구를 한곳에 모을 때도 사용 빈도와 장소, 건조 필요 여부를 먼저 구분하고, 15분 동안 한 구역만 준비·분류·실행·점검해 보세요. 집의 구조나 청소 습관에 따라 일부 도구를 사용 장소 가까이에 두는 예외를 인정하면 정리 기준을 오래 유지하기 수월합니다.


  • A 15-Minute Home Organization Station for Cleaning Tools

    A 15-Minute Home Organization Station for Cleaning Tools

    작성자: Kai Life Editorial Team

    To group cleaning tools in one practical station, choose one easy-to-reach location, collect the tools from around the home, separate them by frequency and use, then return only the useful items to that station. A 15-minute tidy-up works best when the goal is not to redesign every cupboard, but to create a clear home base for the tools used most often.

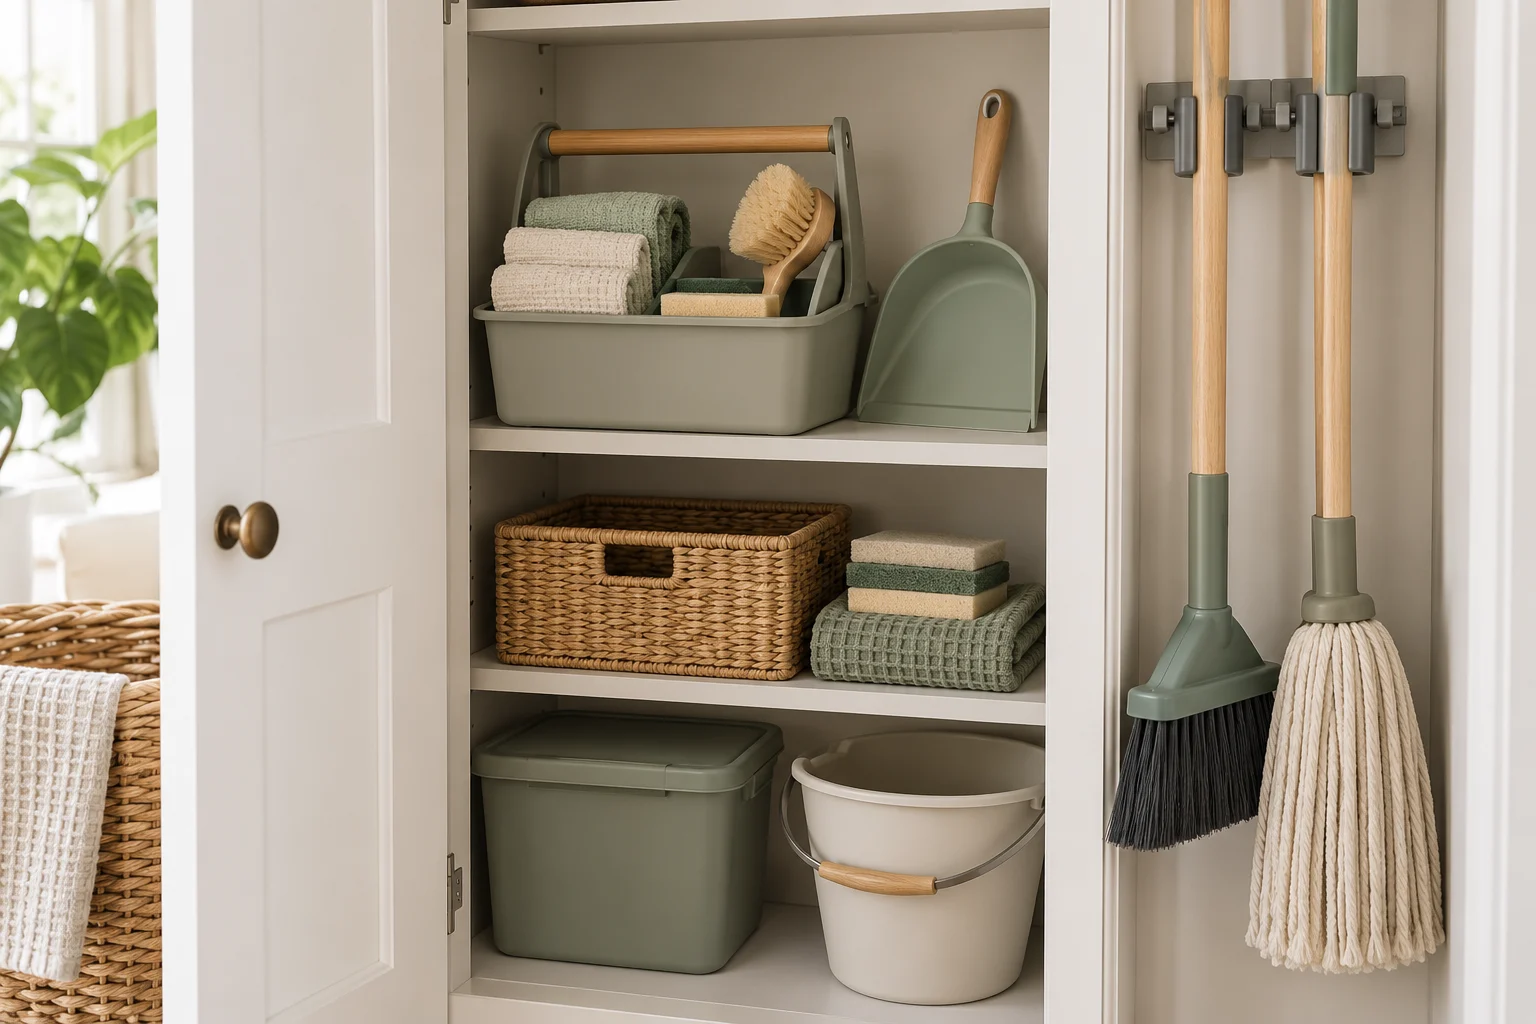
    Cleaning tools grouped in one accessible storage station

    What a practical cleaning station needs to do

    A cleaning station is a designated place for everyday cleaning supplies and tools. It can be a cupboard, a shelf, a narrow corner, a utility area, or another location that fits the home. The best location is not necessarily the largest one. It should reduce unnecessary walking and make it easy to put an item away after use.

    For a one- or two-person home, a small station often works better when it has a limited purpose. Keep frequently used items together, while storing occasional or specialist items elsewhere if the station becomes crowded. This creates a simple storage rule: the more often an item is used, the easier it should be to reach.

    • Daily or frequent items: place them at the front or at hand level.
    • Weekly items: place them behind or below the frequent-use group.
    • Occasional items: store them separately if they make the main station difficult to use.
    • Items with unclear purpose: pause before giving them space in the station.

    The 15-minute prepare, sort, act, review routine

    Minutes 0–3: Prepare the area

    Choose one station before moving anything. Open the cupboard or clear the shelf, then place a temporary collection spot nearby. A box, basket, or clean section of floor can work as a holding area. The collection spot keeps the process contained and makes it easier to see what you actually own.

    Gather a cloth or small bag for rubbish and a separate place for items that belong in another room. Avoid starting with several storage areas at once. One station and one collection spot are enough for this routine.

    Minutes 3–7: Sort by use, not by object type

    Bring cleaning tools from nearby rooms to the collection spot. Sort them into three practical groups:

    1. Use often: tools used for quick spills, surfaces, floors, or other regular tasks.
    2. Use sometimes: tools used during a longer weekly or occasional clean.
    3. Unsure or unused: items that are damaged, duplicated, empty, or not connected to a current task.

    Sorting by use helps the station support a home’s real cleaning flow. A tool that is useful but rarely needed does not have to occupy the easiest-to-reach position. If an item is used in a specific room, consider whether storing it near that room would save more effort than moving it to the central station.

    Minutes 7–12: Act and assign each group a place

    Return the frequent-use group first. Keep similar actions together where practical, such as surface-cleaning items, floor-care tools, and small touch-up tools. The exact categories can vary by home; the useful test is whether a person can find and return an item without opening several containers.

    Use existing containers when possible. A small basket can hold loose items, while taller tools may need an open side or a vertical space. Keep the arrangement visible enough that forgotten items do not disappear at the back. If a container hides the contents, label it with a plain description such as “floor care” or “quick clean.”

    Keep the station safe and suitable for the space. Follow the instructions on any cleaning product, keep incompatible products separate, and store supplies away from children or pets when relevant. Do not combine products merely to save space. If a container is leaking, damaged, or missing important information, set it aside for careful review rather than placing it back in the station.

    Minutes 12–15: Review the flow

    Test the station with a simple imaginary task: wiping a surface, handling a small spill, or cleaning a floor. Can you locate the relevant tool quickly? Is anything blocking the item you reach for most? Can the tool be returned without creating a new pile?

    Make one adjustment, then stop. The purpose of the 15-minute routine is to create a workable starting point. A short review later can improve the arrangement after the station has been used in real life.

    Storage rules that keep the station manageable

    A few repeatable rules are more useful than a complicated organizing system. Write the rules on a note inside the cupboard or save them with the checklist below.

    Situation Storage rule
    Used frequently Keep near the front or at an easy-to-reach height.
    Used in one specific room Consider local storage if carrying it back and forth adds effort.
    Used occasionally Place behind the everyday group or in a separate area.
    Duplicate items Keep only the quantity that fits the household’s routine; review the rest.
    Loose small tools Group them in one open or clearly labeled container.
    New item entering the station Decide where it belongs before putting it away.

    These rules protect the station from becoming a general dumping place. They also make the system easier to explain to another person in the home. Shared spaces work better when the storage decision is visible rather than dependent on one person remembering it.

    Copyable 15-minute checklist

    • Choose one cleaning-tool station.
    • Clear enough space to see the available storage.
    • Set up a temporary collection spot.
    • Collect cleaning tools from nearby rooms.
    • Sort items into frequent, occasional, and unsure or unused groups.
    • Return frequent-use tools first.
    • Group loose tools in an existing basket or container.
    • Move room-specific tools closer to their point of use when that makes sense.
    • Separate damaged, leaking, empty, or unclear items for review.
    • Test the station with one common cleaning task.
    • Make one final adjustment.
    • Set a short review point after the station has been used.

    Common problems and practical adjustments

    The station is too full

    Return to the use-based groups and remove occasional items from the easiest-to-reach area. A full station may need a second location for specialist tools, or it may contain duplicates that are not supporting the current routine.

    Tools keep moving around the home

    Look at where the tool is actually used. A central station can be helpful for shared supplies, but a frequently used room-specific tool may be easier to manage near its task. The aim is a sensible home flow, not a single location at any cost.

    The station looks tidy but is hard to use

    Reduce hidden layers. If reaching one item requires moving several others, change the order or use a more open container. A visually neat arrangement that slows down ordinary tasks will be difficult to maintain.

    Two people put items away differently

    Use broad labels and simple zones instead of detailed instructions. For example, separate “quick clean” from “floor care” if those categories match the household’s habits. Review the arrangement together after a few uses and change only the part that causes confusion.

    FAQ

    Does a cleaning station need special organizers?

    No. The station can begin with the storage already available at home. Containers are useful when they solve a specific problem, such as loose small tools or a difficult-to-see shelf, but buying supplies is not required for the routine.

    Should every cleaning tool be kept in one place?

    Not necessarily. Shared everyday tools can benefit from one station, while a tool used repeatedly in one room may be easier to store there. The decision should follow the home’s movement pattern and the tool’s actual frequency of use.

    How often should the station be reviewed?

    Review it after using the station for a short period and whenever the arrangement begins to slow down a routine. A brief reset is usually easier than waiting until the storage area becomes difficult to sort.

    What should happen to items in the unsure group?

    Keep them outside the main station while deciding what to do. Check whether they are usable, relevant to the household, and safe to store. Avoid forcing an uncertain item into the station simply because it already exists.

    Conclusion

    A practical cleaning-tool station starts with a clear location and a small set of storage rules. In 15 minutes, prepare one area, sort tools by use, return the most frequent items first, and review the flow with a real task in mind. The result does not need to be elaborate. It needs to make the next small cleaning job easier to begin and easier to finish.


  • 현관을 어지럽히지 않는 귀가 후 15분 정리 루틴

    현관을 어지럽히지 않는 귀가 후 15분 정리 루틴

    작성자: Kai Life 편집팀

    귀가 후 현관을 어지럽히지 않으려면 모든 물건을 한꺼번에 치우기보다, 먼저 이동 동선을 비우고 물건을 네 가지로 나눈 뒤 정해 둔 위치에 넣는 순서가 효과적입니다. 이 글에서는 1~2인 가구가 집에 들어온 뒤 15분 동안 실행할 수 있는 생활 공간 정리 루틴을 준비·분류·실행·점검의 4단계로 나눠 소개합니다. 현관 크기나 생활 방식에 따라 보관 위치와 소요 시간은 달라질 수 있습니다.

    가방과 신발을 제자리에 둔 깔끔한 현관

    현관 정리가 자주 밀리는 이유부터 확인하기

    현관은 집 안으로 들어오는 물건이 처음 모이는 장소입니다. 가방, 겉옷, 신발, 우편물, 택배 포장처럼 성격이 다른 물건이 한꺼번에 들어오기 때문에, 각각의 위치가 정해져 있지 않으면 바닥이나 신발장 위가 임시 보관 장소가 되기 쉽습니다.

    또한 귀가 직후에는 식사, 세면, 휴식처럼 바로 처리하고 싶은 일이 있어 모든 물건을 완벽하게 정리하기 어렵습니다. 따라서 목표를 ‘현관을 완전히 비우기’로 잡기보다 통행 공간을 확보하고, 다음 행동이 필요한 물건만 따로 남기는 것으로 정하면 실행 부담을 줄일 수 있습니다.

    정리 전에 정할 세 가지 기준

    • 매일 쓰는 물건: 귀가 후 바로 제자리에 넣거나 걸 수 있는 위치를 정합니다.
    • 다른 공간으로 갈 물건: 현관에 머무는 시간을 줄이기 위해 이동 바구니나 임시 상자를 정합니다.
    • 처리 여부를 판단할 물건: 우편물, 반품 물건, 재활용 포장처럼 별도 행동이 필요한 물건을 구분합니다.

    수납용품을 추가하기 전, 현재 가진 선반·고리·바구니·서랍 중 어떤 것을 활용할지 먼저 확인하세요. 물건보다 수납용품이 많아지면 현관의 관리 대상이 늘어날 수 있습니다.

    귀가 후 15분 실행 루틴

    아래 시간표는 정확히 지켜야 하는 규칙이 아니라, 정리 순서를 잊지 않기 위한 기준입니다. 가족 구성원, 반려동물, 택배 수령 여부에 따라 시간을 조정해도 됩니다.

    시간 단계 실행 내용
    0~2분 준비 현관 바닥의 통행선을 확인하고, 이동 바구니나 빈 봉투를 꺼냅니다.
    2~5분 분류 신발, 가방·겉옷, 우편·택배, 다른 방으로 갈 물건을 나눕니다.
    5~10분 실행 신발과 가방을 정해진 위치에 넣고, 겉옷은 걸며, 처리할 물건은 종류별로 모읍니다.
    10~13분 이동 다른 공간으로 갈 물건을 해당 위치로 옮깁니다. 당장 옮기기 어렵다면 이동 바구니에 담습니다.
    13~15분 점검 현관 바닥, 신발장 위, 문 주변을 살피고 다음 날 필요한 물건만 남깁니다.

    0~2분: 정리 도구보다 통행선부터 확인하기

    현관문을 열고 신발을 벗은 뒤, 가장 먼저 바닥의 이동 공간을 봅니다. 바닥에 놓인 물건을 한곳에 임시로 모으되, 물건을 세부적으로 판단하는 데 시간을 쓰지 않습니다. 이 단계의 목적은 정리 완료가 아니라 분류를 시작할 수 있는 공간을 만드는 것입니다.

    준비할 도구는 많지 않습니다. 다른 방으로 가져갈 물건을 담을 바구니 하나와 버리거나 재활용할 포장물을 담을 봉투 정도면 충분합니다. 도구를 찾는 과정이 길어지면 루틴이 중단될 수 있으므로 현관 가까이에 두거나 쉽게 꺼낼 수 있는 위치를 정합니다.

    2~5분: 물건을 네 가지로 나누기

    현관에 남은 물건을 다음 네 묶음으로 나눕니다.

    1. 현관에 둘 물건: 자주 신는 신발, 외출에 필요한 소품처럼 현관에서 사용하는 물건입니다.
    2. 집 안 다른 곳에 둘 물건: 침실이나 거실로 가져갈 가방 속 물건, 충전기, 책 등입니다.
    3. 처리할 물건: 우편물 확인, 반품 준비, 세탁처럼 다음 행동이 필요한 물건입니다.
    4. 버리거나 재활용할 물건: 불필요한 포장재, 영수증, 사용이 끝난 소모품 등입니다.

    판단이 오래 걸리는 물건은 현관에 다시 내려놓지 말고 ‘처리할 물건’ 묶음으로 보냅니다. 15분 루틴은 물건의 최종 처분을 모두 결정하는 시간이 아니라, 바닥에 흩어진 상태를 끝내는 시간으로 활용하는 편이 부담이 적습니다.

    5~10분: 수납 기준에 따라 제자리 넣기

    수납 기준은 ‘사용 빈도’와 ‘행동 장소’를 중심으로 정합니다. 매일 쓰는 신발은 손이 닿기 쉬운 곳에 두고, 계절성이 강하거나 사용 빈도가 낮은 물건은 별도 위치로 옮깁니다. 단, 신발장 구조와 환기 상태에 따라 보관 방법이 달라질 수 있으므로 젖은 신발은 바로 밀폐된 공간에 넣지 않는 등 주거 환경에 맞게 조정하세요.

    • 신발: 오늘 신은 신발만 필요한 범위에서 정리하고, 짝이 맞지 않거나 관리가 필요한 신발은 별도 위치에 둡니다.
    • 가방: 매일 사용하는 가방은 걸거나 넣는 위치를 하나로 정합니다. 가방을 바닥에 내려놓는 습관이 있다면 문이나 신발장 가까이에 임시 걸이 위치를 마련합니다.
    • 겉옷: 의자나 바닥을 임시 옷걸이로 사용하지 않도록 현관 근처의 고리 또는 옷걸이 위치를 정합니다.
    • 우편물: 확인 전 우편물과 처리 완료 우편물을 섞지 않도록 작은 구역이나 봉투를 나눠 사용합니다.
    • 택배 포장: 포장을 바로 해체하기 어렵다면 내용물과 포장재를 분리해 두고, 재활용 배출 일정에 맞춰 처리합니다.

    10~13분: 다른 공간으로 갈 물건을 이동하기

    현관의 물건 중 상당수는 현관에서 사용할 물건이 아닙니다. 물건을 하나씩 들고 여러 번 왕복하기보다 이동 바구니에 모아 한 번에 옮기는 방식이 생활 동선에 맞을 수 있습니다. 다만 바구니 자체가 새로운 임시 보관 장소가 되지 않도록 ‘당일 비우기’ 또는 ‘다음 정리 시간에 우선 처리’라는 규칙을 정합니다.

    집 안에 들어온 물건을 바로 제자리에 넣기 어려운 날에는 임시 위치를 허용할 수 있습니다. 대신 임시 위치는 한 곳으로 제한하고, 바닥·식탁·소파처럼 여러 장소에 흩어지지 않게 합니다.

    13~15분: 다음 날을 기준으로 점검하기

    마지막 2분에는 현관을 현재의 상태가 아니라 다음 외출의 관점에서 봅니다. 신발을 신을 공간이 있는지, 문이 걸리지 않는지, 필요한 가방이나 우산이 다른 물건에 가려지지 않았는지 확인합니다. 정리 후에도 남은 물건이 있다면 ‘정리가 덜 됐다’고 판단하기보다, 수납 기준에 맞지 않는 물건이 무엇인지 기록합니다.

    생활 동선을 덜 막히게 하는 수납 기준

    수납 위치는 보기 좋은 순서보다 사용하는 순서를 기준으로 정하면 유지하기 쉽습니다. 귀가 직후 손이 움직이는 경로를 따라 내려놓기, 걸기, 넣기, 이동하기의 네 구역을 생각해 보세요.

    구역 어울리는 물건 기준
    내려놓기 열쇠, 카드, 작은 소품 문을 연 직후 손이 닿지만 통행을 방해하지 않는 곳
    걸기 가방, 겉옷, 우산 바닥에 놓지 않고 한 번의 동작으로 걸 수 있는 곳
    넣기 신발, 계절 소품 사용 빈도에 따라 꺼내기 쉬운 위치와 안쪽 위치를 구분
    이동하기 우편물, 다른 방의 물건, 반품 물건 현관에 오래 머물지 않도록 바구니나 처리 구역을 지정

    수납 위치를 정했는데도 같은 물건이 계속 바닥에 남는다면 물건의 문제가 아니라 위치의 문제일 수 있습니다. 실제로 내려놓는 장소와 수납 위치가 너무 멀거나, 문을 열어야 하거나, 다른 물건을 치워야 접근할 수 있는 경우에는 기준을 더 단순하게 조정하세요.

    복사해서 쓰는 현관 정리 체크리스트

    아래 목록은 귀가 후 또는 주말 점검 때 사용할 수 있습니다. 모든 항목을 매번 수행할 필요는 없고, 집에서 반복되는 문제에 해당하는 항목부터 선택하면 됩니다.

    • [ ] 현관 바닥의 통행 공간을 먼저 확보했다.
    • [ ] 신발을 현관에 둘 것과 다른 곳에 둘 것으로 나눴다.
    • [ ] 가방과 겉옷의 고정 위치에 넣거나 걸었다.
    • [ ] 열쇠와 작은 소품을 정해진 내려놓기 구역에 두었다.
    • [ ] 우편물과 택배 포장물을 한곳에 쌓지 않고 처리 상태별로 나눴다.
    • [ ] 다른 방으로 갈 물건을 이동 바구니에 담거나 제자리로 옮겼다.
    • [ ] 버릴 물건과 재활용할 물건을 분리했다.
    • [ ] 다음 외출에 필요한 물건만 현관 가까이에 남겼다.
    • [ ] 바닥에 남은 물건이 있다면 임시 위치와 처리 시간을 정했다.

    15분으로 끝나지 않는 날의 예외 처리

    택배가 몰리거나 외출 준비물이 많은 날에는 15분 안에 모든 일을 끝내기 어렵습니다. 이때는 루틴을 중단하기보다 우선순위를 줄여 실행하세요. 첫째, 문과 통행 공간을 비웁니다. 둘째, 젖은 물건이나 훼손될 수 있는 물건을 안전한 곳으로 옮깁니다. 셋째, 나머지는 ‘처리할 물건’ 한 구역에 모읍니다.

    몸이 피곤하거나 시간이 부족한 날에는 2분짜리 최소 루틴도 사용할 수 있습니다. 바닥에 놓인 물건을 한곳에 모으고, 신발 짝을 맞추고, 다음 날 필요한 물건만 꺼내 두는 방식입니다. 다만 우편물이나 반품처럼 기한이 있는 일은 별도로 확인해야 하므로, 모아 둔 물건을 언제 처리할지 메모해 두는 편이 안전합니다.

    정리 루틴을 유지하기 위한 주간 점검

    귀가 후 루틴을 며칠 실행했는데도 같은 물건이 반복해서 쌓이면, 매일 더 열심히 정리하기보다 수납 기준을 다시 살펴보세요. 다음 질문에 답하면 원인을 찾는 데 도움이 됩니다.

    1. 가장 자주 바닥에 놓이는 물건은 무엇인가?
    2. 그 물건을 실제로 내려놓는 위치와 정해진 수납 위치 사이가 너무 먼가?
    3. 수납하려면 서랍을 열거나 다른 물건을 먼저 치워야 하는가?
    4. 현관에 보관할 필요가 없는 물건이 계속 들어오는가?
    5. 임시 보관 구역이 너무 넓거나 여러 곳으로 나뉘어 있는가?

    답을 바탕으로 위치 하나를 옮기거나, 임시 구역을 하나로 줄이거나, 자주 쓰는 물건의 수납 단계를 단순하게 바꿉니다. 정리 방식은 생활 패턴에 맞아야 하므로 다른 사람의 수납 구성을 그대로 따라 할 필요는 없습니다.

    결론: 현관의 목표를 ‘완벽한 정리’보다 ‘다음 행동이 쉬운 상태’로 잡기

    귀가 후 생활 공간 정리는 15분 동안 모든 물건을 완벽하게 분류하는 작업이 아닙니다. 통행 공간을 먼저 확보하고, 물건을 네 가지로 나누고, 자주 쓰는 물건부터 정해진 위치에 넣으면 정리해야 할 대상의 범위를 줄일 수 있습니다. 현관에 반복해서 남는 물건이 있다면 의지보다 수납 위치와 생활 동선을 먼저 조정하세요.

    오늘은 준비물 하나와 이동 바구니 하나를 정한 뒤 0~2분 준비, 2~5분 분류, 5~10분 수납, 10~13분 이동, 13~15분 점검 순서로 시도해 보세요. 집의 구조와 귀가 시간이 다른 만큼, 시간을 줄이거나 늘리면서 자신에게 맞는 정리 루틴으로 조정하면 됩니다.

    자주 묻는 질문

    Q. 현관에 수납장이 부족하면 어떻게 하나요?

    A. 먼저 현관에 반드시 있어야 하는 물건만 남기고, 다른 방에서 사용할 물건은 이동 바구니나 별도 위치로 보냅니다. 수납장을 추가하기 전 자주 사용하는 물건의 수를 줄이고, 벽면·문 뒤·선반 등 현재 구조에서 활용 가능한 공간을 확인하세요. 임대 주택이거나 벽 손상이 우려되는 경우에는 설치 방법을 신중하게 선택해야 합니다.

    Q. 귀가 후 바로 정리할 체력이 없을 때도 15분 루틴을 해야 하나요?

    A. 전체 루틴을 억지로 수행할 필요는 없습니다. 바닥의 통행 공간을 확보하고, 다음 날 필요한 물건만 꺼내 두는 최소 루틴으로 줄여도 됩니다. 나머지는 처리할 물건 구역에 모으고 처리 시점을 정해 두면 여러 공간으로 흩어지는 것을 줄일 수 있습니다.

    Q. 가족이나 동거인과 함께 살 때 정리 기준이 다르면 어떻게 하나요?

    A. 각자의 물건을 구분하기 전에 공용 기준부터 정하는 것이 좋습니다. 예를 들어 현관 바닥에는 물건을 두지 않기, 신발은 정해진 구역에 두기, 우편물은 한곳에 모으기처럼 확인하기 쉬운 규칙부터 합의합니다. 개인 물건의 세부 수납 방식은 각자가 정하되, 공용 통행 공간의 기준은 함께 유지하는 방식이 현실적입니다.


  • A 15-Minute After-Work Routine for a Clearer Entryway

    A 15-Minute After-Work Routine for a Clearer Entryway

    작성자: Kai Life Editorial Team

    A clearer entryway does not require a long cleaning session. This 15-minute home organization routine gives each task a short time window: prepare the space, sort what has collected there, act on each category, and review the setup before stopping. It is designed for one- or two-person homes where the entryway often handles shoes, bags, coats, parcels, keys, and items waiting to leave.

    A clear entryway with a place for shoes, keys and a bag

    The goal is not to make the entrance look staged. The goal is to create a simple home flow: items arriving in the home have a temporary landing point, items leaving have a visible departure point, and everyday objects have storage rules that are easy to repeat.

    Why a short routine works better than a full reset

    Entryways collect mixed categories. A tote bag can sit beside recycling, a parcel, a pair of shoes, and something that belongs in another room. When every object requires a separate decision, a quick tidy-up can feel larger than it is.

    A short routine reduces that friction by using the same order each time. You are not trying to reorganize the entire home. You are clearing one transition area and deciding what should happen to the objects currently there.

    Use this routine when you have around 15 minutes after work or when the entryway has become difficult to use. If you are tired, reduce the scope to the floor, the main surface, and the items needed for the next morning.

    The four-part framework: prepare, sort, act, review

    1. Prepare the area

    Set a timer for 15 minutes. Bring a small bag or box for items that belong elsewhere, and choose one temporary spot for things that need a later decision. Avoid gathering extra containers at the start. More containers can create another sorting project before the entryway has been cleared.

    Make the working area visible. Open the door or switch on the light, move one object at a time, and keep a clear place for items that are staying. Preparation should make the next action obvious, not add a new layer of planning.

    2. Sort by next action

    Sort each item into one of four groups:

    • Stay here: the item is used at the entryway and has a defined place.
    • Return elsewhere: the item belongs in another room or another part of the home.
    • Leave soon: the item needs to go out, such as a return, donation, parcel, or recycling.
    • Decide later: the item needs a separate decision and should not consume the whole routine.

    This sorting method focuses on movement rather than abstract categories. You do not need to decide whether an item is “organized” or “messy.” You only need to identify its next useful action.

    3. Act on the groups

    Return the items that belong elsewhere. Put outgoing items beside the door, near the keys, or in another place connected to the next departure. Place staying items in their assigned locations. Keep the decide-later group small; if it grows, record a specific follow-up action instead of leaving an unnamed pile.

    For shared homes, avoid creating a vague communal surface. Give shared items one visible zone and give personal items separate zones where possible. A rule such as “keys go in the small tray” is easier to follow than “keep the console clear.”

    4. Review the flow

    Use the final minutes to walk through the entryway as if you were arriving home and leaving again. Can you put down a bag without moving several other objects? Can you find the item needed for the next departure? Does anything have a storage location that is technically available but inconvenient to use?

    If an item repeatedly remains in the entryway, treat that pattern as information. Its current home may be too far away, too full, or unrelated to how the item is used. Adjust the rule rather than blaming the routine.

    A minute-by-minute 15-minute action plan

    Time Action Decision to make
    0–2 minutes Set a timer, bring a return bag or box, and clear a small working area. What is the smallest part of the entryway to reset today?
    2–6 minutes Sort visible items into stay, return elsewhere, leave soon, and decide later. What is each item’s next action?
    6–10 minutes Return misplaced items and move outgoing items to the departure point. Which action can be completed now rather than postponed?
    10–13 minutes Put entryway items in their assigned places. Is each location easy to reach during a normal arrival?
    13–15 minutes Review the walking path and note one adjustment for next time. What repeatedly returns to the same spot?

    Storage rules that support a calmer home flow

    Storage rules work best when they describe an action a person can perform without much thought. Start with the objects that appear most often, then give them a location based on frequency and timing.

    • Daily-use items stay within easy reach. Keys, frequently used bags, and everyday outerwear should not require moving several other items first.
    • Departure items have a departure point. Returns, parcels, library items, or things going to work can sit in one designated area near the exit.
    • Rarely used items do not occupy prime space. Seasonal accessories and occasional equipment can use a less convenient location.
    • Small items need containment. A defined tray, hook, or small box can prevent keys and similar objects from spreading across a surface.
    • Capacity is visible. If a hook, basket, or shelf is consistently full, reduce the number of items assigned to it or choose a different location.

    Keep rules specific enough to guide both people in a shared home. “Bags go on the hooks” is clearer than “bags stay tidy.” If two people use different bags or coats, separate labels or zones can reduce accidental mixing.

    Copyable entryway checklist

    Save or copy this checklist for the next short tidy-up:

    • Prepare: Set a 15-minute timer.
    • Prepare: Bring one bag or box for items that belong elsewhere.
    • Sort: Separate stay-here items from return-elsewhere items.
    • Sort: Identify items that need to leave the home soon.
    • Sort: Put uncertain items in one limited decide-later group.
    • Act: Return misplaced items to their actual homes.
    • Act: Put outgoing items at the place connected to the next departure.
    • Act: Put keys, bags, shoes, and outerwear in defined locations.
    • Review: Check whether the path through the entryway is easy to use.
    • Review: Write down one storage rule or location to adjust.

    What to do when the routine keeps breaking down

    If the same object returns to the floor, ask three questions: Where is it used? When is it used next? What makes its current storage location inconvenient? The answer may suggest a better home near the entryway or a smaller set of items kept there.

    If the surface becomes a general holding area, define its purpose. It might hold keys and mail for a short period, but not clothing, tools, food containers, and parcels at the same time. A narrow rule gives the surface a clear job.

    If 15 minutes is too much on a particular day, use a reduced version: clear the walking path, move outgoing items to the exit, and place only the most visible daily-use items in their homes. A smaller repeatable action can provide useful information about what the entryway needs next.

    FAQ

    Should I organize the whole home during this routine?

    No. Keep the boundary to the entryway and items directly connected to it. If you find objects for other rooms, place them in the return-elsewhere group and move them later without turning the session into a full-home project.

    What if I do not have much storage near the door?

    Use categories and timing instead of adding equipment immediately. Choose one place for keys, one departure point for outgoing items, and one location for daily footwear or bags. If the setup remains difficult, review which items genuinely need to stay near the entrance.

    How should two people share the entryway?

    Create a small shared zone for shared items and separate zones for personal items when possible. Agree on the meaning of each zone, then test the arrangement during normal arrivals and departures. If one person repeatedly avoids a location, discuss the movement needed to use it.

    When should I handle the decide-later group?

    Give it a separate time or a specific next action. For example, “check the return label tomorrow” is more useful than leaving a box in the entryway with no decision attached. Keep this group limited so it does not become permanent storage.

    Conclusion

    A 15-minute entryway routine works as a small home organization system: prepare the area, sort by next action, act on each group, and review the flow. The most useful result is not a temporarily empty surface. It is a set of storage rules that matches how people actually arrive, leave, and move through the home.

    Start with the smallest visible entryway zone, use the checklist, and observe which items repeatedly resist the current setup. Those patterns can guide the next adjustment without requiring a large decluttering project.


  • 계절 물건 생활 공간 정리, 15분 보관 루틴

    계절 물건 생활 공간 정리, 15분 보관 루틴

    작성자: Kai Life 편집팀

    계절 물건을 꺼내기 쉽게 정리하려면 먼저 사용 시기를 기준으로 세 묶음으로 나누고, 그다음 생활 동선에 맞춰 배치하면 됩니다. 오늘 당장 필요한 물건, 가까운 시기에 쓸 물건, 당분간 쓰지 않을 물건을 구분한 뒤 15분 동안 한 구역만 처리하세요. 수납용품을 새로 사기보다 현재 가진 상자와 가방에 이름을 붙이고, 다시 꺼낼 때 손이 먼저 가는 위치를 우선하는 것이 핵심입니다.

    계절별 옷과 소품을 나누어 보관한 수납장

    왜 계절 물건 정리가 자주 흐트러질까

    계절 물건은 사용 빈도가 일정하지 않습니다. 겨울 이불, 여름 선풍기, 장마철 용품처럼 특정 기간에만 필요한 물건은 평소에는 공간을 차지하지만, 필요한 시기에는 빠르게 찾아야 합니다. 문제는 모든 물건을 같은 기준으로 쌓아두는 데서 시작됩니다.

    • 자주 쓰는 물건과 거의 쓰지 않는 물건이 같은 상자에 들어간다.
    • 상자 겉면에 내용물이 표시되지 않아 열어 봐야 확인할 수 있다.
    • 현재 사용 중인 물건을 꺼내려다 뒤쪽 물건까지 함께 무너진다.
    • 정리 범위를 넓게 잡아 중간에 지치고, 임시로 쌓아 두게 된다.

    따라서 이번 정리의 목표는 물건을 최대한 줄이는 것이 아니라 다음 사용 때 찾는 시간을 줄이는 것으로 잡는 편이 현실적입니다. 버리기 어려운 물건은 보류 구역으로 보내고, 먼저 위치와 분류를 정리하세요.

    4단계 프레임워크: 준비·분류·실행·점검

    1단계 준비: 15분 동안 한 구역만 정하기

    현관 수납장, 침대 아래, 옷장 한 칸처럼 경계가 분명한 장소를 고릅니다. 방 전체를 정리 대상으로 잡으면 물건이 다른 공간으로 이동하기 쉬우므로, 처음에는 바닥 면적이 작고 결과를 확인하기 쉬운 곳이 좋습니다.

    준비물은 네 가지면 충분합니다.

    • 분류한 물건을 잠시 담을 가방이나 상자 3개
    • 내용물을 적을 메모지와 펜
    • 먼지나 오염을 닦을 마른 천
    • 버림 또는 수선 여부를 따로 적을 작은 메모

    상자에는 미리 지금 사용, 다음 사용, 보류라고 적어 두세요. 보류 상자는 결정을 미루기 위한 공간이지, 무제한으로 채우는 공간은 아닙니다.

    2단계 분류: 사용 시기와 꺼내는 빈도로 나누기

    물건을 발견할 때마다 다음 질문을 순서대로 적용합니다.

    1. 이번 계절 또는 가까운 시기에 사용할 물건인가?
    2. 사용한다면 한 달 안에 꺼낼 가능성이 있는가?
    3. 다음 사용 전에 상태 확인이나 세탁이 필요한가?
    4. 비슷한 물건이 이미 다른 곳에 있는가?

    첫 번째와 두 번째 질문에 해당하면 손이 닿기 쉬운 위치에 둡니다. 당장 쓰지 않지만 다음 계절에 사용할 물건은 한 묶음으로 모읍니다. 사용 여부를 판단하기 어려운 물건은 즉시 버리지 말고 보류 상자에 넣되, 상자 겉면에 다음 점검 시기를 적어 두세요.

    3단계 실행: 생활 동선에 맞게 배치하기

    수납 위치는 빈 공간보다 행동 순서를 기준으로 정합니다. 외출 직전에 사용하는 물건은 현관 가까이에, 세탁 후 다시 넣는 물건은 옷장이나 세탁 동선에, 계절이 바뀔 때 한 번 꺼내는 물건은 높은 선반이나 침대 아래처럼 접근 빈도가 낮은 곳에 둘 수 있습니다.

    단, 무거운 물건을 높은 곳에 올리거나 꺼내기 위해 의자에 올라가야 하는 위치에 두는 것은 피하세요. 집에 어린이, 반려동물, 거동이 불편한 사람이 있다면 안전을 먼저 고려하고 통풍이나 습기에 민감한 물건은 밀폐 여부를 물건의 특성에 맞춰 판단해야 합니다.

    4단계 점검: 다음 사람이 찾아도 알 수 있게 표시하기

    상자에는 단순히 ‘겨울용품’이라고 적기보다 종류 + 수량 또는 특징 + 꺼낼 시기를 적습니다. 예를 들어 ‘침구·두꺼운 이불·다음 겨울’처럼 쓰면 다시 열어 보지 않고도 대략적인 내용을 파악할 수 있습니다. 여러 사람이 함께 사는 집이라면 줄임말보다 누구나 이해할 수 있는 표현을 사용하세요.

    15분 실행표

    타이머를 15분으로 설정하고 아래 순서대로 움직입니다. 시간이 끝났을 때 정리가 완성되지 않아도 괜찮습니다. 남은 물건은 다음 15분의 시작점이 되도록 한곳에 모아 두세요.

    시간 할 일 판단 기준
    0~2분 구역과 분류 상자 준비 이번 회차에는 한 구역만 처리
    2~7분 물건을 꺼내 세 묶음으로 분류 사용 시기와 꺼내는 빈도 우선
    7~11분 먼지 제거와 묶음별 배치 무거운 물건은 낮고 안정적인 위치
    11~14분 상자 이름과 내용 기록 다음 사용자가 찾을 수 있는 표현
    14~15분 통로와 작업면 정리 임시 물건을 남기지 않기

    한 번에 많은 물건을 처리하려 하지 말고, 같은 종류가 흩어져 있다는 사실만 기록해도 됩니다. 예를 들어 ‘여름 냉방용품이 현관과 베란다에 나뉨’처럼 적으면 다음 회차에 이동 작업부터 시작할 수 있습니다.

    복사해서 쓰는 계절 물건 체크리스트

    • [ ] 오늘 정리할 구역을 한 곳으로 정했다.
    • [ ] ‘지금 사용·다음 사용·보류’ 상자를 준비했다.
    • [ ] 물건을 사용 시기와 꺼내는 빈도로 나눴다.
    • [ ] 같은 종류의 물건이 여러 장소에 있는지 확인했다.
    • [ ] 다음 사용에 필요한 세탁, 건조, 점검 여부를 적었다.
    • [ ] 상자 겉면에 내용과 사용 시기를 표시했다.
    • [ ] 무거운 물건을 높은 곳에 두지 않았다.
    • [ ] 보류 상자에 점검 시기를 적었다.
    • [ ] 통로와 문 여닫는 공간을 확인했다.
    • [ ] 다음 15분에 할 일을 한 줄로 남겼다.

    정리할 때 생기는 예외와 조정 방법

    계절이 바뀌는 시점에는 모든 물건을 동시에 꺼내야 할 수 있습니다. 이때는 ‘이번 주에 사용할 것’과 ‘아직 확인하지 않을 것’을 먼저 나누세요. 날씨 변화가 잦다면 완전히 깊숙한 곳에 넣기보다 중간 위치에 두어 교체 부담을 줄일 수 있습니다.

    공간이 매우 좁다면 종류별 분류보다 사용 순서를 우선하는 방법도 있습니다. 외출용, 취침용, 세탁용처럼 행동 단위로 묶으면 물건의 종류가 달라도 한 번에 꺼낼 수 있습니다. 반대로 수납공간이 충분한데 찾기 어렵다면 공간 부족보다 표시와 분류 기준의 문제일 가능성이 있으므로 라벨과 묶음부터 점검하세요.

    버릴지 말지 결정하기 어려운 물건은 정리 중에 오래 붙잡지 않는 것이 좋습니다. 보류 상자에 넣고 점검 날짜를 정한 뒤, 실제로 다시 찾는지 확인하세요. 다만 고장, 곰팡이, 날카로운 부분 등 안전과 위생에 관련된 상태라면 보관보다 적절한 폐기 또는 수선 여부를 우선 검토해야 합니다.

    자주 묻는 질문

    Q. 수납함을 먼저 사야 하나요?

    꼭 그렇지는 않습니다. 현재 물건의 양과 크기, 꺼내는 빈도를 확인한 뒤 필요한 형태를 정하는 편이 낭비를 줄일 수 있습니다. 우선 가방이나 기존 상자로 분류하고, 반복해서 불편한 지점이 확인될 때 수납 도구를 검토하세요.

    Q. 보류 상자는 얼마나 오래 두면 되나요?

    집의 계절 변화와 사용 주기에 맞춰 점검 시기를 정하면 됩니다. 중요한 점은 날짜 없이 방치하지 않는 것입니다. 다음 계절 전이나 정기적인 생활 점검일처럼 실제로 확인할 수 있는 시점을 적어 두세요.

    Q. 15분 안에 끝나지 않으면 실패인가요?

    아닙니다. 15분은 전체 정리의 완료 시간이 아니라 시작을 쉽게 만드는 단위입니다. 한 구역의 분류를 끝냈다면 다음 회차에서는 배치와 라벨링만 진행해도 됩니다. 중간에 멈출 때는 남은 물건을 한곳에 모으고 다음 작업을 한 줄로 기록하세요.

    마무리: 찾기 쉬운 정리는 작은 기준에서 시작된다

    생활 공간 정리는 물건을 모두 같은 방식으로 숨기는 일이 아니라, 다시 사용할 순간을 예상해 위치와 표시를 정하는 작업입니다. 먼저 한 구역을 고르고, 지금 사용·다음 사용·보류로 나눈 뒤, 생활 동선과 안전을 고려해 배치하세요. 오늘 15분 동안 한 상자에 이름을 붙이는 것만으로도 다음 정리의 기준이 생깁니다.


THANKS KAI CONTACT

WeChat

위챗에서 QR코드를 스캔해 주세요.
Scan the QR code in WeChat.

Thanks Kai WeChat contact QR code위챗 열기 / Open WeChat