Home & Living

정리·청소·생활 공간을 더 편안하게 만드는 방법
Practical ways to organize, clean, and make your living space more comfortable.

  • A 15-Minute Home Organization Routine for Seasonal Items

    A 15-Minute Home Organization Routine for Seasonal Items

    작성자: Kai Life Editorial Team

    For a short seasonal tidy-up, use one visible staging area, sort items into four decisions, and give each group a specific storage destination. A practical 15-minute home organization routine is: prepare for 2 minutes, sort for 5 minutes, act for 6 minutes, and review for 2 minutes. The aim is not to reorganize the entire home; it is to create a clear next step for the seasonal items currently taking up space.
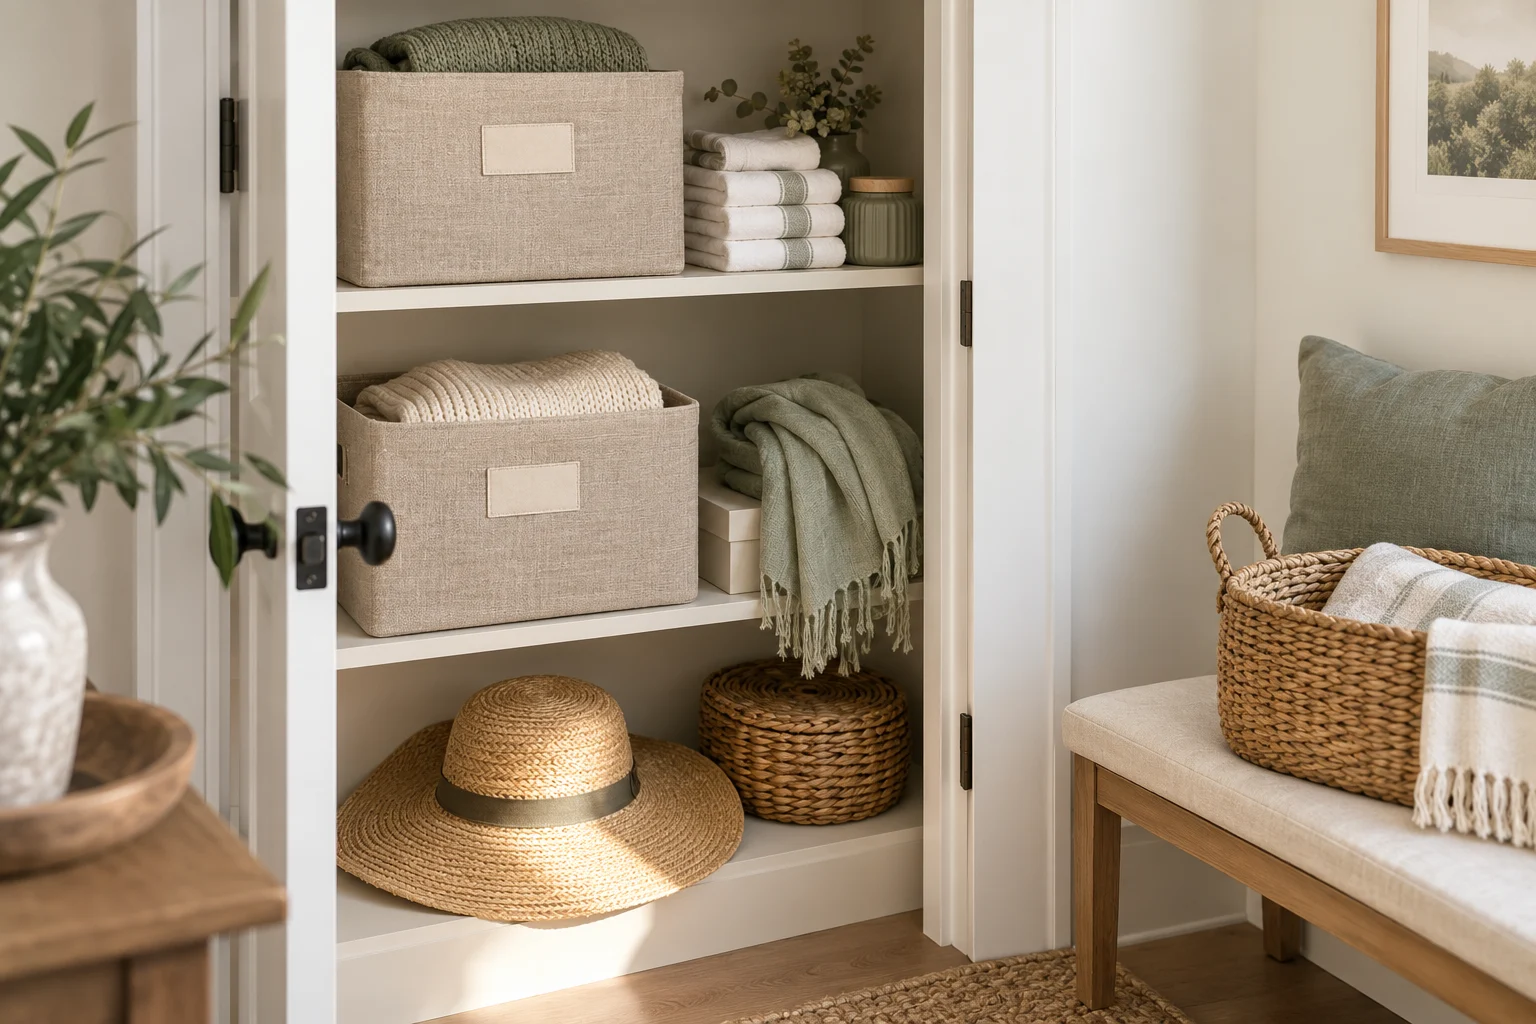
    Seasonal clothes and accessories sorted into storage baskets

    Why seasonal items create friction in small homes

    Seasonal household items often move between useful and unused states. A fan, blanket, picnic set, humidifier, holiday decoration, or rain gear may be needed later, but it does not need to occupy the easiest-to-reach space today. When these items are stored without a shared rule, several small problems appear:

    • Items from different seasons become mixed together.
    • A container is opened repeatedly because its contents are unclear.
    • Useful items are stored too far away, while rarely used items occupy convenient space.
    • One item is kept in a different place from its accessories.
    • A short tidy-up turns into a full-room project.

    A calmer home flow comes from reducing decisions at the moment of putting something away. The system below focuses on four questions: What is this for? When will it be used? How often will it be accessed? Where can it return without blocking daily movement?

    The four-part storage rule

    1. Prepare: define the small project

    Choose one seasonal category or one storage zone. Examples include cold-weather bedding, warm-weather accessories, outdoor meal items, or holiday decorations. Avoid combining several unrelated categories in the same 15-minute session.

    Set out one temporary staging area, such as a clear section of the floor, a table corner, or an empty chair. Gather only what you need to move the items: a cloth if dust is visible, labels or a marker, and an empty bag or box for items that need a different decision. You do not need to buy new storage equipment before testing the system.

    2. Sort: make four decisions

    Handle each item once when possible and place it into one of these groups:

    • Use soon: The item is likely to be needed in the next part of the season or within the next few weeks.
    • Store away: The item is useful but not part of the current routine.
    • Move elsewhere: The item belongs with another category, room, or household member.
    • Review later: The item needs a separate decision because it is damaged, duplicated, incomplete, or no longer relevant.

    The “review later” group prevents a storage session from becoming a difficult decluttering session. Put those items together and give them a visible note or a later review date. The purpose is to contain the uncertainty, not to hide it inside a box.

    3. Act: match access to storage

    Place “use soon” items where they can be reached without disturbing other stored items. Place “store away” items in a less convenient location, provided the area is dry, stable, and suitable for the item. Keep sets together when a part is difficult to replace or easy to lose.

    For each container, use a label that answers a useful question. “Winter” may be too broad if the container holds several unrelated objects. “Winter bedding—guest room” or “Outdoor picnic items” gives a clearer retrieval cue. If you do not have labels, write the category on a piece of paper and place it where the contents can be seen.

    4. Review: check the home flow

    Stand back and look at the route you use most often. Check whether the stored items block a doorway, drawer, cleaning tool, laundry path, or frequently used shelf. Then ask whether the next person in the household could find the category without an explanation. If not, change the location or improve the label.

    The 15-minute action plan

    Time Action Decision rule
    0–2 minutes Prepare one category and one staging area. Keep the project narrow enough to finish a visible part.
    2–7 minutes Sort each item into use soon, store away, move elsewhere, or review later. Do not solve every uncertain item during the sorting phase.
    7–13 minutes Return items to destinations and group accessories. Place frequent-use items closer to the point of use.
    13–15 minutes Label, remove the staging area, and check the walking route. Leave no temporary pile without a next action.

    Use a timer if it helps you stop at the planned point. When the timer ends, unfinished work can become the next session’s starting point. A short routine stays useful when it has a clear stopping boundary.

    Storage rules that work in a one- or two-person home

    Give each category a home

    Choose one primary location for each seasonal category. The location can be a shelf, drawer, cabinet section, under-bed area, or another suitable storage zone. A primary home reduces the chance that similar items will be distributed across several places.

    Store by retrieval effort, not only by size

    A small item may deserve an easy-to-reach location if it is used often. A large item may be acceptable in a harder-to-reach location if it is used briefly during one part of the year. Consider both physical size and retrieval frequency before assigning a space.

    Keep components with the main item

    Place cables, covers, spare parts, attachments, and related instructions with the item they support when practical. If a component needs a separate location, add a note to the main container. This reduces the chance of finding the main item but not the part needed to use it.

    Leave a little decision space

    Do not fill a storage area so tightly that returning one item requires removing several others. Some open space makes future seasonal changes easier and provides room for items that genuinely belong in the category.

    Use visible cues for shared spaces

    In a two-person home, a clear label or category name can be more useful than relying on memory. Use familiar words and avoid labels that describe the storage container rather than its contents. “Rainy-day entry items” communicates more than “blue box.”

    Copyable seasonal storage checklist

    Copy this checklist into a note or print it for the next short tidy-up:

    • [ ] Choose one seasonal category.
    • [ ] Select one staging area.
    • [ ] Gather a marker, label, cloth, and review bag or box.
    • [ ] Set a 15-minute boundary.
    • [ ] Sort items into use soon, store away, move elsewhere, or review later.
    • [ ] Keep important accessories with the main item.
    • [ ] Move frequent-use items closer to their point of use.
    • [ ] Place stored items in a dry, stable, suitable location.
    • [ ] Label the container or shelf with a clear category name.
    • [ ] Give review-later items a separate follow-up note.
    • [ ] Remove the staging area.
    • [ ] Check that doors, drawers, walkways, and daily-use surfaces remain clear.

    What to do when the routine does not fit

    Some items need special handling. Fragile objects may need protective packing. Fabrics may need to be clean and fully dry before storage. Items affected by moisture, heat, weight, or pests should be placed only in a location suitable for their material. If you are unsure whether a location is appropriate, pause the storage decision and check the item’s care guidance.

    If the category cannot be sorted in 15 minutes, reduce the scope. Work on one shelf, one drawer, or one type of item instead of extending the session indefinitely. If the same category repeatedly creates confusion, the issue may be the storage rule rather than the amount of storage. Consider separating items by point of use or by season instead of adding another mixed container.

    FAQ

    Should I buy storage containers first?

    Not necessarily. Sort the items and test a destination with the storage already available. This reveals the category’s actual shape and access needs before you choose any additional container.

    What if I cannot decide whether to keep an item?

    Place it in the review-later group rather than making a rushed decision. Keep that group separate from active seasonal storage and record the follow-up action. A contained delay is easier to manage than an unclear box.

    Where should items used every season go?

    Keep them in a location that is easy to reach during the relevant period. If the item is used frequently, point-of-use storage may be more useful than a distant storage area, even when the item is seasonal.

    How often should I repeat the routine?

    Repeat it when the season changes, when a storage zone becomes difficult to use, or when a category gains several new items. The routine can also be used after returning from a trip or completing a temporary household project.

    Conclusion

    A practical home organization system for seasonal items does not need a large reset. Start with one category, sort by the next useful decision, return items to a clear home, and review the walking route before stopping. The four-part sequence—prepare, sort, act, and review—keeps a 15-minute tidy-up focused while creating storage rules that can be repeated across the home.


  • 작은 집 생활 공간 정리 기준: 동선을 줄이는 15분 실행 루틴

    작은 집 생활 공간 정리 기준: 동선을 줄이는 15분 실행 루틴

    작성자: Kai Life 편집팀

    작은 집의 생활 공간 정리는 물건을 모두 꺼내는 일보다 자주 오가는 길을 줄이는 데서 시작할 수 있습니다. 현관에서 자주 쓰는 물건을 가까운 곳에 두고, 사용 장소와 보관 장소가 어긋난 물건을 다시 배치하면 짧은 시간에도 생활 동선을 점검하기 쉬워집니다. 이 글에서는 준비·분류·실행·점검의 4단계로 15분 정리 루틴을 진행합니다.

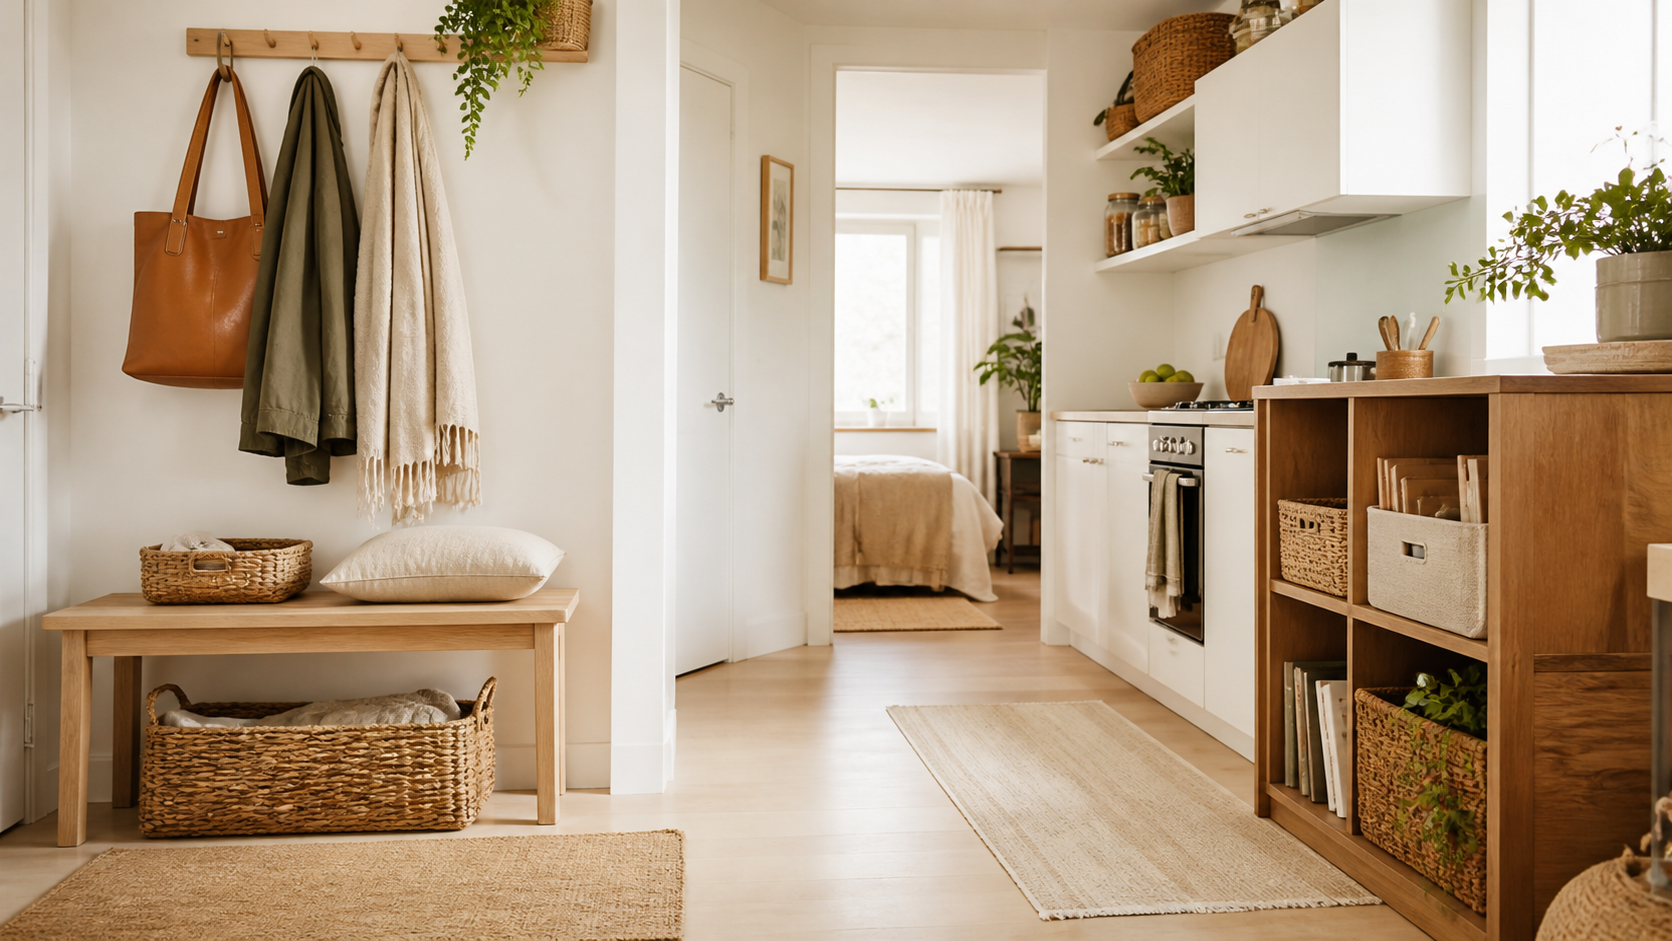
    현관과 주방을 연결하는 정돈된 작은 집의 수납 동선

    1. 정리 전에 생활 동선을 먼저 찾기

    정리 대상은 방 전체가 아니라 한 구역으로 좁히는 것이 좋습니다. 작은 집에서는 물건의 양보다 이동 경로가 겹치는 지점이 불편을 크게 만들 수 있습니다. 현관, 주방 조리대, 책상, 침대 옆처럼 하루에 여러 번 사용하는 곳부터 살펴보세요.

    15분 동안 관찰할 세 가지

    • 반복 이동: 같은 물건을 찾거나 가져오려고 여러 번 움직이는 구간
    • 임시 적치: 의자, 식탁, 바닥처럼 보관 장소가 아닌 곳에 물건이 쌓이는 지점
    • 통로 방해: 문을 열거나 지나갈 때 손으로 옮겨야 하는 물건

    관찰할 때는 ‘정리가 안 됐다’고 판단하기보다 ‘어떤 물건 때문에 움직임이 늘어나는가’를 적어보는 편이 유용합니다. 예를 들어 외출용 가방이 침실에 있어 현관과 침실을 오가거나, 자주 쓰는 조리도구가 깊은 수납장 안쪽에 있다면 배치가 생활 방식과 맞지 않을 수 있습니다.

    구역을 하나만 고르는 기준

    • 매일 사용하는 곳인가?
    • 물건을 찾는 시간이 자주 생기는가?
    • 물건을 임시로 내려놓는 일이 반복되는가?
    • 정리 후 변화를 확인하기 쉬운가?

    처음에는 현관이나 식탁처럼 범위가 분명한 곳을 고르는 편이 좋습니다. 집 전체를 한 번에 바꾸려 하면 분류와 이동이 길어져 실행을 이어가기 어려울 수 있습니다.

    2. 물건을 네 가지 기준으로 분류하기

    선택한 구역의 물건을 모두 다른 방으로 옮기기보다, 그 자리에서 네 가지 범주로 나눠보세요. 분류 기준은 물건의 소유 여부가 아니라 현재 공간과의 관계입니다.

    1. 이 자리에서 자주 쓰는 물건: 손이 쉽게 닿는 위치에 둘 대상
    2. 이 집에서 쓰지만 다른 장소가 맞는 물건: 사용 장소 가까이 이동할 대상
    3. 사용 빈도가 낮은 물건: 접근성이 낮아도 되는 보관 대상
    4. 역할이 불분명한 물건: 보류 상자나 임시 구역에 둘 대상

    네 번째 범주를 두면 즉시 버리거나 기부할지 결정하기 어려운 물건 때문에 정리가 멈추는 일을 줄일 수 있습니다. 보류 물건은 별도 봉투나 상자에 담고, 상자 겉면에 확인 날짜와 물건의 용도를 간단히 적어두세요. 이 글에서는 물건의 처분 여부를 대신 결정하지 않습니다. 공간과 사용 습관에 맞춰 판단할 수 있도록 분류만 단순화합니다.

    수납 기준을 정하는 질문

    • 이 물건은 어디에서 가장 자주 사용하는가?
    • 사용한 뒤 어느 장소에 두면 다음 사용이 편한가?
    • 꺼내기 위해 다른 물건을 먼저 치워야 하는가?
    • 함께 쓰는 물건이 서로 다른 장소에 흩어져 있는가?

    수납 위치는 ‘빈 공간이 있는 곳’보다 ‘사용하는 곳에 가까운 곳’을 기준으로 정합니다. 다만 통로, 열리는 문 앞, 조리나 작업에 필요한 면은 물건을 두는 장소로 사용하지 않는 편이 안전하고 편리합니다.

    3. 15분 실행표로 배치를 바꾸기

    아래 실행표는 한 구역을 대상으로 하는 기본 루틴입니다. 타이머를 사용하되, 시간 안에 모든 결정을 끝내야 한다고 생각할 필요는 없습니다. 핵심은 한 구역에서 이동 동선과 물건의 위치를 함께 점검하는 것입니다.

    시간 할 일 확인할 내용
    0~2분 구역 선택과 관찰 가장 자주 오가는 경로와 방해 물건을 찾기
    2~5분 네 가지 범주로 분류 자주 사용, 다른 장소, 낮은 빈도, 보류로 나누기
    5~10분 자리 이동 사용 장소 가까이에 자주 쓰는 물건 배치하기
    10~13분 통로와 표면 정리 바닥과 문 앞을 비우고 작업 면의 물건 수 줄이기
    13~15분 짧은 점검 한 번의 이동으로 물건을 꺼내고 되돌릴 수 있는지 보기

    구역별 배치 예시

    현관: 외출할 때 함께 사용하는 물건은 이동 경로가 겹치지 않는 범위에서 현관 가까이에 묶습니다. 집 안쪽에 흩어진 가방이나 외출용 소품은 사용 순서를 떠올리며 위치를 조정합니다.

    주방: 조리 중 반복해서 쓰는 도구와 식사 후 정리에 필요한 물건을 구분합니다. 자주 쓰는 물건을 깊은 곳에 넣어 꺼내기 위해 다른 물건을 옮기는 상황이 있다면 앞뒤 위치를 다시 검토합니다.

    책상: 매일 사용하는 물건과 가끔 사용하는 자료를 나눕니다. 작업 면에는 현재 작업에 필요한 물건만 남기고, 나머지는 손이 닿되 작업을 방해하지 않는 위치로 이동합니다.

    침대 주변: 잠들기 전과 일어난 뒤 사용하는 물건을 따로 살핍니다. 바닥에 내려놓는 물건이 반복된다면 침대 주변의 작은 범위 안에서 임시 적치가 생기는 이유를 확인하고 보관 위치를 조정합니다.

    4. 정리 후 동선이 줄었는지 점검하기

    정리의 기준은 보기 좋은 상태 하나로 정하지 않습니다. 실제로 물건을 사용할 때 손과 발의 이동이 줄었는지 확인해야 합니다. 배치 후 다음 세 가지 동작을 천천히 재현해보세요.

    1. 물건을 사용하는 장소까지 이동합니다.
    2. 물건을 꺼내고 사용한 뒤 원래 위치로 되돌립니다.
    3. 다음 행동에 필요한 물건을 찾는 경로를 확인합니다.

    이 과정에서 같은 물건을 두 번 옮기거나, 수납장 문과 서랍을 연속으로 열어야 한다면 배치를 조금 더 조정할 수 있습니다. 반대로 통로가 넓어지고 자주 쓰는 물건이 손에 닿는다면 그 구역의 15분 루틴은 일단 마친 것으로 기록합니다.

    복사 가능한 15분 체크리스트

    • [ ] 오늘 정리할 구역을 한 곳으로 정했다.
    • [ ] 반복해서 오가는 경로를 적었다.
    • [ ] 임시로 물건을 내려놓는 지점을 찾았다.
    • [ ] 물건을 자주 사용, 다른 장소, 낮은 빈도, 보류로 나눴다.
    • [ ] 자주 쓰는 물건을 사용 장소 가까이 옮겼다.
    • [ ] 통로와 문 앞을 확인했다.
    • [ ] 작업 면에 남은 물건의 역할을 확인했다.
    • [ ] 물건을 꺼내고 되돌리는 동작을 재현했다.
    • [ ] 추가 조정이 필요한 위치를 한 곳만 기록했다.

    5. 정리 루틴을 이어가기 위한 기록법

    생활 공간 정리는 한 번의 대규모 작업보다 짧은 점검을 반복하는 방식으로 관리하기 쉽습니다. 다만 모든 구역을 매일 점검할 필요는 없습니다. 불편이 다시 생긴 장소만 기록해 다음 15분 루틴의 대상으로 삼으세요.

    기록은 다음처럼 간단히 남길 수 있습니다.

    구역: 주방 조리대
    불편: 자주 쓰는 도구를 찾을 때 앞쪽 물건을 옮김
    조정: 사용 빈도가 낮은 물건을 다른 위치로 이동
    점검: 조리 순서에 맞춰 꺼내고 되돌리기

    새로운 수납용품을 마련하기 전에 현재 위치를 바꾸는 것만으로 불편이 줄어드는지 먼저 확인해보세요. 수납용품이 필요하다고 판단하더라도 크기나 개수보다 보관할 물건의 종류, 꺼내는 빈도, 통로와 문이 열리는 범위를 먼저 정리하는 편이 좋습니다.

    결론: 물건보다 이동 경로를 먼저 정리하기

    작은 집의 생활 공간 정리는 집 전체를 비우는 프로젝트가 아니라, 자주 쓰는 물건과 움직이는 경로를 맞추는 작업으로 시작할 수 있습니다. 한 구역을 고르고, 물건을 네 가지 범주로 나눈 뒤, 15분 실행표에 따라 배치를 바꾸고, 실제 사용 동작으로 점검하세요. 정리 결과를 오래 유지하려면 보기 좋은 배치보다 사용 후 돌아가기 쉬운 위치인지 확인하는 것이 중요합니다.

    FAQ

    Q1. 물건이 많은데 15분 안에 정리가 가능한가요?

    15분 안에 집 전체를 정리하는 것이 아니라 한 구역의 문제를 확인하고 다음 행동을 정하는 방식입니다. 물건이 많다면 현관 바닥, 책상 표면처럼 범위를 더 좁혀 시작하세요. 보류 물건은 별도로 두어 결정이 늦어져도 전체 루틴이 멈추지 않게 할 수 있습니다.

    Q2. 자주 쓰는 물건은 모두 밖에 꺼내두는 것이 좋은가요?

    그렇지는 않습니다. 꺼내두었을 때 작업 면이나 통로를 방해한다면 가까운 서랍이나 수납 공간이 더 적합할 수 있습니다. 기준은 노출 여부가 아니라 사용하는 장소에서 꺼내고 되돌리기 쉬운지입니다.

    Q3. 버릴 물건을 정하지 못하면 어떻게 하나요?

    처분 결정을 잠시 미뤄도 됩니다. 보류 상자에 넣고 확인 날짜와 물건의 용도를 적어두면 정리 작업과 처분 판단을 분리할 수 있습니다. 이후 실제 사용 여부와 보관 공간을 함께 살펴보세요.

    Q4. 동선이 줄었는지 무엇으로 확인하나요?

    물건을 사용하는 과정을 한 번 재현해보세요. 같은 물건을 여러 번 옮기거나, 다른 물건을 치워야 꺼낼 수 있거나, 사용 후 되돌릴 장소가 불분명하면 배치를 다시 검토할 수 있습니다.


  • A Simple Home Organization Rule for Shorter Paths in a Small Home

    A Simple Home Organization Rule for Shorter Paths in a Small Home

    작성자: Kai Life Editorial Team

    A useful home organization rule for a small home is simple: place an item as close as practical to the point where it is used, not merely where there is an empty shelf. In a 15-minute tidy-up, you can identify a few repeated trips, sort the items involved, move them closer to their work area, and review whether the new arrangement makes sense for daily life. This approach is especially useful in one- or two-person homes, where a small change in the location of keys, cleaning supplies, chargers, or cooking tools can affect the home’s flow.

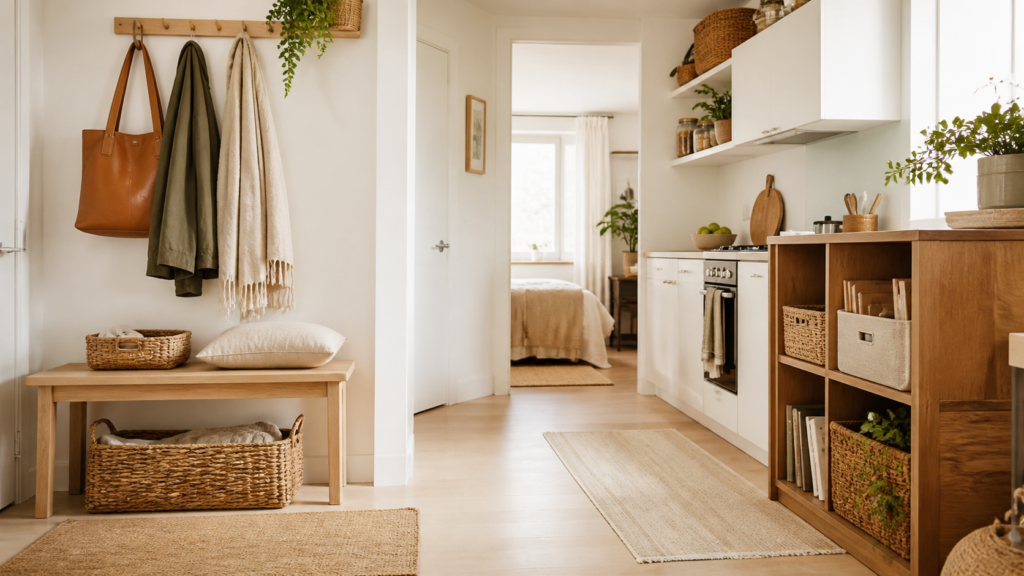
    Organized storage along the entryway and kitchen of a small home

    The placement rule: organize around movement

    Many storage decisions begin with appearance: an open surface looks cluttered, so everything is placed out of sight. That can create a second problem. If an item is hidden far from where it is used, you may walk back and forth, leave it on a temporary surface, or forget where it belongs.

    Instead, look at the short routes you repeat during an ordinary day. Examples include:

    • Door to key storage, bag storage, or shoe care.
    • Sink to dish towel, drying area, or cleaning supplies.
    • Desk to charger, notebook, or headphones.
    • Bedside area to glasses, medication packaging, or reading material.
    • Laundry area to hamper, drying space, or folding surface.

    The aim is not to keep every object visible. The aim is to give frequently used objects a clear home near the activity that needs them. Items used less often can usually tolerate a less convenient location, provided that the storage place is labelled by function or easy to remember.

    A 15-minute home organization routine

    1. Prepare: choose one route

    Set a timer for 15 minutes and choose one small route, such as the entrance, desk, kitchen counter, or bedside area. Avoid attempting the whole home in one session. A narrow focus makes it easier to see which items are causing repeated movement or surface clutter.

    Prepare three temporary groups:

    • Keep here: items that are used in this area and have a sensible location nearby.
    • Move closer to use: items that belong in the area but are stored too far away.
    • Review later: items that need a decision about frequency, ownership, or disposal.

    You do not need new containers for this exercise. Use the existing shelves, drawers, hooks, or a temporary box while you test the arrangement.

    2. Sort: notice repeated trips

    Look at the selected area and ask four questions:

    1. What do I reach for here?
    2. What do I carry into this area from somewhere else?
    3. What do I leave here because returning it is inconvenient?
    4. Which item has no clear next destination?

    Write down two or three examples. A short note such as “charger is used at the desk but stored in the bedroom” is enough. This keeps the exercise focused on observable routines rather than an idealized room.

    3. Act: move the highest-friction items first

    Choose one to three items that create the most repeated movement or temporary piles. Move them to a location that is:

    • Near the point of use.
    • Easy to reach without moving several other objects.
    • Appropriate for the item’s safety and condition.
    • Simple enough that another household member can understand it.

    For example, a notebook used at a desk can stay in a desk drawer rather than on a distant bookshelf. A small cleaning cloth used near the kitchen sink can have a nearby hook or designated shelf. A bag used when leaving home can be placed near the entrance, if that location does not block the walkway.

    Keep the arrangement modest. The purpose of this session is to test a route, not to redesign every storage area. If moving an item creates a safety concern, obstructs a passage, exposes it to moisture or heat, or makes it harder to secure, choose a different location.

    4. Review: run the route once

    After making the changes, imitate the activity that normally creates the clutter. Sit at the desk and collect the items you use there. Enter the home and put down your bag and keys. Prepare a simple drink and return the tools to their places.

    Ask:

    • Can I reach the item without an unnecessary detour?
    • Can I return it with one clear action?
    • Is the new location visible or memorable enough?
    • Did the change create a new obstacle somewhere else?

    If the arrangement feels awkward, adjust one item at a time. A location that looks efficient on paper may not fit the way the room is actually used.

    Copyable 15-minute checklist

    Time Action Prompt
    0–2 minutes Choose one route Which small area causes repeated movement or temporary piles?
    2–5 minutes Gather and sort What belongs here, what needs to move closer, and what needs later review?
    5–10 minutes Change locations Which one to three items would benefit from a shorter path?
    10–13 minutes Return related items Can each item be reached and put away with a clear action?
    13–15 minutes Test and note What worked, and what should be adjusted during the next reset?

    You can copy this shorter version into a note:

    • Area: ____________________
    • Repeated trip I noticed: ____________________
    • Item to move closer: ____________________
    • New location: ____________________
    • Test result: ____________________
    • Next small adjustment: ____________________

    Storage rules that support home flow

    Give frequent items the easiest access

    Items used every day benefit from a location that is quick to reach and easy to restore. This may be an open tray, a front section of a drawer, or a hook at a natural stopping point. Convenience can reduce the temptation to leave an item on a table or counter.

    Group items by activity, not only by object type

    Keeping all similar objects together can be useful, but activity-based grouping may be more practical in a small home. For example, the objects used for preparing coffee can share a zone even if they are different types of items. The same idea can apply to a work-from-home kit, an entryway kit, or a basic cleaning kit.

    Keep a small buffer near busy surfaces

    A busy surface often needs a temporary landing place. A small tray or clearly defined section can hold items that have entered the room but are not ready to be put away. The buffer should be limited enough to reveal when it needs attention. It is a holding zone, not a replacement for storage.

    Separate daily access from occasional storage

    Do not give prime storage space to items that are rarely used if daily items are difficult to reach. Place occasional items higher, farther back, or in a less convenient cabinet when their condition and safety allow. Keep the most accessible locations for the routines that happen frequently.

    Common mistakes to avoid

    • Changing too many areas at once: A large rearrangement makes it difficult to tell which change helped.
    • Choosing a location only because it is empty: Empty space may be far from the activity or inconvenient to restore.
    • Buying organizers before observing the route: A new container cannot correct an unclear storage rule.
    • Ignoring other household members: A system works better when its locations are understandable to everyone who uses them.
    • Keeping a temporary pile without a review point: Add a short review time so the pile does not become permanent.

    Conclusion: make one route easier

    Effective home organization in a small home can begin with one repeated route rather than a complete makeover. Choose a small area, identify the objects that travel unnecessarily, move a few of them closer to their point of use, and test the result. The goal is a home flow that supports real routines, including imperfect days. Repeat the 15-minute process in another area when the first change has had enough time to show whether it fits.

    FAQ

    Should every item be stored near where it is used?

    No. Prioritize items used frequently or items that create repeated trips and surface clutter. Infrequently used belongings can stay in more remote storage if the location is safe and easy to remember.

    What if there is not enough storage near the activity?

    First, review whether the area contains items that belong elsewhere. Then consider a small existing shelf, drawer section, hook, or tray. If no suitable location exists, use a clear portable group for that activity and review whether it is helping before adding more equipment.

    How often should I repeat the 15-minute routine?

    Repeat it when a route begins producing the same temporary pile or repeated search. A short session can also be useful after a change in work schedule, household membership, or room use.

    What is the best place for items shared by two people?

    Choose a location that both people can reach and recognize. If the item is used in two separate areas, keep a small shared location near the more frequent activity and agree on the return rule.


  • 작은 집을 더 넓게 쓰는 15분 수납 동선 정리법

    작은 집을 더 넓게 쓰는 15분 수납 동선 정리법

    작은 집에서 답답함을 만드는 원인은 단순히 물건이 많아서만은 아닙니다. 외출하고 돌아온 뒤 가방을 어디에 두는지, 요리를 시작할 때 무엇을 먼저 꺼내는지, 잠들기 전에 옷과 충전기를 어디에 놓는지가 매일 조금씩 어긋나면 바닥과 작업대가 빠르게 복잡해집니다.

    현관에서 주방과 침실로 이어지는 정돈된 소형 주거 공간

    반대로 자주 쓰는 물건이 이동 경로 가까이에 있고, 사용한 뒤 한 번의 동작으로 제자리로 돌아갈 수 있다면 넓은 수납장이 없어도 공간은 한결 여유롭게 보입니다. 아래 방법은 수납용품을 새로 사기 전에 타이머 15분으로 생활 동선을 먼저 점검하는 순서입니다.

    수납장보다 먼저 살펴볼 것은 ‘돌아오는 자리’

    정리할 때 모든 물건을 완벽하게 분류하려고 하면 시작부터 부담이 커집니다. 먼저 하루 동안 반복되는 행동을 세 구간으로 나눠 보세요. 집에 들어오는 순간, 음식을 준비하는 순간, 잠들기 전의 순간입니다. 각 구간에서 손에 들고 있는 물건과 다음 행동을 적으면 필요한 수납 위치가 자연스럽게 드러납니다.

    • 현관 동선: 열쇠, 가방, 외투, 우편물처럼 집에 들어오자마자 손에서 내려놓는 물건
    • 주방 동선: 자주 쓰는 조리도구, 양념, 행주처럼 한 끼를 준비할 때 반복해서 찾는 물건
    • 침실 동선: 다음 날 입을 옷, 충전기, 안경처럼 취침 전후에 사용하는 물건

    물건의 종류가 아니라 행동의 순서대로 묶으면 ‘왜 늘 이 자리에 쌓이는지’를 이해할 수 있습니다. 자꾸 쌓이는 자리는 정리 실패의 증거가 아니라, 현재 수납 위치가 실제 동선과 맞지 않는다는 신호에 가깝습니다.

    준비물은 타이머·임시 바구니·메모·줄자

    15분 정리를 위해 특별한 수납함은 필요하지 않습니다. 다른 방으로 이동할 물건을 잠시 모을 바구니나 종이상자 하나, 위치를 기록할 메모, 빈 공간을 확인할 줄자면 충분합니다. 처음부터 정리용품을 구매하지 않는 이유는 물건의 양과 공간의 치수를 확인하기 전에는 필요한 크기와 형태를 판단하기 어렵기 때문입니다.

    15분 실행 순서

    0–3분: 바닥과 작업대를 사진처럼 관찰하기

    치우기 전에 현관 바닥, 식탁 한쪽, 주방 작업대, 침대 옆을 차례로 봅니다. 각 장소에서 가장 자주 놓이는 물건을 세 개까지만 메모하세요. 물건을 모두 세기보다 반복해서 등장하는 품목을 찾는 것이 중요합니다.

    3–7분: 한 번에 되돌릴 수 있는 자리 정하기

    열쇠는 현관문 가까운 작은 트레이, 매일 드는 가방은 허리 높이의 고리, 자주 쓰는 충전기는 앉는 자리 가까운 상자처럼 사용 장소에서 한두 걸음 이내에 둡니다. 문을 여러 번 열거나 다른 방까지 가야 하는 위치는 유지하기 어렵습니다.

    7–11분: 수평면을 하나만 비우기

    식탁 전체를 완벽하게 정리하려 하기보다 한쪽 끝, 주방 작업대 한 칸, 현관 벤치 상판처럼 작은 수평면 하나를 선택합니다. 그곳에 속하지 않는 물건은 임시 바구니에 담고, 남은 물건은 정한 자리로 옮깁니다. 눈에 보이는 빈 면이 하나 생기면 공간의 기준점이 만들어집니다.

    11–15분: 내일도 지킬 한 가지 규칙 만들기

    ‘외출 후 가방은 현관 고리에 건다’, ‘잠들기 전 식탁 한쪽만 비운다’처럼 동작이 분명한 규칙을 하나 정합니다. ‘항상 깔끔하게 유지한다’처럼 범위가 큰 목표보다, 특정 시간과 장소가 포함된 짧은 규칙이 반복하기 쉽습니다.

    공간별로 배치하는 방법

    현관: 들어오면서 끝나는 수납

    현관에는 매일 사용하는 것만 남겨 두는 편이 좋습니다. 계절이 지난 외투, 가끔 쓰는 가방, 여분 우산은 다른 수납공간으로 옮기고 현재 사용하는 물건에 자리를 내주세요. 열쇠와 이어폰처럼 작은 물건은 손이 닿는 높이의 트레이에, 가방은 바닥이 아닌 고리나 벤치 아래에 둡니다.

    주방: 작업별로 묶는 수납

    조리도구를 크기별로 나누기보다 ‘차 준비’, ‘아침 식사’, ‘기본 조리’처럼 실제 작업별로 묶어 보세요. 매일 쓰는 도구는 손과 허리 사이 높이에 두고, 사용 빈도가 낮은 용품은 위쪽이나 안쪽으로 옮깁니다. 작업대에는 매일 사용하는 것이라도 가능한 한 적게 남겨 닦기 쉬운 상태를 유지합니다.

    침실: 잠들기 전 임시 자리를 줄이기

    의자 위에 옷이 쌓인다면 ‘다시 입을 옷’의 자리가 없는 경우가 많습니다. 작은 고리나 바구니 하나를 별도 구역으로 정하고, 용량을 넘으면 세탁하거나 옷장으로 돌려보냅니다. 충전 케이블은 사용 위치에서 멀지 않게 고정하고, 침대 옆에는 잠들기 전에 실제로 쓰는 물건만 남깁니다.

    수납용품을 사기 전에 확인할 세 가지 치수

    1. 실제 내부 폭과 깊이: 선반의 바깥 크기가 아니라 물건이 들어가는 안쪽 공간을 잽니다.
    2. 문과 서랍의 움직임: 수납함을 놓았을 때 문이 완전히 열리는지, 손잡이와 부딪히지 않는지 확인합니다.
    3. 손이 들어갈 여유: 공간에 정확히 맞는 상자보다 앞뒤나 위쪽에 손가락이 들어갈 여유가 있어야 꺼내고 넣기 쉽습니다.

    측정값과 보관할 물건의 양을 메모한 뒤 필요한 경우에만 수납용품을 선택하세요. 빈 상자 자체도 공간을 차지하므로, 기존 바구니나 신발 상자 등으로 며칠 시험해 본 뒤 구매 여부를 정하는 방법도 실용적입니다.

    정리한 상태를 일주일 유지하는 간단한 루틴

    • 저녁에 5분만 타이머를 맞추고 가장 눈에 띄는 수평면 하나를 비웁니다.
    • 임시 바구니는 일주일에 한 번 비우고, 같은 물건이 반복해서 들어오면 정식 자리를 바꿉니다.
    • 새 물건을 들일 때는 보관 위치를 먼저 정하고, 자리가 없다면 비슷한 물건을 함께 점검합니다.
    • 가족이나 동거인과 함께 쓴다면 누구나 한 번의 동작으로 되돌릴 수 있는 높이와 위치를 선택합니다.

    빠른 점검표

    • 자주 쌓이는 장소 세 곳을 확인했는가?
    • 매일 쓰는 물건에 한 번의 동작으로 돌아갈 자리가 있는가?
    • 바닥이나 작업대에서 빈 면을 하나 만들었는가?
    • 수납용품을 사기 전에 내부 치수와 문 열림을 확인했는가?
    • 내일 반복할 한 가지 규칙을 정했는가?

    자주 묻는 질문

    수납공간이 정말 부족하면 어떻게 하나요?

    먼저 매일 쓰는 물건과 가끔 쓰는 물건을 분리해 접근성이 좋은 공간을 확보하세요. 그래도 부족하다면 문 뒤, 침대 아래, 선반 위처럼 비어 있는 공간을 검토하되 이동과 청소를 방해하지 않는지 함께 확인합니다.

    매일 15분씩 해야 하나요?

    처음 동선을 정리할 때는 15분이 도움이 되지만, 이후에는 5분 정도의 짧은 복구 루틴으로도 충분합니다. 같은 장소가 계속 어지러워질 때만 수납 위치를 다시 점검하세요.

    임대 주택에서도 적용할 수 있나요?

    벽을 뚫지 않는 이동식 선반, 문걸이, 독립형 바구니처럼 원상 복구가 쉬운 방식을 우선 검토할 수 있습니다. 설치 전에는 제품 무게와 벽·문 표면에 맞는 사용 조건을 확인하세요.

    작은 집을 넓게 쓰는 정리는 모든 물건을 숨기는 일이 아니라, 반복되는 행동에 맞춰 물건이 돌아갈 자리를 만드는 일입니다. 오늘은 한 공간만 선택해 15분 동안 동선을 확인해 보세요. 완벽한 정리보다 내일 다시 지킬 수 있는 한 가지 규칙이 공간을 오래 편안하게 만듭니다.

THANKS KAI CONTACT

WeChat

위챗에서 QR코드를 스캔해 주세요.
Scan the QR code in WeChat.

Thanks Kai WeChat contact QR code위챗 열기 / Open WeChat