Tag: n8n-managed

n8n 자동화가 관리하는 글

  • A 15-Minute Grocery Price Comparison Table for Simpler Spending Records

    A 15-Minute Grocery Price Comparison Table for Simpler Spending Records

    작성자: Kai Life Editorial Team

    A lightweight grocery price comparison table can help organize household spending without turning everyday shopping into a full accounting project. In about 15 minutes, choose a small group of repeat purchases, record the details in one table, compare like with like, and decide what—if anything—deserves attention next time you shop. The goal is a clear reference for household spending organization, not a promise of a specific saving amount.
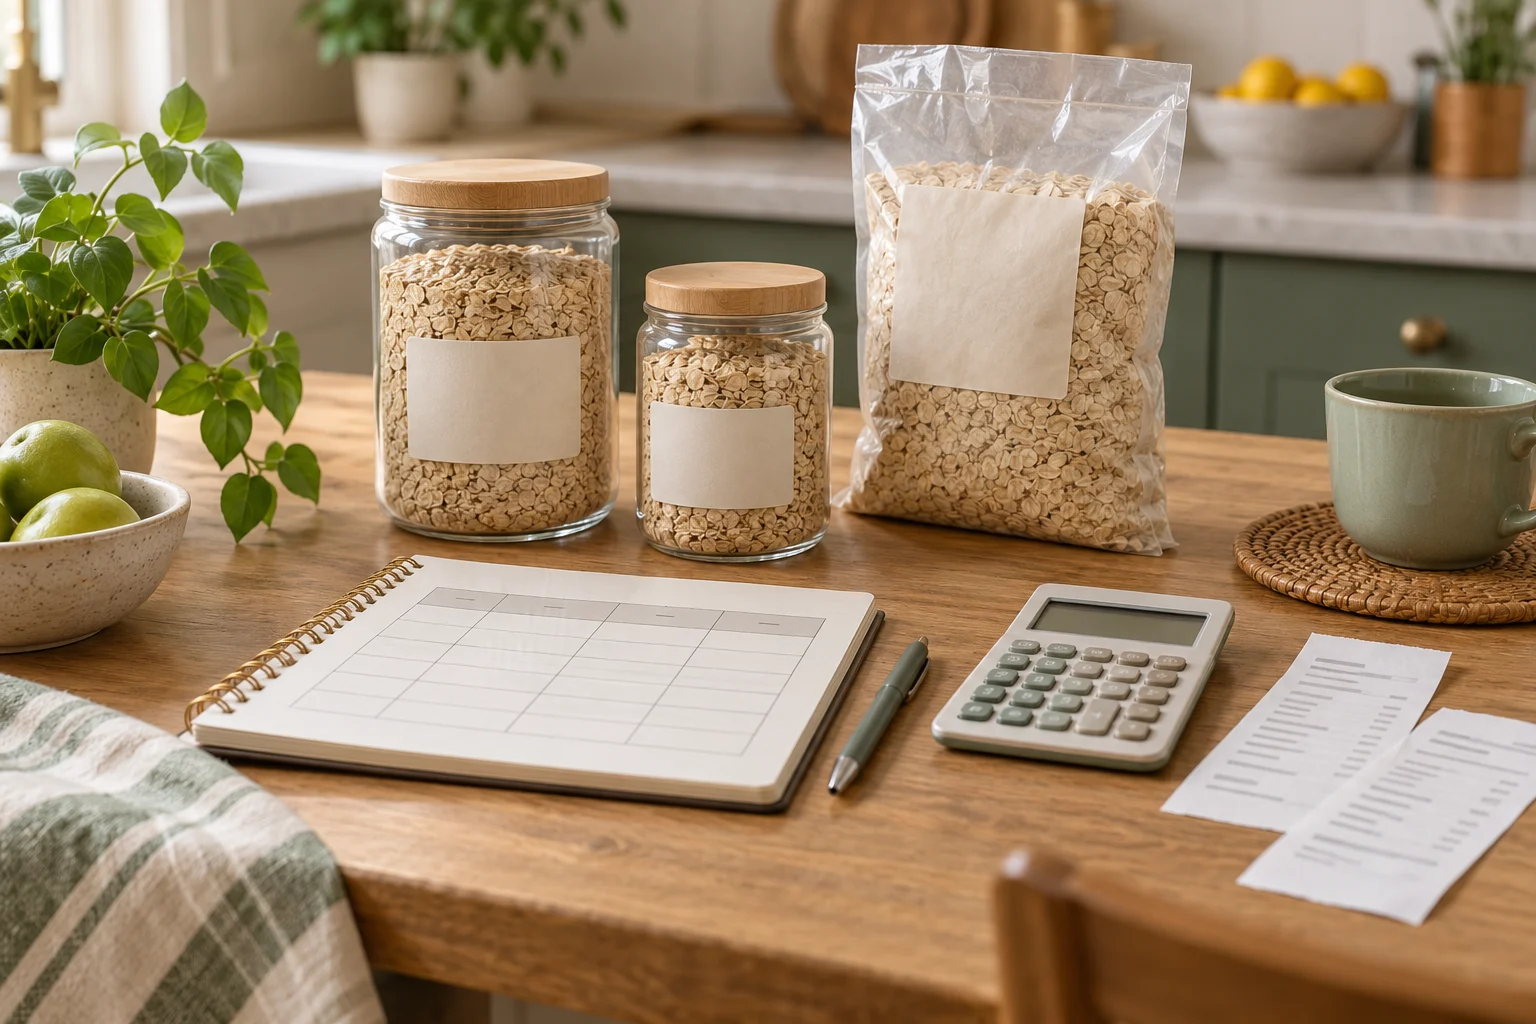
    Grocery containers, a comparison table and calculator for comparing unit prices

    Why a small comparison table is useful

    Grocery records become difficult to maintain when they include too many categories, irregular items, and details that do not support a decision. A compact table keeps the record focused on products your household buys often enough to compare.

    For example, the table might include a staple food, a household cleaning item, a snack, or a personal-care product. The specific items are up to you. What matters is that each row answers a practical question: “What did we buy, in what size, from where, and what should we check next time?”

    This approach is different from trying to reconstruct every receipt. It is a reference system for recurring purchases. You can keep a separate general expense note if needed, while using the comparison table for items where price, pack size, or purchase location tends to vary.

    The prepare-sort-act-review framework

    1. Prepare: choose a narrow scope

    Begin with five to ten repeat purchases. A smaller list is easier to update and review. Avoid adding every item from the latest receipt just because it is available. A product belongs in the table when the information may help with a future shopping decision.

    Choose one recording location, such as a spreadsheet, notes app, or paper page. The best format is the one you are willing to open again. Keep the initial setup simple enough that another household member could understand the columns without a separate explanation.

    Use a date for each entry. Prices and pack sizes can change, so a dated note is more useful than an undated number that looks current long after the purchase.

    2. Sort: separate comparable information

    Record the product name, brand or version when relevant, pack size, purchase location, listed price, and a short note. If a promotion, substitute, or unusual package affected the purchase, write that in the note rather than hiding it in the price column.

    Try to compare products with similar sizes and qualities. A large pack and a small pack should not be treated as equivalent simply because both are labeled with the same product name. If you use a unit price, record the unit clearly, such as price per kilogram, liter, or item. The unit should match the way the product is sold and used.

    Do not create a unit comparison when the contents or quality are meaningfully different. In that case, label the difference plainly. A comparison table is more useful when it shows uncertainty than when it creates a misleadingly precise ranking.

    3. Act: make one modest decision

    After entering the information, select one action for the next shopping trip. Possible actions include checking a second store, buying a different pack size, postponing a nonessential purchase, adding a preferred option to a shopping list, or simply watching the item for another entry.

    One decision is enough for a short review. The table is not an instruction to choose the lowest displayed number in every situation. Availability, quality, travel time, household preferences, storage space, and the risk of unused food can all matter. Record the reason for a choice when it is not obvious.

    4. Review: keep only useful columns

    Review the table after a few shopping trips. Look for columns that you actually use and remove fields that create work without helping a decision. You may find that a notes column is more useful than a detailed category field, or that one product needs a pack-size note while another does not.

    A review also helps identify stale entries. Mark old information as outdated rather than silently treating it as a current price. If the table becomes difficult to scan, archive older rows and keep a short current view.

    A copyable grocery price comparison table

    Copy the following structure into a spreadsheet, document, or notes app. Add only the fields that support your shopping decisions.

    Date Item Brand or version Pack size Purchase location Price Unit, if used Note or next action
    YYYY-MM-DD Product name Optional Size or count Store or channel Amount Unit and basis Promotion, substitute, or check next time
    YYYY-MM-DD Product name Optional Size or count Store or channel Amount Unit and basis Promotion, substitute, or check next time
    YYYY-MM-DD Product name Optional Size or count Store or channel Amount Unit and basis Promotion, substitute, or check next time

    If you want a simpler version, use just five columns: date, item, pack size, location, and price. Start with that version if detailed entries are likely to interrupt your routine.

    The 15-minute action plan

    1. Minutes 1–3: Choose five to ten recurring grocery or household items. Leave out one-off purchases.
    2. Minutes 4–6: Open one recording location and create the table headings.
    3. Minutes 7–10: Enter the most recent information available from receipts, order history, or your existing expense notes. If a detail is unknown, leave it blank or label it as unknown.
    4. Minutes 11–13: Check whether the entries are comparable. Add pack size, unit, promotion, or substitution notes where they affect interpretation.
    5. Minutes 14–15: Choose one next action and set a review point after a few future shopping trips.

    This schedule is a starting format rather than a requirement. If the available information is incomplete, record what you know and avoid filling gaps from memory with false precision.

    Checklist for maintaining the record

    • Prepare: I selected a small list of repeat purchases.
    • Prepare: I chose one place to store the table.
    • Sort: I included the date and pack size for each entry.
    • Sort: I separated different versions or qualities instead of combining them.
    • Sort: I labeled any unit comparison clearly.
    • Act: I chose one practical next step rather than trying to change every shopping habit.
    • Review: I marked old, promotional, or uncertain information.
    • Review: I removed columns that do not help with a decision.

    Common problems and simple adjustments

    The table takes longer than shopping

    Reduce the number of items and columns. A record with five useful rows is more sustainable than a detailed record that stops after one entry. You can add fields later if a recurring question appears.

    Prices look different because pack sizes differ

    Keep the pack size visible and add a clearly labeled unit comparison when appropriate. If the products differ in quality or contents, note that distinction instead of relying on the unit number alone.

    Promotions make the history confusing

    Keep the observed purchase price, but label it as a promotion or special condition. This preserves what happened without presenting the entry as a normal reference price.

    The record becomes outdated

    Add dates and review the current rows after several shopping trips. Archive older observations if they make the table hard to read. Older entries can remain useful as context, but they should not be mistaken for current information.

    Several people in the household shop

    Use shared column names and a short note about unusual substitutions. If each person records information differently, agree on a small convention for dates, pack sizes, and locations. Consistency makes the table easier to interpret than detailed instructions.

    FAQ

    Do I need to record every grocery purchase?

    No. This routine is intended for recurring purchases and comparison questions. One-off items can remain in ordinary expense notes if you track them separately.

    Should I compare only prices?

    Price is one useful field, but it is not the only consideration. Pack size, quality, availability, travel effort, storage, and the likelihood of using the product can affect a household decision. Use the note column to preserve those considerations.

    Is a spreadsheet necessary?

    No. A notes app or paper page can work. A spreadsheet may help when you want to sort dates or calculate a unit figure, but the system should remain understandable and easy to update.

    How often should I update the table?

    Update it when a repeat purchase provides information that could affect a future choice. A short review after a few shopping trips is often more practical than trying to maintain a fixed daily schedule.

    Conclusion

    A grocery price comparison table works best as a small household reference, not as a second job. Prepare a narrow list, sort information by date and comparable size, act on one observation, and review the format when it becomes less useful. Starting with a 15-minute table can create a clearer record while leaving room for real-world factors that a single price cannot capture.



  • A Refined Guide to CHLOE’s Platform Sandals

    CHLOE Nama sandals in eggshell with platform heel, wide buckled straps and visible blanket stitching

    CHLOE Nama sandals bring a quietly distinctive finish to warm-weather dressing through a considered balance of structure and softness. The eggshell colour offers an elegant neutral foundation, while the modern platform profile gives the open sandal a defined silhouette. Gold-finish buckles, visible blanket stitching and broad straps add visual interest without making the design difficult to coordinate.

    Designed with an open round toe and a 3 cm medium heel, this pair sits comfortably between a flat sandal and a more elevated option. It can accompany everyday outfits while still lending a polished note to occasions that call for a little more presence. The result is a versatile style to consider when you want your footwear to look refined, composed and easy to wear.

    Design details that shape the look

    The appeal of CHLOE Nama sandals lies in the way several recognisable details work together. The modern platform heel gives the profile a subtle lift, while the open round toe keeps the overall impression light and relaxed. A thick outer sole reinforces the design’s substantial character and creates a grounded finish beneath the foot.

    • Eggshell colour: A soft, versatile neutral that can sit naturally alongside light tailoring, denim, warm-toned separates and understated occasion dressing.
    • Wide straps: The broad strap arrangement gives the upper a confident visual presence and helps the sandal read as a considered part of the outfit rather than an afterthought.
    • Gold-finish buckles: These add a restrained metallic accent, making it easy to coordinate with gold jewellery or other warm-toned accessories.
    • Visible blanket stitching: The stitching provides artisanal-looking definition around the design and introduces texture to the clean neutral palette.
    • Platform and medium heel: The 3 cm heel offers a modest elevation while preserving the practical character of a sandal and slide-inspired shape.
    • Material composition: The upper, insole and main lining are cowhide, while the sole is composed of 50% rubber and 50% EVA.

    Rather than relying on a single decorative feature, the sandal combines proportion, texture and hardware. This makes it a strong choice for wardrobes built around sophisticated essentials, where small details can make a complete look feel more intentional.

    How to style them across the day

    For an effortless daily look, pair the eggshell tone with straight-leg denim and a clean cotton shirt. The platform shape gives the combination a more finished appearance than a basic flat sandal, while the open toe keeps it relaxed. Add a compact shoulder bag or simple gold jewellery to echo the buckles without over-accessorising.

    For a polished city outfit, consider CHLOE Nama sandals with wide-leg trousers and a fitted knit or sleeveless top. The sandal’s visible stitching and thick outer sole provide enough definition to balance the volume of the trousers. Keeping the rest of the outfit in tonal neutrals will allow the eggshell shade to remain the focal point.

    They also work well with dresses and skirts. A fluid midi dress creates contrast with the structured platform, while a simple short dress gives the buckles and blanket stitching more room to stand out. For a softer approach, coordinate the eggshell colour with cream, beige or pale brown. For clearer contrast, try black, navy or denim.

    When dressing for a relaxed occasion, linen-look separates, a simple jumpsuit or a coordinated shirt-and-short combination can highlight the sandal’s easy character. The open round toe and wide straps maintain a casual mood, while the medium heel and gold-finish details prevent the result from feeling too plain.

    For accessory coordination, repeat one element at a time. Gold earrings can reflect the hardware; a textured bag can complement the blanket stitching; or a neutral belt can connect the eggshell colour with the rest of the outfit. The design already has several points of interest, so a restrained styling approach will keep the overall look elegant.

    What to consider before choosing

    Begin with the role you want the pair to play in your wardrobe. If you are looking for a sandal that can move between everyday outfits and more polished settings, the combination of a neutral eggshell colour, 3 cm medium heel and refined hardware makes this a versatile direction. If your wardrobe favours understated shoes, note that the visible stitching and platform sole give the design a distinct presence.

    1. Check your usual size: The product information states that the sandals fit true to size and recommends taking your normal size. Consult the size guide before purchase for the most appropriate selection.
    2. Consider proportion: The wide straps and thick outer sole create a structured look. They are especially suitable if you appreciate footwear with a noticeable silhouette rather than an almost invisible finish.
    3. Plan your colour palette: Eggshell is easy to style with neutrals and denim, but it can also brighten darker outfits. Think about whether you prefer tonal coordination or a deliberate light-versus-dark contrast.
    4. Review the construction: The upper, insole and main lining are cowhide, and the sole uses 50% rubber and 50% EVA. This information can help you assess whether the listed composition suits your preferences.
    5. Match the occasion: The design is described as a sandal and slide style with an open round toe, platform, buckled strap and thick outer sole. Consider the settings in which that open, elevated profile best fits your wardrobe.

    For care, keep the sandals aligned with the product’s material composition and avoid assuming that every cleaning method is suitable for cowhide or the sole materials. Store them in a clean, dry place and protect the visible stitching, gold-finish buckles and eggshell surface from unnecessary contact with substances that could affect their appearance. For specific care instructions, confirm the current product information before use.

    Frequently asked questions

    What colour are CHLOE Nama sandals?
    The listed colour is eggshell, a soft neutral that can be paired with light or dark outfits.

    What is the heel height?
    The heel height is 3 cm, or 1.18 inches.

    Do they fit true to size?
    The product information states that they fit true to size and recommends taking your normal size. Please also review the size guide.

    What materials are used?
    The upper, insole and main lining are cowhide. The sole is made from 50% rubber and 50% EVA.

    What details define the design?
    The sandals feature a modern platform heel, open round toe, wide buckled straps, gold-finish buckles, visible blanket stitching and a thick outer sole.

    How can I coordinate them?
    Try eggshell with cream, beige, denim or darker neutrals. Gold jewellery can echo the buckles, while simple clothing helps the stitching and platform silhouette remain visible.

    Please verify the current product details, sizing, material information and purchase information on the product page before purchase.

    View CHLOE Nama sandals at THANKS KAI to explore the current product information and styling details.

    Product: CHLOE Nama sandals

  • A 15-Minute Routine for Turning Meeting Notes into Next Actions

    A 15-Minute Routine for Turning Meeting Notes into Next Actions

    작성자: Kai Life Editorial Team

    To extract the next action from meeting notes, give yourself 15 minutes to prepare the notes, sort decisions from tasks, define one visible next step for each useful item, and review the results against your priorities. The goal is not to rewrite the meeting. It is to create a short work checklist that tells you what happens next, who is involved, and when the item should be revisited.

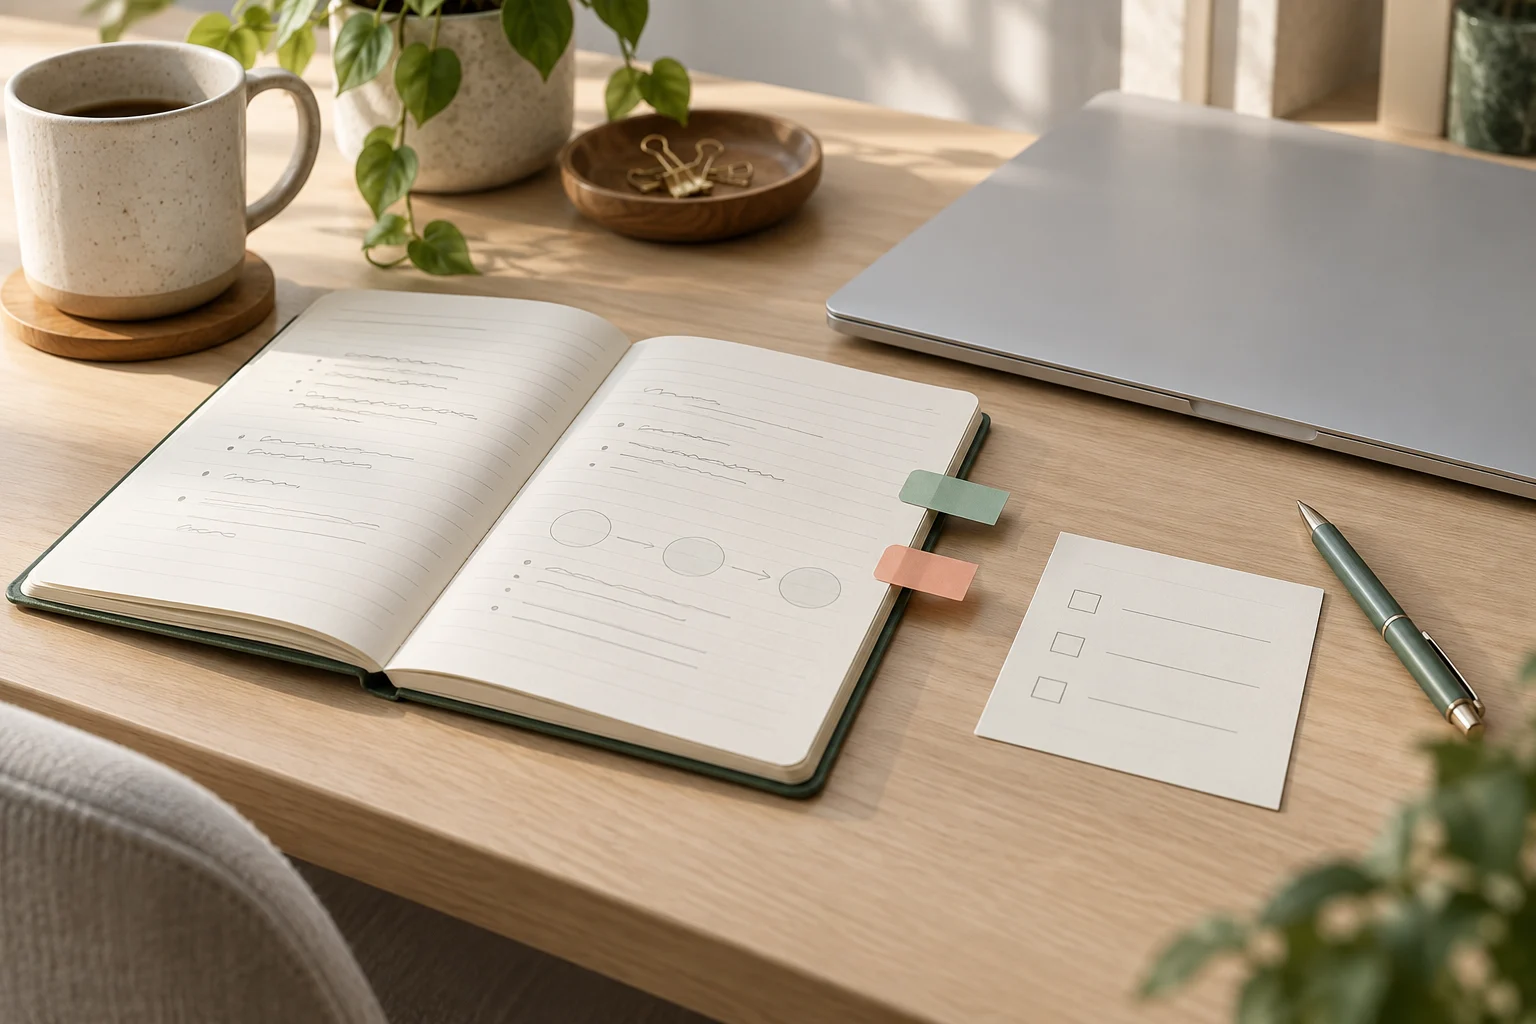
    Meeting notes beside a short next-action checklist

    Why meeting notes often fail to become action

    Meeting notes usually contain several kinds of information at once: background, discussion, decisions, open questions, requests, and reminders. Treating every sentence as an action creates a crowded task list. Treating none of it as an action leaves useful commitments hidden in a document.

    A practical work organization system separates information by function. A decision may need to be recorded but not scheduled. An open question may need an owner before it becomes a task. A request may need clarification about scope or timing. The next action is the smallest observable step that moves an item forward.

    For example, “improve the onboarding guide” is a direction, not a clear next action. “Open the current onboarding guide and list the three sections that need review” is easier to start, check, and discuss with someone else.

    The Prepare–Sort–Act–Review framework

    1. Prepare: gather the right material

    Start a 15-minute timer. Open the meeting notes, any linked documents, and your current task list or calendar. Do not collect every possible source. Use only the material needed to understand the commitments from this meeting.

    Write the meeting date and topic at the top of a temporary processing area. If the notes belong to several projects, mark the project beside each relevant line. This prevents a task from becoming detached from its context.

    • Meeting notes or transcript
    • Linked files mentioned during the meeting
    • Your existing task list
    • Calendar, if a deadline or follow-up meeting was discussed

    During this stage, avoid polishing the notes. Read for decisions, responsibilities, dependencies, and unanswered questions.

    2. Sort: place each item in a useful category

    Use four categories. They are broad enough for most routine meetings and specific enough to support a decision.

    Category Question to ask Typical result
    Decision What was agreed? Record it or share it with affected people
    Action What work needs to happen? Create a task with an owner and next step
    Question What is still unclear? Write a clarification action
    Reference What may be useful later? File it without adding a task

    Use a simple test: if the item can be completed, it may be an action; if it changes how work should proceed, it may be a decision; if progress is blocked by missing information, it is probably a question; if it provides context without requiring work, store it as reference.

    Some lines fit more than one category. In that case, keep the decision as a record and create a separate action only if someone needs to do something because of it.

    3. Act: write the smallest useful next action

    Convert each selected item into a verb-led sentence. Include enough detail for your future self or a colleague to recognize the finish line.

    • Weak: “Budget discussion”
    • Clearer: “Compare the two proposed budget options in the planning sheet.”
    • Weak: “Ask about launch date”
    • Clearer: “Send the project lead one message asking which launch date is currently being planned.”

    A useful next action usually contains four parts:

    1. Verb: draft, check, send, compare, schedule, confirm, or decide.
    2. Object: the document, person, issue, or deliverable involved.
    3. Context: the project or meeting that gives the action meaning.
    4. Completion signal: what will be visibly different when the step is done.

    Do not split a single action into many artificial subtasks. Split it when the work changes context, requires a different person, or is likely to be postponed because it feels too vague.

    4. Review: connect actions to priorities

    Use the final few minutes to check whether the extracted actions fit your current priorities. A meeting can create legitimate work that still needs to wait. Moving every action into the current day can hide trade-offs.

    For each action, choose one destination:

    • Do: place it in today’s work if it is small and relevant to the current focus.
    • Schedule: assign a realistic day or time block when timing matters.
    • Delegate or confirm: identify the person responsible and send the needed message.
    • Waiting: record what you are waiting for and the date to check again.
    • Archive: retain the decision or reference without creating a task.

    If an action has no owner, no timing, and no reason to be revisited, it may not be ready for your active list. Keep it as a question or ask for clarification rather than guessing.

    A practical 15-minute action plan

    Time Focus Output
    0–2 minutes Prepare Open notes, links, task list, and calendar
    2–6 minutes Sort Mark decisions, actions, questions, and references
    6–11 minutes Act Write clear next actions with owners where relevant
    11–14 minutes Review Choose do, schedule, delegate, waiting, or archive
    14–15 minutes Close Send one needed follow-up and store the processed notes

    If the notes are unusually long, process only the sections that contain decisions or commitments during this session. Mark the remaining material for a separate reading block. A time limit protects the routine from turning into an open-ended documentation task.

    Copyable meeting-notes checklist

    Copy the following checklist into your notes or task system:

    • [ ] Open the meeting notes and related links.
    • [ ] Mark each line as decision, action, question, or reference.
    • [ ] Remove duplicate or already completed tasks.
    • [ ] Rewrite each useful action with a clear verb.
    • [ ] Add the owner, project, and timing when known.
    • [ ] Identify the smallest step that can be started.
    • [ ] Send any clarification or handoff message.
    • [ ] Put scheduled work on the calendar or task list.
    • [ ] Record waiting items with a review date.
    • [ ] Store the processed notes where the team can find them.

    Examples of common meeting-note problems

    “Team to review the draft”

    This phrase hides both ownership and timing. A clearer version could be “Ask the design reviewer to comment on sections two and three by Thursday.” If the reviewer has not been selected, the first action becomes “Confirm who will review sections two and three.”

    “We should consider changing the process”

    This may be an idea rather than a commitment. Record it as reference unless the meeting created a follow-up. If discussion is needed, write “List the current process steps and bring two change options to the next planning meeting.”

    “Waiting for data”

    Turn the dependency into a trackable item: “Request the missing sales-period data from the reporting owner and check the response next Tuesday.” The action is not to stare at the blocked task; it is to make the dependency visible and reviewable.

    “Finish the presentation”

    Identify the next concrete part: “Add the customer feedback slide using the approved summary.” If several sections remain, choose the first section that affects other work or has a known deadline.

    Weekly review: prevent repeated meeting actions

    During a weekly review, scan actions created from meetings and look for repeated patterns. Similar tasks may indicate a missing template, unclear ownership, or a decision that has not been recorded in a shared location.

    Ask these questions:

    • Which actions are still waiting for the same person or information?
    • Which recurring meeting creates tasks that are already tracked elsewhere?
    • Which decisions should be added to a shared project record?
    • Which actions no longer support a current priority?
    • Which follow-up questions should be placed on the next agenda?

    This review is not a demand to complete every open item. It is a chance to improve visibility and reduce repeated interpretation of the same notes.

    FAQ

    Should every meeting produce a task?

    No. Some meetings produce decisions, information, or references without personal follow-up. Create a task when a specific action, question, handoff, or review is needed.

    What if the owner is unclear?

    Create a clarification action, such as “Confirm who owns the draft revision.” Avoid assigning work to yourself only because your notes are convenient to access.

    How many next actions should I extract?

    Extract the actions supported by the notes and current commitments, then separate active work from scheduled or waiting work. A short, accurate list is easier to review than a complete transcription of every possibility.

    Where should the next actions live?

    Use the task or project system your team already checks. The important properties are visibility, an identifiable owner, and a way to review timing. If the team uses several systems, record the source location in the action.

    What if I cannot process the notes within 15 minutes?

    Capture only decisions, clear commitments, and blockers in the first session. Mark the remaining sections for another block. A limited first pass is more useful than leaving urgent actions mixed into an unprocessed document.

    Conclusion

    A reliable meeting-notes routine does not require a complex productivity platform. Prepare the relevant material, sort each item, write the smallest useful next action, and review it against your priorities. After 15 minutes, you should have a focused work checklist rather than a second copy of the meeting. Use the same framework after recurring meetings, then use the weekly review to improve ownership, timing, and follow-up.


  • 선명한 그린으로 완성하는 데일리 메신저백 가이드

    선명한 그린 컬러의 LOUIS VUITTON Alpha Messenger 메신저백

    LOUIS VUITTON Alpha Messenger는 컴팩트한 크기와 선명한 그린 컬러가 돋보이는 카메라 백 스타일의 메신저백입니다. 모노그램 캔버스와 정교하게 엠보싱된 타이가 카우하이드가 어우러져, 캐주얼한 차림에 분명한 포인트를 더하면서도 브랜드 특유의 정제된 분위기를 유지합니다.

    가방 전면의 인상적인 컬러와 시그니처 리벳, 팔라듐 컬러 하드웨어는 단순한 데일리 아이템보다 스타일링의 중심에 가까운 존재감을 만듭니다. 셔츠와 데님처럼 담백한 조합에는 생기를 더하고, 블랙이나 네이비 아우터와 함께하면 그린 컬러가 더욱 선명하게 드러납니다.

    두 개의 지퍼 수납공간과 전면 플랫 포켓, 내부 플랫 포켓을 갖춘 구성은 일상적인 소지품을 나누어 정리하고 싶은 분에게 잘 맞습니다. 크로스바디로 가볍게 연출하거나, 전면 D링과 디테일을 살펴보며 액세서리와의 조화를 구상해 보세요.

    디자인과 수납 구성을 살펴보기

    선명한 그린 컬러
    그린은 가방 하나만으로도 룩의 분위기를 바꿀 수 있는 색상입니다. 전체 착장을 무채색으로 구성하면 색감이 또렷한 포인트가 되고, 베이지·브라운 계열과 매치하면 보다 부드러운 계절감의 조합을 만들 수 있습니다.

    두 소재가 만드는 균형
    모노그램 코팅 캔버스와 타이가 레더가 함께 사용되어 패턴의 시각적 재미와 가죽의 차분한 인상이 공존합니다. 트리밍에는 카우하이드 레더가 사용되며, 안감은 패브릭으로 구성되어 있습니다.

    실용적인 지퍼 수납
    두 개의 지퍼 수납공간은 소지품을 구분해 넣기 좋은 기본 구조입니다. 전면 플랫 포켓과 내부 플랫 포켓도 마련되어 있어 자주 확인해야 하는 물건을 나누어 정리하는 방식으로 활용할 수 있습니다.

    • 팔라듐 컬러 하드웨어
    • 트렁크에서 영감을 받은 보강 코너
    • 시그니처 리벳과 전면 D링
    • 가로 24cm, 세로 16cm, 폭 8cm
    • 제조국: 프랑스

    이런 스타일과 상황에 잘 어울립니다

    주말 데일리룩
    티셔츠, 데님, 스니커즈처럼 편안한 아이템으로 구성한 주말 차림에 매치해 보세요. 가방의 그린 컬러가 룩에 생동감을 더하므로 의상은 화이트, 그레이, 블랙처럼 정돈된 색상으로 선택하면 균형을 잡기 쉽습니다.

    도시적인 출근 전후 스타일
    간결한 셔츠나 니트, 슬랙스와 함께하면 메신저백의 캐주얼한 형태를 유지하면서도 전체 인상을 단정하게 연출할 수 있습니다. 네이비 재킷이나 차콜 아우터를 더하면 모노그램과 그린 컬러가 자연스럽게 강조됩니다.

    여행과 가벼운 외출
    컴팩트한 크기의 가방을 선호하면서 소지품을 여러 공간에 나누어 보관하고 싶은 경우에 고려하기 좋습니다. 외출 전 필요한 물건이 가방의 수납 구성과 크기에 맞는지 먼저 확인하고, 과도하게 채우기보다 형태가 유지되는 범위에서 정리하는 것이 좋습니다.

    액세서리 조율
    팔라듐 컬러 하드웨어에 맞춰 실버 톤 시계나 주얼리를 선택하면 디테일이 통일됩니다. 반대로 액세서리를 최소화하면 가방의 그린 컬러와 모노그램 패턴이 룩의 중심이 됩니다.

    선택 전 확인할 포인트와 관리 아이디어

    1. 크기와 소지품을 먼저 대조하세요. 가로 24cm, 세로 16cm, 폭 8cm의 컴팩트한 규격이므로 평소 휴대하는 물건의 크기를 미리 비교하는 것이 좋습니다. 큰 물건을 넣기보다 필요한 소지품을 간결하게 구성하는 방식에 적합합니다.
    2. 컬러의 활용도를 생각해 보세요. 그린은 룩에 확실한 포인트를 주는 색상인 만큼, 평소 옷장이 모노톤이나 뉴트럴 계열이라면 여러 조합에 활용하기 쉽습니다. 이미 색감이 강한 의상이 많다면 가방과 의상의 중심 색상을 하나로 정해 시선을 분산시키지 않는 방법을 고려해 보세요.
    3. 수납 습관을 정해 두세요. 두 개의 지퍼 공간 중 하나는 자주 쓰는 물건, 다른 하나는 보관용 물건으로 나누고 플랫 포켓에는 얇은 소지품을 배치하면 내부를 찾기 편합니다. 보강 코너와 하드웨어가 있는 디자인이므로 바닥이나 거친 표면에 무심코 닿지 않도록 주의하세요.
    4. 소재별로 조심스럽게 다루세요. 타이가 레더, 모노그램 코팅 캔버스, 카우하이드 레더, 패브릭 안감이 사용된 제품입니다. 물기, 마찰, 오염을 피하고 사용 후에는 부드러운 마른 천으로 가볍게 상태를 확인하는 정도로 관리하세요. 세정제나 강한 문지름은 소재에 영향을 줄 수 있으므로 임의로 사용하지 않는 편이 안전합니다.
    5. 구성품을 구매 전에 확인하세요. 상품 페이지에 명시된 내용과 제품 사진에 표시된 항목만 포함되며, 오리지널 브랜드 패키지는 보장되지 않습니다. 구매 전 구성품과 현재 상품 정보를 꼭 대조하세요.

    자주 묻는 질문

    Q. 어떤 형태의 가방인가요?
    A. 컴팩트한 카메라 백 스타일의 메신저백으로, 두 개의 지퍼 수납공간과 전면·내부 플랫 포켓을 갖추고 있습니다.

    Q. 주요 소재는 무엇인가요?
    A. 타이가 레더와 모노그램 코팅 캔버스가 사용되었고, 트리밍은 카우하이드 레더, 안감은 패브릭입니다.

    Q. 색상과 제조국은 어떻게 되나요?
    A. 색상은 그린이며 제조국은 프랑스입니다.

    Q. 구매 시 패키지가 함께 제공되나요?
    A. 제품 사진에 보이고 페이지에 명시된 항목만 포함됩니다. 오리지널 브랜드 패키지는 보장되지 않으므로 구매 전 상품 페이지의 구성 안내를 확인하세요.

    Q. 크기는 어느 정도인가요?
    A. 가로 24cm, 세로 16cm, 폭 8cm입니다. 휴대할 물건의 크기와 수납 방식을 구매 전에 비교해 보세요.

    상품의 소재, 치수, 구성품 및 구매 관련 정보는 변경될 수 있으므로, 구매 전 THANKS KAI 상품 페이지에서 최신 상세 내용과 구매 정보를 반드시 확인해 주세요.

    스타일링 아이디어와 상품 상세 정보를 함께 살펴보려면 THANKS KAI에서 LOUIS VUITTON Alpha Messenger를 확인해 보세요.

    Product: LOUIS VUITTON Alpha Messenger

  • A 15-Minute System for Organizing Saved Map Places

    A 15-Minute System for Organizing Saved Map Places

    작성자: Kai Life Editorial Team

    If your saved map contains restaurants, museums, hotels, viewpoints, shops, and “maybe later” locations mixed together, a purpose-based rule can make travel planning easier: organize each place according to what you might do with it next. In a 15-minute routine, prepare a small working list, sort places by purpose, choose a few actionable locations, and review the result before the trip or local visit.

    Saved map places grouped by colored location pins

    Why purpose works better than a long list

    A saved place is not automatically part of an itinerary. It may be a useful option for a rainy afternoon, a restaurant near a station, a location worth visiting only if you are already nearby, or simply an idea you do not want to forget. Treating all saved places as equally important creates extra decisions later.

    A purpose-based system asks a more useful question: What decision could this place help me make? The answer becomes its working group. This keeps the organization connected to real travel situations instead of turning it into a collection project.

    • Go: places you are likely to visit during this trip or outing.
    • Eat: food and drink options connected to a time or area.
    • Do: activities, attractions, events, or experiences.
    • Nearby: useful options if you are already in a particular neighborhood.
    • Weather backup: indoor or flexible choices for changing conditions.
    • Reference: places worth keeping for a future plan, but not part of the current one.

    The labels can be adapted to your travel style. The important feature is that every saved place has a reason for being kept.

    The four-step framework: prepare, sort, act, and review

    1. Prepare: define the planning container

    Start by choosing one planning container. This might be a trip note, a temporary map list, a paper page, or a simple table. Avoid opening several systems at once. The aim is to create a small workspace for one trip, one weekend, or one local visit.

    Write three boundaries at the top:

    • Time: the dates, day, or approximate visiting window.
    • Area: the neighborhood, route, or group of nearby places.
    • Purpose: what you want the outing to provide, such as food, culture, shopping, rest, or a short walk.

    These boundaries prevent a general saved-place archive from taking over a specific planning task.

    2. Sort: assign each place a practical role

    Review saved places one by one. Give each place one primary role before adding extra details. If a place fits several groups, choose the role that would help you make a decision later.

    For example, a bakery could be classified as Eat if you want breakfast, or Nearby if it is simply a convenient option close to a museum. The classification can change when the trip changes. It is not a permanent judgment about the place.

    Use a short note when the reason is not obvious. “Good after the station” is more useful than a generic label such as “interesting.” A useful note explains when or why the place may be selected.

    3. Act: convert saved places into next actions

    Sorting is only useful when it leads to a decision. For each selected place, record one next action. Examples include “check opening hours,” “compare with nearby lunch options,” “place after the gallery,” or “keep as rain backup.”

    Then reduce the active list. A travel plan can include optional choices, but an unfiltered list makes it harder to see the route. Consider separating places into:

    • Planned: connected to a specific time, route, or reservation.
    • Flexible: suitable if there is time or energy.
    • Backup: useful when weather, crowds, closures, or fatigue change the plan.
    • Archive: retained for another occasion and removed from the current view.

    This distinction keeps options available without treating every option as an obligation.

    4. Review: remove friction before you leave

    Finish by scanning the active list for gaps and duplicates. Check whether each planned place has enough information for the next decision. Depending on the trip, that may include the area, intended day, opening-hours check, reservation status, or a note about why it matters.

    Review also means accepting that some saved places should be moved out of the current plan. A place can remain valuable without belonging to this itinerary.

    A 15-minute travel planning organization routine

    Use a timer and stop when the routine ends. The goal is a clearer working list, not a complete catalog of every place you have ever saved.

    Minutes Action Output
    0–2 Choose the trip, day, or local outing and write its area and purpose. A defined planning container
    2–6 Scan relevant saved places and assign each one a purpose. A sorted shortlist
    6–10 Mark places as planned, flexible, backup, or archive. An active list with priorities
    10–13 Add one next action and one useful context note to selected places. Actionable trip notes
    13–15 Check gaps, duplicates, route conflicts, and unresolved details. A review list for later

    If the list is large, do not attempt to process every saved place. Filter by the relevant area or trip first. A smaller, current list is more useful than a complete archive that requires repeated sorting.

    A copyable place-list template

    Copy the following fields into your notes or spreadsheet. Use only the columns that support your decisions.

    Place Purpose Status Area or route Why it matters Next action
    [Name] [Eat/Do/Nearby/Backup] [Planned/Flexible/Backup/Archive] [Area] [Short reason] [Check/book/place after]
    [Name] [Purpose] [Status] [Area] [Short reason] [Next action]

    Keep the “why it matters” field short. A phrase such as “quiet stop near the afternoon route” can be enough. If a place requires extensive explanation before you can decide whether to use it, mark it for later research rather than allowing it to slow down the entire list.

    Checklist for a useful saved-place review

    • Have I defined one trip, day, route, or local outing?
    • Does each active place have a purpose?
    • Have I separated planned locations from flexible options?
    • Is there a backup option for a likely change, such as weather or fatigue?
    • Does each selected place have one clear next action?
    • Have I removed places that belong to a different area or future trip?
    • Are there duplicates or places whose role is unclear?
    • Do I need to verify current opening hours, reservations, access, or travel time?

    The final question is especially important because map information and business conditions can change. Treat saved-place organization as a planning aid, not as confirmation that a location is currently available.

    Common problems and simple adjustments

    Too many categories

    If every type of place has its own label, the system becomes difficult to maintain. Start with broad purposes and add a narrower label only when it changes a real decision.

    Everything feels important

    Use the status field to distinguish interest from intention. “I would like to visit” and “I will build the route around this” are different planning states.

    The map is doing too much

    A map is useful for location and route context, while a note may be better for timing, priorities, and questions to verify. Let each tool handle the information it presents most clearly.

    Old saves keep returning

    Create a reference or archive area. Moving an old place out of the active view is not the same as deleting the idea. It simply keeps the current plan readable.

    FAQ

    Should I organize every saved place?

    No. Begin with the places relevant to the next trip or outing. A focused review reduces work and gives the system a clear purpose.

    How many places should be in an itinerary?

    There is no universal number. The practical test is whether the list leaves room for travel time, meals, rest, delays, and spontaneous choices. Use planned, flexible, and backup statuses instead of forcing every saved place into a fixed schedule.

    What if I travel without a fixed itinerary?

    Organize by situation rather than by time. Groups such as “near the hotel,” “short walk,” “rainy afternoon,” and “near the station” can support spontaneous decisions without requiring a detailed route.

    When should I review the list again?

    Review it when the area, dates, transport plan, or purpose changes. A short check before leaving can also identify details that need current verification.

    Conclusion

    Travel planning organization becomes more manageable when saved map places are connected to decisions instead of stored as one undifferentiated list. Define a small planning container, sort places by purpose, assign a status, record the next action, and review the result in 15 minutes. This approach keeps useful options visible while leaving room for changing plans and real-world conditions.


  • A Refined Guide to Studded Leather Mule Styling

    Black Magda Butrym open-toe studded leather mules with gold-tone studs and a high heel

    Magda Butrym opentoe studded leather mules bring a distinctly polished edge to the open-toe mule. Presented in black, the design combines a slip-on shape with gold-tone studs, a 11.5 cm heel and a rubber sole. The result is a statement shoe with a clean, deliberate silhouette: easy to recognise, yet versatile enough to anchor several different wardrobes.

    Made in Italy, the pair is crafted with a calf leather outer and calf leather lining, while the rubber sole adds a practical contrast to the refined upper. Its open-toe construction gives the shoe a lighter visual character, while the sculptural heel height keeps the overall look elevated. This is a style to consider when an outfit needs a confident finishing touch without relying on elaborate layers or overt decoration elsewhere.

    Within a contemporary wardrobe, these mules can work as a focal point for evening dressing, a sharp accent for tailoring or a considered contrast to relaxed separates. The most effective styling approach is to let the black leather and gold-tone studs lead, then build the rest of the look around their graphic balance.

    Design Details Worth Noting

    The appeal of Magda Butrym opentoe studded leather mules lies in the tension between streamlined form and decorative detail. Each feature contributes to that balance:

    • Black finish: A versatile foundation that coordinates naturally with monochrome dressing, denim and neutral tailoring.
    • Open toe: Introduces a lighter, more expressive feel than a fully enclosed mule and suits warm-weather styling.
    • Slip-on style: Keeps the profile visually clean, with no visible fastening competing with the studded upper.
    • Gold-tone studs: Add a jewellery-like accent and give simple outfits a more distinctive finish.
    • 11.5 cm heel: Creates a pronounced elevated silhouette. Consider the heel height carefully in relation to your walking routine and preferred proportions.
    • Rubber sole: Provides a clearly defined sole construction beneath the leather upper.
    • Calf leather construction: The outer and lining are both listed as 100% calf leather, giving the design a cohesive material story.
    • Made in Italy: A stated point of origin that forms part of the product details.

    The combination of open toe, slip-on construction and high heel makes the shoe visually immediate. The gold-tone studs then shift it away from a purely minimal mule, adding a confident decorative note. Because the colour palette remains black and gold, the effect stays easy to coordinate rather than becoming difficult to style.

    Ways to Style and Wear the Mules

    For an evening occasion, pair the mules with a streamlined black dress or a sharply cut black trouser look. Keeping the main outfit tonal allows the gold-tone studs to read as the central accent. Gold jewellery can echo that detail, but it is best used selectively: a pair of earrings or a simple bracelet is enough to create coordination without competing with the shoes.

    For tailored dressing, try the mules with cropped trousers or a clean-cut suit. A slightly shorter trouser line can reveal the open toe and heel, while a longer, fluid trouser can create a more continuous silhouette. In either case, choose a hem that allows the shoes to remain visible. A crisp white shirt, a black blazer or a refined neutral top can complete the look while preserving the footwear’s graphic impact.

    For a more relaxed interpretation, use the mules to sharpen denim. Straight-leg or gently relaxed jeans can temper the formality of the heel, while a simple fitted knit or polished shirt keeps the combination intentional. Black denim creates a sleek tonal effect; blue denim offers a more visible contrast. Avoid adding too many embellished pieces, as the studs already provide the outfit with a focused point of interest.

    Warm-weather dressing also suits the open-toe profile. Consider a midi skirt, a pared-back column dress or tailored shorts with an elegant top. Neutral shades such as cream, stone and soft grey can highlight the black leather, while deep brown or burgundy can create a richer, more autumnal palette. The key is proportion: the substantial heel works best when balanced by a clear, composed silhouette rather than an overly busy outfit.

    As the heel measures 11.5 cm, occasion planning matters. For events that involve extended standing or walking, consider how the height fits your own preferences before choosing the mules. They are particularly well suited to settings where the shoe can be appreciated as part of a considered, elevated look.

    How to Assess the Pair for Your Wardrobe

    Begin with silhouette. These are open-toe, slip-on mules with a pronounced 11.5 cm heel, so they make a clear visual statement. If your wardrobe relies on elegant evening pieces, tailored separates or refined everyday looks, the design can provide a strong finishing element. If you usually prefer low-profile footwear, assess whether the heel height and open-toe shape align with your existing style before purchasing.

    Next, consider colour coordination. Black makes the pair straightforward to combine with dark neutrals, denim and lighter shades, while the gold-tone studs introduce a warm metallic detail. Review the accessories you already wear: the mules can sit comfortably alongside gold jewellery, but they can also stand alone as the only embellished element.

    Material details should also inform your decision. The outer and lining are listed as 100% calf leather, with a 100% rubber sole. This composition gives the shoe a polished leather presence with a distinct sole material. When considering care, keep the pair away from unnecessary moisture, store it in a clean, dry environment and avoid placing heavy items on the leather or studs. A soft, dry cloth may be used for gentle surface dusting; for any treatment, follow guidance appropriate to the specific leather.

    Finally, check the product page for the current size and purchase information before completing your decision. Pay particular attention to fit, the open-toe shape and your comfort expectations for a high-heeled slip-on. A well-chosen pair should complement not only your outfits, but also the occasions and movement patterns for which you intend to wear it.

    Frequently Asked Questions

    What colour are the mules?

    The design is black, finished with gold-tone studs.

    What type of shoe is this?

    It is an open-toe, slip-on mule with a 11.5 cm heel.

    What materials are listed?

    The outer and lining are 100% calf leather, and the sole is 100% rubber.

    Where are they made?

    The product details state that the mules are made in Italy.

    How can they be styled?

    They can be paired with black eveningwear, tailored trousers, denim, midi skirts or understated neutral separates. Keep additional embellishment considered so the studs remain the defining accent.

    What should I check before buying?

    Review the current product page for fit, size information and purchase details, and consider whether the 11.5 cm heel suits your intended occasions.

    Please verify current product details, sizing and purchase information on the product page before purchase.

    View Magda Butrym opentoe studded leather mules at THANKS KAI.

    Product: Magda Butrym opentoe studded leather mules

  • A 15-Minute Routine for Clearing Your Downloads Folder

    A 15-Minute Routine for Clearing Your Downloads Folder

    작성자: Kai Life Editorial Team

    A downloads folder becomes easier to manage when you give it a short, repeatable routine rather than waiting for a large cleanup session. Set a 15-minute timer, gather the items that need attention, sort them into a few decision groups, take the smallest useful action, and finish with a quick review. The goal is not a flawless filing system; it is a clear next step for each item.

    A digital workspace for sorting files and finding them again

    Why a downloads folder becomes difficult to use

    The downloads folder often acts as a temporary inbox for many kinds of digital material. It may contain an invoice, a document needed for a meeting, an image for a project, an installer, a duplicate attachment, or a file downloaded only to check its contents. These items have different purposes, so treating them all as ordinary files creates friction.

    The same problem can appear in nearby places. An app may be installed but difficult to find. A useful webpage may be open in a browser tab or saved in an unstructured bookmarks folder. Digital organization works better when these three areas are reviewed together:

    • Files: downloaded documents, images, installers, and temporary exports.
    • Apps: tools that are installed, unused, duplicated, or hard to locate.
    • Links: browser tabs, bookmarks, and references that may need a clear home.

    A short routine can reduce the number of decisions you carry forward. It also creates a habit that can be repeated when the folder starts to feel crowded again.

    The four-part digital organization framework

    1. Prepare

    Choose one workspace and set a timer for 15 minutes. Close unrelated windows if they are distracting, but keep open any application needed to identify or move a file. Create a small set of destination areas before you begin. For example:

    • Action: items you still need to use, send, read, or install.
    • File: items that belong in a project, client, finance, reference, or personal folder.
    • Reference: material worth keeping for future use but not tied to an immediate task.
    • Delete: duplicates, failed downloads, expired temporary files, or items you no longer need.
    • Decide later: uncertain items that require information you do not have during this session.

    These labels do not need to become permanent folders. They can be temporary categories in your notes, file manager, or working area. The purpose is to make the first decision easier.

    2. Sort

    Scan the folder from the top and assign each item to one category. Avoid opening every file immediately. Start with visible clues such as the filename, file type, date, and nearby project context. If the item is clear, move on quickly. If it is unclear, place it in Decide later and continue.

    Use a simple question for each item: What is the next useful action for this item? This question is more practical than asking whether the item is generally important. A file can be valuable but still need to move to a project folder, be renamed, or be attached to a task.

    For files with sensitive content, pause before deleting or moving them. Check whether the item is part of a work, tax, client, contract, or backup process. If you do not know the retention requirement, leave it in the review group and add a reminder for the appropriate person or process.

    3. Act

    After sorting, take one clear action per group. Move completed files to their relevant folder, rename items with vague names, delete confirmed duplicates, and keep active items in a location that supports the next task. Avoid building a complicated folder tree during the 15-minute session.

    For apps, use the same decision pattern. Ask whether an app supports a current task, whether it is easy to find, and whether another tool already covers the same need. You can remove a shortcut, group related apps, or record an app for later review. Uninstalling software may involve account, file, or license considerations, so use a separate review step when those details are unclear.

    For links, choose one landing place. A small set of clearly named browser bookmark folders, a project note, or a task list can work. Rename links so that the title explains why they matter. A title such as “pricing page” may be less useful later than “Client proposal—pricing reference,” provided that description is accurate.

    4. Review

    Use the final minutes to check the destination of the items you handled. Look for files left open, items with unclear names, and temporary material that still needs a decision. Then record one small rule for the next cycle, such as “downloaded client files go into the current client folder” or “use one bookmark folder for research links.”

    The review is also a useful point to notice recurring clutter. If the same type of file repeatedly lands in the downloads folder, the problem may be a missing workflow rather than a lack of discipline. A clearer save location, a consistent naming pattern, or a task reminder may address the cause.

    A practical 15-minute action plan

    Time Focus Action
    0–2 minutes Prepare Set a timer, close distractions, and define the destination categories.
    2–7 minutes Sort Scan items and assign each to Action, File, Reference, Delete, or Decide later.
    7–12 minutes Act Move, rename, delete confirmed duplicates, or record the next task.
    12–15 minutes Review Check unresolved items, handle nearby apps or links, and note one workflow improvement.

    If the folder contains more items than you can review in one session, stop when the timer ends. Carry the remaining items into the next scheduled session instead of allowing the cleanup to expand into an unplanned project.

    Copyable digital organization checklist

    • Prepare: ☐ Set a 15-minute timer.
    • ☐ Choose or create temporary groups for Action, File, Reference, Delete, and Decide later.
    • Sort: ☐ Review filenames, types, dates, and project context before opening items.
    • ☐ Identify duplicates, failed downloads, temporary exports, and active work.
    • ☐ Flag sensitive or uncertain files for a separate review.
    • Act: ☐ Move files to a relevant project or reference location.
    • ☐ Rename files when the current name does not explain their purpose.
    • ☐ Delete only items you can identify as unnecessary.
    • ☐ Group or record apps that need attention.
    • ☐ Move useful links to one clearly named bookmark or project location.
    • Review: ☐ Check what remains in the downloads folder.
    • ☐ Write down one rule that could prevent repeated clutter.
    • ☐ Schedule the next short review based on your workload.

    Rules that keep the routine manageable

    Use names that support retrieval

    A useful filename gives enough context to recognize the item later. Depending on your work, that may include a project, document type, subject, or date. Choose a pattern that fits your existing folders rather than adding details that you will not maintain.

    Separate active work from reference material

    Active files support a current task and should be easy to reach. Reference files may be useful later but do not need to remain in the same working area. Separating these groups reduces the chance that old material competes with current priorities.

    Keep an uncertainty lane

    A “Decide later” group protects the routine from difficult edge cases. Give it a follow-up date or attach it to a task. Without a follow-up, the group can become another form of storage, so keep it small and review it during a later session.

    Use one home for saved links

    Links are easier to find when they have a consistent destination. Choose a location that you already check, then use short, descriptive names and a few broad categories. A link with no context may be difficult to recognize after several weeks.

    FAQ

    Should I sort by file type or by project?

    Project context is often more useful for active work because it connects the file to the task that needs it. File type can help with broad reference material or technical assets. Choose the arrangement that matches how you search for the item later.

    What should I do with files I cannot identify?

    Place them in the review group, then inspect their details when you have enough context. You can also record the filename and ask the relevant colleague or client. Deleting an unidentified file removes uncertainty by removing the item, but it may also remove information you later need.

    How often should I run the routine?

    Choose a rhythm that matches your download volume. A short review after a busy work period may be more useful than a fixed calendar interval. If the folder regularly interferes with current tasks, consider a more frequent short session or a clearer save process.

    Can this routine include cloud storage?

    Yes. The same prepare, sort, act, and review steps can apply to a cloud inbox, shared folder, or project upload area. Pay attention to permissions, shared ownership, and version history before moving or deleting collaborative files.

    Conclusion

    Digital organization does not require an elaborate system to become more practical. A 15-minute routine gives each download a next step, connects file organization with app and link management, and creates a chance to improve the way new material enters your workspace. Start with a small set of categories, postpone uncertain decisions safely, and repeat the process when clutter begins to slow your work.


  • 데일리 룩을 완성하는 여성용 베이스볼 캡 스타일 가이드

    전면 Christian Dior 및 별 자수가 있는 베이지 브릴리언트 색상 DIOR DPlayer cap

    DIOR DPlayer cap은 일상적인 옷차림에 선명한 포인트를 더하고 싶을 때 살펴보기 좋은 베이스볼 캡입니다. 베이지 브릴리언트 색상은 데님, 니트, 셔츠처럼 다양한 데일리 아이템과 자연스럽게 어울리며, 전면의 Christian Dior 및 별 자수는 모자의 앞면에 브랜드 특유의 인상을 더합니다.

    뒤쪽에는 조절 탭이 있어 머리둘레에 맞춰 착용감을 조정할 수 있습니다. 네 가지 사이즈가 제공되므로 디자인만 보고 고르기보다 자신의 머리둘레와 평소 선호하는 착용감을 함께 확인하는 것이 좋습니다. 면 100% 소재와 이탈리아 제조 정보를 바탕으로, 계절에 구애받지 않는 캐주얼 액세서리를 찾는 분께 제안할 수 있는 아이템입니다.

    디자인과 선택 포인트

    한눈에 보는 주요 특징

    • 전면 디테일: Christian Dior 및 별 자수가 전면에 배치되어 심플한 코디에도 포인트를 줍니다.
    • 브랜드 레터링: 램스킨에 Christian Dior Paris가 엠보싱된 디테일이 더해져 소재 대비와 시각적 변화를 보여줍니다.
    • 조절 가능한 뒷면: 후면 조절 탭으로 머리둘레에 맞춰 착용 사이즈를 조정할 수 있습니다.
    • 색상: Beige Brillant 색상으로 밝고 차분한 스타일링을 구성하기 좋습니다.
    • 소재와 제조국: 100% Cotton, Made in Italy로 안내되어 있습니다.
    • 사이즈: 머리둘레 기준 56cm, 57cm, 58cm, 59cm 네 가지 사이즈가 있습니다.

    사이즈를 선택할 때는 평소 착용하는 모자 표기보다 실제 머리둘레를 기준으로 확인해 보세요. 조절 탭이 있더라도 기본 사이즈가 잘 맞아야 모자의 형태를 안정적으로 유지하기 쉽습니다. 여유 있는 착용을 선호하는지, 비교적 단정한 핏을 원하는지도 함께 고려하면 선택에 도움이 됩니다.

    상황별 스타일링 아이디어

    출근 전후의 캐주얼 룩

    베이지 계열의 캡은 흰 셔츠와 데님, 또는 아이보리 니트와 매치했을 때 색상 흐름을 부드럽게 이어 줍니다. 전면 자수가 룩의 중심이 되므로 상의는 로고가 적은 디자인을 선택하면 모자의 디테일이 더 잘 드러납니다.

    주말 데일리룩

    티셔츠와 와이드 팬츠, 스니커즈처럼 편안한 조합에 더해 보세요. 챙을 정면으로 맞추면 깔끔한 인상을 만들 수 있고, 헤어스타일이나 전체 실루엣에 따라 약간의 각도를 조절해 분위기를 바꿀 수 있습니다. 가방이나 신발의 색상을 베이지 또는 브라운 계열로 연결하면 통일감이 생깁니다.

    여행과 야외 일정

    가벼운 아우터와 팬츠를 활용한 실용적인 차림에도 브랜드 자수가 포인트 역할을 합니다. 일정 중 착용감이 달라지면 후면 조절 탭을 활용해 보세요. 보관할 때는 다른 소품에 눌리지 않도록 형태를 확인한 뒤 놓는 것이 좋습니다.

    이 캡은 하나의 스타일에만 한정하기보다, 색상은 차분하게 유지하고 전면 자수로 개성을 더하는 방식으로 활용하기 좋습니다.

    구매 전 확인할 항목과 관리 아이디어

    1. 머리둘레 확인: 56cm, 57cm, 58cm, 59cm 중 자신의 머리둘레에 해당하는 범위를 먼저 확인하세요. 상품 안내의 사이즈 기준은 머리둘레의 cm 및 inch 표기입니다.
    2. 색상과 코디 점검: Beige Brillant가 현재 옷장에 있는 데님, 뉴트럴 톤, 밝은 색상과 잘 어울리는지 생각해 보세요.
    3. 디테일 선호도: 전면 Christian Dior 및 별 자수, 램스킨 엠보싱 디테일이 원하는 포인트인지 살펴보세요.
    4. 착용감 고려: 조절 탭으로 핏을 조정할 수 있지만, 기본 사이즈 선택이 우선입니다.

    소재가 100% Cotton으로 안내된 만큼 착용 후에는 통풍이 되는 곳에서 상태를 확인하고, 보관 시에는 캡의 앞면과 챙이 구겨지거나 눌리지 않도록 주의하는 편이 좋습니다. 오염이나 세탁 방법은 제공된 정보만으로 단정할 수 없으므로, 제품 페이지의 최신 관리 안내를 확인한 뒤 관리하세요. 램스킨 엠보싱 부분은 별도 디테일인 만큼 거친 마찰이나 압박을 피하는 방식으로 다루는 것이 안전합니다.

    제품 코드 DIO34MGQBEI24EAA00도 구매 전 상품 식별을 위해 함께 확인할 수 있습니다.

    자주 묻는 질문

    Q. 어떤 사이즈를 선택해야 하나요?

    A. 상품 안내상 56cm, 57cm, 58cm, 59cm 네 가지 사이즈가 있습니다. 자신의 머리둘레를 측정해 해당 표기와 비교하고, 후면 조절 탭을 고려해 선택하세요.

    Q. 색상은 무엇인가요?

    A. 색상은 Beige Brillant로 안내되어 있습니다. 구매 전 화면에서 보이는 색상과 실제 제품의 차이를 확인하는 것이 좋습니다.

    Q. 소재와 제조국은 어디인가요?

    A. 소재는 100% Cotton, 제조국은 Italy로 안내되어 있습니다.

    Q. 어떻게 코디하면 좋나요?

    A. 데님, 흰 셔츠, 아이보리 니트, 캐주얼한 팬츠와 매치하면 베이지 색상과 전면 자수를 함께 살릴 수 있습니다.

    Q. 관리 방법은 무엇인가요?

    A. 제공된 정보에는 구체적인 세탁법이 포함되어 있지 않습니다. 세탁이나 오염 제거 전 제품 페이지의 최신 관리 안내를 확인하세요.

    상품의 소재, 색상, 사이즈, 제조국, 관리 방법 및 구매 관련 정보는 변경될 수 있으므로 구매 전 THANKS KAI 상품 페이지에서 최신 내용을 반드시 확인해 주세요.

    DIOR DPlayer cap의 상세 이미지와 현재 상품 정보를 확인하려면 THANKS KAI에서 제품을 살펴보세요.

    Product: DIOR DPlayer cap

  • A 15-Minute Tagging Rule for Finding Saved Recipes

    A 15-Minute Tagging Rule for Finding Saved Recipes

    작성자: Kai Life Editorial Team

    If saved recipes are difficult to find, use one small tagging rule instead of adding more folders: give each item a type tag, a time tag, a planning tag, and an action tag. A 15-minute routine can then turn a mixed collection of recipes, meal notes, and shopping lists into a system that is easier to browse and maintain.

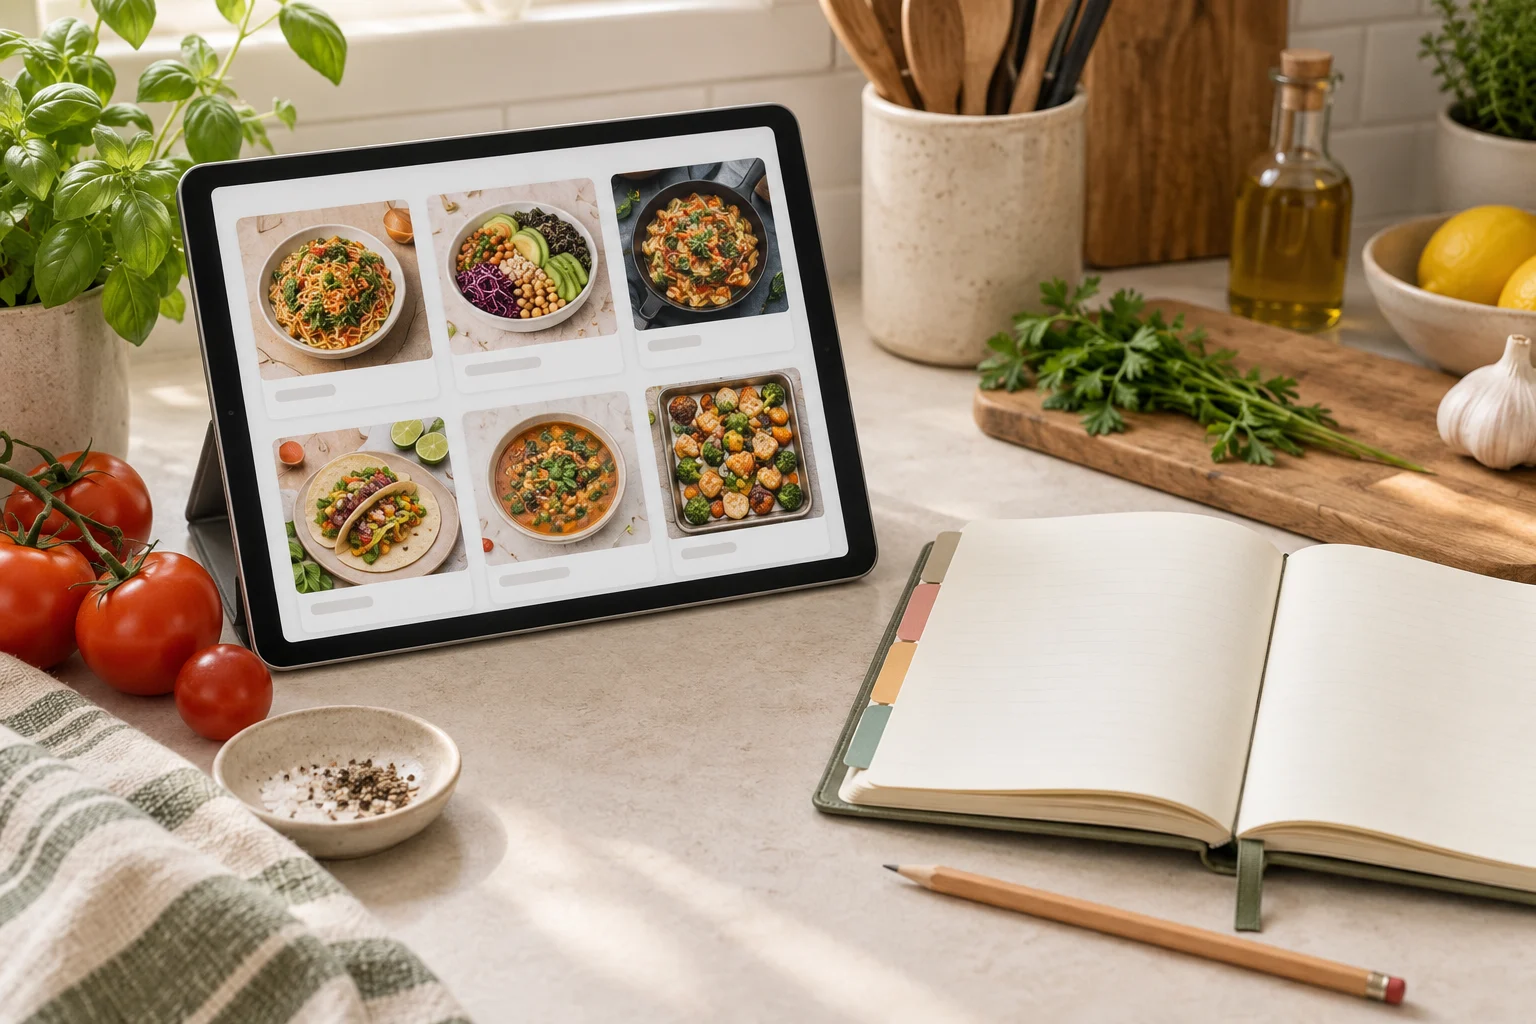
    Tablet recipe cards beside a notebook for organizing recipes and meal ideas

    This approach is designed for busy people who save recipes in several places, such as notes, bookmarks, screenshots, messages, or paper lists. It does not require moving everything into one app. The useful part is the shared naming pattern.

    The four-part tagging rule

    Use four questions when you label a saved item:

    • What is it? Add a type tag such as recipe, meal-note, shopping-list, or technique.
    • How much time does it fit? Add a time tag such as quick, weeknight, slow, or prep-ahead.
    • Where does it belong in planning? Add a planning tag such as breakfast, lunch, dinner, snack, or side.
    • What should happen next? Add an action tag such as try, repeat, adapt, buy, or archive.

    A tag set might look like this:

    recipe / weeknight / dinner / try

    The point is not to describe every detail. The point is to create enough predictable language for future searches.

    Why a small vocabulary helps

    Recipe collections often become hard to search because each saved item is labeled differently. One note might say “fast dinner,” another “easy meal,” and another “busy-night food.” They may describe a similar use, but a search for one phrase will not necessarily surface the others.

    A limited vocabulary reduces that problem. Choose one preferred word for each idea and use it repeatedly. For example, select quick rather than alternating between fast, easy, and 15-min. You can still write natural descriptions in the note itself; the tags provide the consistent index.

    Keep tags separate from ingredients and personal comments. “Tomato, rice, and lemon” are useful contents, while weeknight and try explain how you expect to use the item. Separating these functions makes the collection easier to scan.

    The 15-minute routine

    Minutes 1–3: Prepare

    Choose one capture location to work on during this session. It could be a recipe note, a bookmark folder, a spreadsheet, or a paper stack. Do not attempt to reorganize every kitchen record at once.

    Write down the four tag groups somewhere visible:

    Group Question Example tags
    Type What is this item? recipe, meal-note, shopping-list
    Time When does it fit? quick, weeknight, slow
    Planning How might it be used? breakfast, lunch, dinner
    Action What is the next decision? try, repeat, adapt

    Pick a short list of approved tags before sorting. If a new label comes to mind, record it in a temporary note rather than adding it immediately. This keeps the first pass moving.

    Minutes 4–8: Sort

    Process only the items you can see in the selected collection. For each item, answer the four questions. If an answer is unclear, leave that group blank or use a neutral label such as review. Avoid spending the session researching ingredients, rewriting instructions, or comparing similar recipes.

    For a saved recipe, you might write:

    • recipe
    • quick
    • dinner
    • try

    For a meal note, you might write:

    • meal-note
    • weeknight
    • lunch
    • repeat

    For a shopping reminder, you might write:

    • shopping-list
    • prep-ahead
    • dinner
    • buy

    Minutes 9–12: Act

    Use the action tag to make a small decision about each item. The action is not a promise to cook or purchase anything. It is simply a way to separate current possibilities from notes that no longer need attention.

    • try: interesting, but not yet evaluated in your routine.
    • repeat: a meal idea you would consider using again.
    • adapt: useful starting material that needs edits to fit your preferences or schedule.
    • buy: a shopping-related reminder that needs a later decision.
    • archive: information you want to retain without keeping it in the active view.

    At this stage, avoid turning the routine into a cooking session. The goal is to improve retrieval and reduce ambiguous notes, not to complete every food-related task.

    Minutes 13–15: Review

    Search or scan the collection using two tags together. Examples include quick + dinner, meal-note + repeat, or shopping-list + buy. Check whether the results resemble the question you would ask on a busy day.

    If the results feel too broad, adjust one tag rather than creating several new ones. If the results feel too narrow, remove a tag from the search before changing the system. Finish by writing down any vocabulary decisions that should apply next time.

    How to write tags that remain useful

    Choose the way you search

    Tags should reflect the words you are likely to type when looking for something. If you think “dinner this week,” a tag such as dinner may be more useful than a detailed category that you rarely remember.

    Keep each tag focused

    A tag works best when it answers one kind of question. Do not use quick-dinner for every purpose if separate quick and dinner tags make combinations easier. The right level of detail depends on the number of saved items and how you browse them.

    Separate current action from personal judgment

    Words such as “good,” “favorite,” and “interesting” can be subjective. They may still be useful as comments, but action tags are often easier to apply consistently. For example, repeat says what you may do with the item, while “best” requires a more personal interpretation.

    Use one format

    Pick a format and keep it stable. Lowercase single words are easy to type, but a hyphenated phrase may be clearer for a specific concept. The format matters less than consistency across the collection.

    A copyable kitchen organization checklist

    • Choose one recipe, meal-note, or shopping-list collection for the session.
    • Write down the approved type, time, planning, and action tags.
    • Apply no more than one tag from each group when the information is clear.
    • Use a temporary review label when a decision would take too long.
    • Keep ingredients and personal comments in the note, not in the tag vocabulary.
    • Test two-tag searches that match real planning questions.
    • Record unfamiliar labels for later review instead of expanding the system immediately.
    • Stop after 15 minutes and continue from the next visible item another time.

    What to do with older or duplicated notes

    Older collections often contain repeated links, incomplete meal notes, or several versions of one idea. During the first pass, label the items before deciding whether to merge them. A tag such as review can hold uncertain records without interrupting the rest of the routine.

    When two notes appear to serve the same purpose, compare their action tags. One may be a reference recipe and the other a personal adaptation. Keeping both can be reasonable if they answer different questions. If they do not, place the less useful version in archive rather than deleting it during a rushed session.

    For shopping lists, distinguish between a reusable reference and a current reminder. A general list of items to consider can use shopping-list and reference, while a list connected to a particular meal can use buy and the relevant planning tag. This prevents a long-term note from being confused with a current task.

    FAQ

    How many tags should one saved recipe have?

    Start with up to four: one type, one time, one planning, and one action tag. Add more only when a repeated search problem shows that another dimension is useful.

    What if I save recipes in multiple apps?

    Use the same vocabulary wherever the app allows tags or searchable text. If one tool does not support tags, place a short label line at the top of the note, such as recipe | quick | dinner | try.

    Should ingredients become tags?

    Usually, ingredients can remain in the recipe text or note body. Ingredient tags may be useful for a collection built specifically around ingredient-based searches, but adding them to every item can make the system slower to maintain.

    When should I revise the tag list?

    Review it after several short sessions or when searches repeatedly fail. Remove labels that mean nearly the same thing, combine terms that are used interchangeably, and keep a small record of changes so older notes can be updated gradually.

    Conclusion

    A manageable kitchen organization system does not need a long taxonomy. The four-part rule—type, time, planning, and action—gives each saved recipe or meal note a practical place in future searches. Use the 15-minute routine to prepare a small vocabulary, sort a limited collection, assign next actions, and test searches that reflect real life. Over time, this creates a shared language for recipes, meal notes, and shopping lists without requiring a complete reorganization day.


  • A Refined Halo Ring for Everyday and Bridal Styling

    Foreverness halo moissanite ring with warm 18K yellow gold-plated finish and geometric engagement-ring styling

    Luxury VVS 1ct Halo Diamond Moissanite Wedding Ring for Women 18K Yellow Gold Plated Real 925 Silver D Color Engagement Ring brings a polished halo silhouette to occasions that call for considered sparkle. Listed under the Foreverness brand, this ring combines a round brilliant-cut moissanite main stone with a geometric profile, claw-style inlay and prong setting. Its 18K gold-plated finish gives the design a warm yellow-gold appearance, while the supplied product details identify the precious-metal purity as 92.5%.

    The overall effect is classic without feeling overly formal. A central stone framed by a halo creates a defined focal point on the hand, making the ring easy to position as an engagement-style piece, a wedding accessory or a celebratory gift. It can also be approached as an elevated detail for daily dressing, particularly when the rest of a look is kept clean and understated.

    With its approximately 3g precious-metal weight and versatile occasion listing, this design is suited to shoppers who want one ring to move between meaningful events and refined everyday outfits. The styling direction is simple: let the halo provide the visual emphasis, then coordinate surrounding jewellery through restrained shapes, warm tones or a single complementary stone detail.

    Design details that define the look

    The appeal of this ring lies in the relationship between its centre stone, halo outline and warm finish. Each element contributes to a clear, jewellery-led presence rather than a heavily layered appearance.

    • Moissanite centre: The main stone is identified as moissanite, with a stated 1ct reference in the product name and a round brilliant cut in the specifications.
    • Halo profile: The surrounding arrangement gives the centre a framed, radiant appearance and creates the signature wedding-ring silhouette.
    • Warm gold tone: The ring is described as 18K yellow gold plated, making it particularly natural to coordinate with other yellow-gold or warm-toned accessories.
    • Silver specification: The supplied details describe real 925 silver and list precious-metal purity as 92.5%. Review the current product page for the precise construction information before purchasing.
    • Prong and claw setting: These setting descriptions reinforce the design’s focus on presenting the stone clearly while adding a traditional engagement-ring character.
    • Geometric styling: The geometric shape keeps the ring visually structured, balancing the softness of the halo with a more defined outline.
    • Flexible occasion profile: Listed occasions include engagement, wedding, anniversary, gifting and party wear, supporting both ceremonial and dressed-up styling.

    Rather than treating the ring as a standalone statement only, consider its proportions when selecting accompanying pieces. Small, fine bands can preserve the halo’s prominence, while a simple bracelet or delicate necklace can echo the ring without competing with its centre stone.

    Styling the ring across occasions

    For an engagement or wedding look, place the ring at the centre of the styling story. Pair it with a clean manicure, streamlined tailoring or a softly structured dress so the halo outline remains visible. If adding another ring, choose a narrow silhouette with minimal surface detail. This keeps the hand looking composed and allows the round brilliant-cut centre to remain the first point of focus.

    For anniversaries and meaningful gifts, the ring can be styled with warm, understated accessories. A fine gold-tone chain, small earrings or a slim watch creates continuity without turning the outfit into a full jewellery set. A monochrome cream, black or navy wardrobe also gives the yellow-gold plating room to stand out with clarity.

    For party dressing, use the ring as a bright finishing detail against a simple evening palette. Satin-like textures, tailored separates or a single sculptural accessory can complement the geometric shape. Keep larger jewellery away from the same hand where possible; visual spacing helps the halo read as intentional rather than crowded.

    For daily outfits, the design can add polish to denim, knitwear, a crisp shirt or a minimal dress. Balance its luxury styling with uncomplicated pieces and keep other jewellery light. The result is an OOTD-friendly approach that feels refined while remaining easy to coordinate.

    The ring is listed with unisex, women’s and men’s gender categories, so styling need not follow a single tradition. Its appeal can be interpreted through proportion, personal symbolism and the wearer’s preferred jewellery mix. The most effective coordination is the one that leaves the central stone clearly visible and the warm finish integrated with the rest of the look.

    What to consider before choosing

    Begin with the role you want the ring to play. If it is intended for an engagement or wedding setting, consider how its halo and geometric profile will sit beside any existing or future band. If it is primarily an occasion or daily accessory, focus on whether the warm gold tone suits the jewellery already in your wardrobe.

    Next, review the stone and setting information carefully. The product data identifies moissanite as the main stone, a round brilliant cut, and a prong setting with claw inlay technology. These details describe the visual language of the ring, but the current product page should be checked for any available size, fit or option information before purchase.

    Material wording is also worth reading closely. The supplied listing refers to 18K yellow gold plating and real 925 silver, while the specifications state 92.5% precious-metal purity. Since plating and base-metal details affect expectations for appearance and care, confirm the current product-page information and selected option before completing an order.

    For coordination, decide whether you prefer a matched warm-metal look or a deliberate mixed-metal arrangement. Matching yellow-gold tones will create a traditional, cohesive impression. A restrained mix with silver-toned pieces can feel more contemporary, but keeping the remaining jewellery simple will help the ring retain its prominence.

    Finally, think about maintenance as part of the selection. Remove the ring when practical during activities that may expose jewellery to unnecessary wear, and store it separately so the setting and plated surface are not rubbed against other pieces. Gentle, considered handling is the best foundation for preserving its presentation.

    Frequently asked questions

    What is the main stone?
    The supplied specifications identify moissanite as the main stone, with a round brilliant cut. The product name also includes a 1ct reference.

    What is the ring made from?
    The listing describes real 925 silver and an 18K yellow gold-plated finish. The specifications state 92.5% precious-metal purity. Verify the current product page for the latest material wording.

    How is the stone held?
    The product details list a prong setting and claw setting technology.

    When can it be worn?
    Listed occasions include engagement, wedding, anniversary, gifting, party wear and other uses. It can also be styled with everyday outfits when paired with simpler accessories.

    How should it be coordinated?
    Warm yellow-gold accessories create a cohesive look, while minimal mixed-metal jewellery offers a more contemporary contrast. Keep nearby pieces understated so the halo remains visible.

    What is the approximate precious-metal weight?
    The supplied information states approximately 3g. Check the product page for any current option-specific details.

    Product details, materials, options and purchase information may change. Please verify the current product details and purchase information on the product page before purchase.

    View Luxury VVS 1ct Halo Diamond Moissanite Wedding Ring for Women 18K Yellow Gold Plated Real 925 Silver D Color Engagement Ring at THANKS KAI to explore its current details and styling potential.

    Product: Luxury VVS 1ct Halo Diamond Moissanite Wedding Ring for Women 18K Yellow Gold Plated Real 925 Silver D Color Engagement Ring

THANKS KAI CONTACT

WeChat

위챗에서 QR코드를 스캔해 주세요.
Scan the QR code in WeChat.

Thanks Kai WeChat contact QR code위챗 열기 / Open WeChat