Author: n8n-publisher

  • Turn Repeated Work Into a Reusable Checklist in 15 Minutes

    Turn Repeated Work Into a Reusable Checklist in 15 Minutes

    작성자: Kai Life Editorial Team

    If a repeated task keeps consuming mental energy, turn it into a reusable checklist instead of rebuilding the process from memory. In about 15 minutes, identify the task’s trigger, write its essential steps, separate urgent decisions from routine actions, and add a short review point. The result should be a practical work checklist that supports your priorities without becoming another project to manage.
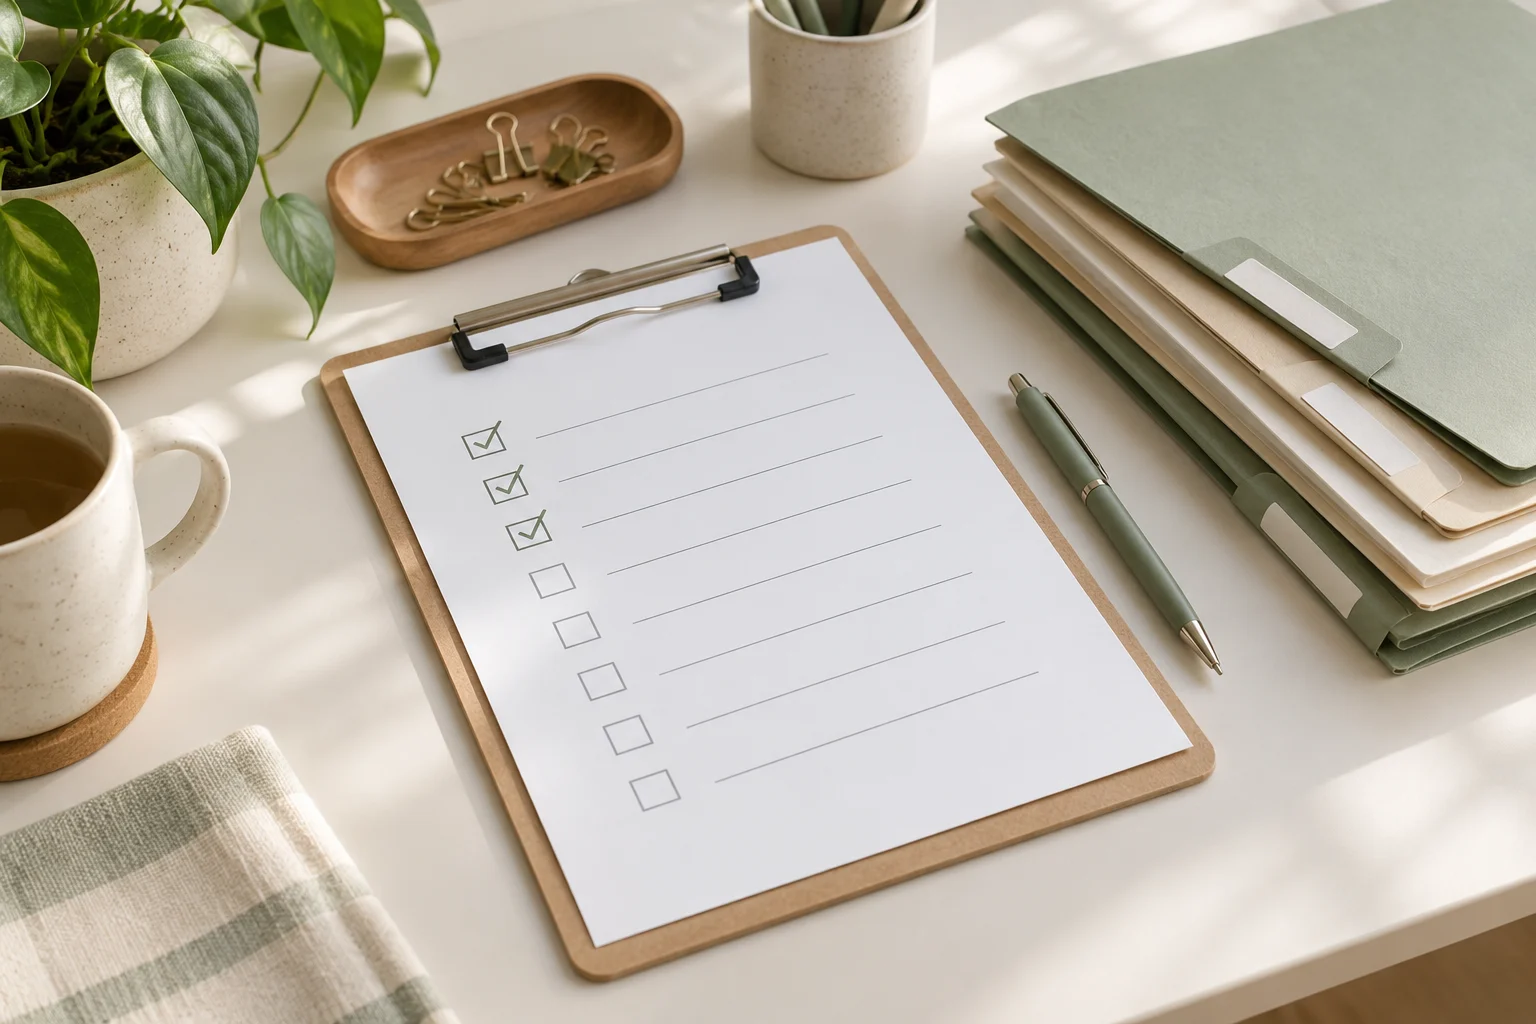
    A reusable work checklist beside neatly arranged folders

    Why repeated tasks become difficult to manage

    Repeated work often looks simple from a distance. It may involve preparing a weekly report, processing requests, organizing meeting notes, checking a shared inbox, or sending a regular update. The difficulty comes from the small decisions around the task:

    • When should the task begin?
    • What information needs to be collected first?
    • Which parts are time-sensitive?
    • What can be skipped when the available time is limited?
    • What should be recorded for the next person or the next cycle?

    When these decisions remain in your head, the task can feel new each time. A checklist makes the starting point visible and gives you a place to capture exceptions. It does not need to describe every possible situation. It needs to support the common path and point out the decisions that deserve attention.

    The four-part framework: prepare, sort, act, and review

    Use four sections to design a checklist that is short enough to use and detailed enough to help.

    1. Prepare: define the trigger and inputs

    Begin with the event that starts the task. A trigger could be a calendar reminder, the arrival of a request, the end of a workday, or the first day of a workweek. Write it as a clear sentence, such as “When the weekly update request arrives” or “At the start of the Monday planning block.”

    Next, list the inputs needed before action begins. These might include a document, a list of open items, meeting notes, a deadline, or a person to contact. If an input is missing, the checklist should tell you what to do rather than leave you searching without a plan.

    • Trigger: What tells me it is time to start?
    • Inputs: What information or files do I need?
    • Time box: How much time can I give this pass?
    • Starting condition: What counts as “ready to begin”?

    2. Sort: separate priorities from background work

    Sorting prevents a routine task from expanding to fill every available minute. Divide the work into three groups: actions that affect a current deadline, actions that keep the process moving, and items that can wait.

    Group Question Example action
    Priority now What has a near deadline or blocks someone else? Confirm a missing decision before sending the update
    Routine next What supports the standard process? Update the task status and file the notes
    Later or optional What would be useful but does not affect this cycle? Improve formatting or add background detail

    Keep the “priority now” group small. If every item is urgent, the checklist is not helping you choose. When priorities conflict, write down the decision or ask the relevant owner for clarification rather than silently changing the scope.

    3. Act: describe observable actions

    Write each checklist item as an action that can be checked off. “Handle report” is too broad to guide the next step. “Compare this week’s figures with the previous update” is easier to start and verify.

    Use one action per line where possible. Include a result when the result matters:

    • Collect the latest information from the agreed source.
    • Check for missing fields, conflicting dates, or unclear ownership.
    • Record decisions and open questions in the meeting notes.
    • Send the update to the intended group.
    • Move unfinished items to a named follow-up list.

    A useful checklist also identifies stopping points. For example, after a routine check, you might stop and escalate only if a deadline, owner, or required input is unclear. This keeps unusual cases from making the standard process unnecessarily long.

    4. Review: improve the checklist after use

    Reserve a short review at the end of the task or during a weekly review. Ask what slowed the process, what was repeated unnecessarily, and what question appeared more than once. Then change one or two lines rather than redesigning the entire system.

    Useful review notes include:

    • A step that was missing from the checklist.
    • An item that no longer belongs in the routine.
    • A decision that needs a clearer owner.
    • An input that should be collected earlier.
    • An exception that deserves a separate note instead of a longer main list.

    A 15-minute setup routine

    Use the following sequence when you want to convert one repeated task into a usable checklist during a short planning block.

    1. Minutes 0–2: name the task. Write the task in plain language and state how often it occurs or what event starts it.
    2. Minutes 2–5: capture the normal path. List the actions you take when nothing unusual happens. Do not edit the wording too much yet.
    3. Minutes 5–8: identify decision points. Mark where you check a deadline, choose a priority, request missing information, or involve another person.
    4. Minutes 8–11: shorten and order. Put preparation first, priority decisions next, routine actions after that, and follow-up last.
    5. Minutes 11–13: add exception instructions. Write a brief response for common problems, such as “If information is missing, record the owner and next request date.”
    6. Minutes 13–15: test the first pass. Read the checklist as if you were starting the task tomorrow. Remove vague items and confirm that the final line tells you where unfinished work goes.

    The goal of this session is not to document every detail. It is to create a reliable first version that can be adjusted after real use.

    Copyable reusable work checklist

    Copy the template below into your notes or task system and adapt the labels to the type of work you repeat.

    Stage Checklist item Notes or owner
    Prepare Confirm the trigger, deadline, and time available.
    Prepare Gather the required files, requests, and previous notes.
    Sort Mark the item that affects the nearest deadline or blocks another person.
    Sort Move optional improvements to a later list.
    Act Complete the standard actions in their working order.
    Act Record decisions, missing information, and follow-up owners.
    Act Share or file the completed output in the agreed location.
    Review Note one friction point and one possible checklist change.
    Review Move unfinished work to a dated follow-up item.

    How to use meeting notes and weekly reviews

    Meeting notes can improve a repeated checklist when they capture decisions rather than only discussion. For each open item, record the decision or question, the owner, and the next point at which it will be checked. This gives the next work cycle a clear starting point.

    During a weekly review, scan completed checklists for patterns. If the same clarification appears repeatedly, add it near the relevant action. If a task is often postponed, examine whether the trigger, time estimate, or priority rule is unclear. If a checklist has grown too long, separate the common path from an exception guide.

    A simple weekly review can use these questions:

    • Which step was easiest to forget?
    • Which item created the most waiting?
    • Did the checklist help distinguish important work from optional work?
    • Were meeting notes clear enough for the next action?
    • What single edit would make the next cycle easier to start?

    Common checklist problems and practical fixes

    The list is too detailed

    If the checklist reads like a training manual, keep the main list focused on decisions and actions. Link or refer to supporting instructions separately, where appropriate.

    The list is too vague

    Replace broad verbs such as “review,” “handle,” or “follow up” with a visible action and a completion signal. State what is being checked and where the result should be recorded.

    Everything is marked urgent

    Add a priority rule based on deadlines, dependencies, or risk to the current work. If two items still compete, record the conflict and seek a decision from the relevant owner.

    Exceptions take over the main process

    Keep the normal path short. Add a small “if this happens” section for recurring exceptions, and create a separate reference when an exception requires extensive detail.

    Unfinished work disappears

    End the checklist with a handoff action: record the next step, owner, and date. A task is easier to resume when its current state is visible.

    FAQ

    How long should a reusable work checklist be?

    It should be short enough to scan during the task. The right length depends on the work, but each line should earn its place by guiding an action, decision, or handoff. Detailed background material can sit outside the main checklist.

    Should every repeated task have its own checklist?

    No. Start with tasks that recur, contain easy-to-forget steps, involve handoffs, or cause repeated uncertainty. A simple task that is already easy to complete may not need formal documentation.

    Where should meeting notes fit?

    Use meeting notes as an input and follow-up record. Pull decisions, owners, and open questions into the relevant checklist step instead of copying an entire conversation into the routine.

    When should I update the checklist?

    Update it after a meaningful friction point or during a regular weekly review. Small changes based on actual use are generally easier to evaluate than a large rewrite based only on assumptions.

    Conclusion

    A reusable checklist is a small work organization system: it tells you when to begin, what to gather, how to sort priorities, which actions to complete, and where to leave the next step. Spend 15 minutes creating a first version with the prepare, sort, act, and review framework. Then use real work, meeting notes, and a weekly review to refine only the parts that cause confusion. The aim is not a more complicated workflow; it is a clearer way to start and finish repeated work.


  • A Refined Guide to a Turquoise Designer Sneaker

    Turquoise LOUIS VUITTON Rivoli Sneaker with oversized LV Initials and bicolor design

    The LOUIS VUITTON Rivoli Sneaker brings a considered, contemporary attitude to everyday dressing. Its turquoise colour creates an immediate focal point, while the smart bicolor palette keeps the overall impression polished rather than overstated. Designed as the first eco-designed edition of the emblematic Rivoli sneaker, it combines recognizable Louis Vuitton signatures with a thoughtful use of sustainable materials.

    The silhouette is especially appealing for wardrobes that move between relaxed and refined settings. Pair it with denim, tailored trousers, or understated casual separates when you want footwear to provide the defining accent. The oversized LV Initials on the side give the profile a distinctive graphic finish, while the Louis Vuitton signature on the back adds another branded detail without requiring additional accessories.

    This guide explores the sneaker’s documented design details, styling possibilities, selection considerations, and care-minded coordination ideas. It is intended to help you decide whether this particular colour, construction, and visual language suit your wardrobe.

    Design Details and Distinctive Features

    The defining feature of the LOUIS VUITTON Rivoli Sneaker is its balance of visual recognition and material-conscious design. The upper uses a mix of sustainable materials, including recycled polyester and bio-based materials, while the outsole is made from recycled polyurethane. In total, the description identifies 90% sustainable materials for this edition.

    • Colour: Turquoise, selected for a vivid yet versatile statement within a modern wardrobe.
    • Signature treatment: Oversized LV Initials appear on the side, creating a strong lateral graphic when the shoe is viewed in profile.
    • Branding details: The tongue features the LV upcycling logo, and the Louis Vuitton signature is placed on the back.
    • Insole: The removable insole is described as shape-memory and anatomic, offering a considered internal detail while allowing it to be removed.
    • Outsole: Recycled polyurethane forms the outer sole, with a listed heel height of 2 cm / 0.79 inches.
    • Origin: The model is manufactured in Italy.

    Together, these elements give the sneaker a layered identity. The colour supplies personality, the bicolor approach adds structure, and the LV details make the design immediately legible. The result is a piece that can carry a simple outfit while remaining suitable for more composed casual styling.

    How to Style It Across the Week

    Use the turquoise tone as the starting point for coordination rather than treating it as a colour that must be matched exactly. Neutral foundations are the most straightforward route: ivory, white, grey, navy, black, and denim can all allow the sneaker to take centre stage. A clean pair of straight-leg jeans and a simple knit creates an easy daily look, while a crisp shirt and relaxed trousers give the same footwear a more tailored direction.

    For an understated outfit, keep the rest of the palette quiet and repeat only one small tonal reference to the turquoise. This might be a subtle detail in a shirt, lightweight layer, or accessory. The aim is not to create a uniform colour story, but to make the sneaker feel intentionally placed.

    For a more graphic approach, work with the shoe’s bicolor character. Pair it with separates in two restrained tones, then let the turquoise function as the visual accent. The oversized LV Initials already provide a strong side detail, so minimal clothing patterns can help preserve the clarity of the silhouette.

    In a smart-casual setting, consider the sneaker with tapered trousers and a structured outer layer. The listed 2 cm / 0.79-inch heel height keeps the profile relatively low, which supports a clean transition between casual and polished pieces. For weekend dressing, combine it with denim or relaxed casual separates and allow the Louis Vuitton signature on the back to appear as a finishing detail when walking.

    Coordination should also consider the sneaker’s material-conscious identity. Accessories in simple, durable-looking finishes can complement the design without competing with it. Avoid overloading the outfit with prominent logos; the side LV Initials, tongue logo, and back signature already provide enough visual information.

    Selection and Care-Minded Considerations

    Begin with colour. Turquoise is expressive, so consider how often your existing wardrobe uses neutral foundations and whether you enjoy footwear that acts as the main accent. If your usual outfits are already highly patterned or brightly coloured, plan a few quieter combinations before choosing this model. If your wardrobe is built around denim, tailoring, and restrained layers, the sneaker can add a clear point of distinction.

    Next, review the sizing information carefully. The supplied details direct you to the size guide, so consult that guide before purchase rather than relying only on your usual sneaker size. The removable shape-memory anatomic insole is a notable construction detail, but it should not be treated as a substitute for checking the product’s current sizing information.

    Consider the branding placement as part of your selection decision. The oversized LV Initials make the side profile prominent, while the LV upcycling logo on the tongue and Louis Vuitton signature on the back reward closer viewing. Choose this model if you appreciate a recognisable designer treatment presented through several coordinated details.

    For care-minded styling, keep the sneaker visually supported by clean, well-organised outfits and handle the turquoise upper with attention. The supplied product data does not specify cleaning instructions, so check the product page and any accompanying care guidance before using cleaning products or applying a treatment. Store it in a way that protects its shape, and avoid assuming that one care method suits every material in the mixed upper and recycled polyurethane outsole.

    Finally, confirm the current product information before completing your decision. The product code is LVU6YSSCBLUU711A00, the country of manufacture is Italy, and the documented colour is turquoise. These details are useful reference points when checking the listing and ensuring that the selected product matches your expectations.

    Frequently Asked Questions

    What colour is the LOUIS VUITTON Rivoli Sneaker?

    The documented colour is turquoise, presented in a smart bicolor palette.

    What materials are described?

    The upper uses a mix of sustainable materials, including recycled polyester and bio-based materials. The outsole is made from recycled polyurethane, and the description states that 90% of the model uses sustainable materials.

    What details identify the design?

    The sneaker has oversized LV Initials on the side, an LV upcycling logo on the tongue, and a Louis Vuitton signature on the back.

    Does it have a removable insole?

    Yes. The description identifies a removable, shape-memory anatomic insole.

    Where is it made?

    The listed country of manufacture is Italy.

    How should I choose the size?

    View the product’s size guide before purchase, as the supplied information does not provide a full size chart.

    What is the listed heel height?

    The listed heel height is 2 cm / 0.79 inches.

    Product details, sizing information, materials, and purchase information may change. Please verify the current details on the product page before purchase.

    View the LOUIS VUITTON Rivoli Sneaker at THANKS KAI to review the current product details and purchase information.

    Product: LOUIS VUITTON Rivoli Sneaker

  • 데일리 스타일을 완성하는 로우톱 스니커즈 가이드

    Bruciato 색상의 MIU Low top sneakers 로우톱 스니커즈

    MIU Low top sneakers는 둥근 앞코와 낮은 힐, 대비되는 솔과 로고 디테일이 조화를 이루는 로우톱 스니커즈입니다. 브루치아토 색상이 전체 인상에 깊이를 더하고, 텅과 뒤축에 배치된 시그니처 로고가 브랜드 특유의 존재감을 보여줍니다.

    끈과 스트랩을 함께 사용하는 디자인, 드러나는 스티치, 패딩 텍스처가 특징이며 일상적인 스타일링을 중심으로 살펴보기 좋은 아이템입니다. 데님과 함께 편안한 데일리룩을 연출하거나, 비교적 단정한 팬츠에 매치해 신발의 대비되는 솔과 로고 디테일을 포인트로 활용할 수 있습니다.

    디자인과 사양에서 확인할 포인트

    • 로우톱 실루엣: 발목을 많이 덮지 않는 형태로 팬츠와 스커트 등 다양한 하의에 연결하기 좋습니다.
    • 둥근 앞코와 낮은 힐: 제품 설명에 기재된 둥근 클로즈드 토와 1cm 힐이 기본적인 외형을 구성합니다.
    • 대비되는 솔과 가시적인 스티치: 단색으로만 마무리하지 않은 외관이 캐주얼한 조합에 선명한 포인트를 더합니다.
    • 로고 디테일: 텅과 뒤축에 로고가 있으며, 프린트된 “Miu Miu” 레터링도 확인할 수 있습니다.
    • 끈과 스트랩: 두 가지 여밈 요소가 디자인에 포함되어 있어 신발의 디테일을 가까이에서 살펴볼 수 있습니다.
    • 소재와 색상: 재활용 폴리아미드와 재활용 폴리에스터로 안내되어 있으며, 색상은 Bruciato입니다.
    • 제조국과 사이즈: 제조국은 Italy이며 정사이즈로 안내됩니다. 평소 착용 사이즈를 선택하고, 구매 전 사이즈 가이드를 함께 확인하는 것이 좋습니다.

    상황별 스타일링 아이디어

    편안한 데일리룩: 스트레이트 또는 여유 있는 데님에 스니커즈를 매치하면 로우톱 형태가 자연스럽게 드러납니다. 상의는 로고가 과하게 겹치지 않는 심플한 아이템으로 선택하면 뒤축과 텅의 디테일이 정돈된 포인트가 됩니다.

    출근 전후의 캐주얼 조합: 블랙이나 네이비 계열의 팬츠와 브루치아토 컬러를 조합하면 신발의 색감을 중심으로 차분한 대비를 만들 수 있습니다. 팬츠 밑단이 신발을 완전히 덮지 않도록 길이를 조절하면 대비되는 솔과 스티치를 보다 또렷하게 보여줄 수 있습니다.

    스커트와의 믹스 매치: 미디 길이 스커트나 간결한 실루엣의 스커트에 로우톱 스니커즈를 더하면 격식과 캐주얼 요소를 함께 구성할 수 있습니다. 양말을 활용할 때는 색상을 상의 또는 하의와 연결해 전체적인 흐름을 맞춰보세요.

    선택 시 체크할 점: 가장 먼저 평소 신는 사이즈와 사이즈 가이드를 비교하고, 앞코 형태와 끈·스트랩 구성처럼 실제로 선호하는 디자인 요소를 확인하세요. 브루치아토 색상은 옷장 속 데님, 뉴트럴 톤, 어두운 색상의 하의와 조합할 계획이 있는지 살펴본 뒤 선택하면 활용 방향을 구체화하기 쉽습니다.

    구매 전 확인과 관리 아이디어

    구매 전에는 제품 페이지의 현재 사이즈 정보와 안내 사항을 우선 확인하세요. 이 제품은 정사이즈로 안내되어 있지만 발볼이나 착화감에 대한 개인적인 선호는 다를 수 있으므로, 평소 선택하는 사이즈와 제공된 사이즈 가이드를 함께 비교하는 것이 좋습니다. 제품 코드는 MIUTCK7UBRWI21A100으로 기재되어 있습니다.

    관리할 때는 재활용 폴리아미드와 재활용 폴리에스터 소재라는 점을 참고해 제품 페이지에 표시된 관리 안내를 따르는 것이 안전합니다. 착용 후에는 오염 여부를 확인하고, 보관 시 끈과 스트랩을 지나치게 당기지 않도록 정리해 형태를 살펴보세요. 솔과 스티치, 로고가 이 제품의 주요 시각적 요소인 만큼 거친 표면과의 마찰을 줄이고, 오염이 생겼을 때는 소재에 맞는 방법인지 먼저 확인하는 편이 좋습니다.

    코디네이션은 신발의 색상과 대비되는 솔을 기준으로 단순하게 시작하면 편리합니다. 상·하의 중 한 가지 색상만 브루치아토와 연결하고 나머지는 절제하면 로고와 스티치가 자연스럽게 강조됩니다.

    자주 묻는 질문

    Q. 어떤 형태의 스니커즈인가요?
    A. 둥근 클로즈드 토, 로우톱 형태, 낮은 힐을 갖춘 스니커즈입니다. 대비되는 솔과 가시적인 스티치가 외관의 특징입니다.

    Q. 사이즈는 어떻게 선택하나요?
    A. 제품 안내상 정사이즈이며 평소 사이즈를 선택하도록 기재되어 있습니다. 구매 전 제공되는 사이즈 가이드도 함께 확인하세요.

    Q. 색상과 소재는 무엇인가요?
    A. 색상은 Bruciato이며, 소재는 재활용 폴리아미드와 재활용 폴리에스터로 안내되어 있습니다.

    Q. 로고는 어디에 있나요?
    A. 텅과 뒤축에 로고가 있으며, “Miu Miu” 레터링 디테일도 포함되어 있습니다.

    Q. 힐 높이는 얼마인가요?
    A. 안내된 힐 높이는 1cm입니다.

    상품의 소재, 사이즈, 색상, 구성 및 구매 관련 정보는 변경될 수 있으므로 구매 전 THANKS KAI의 상품 페이지에서 현재 상세 내용과 구매 정보를 반드시 확인해 주세요.

    MIU Low top sneakers의 상세 이미지와 현재 상품 정보를 THANKS KAI에서 확인해 보세요.

    Product: MIU Low top sneakers

  • A Refined Guide to a Signature Leather Cardholder

    Black Saint Laurent Cassandre matelasse leather cardholder with chevron quilting and signature YSL logo plaque

    The Saint Laurent Cassandre matelasse leather cardholder is a compact accessory designed to bring a polished finish to everyday organisation. Its black calf leather exterior, chevron quilting and signature YSL logo plaque create a recognisable Saint Laurent expression while keeping the overall profile considered and easy to coordinate.

    Measuring 10.5 cm in length and 7.5 cm in width, this one-size cardholder offers a neat alternative to carrying a larger wallet when the essentials are best kept streamlined. The proportions make it suited to a variety of daily settings, from a minimal workday edit to a more elevated evening arrangement.

    As part of the small leather goods for women category, it can be approached as both a practical accessory and a finishing detail. The black colour works naturally with monochrome dressing, tailored separates and relaxed everyday looks, while the quilted surface adds subtle texture to an otherwise simple combination.

    Signature Details and Everyday Function

    The appeal of the Saint Laurent Cassandre matelasse leather cardholder lies in the balance between distinctive design language and compact utility. Each listed feature contributes to that balance without making the piece feel visually overworked.

    • Black calf leather: The black outer is versatile and easy to place alongside a broad wardrobe palette, from crisp white and neutrals to denim and darker tailoring. Calf leather gives the accessory a refined surface that complements its premium presentation.
    • Chevron quilting: The repeated quilted pattern introduces structure and visual rhythm. It gives the cardholder more dimension than a completely plain leather design while remaining restrained enough for everyday use.
    • Signature YSL logo plaque: The logo plaque provides a focused point of recognition. Against the black exterior, it reinforces the house identity without requiring additional decoration.
    • Card slots: The card slots support a deliberately edited carry. This format is especially appropriate when the goal is to keep frequently used cards together in a smaller accessory.
    • Compact measurements: At 10.5 cm by 7.5 cm, the cardholder has a clearly defined small-leather-goods profile. Its dimensions are useful to consider when comparing it with the space available in your preferred bag or pocket.
    • Made in Italy: The product is listed as made in Italy, adding an important point of origin to its product profile.

    Together, these elements create a piece that can sit quietly within an outfit or act as a small statement detail when placed on a desk, carried separately or paired with other black accessories.

    Ways to Style and Use It

    The strongest styling opportunity is its adaptability. With a black base and a graphic quilted finish, the cardholder can coordinate with both understated and more defined looks.

    • For a minimal daily edit: Pair it with a black bag, clean-lined outerwear and neutral knitwear. The cardholder’s texture adds interest while preserving a cohesive tonal palette.
    • With tailored clothing: A blazer, trousers or a structured coat can be complemented by the precise geometry of the chevron quilting. The logo plaque adds a subtle designer accent to an otherwise restrained arrangement.
    • For softer contrast: Use the black cardholder alongside cream, beige, grey or light denim. The darker accessory can anchor a lighter look without competing with its main pieces.
    • For an evening transition: Its compact format suits occasions when a full-size wallet feels unnecessary. Coordinate it with a small black bag or another polished accessory for a consistent finish.
    • As a considered gift idea: A cardholder is a useful choice when you are looking for a compact luxury accessory rather than a larger leather item. The black colour and recognisable YSL plaque give it a clear identity.

    For coordination, consider repeating one element rather than matching everything. A black belt, shoes, sunglasses or bag can echo the cardholder’s colour, while the quilted texture can remain the distinctive detail. If your outfit already includes prominent patterns, letting the accessory work as a simple black accent will keep the overall composition balanced.

    Because the piece is made from calf leather, it is best to treat it as a refined accessory and consult the product page for any current care guidance. Storing it thoughtfully and avoiding assumptions about cleaning methods can help you make more informed decisions about its upkeep.

    What to Consider Before Choosing

    Before selecting the Saint Laurent Cassandre matelasse leather cardholder, consider how you normally carry cards and how much visual detail you want from a small accessory.

    1. Check the dimensions against your routine: The listed measurements are 10.5 cm in length and 7.5 cm in width. Compare these with the compartments of your usual bag or the space where you plan to carry it.
    2. Review the card-slot format: This is a cardholder rather than a described full wallet. If you prefer a compact, edited carry, the slot-based design may suit your habits. If you need room for additional items, review the product presentation carefully before purchasing.
    3. Consider the colour’s role: Black offers broad coordination potential and works particularly well with a capsule wardrobe. It can also provide a grounding contrast against lighter or more colourful clothing.
    4. Decide how visible you want the branding to be: The signature YSL logo plaque is a defining feature. It makes the accessory immediately identifiable while remaining concentrated in a single detail.
    5. Assess texture alongside your existing accessories: Chevron quilting adds a tactile, patterned finish. It pairs easily with smooth leather pieces, but you may prefer to keep other textures simple if you want the cardholder to remain the focal accent.
    6. Confirm the current listing information: Product details, presentation and purchase information should be checked on the product page before making a final decision.

    The product is listed in one size and includes the reference 423291BOW01, with product identifier 11637389. These details can help you distinguish the item when reviewing the listing.

    Frequently Asked Questions

    What is the product?
    It is a Saint Laurent cardholder in black calf leather, featuring chevron quilting, a signature YSL logo plaque and card slots.

    What are its measurements?
    The listed measurements are 10.5 cm in length and 7.5 cm in width.

    Is it available in different sizes?
    The supplied product information lists it as one size.

    Where is it made?
    The product is listed as made in Italy.

    How can it be styled?
    Its black colour works with monochrome outfits, tailoring, neutral separates, denim and evening accessories. The quilted finish adds texture without requiring a heavily accessorised look.

    What should I check before purchase?
    Review the current product details, dimensions and purchase information on the product page, particularly if you need a specific carrying capacity or compartment arrangement.

    Please verify the current product details, measurements, condition or presentation where applicable, and all purchase information on the product page before purchase.

    View the Saint Laurent Cassandre matelasse leather cardholder at THANKS KAI to explore its current product details and styling potential.

    Product: Saint Laurent Cassandre matelasse leather cardholder

  • 리본 디테일로 완성하는 블랙 플랫 샌들 스타일 가이드

    리본 장식과 스퀘어 오픈 토가 돋보이는 블랙 GIVENCHY 플랫 샌들

    GIVENCHY Flat sandals with bow는 블랙 컬러와 리본 디테일, 간결한 플랫 실루엣이 조화를 이루는 샌들입니다. 스퀘어 오픈 토와 와이드 스트랩이 발등 주변에 또렷한 인상을 더하고, 매우 얇은 솔이 전체적인 형태를 가볍고 세련되게 정리합니다.

    장식적인 포인트는 분명하지만 디자인의 바탕은 차분해 데일리룩부터 분위기를 갖춘 외출 스타일링까지 폭넓게 살펴볼 수 있습니다. 부드러운 양가죽 소재와 블랙 컬러라는 정보, 1cm 힐 높이와 이탈리아 제조라는 제품 사양을 중심으로 자신의 옷장과 잘 맞는지 확인해 보세요.

    디자인과 사양에서 살펴볼 포인트

    • 리본 장식: 샌들의 앞부분에 시선을 모으는 보우 디테일이 있어, 심플한 옷차림에도 선명한 포인트를 더하기 좋습니다.
    • 스퀘어 오픈 토: 둥근 형태보다 구조적인 인상을 주는 오픈 토 디자인으로, 슬림한 팬츠나 미디 길이 스커트와 매치했을 때 깔끔한 분위기를 만들 수 있습니다.
    • 와이드 스트랩과 얇은 솔: 넓은 스트랩과 매우 얇은 솔이 함께 구성되어 단정하면서도 현대적인 실루엣을 보여 줍니다. 힐 높이는 1cm입니다.
    • 소재와 컬러: 주요 소재와 기타 소재는 100% 양가죽이며, 안감은 100% 소가죽입니다. 컬러는 블랙으로 안내되어 다양한 색상의 의류와 조율하기 쉽습니다.
    • 사이즈 정보: 정사이즈에 맞는 핏으로 안내되며, 평소 선택하는 사이즈를 권장합니다. 다만 발 모양과 착용감에 따라 체감이 다를 수 있으므로 구매 전 사이즈 가이드를 함께 확인하는 것이 좋습니다.

    제품 코드 GIVY4V9TBCKI21A100, 제조국 이탈리아라는 정보도 구매 전 제품 페이지에서 함께 대조해 보세요.

    어떤 룩에 어울릴까

    담백한 데일리룩: 블랙 톱과 데님, 또는 간결한 셔츠와 스트레이트 팬츠에 매치하면 리본과 스퀘어 토가 룩의 중심을 잡아 줍니다. 장식이 있는 슈즈인 만큼 가방이나 주얼리는 형태가 단순한 아이템으로 고르면 균형이 좋습니다.

    여성스러운 여름 스타일: 미디 스커트나 원피스와 함께 코디하면 리본 디테일의 섬세한 분위기를 자연스럽게 살릴 수 있습니다. 의류에 패턴이 있다면 작은 액세서리와 블랙 컬러를 연결해 전체 인상을 정돈해 보세요.

    차분한 외출 차림: 블랙 슬랙스와 재킷처럼 선이 분명한 조합에는 스퀘어 오픈 토가 모던한 포인트가 됩니다. 매우 얇은 솔과 1cm 힐 높이는 과장되지 않은 실루엣을 선호하는 경우 살펴볼 만한 요소입니다.

    계절감 있는 스타일링을 원한다면 발목이 드러나는 하의 길이를 선택해 샌들의 형태를 보여 주세요. 다만 실제 착용 환경과 편안함은 개인차가 있으므로, 용도와 이동량을 자신의 기준으로 판단하는 것이 중요합니다.

    선택 전 확인할 기준과 관리 아이디어

    1. 스타일 우선순위 확인: 리본처럼 눈에 띄는 포인트를 원하는지, 얇은 솔과 낮은 힐의 절제된 형태를 원하는지 먼저 정리해 보세요. 두 요소가 함께 이 제품의 인상을 구성합니다.
    2. 옷장과의 조화 점검: 블랙 샌들은 데님, 팬츠, 스커트, 원피스와 색상 연결이 쉽지만, 리본 디테일까지 고려해 의류의 장식 정도를 맞추면 더욱 안정적인 코디가 가능합니다.
    3. 사이즈 정보 대조: 정사이즈 안내와 평소 사이즈 권장 내용을 확인하되, 발볼과 발등 형태, 선호하는 여유를 함께 고려하세요. 구매 전 제공되는 사이즈 가이드 확인을 권합니다.
    4. 소재 특성에 맞는 관리: 양가죽과 소가죽이 사용된 제품이므로 착용 후에는 표면 상태를 살피고, 보관 시 형태가 눌리거나 장식이 걸리지 않도록 주의하는 방식이 적절합니다. 구체적인 관리법은 제품 페이지의 최신 안내를 우선하세요.
    5. 구매 정보 확인: 상품명, 컬러, 제조국, 제품 코드와 함께 현재의 사이즈 및 구매 조건을 최종적으로 확인한 뒤 선택하세요.

    자주 묻는 질문

    Q. 이 제품의 컬러는 무엇인가요?
    A. 제품 정보상 컬러는 블랙입니다.

    Q. 힐 높이는 어느 정도인가요?
    A. 힐 높이는 1cm로 안내되어 있습니다.

    Q. 어떤 소재가 사용되었나요?
    A. 주요 소재와 기타 소재는 100% 양가죽이며, 안감은 100% 소가죽입니다.

    Q. 사이즈는 어떻게 선택하나요?
    A. 정사이즈에 맞는 핏으로 안내되며 평소 사이즈가 권장됩니다. 발 모양에 따른 차이를 고려해 사이즈 가이드를 확인해 주세요.

    Q. 제조국은 어디인가요?
    A. 이탈리아 제조로 안내되어 있습니다.

    상품 사양, 사이즈, 소재, 재고 및 구매 조건은 변경될 수 있으므로 구매 전 THANKS KAI 상품 페이지에서 최신 제품 정보와 구매 정보를 반드시 확인해 주세요.

    GIVENCHY Flat sandals with bow의 상세 이미지와 최신 제품 정보를 THANKS KAI에서 확인해 보세요.

    Product: GIVENCHY Flat sandals with bow

  • A Refined Guide to a Versatile Monogram Cross-Body Bag

    LOUIS VUITTON Soft Polochon PM in black Monogram Eclipse with detachable handle and jacquard shoulder strap

    LOUIS VUITTON Soft Polochon PM presents a polished interpretation of relaxed everyday carrying. In black Monogram Eclipse coated canvas, its compact proportions and clear white Louis Vuitton lettering create a distinctive visual presence without relying on excess decoration. The shape feels considered and adaptable: carry it by hand for a composed finish, or attach the textile strap when a shoulder or cross-body option better suits the day.

    With a width of 26 cm, a height of 14 cm and a depth of 14 cm, this is a compact format with a softly practical character. The zip closure helps keep the interior contained, while the inside flat pocket offers a designated place for smaller essentials. A removable name tag adds another functional detail, and the combination of black colouring, Monogram Eclipse fabric and a jacquard strap makes coordination straightforward across a modern wardrobe.

    This guide focuses on how to style and assess the bag before purchase: its carrying options, visual balance, organisation and care considerations. Whether selected for a streamlined daily look or as a refined accent to understated tailoring, LOUIS VUITTON Soft Polochon PM is best understood as a flexible compact bag with a strong branded identity.

    Design details that shape the experience

    The appeal of LOUIS VUITTON Soft Polochon PM lies in the relationship between its defined details and easy styling potential. Each element contributes to how the bag looks, carries and coordinates.

    • Compact proportions: At 26 cm wide, 14 cm high and 14 cm deep, the silhouette is easy to integrate into everyday outfits while retaining a clear, structured visual presence.
    • Monogram Eclipse character: The black Éclipse reverse Monogram fabric gives the design a dark, graphic foundation. It works naturally with tonal outfits and can also ground lighter separates.
    • Multiple carrying options: The detachable handle supports hand-carry styling, while the removable and adjustable textile strap allows shoulder or cross-body wear. This makes the bag suitable for changing the rhythm of a day.
    • Distinctive strap finish: The jacquard strap features “Louis Vuitton” woven into it, introducing a visible branded detail when the bag is worn across the body or over the shoulder.
    • Practical closure and storage: A zip closure keeps the main compartment enclosed, and an inside flat pocket provides a separate location for smaller items.
    • Considered finishing: The removable name tag, cowhide leather trimming, fabric lining and metal details complete the design language. The bag is listed in black and manufactured in France.

    Together, these features create a bag that can move between a cleaner hand-carried appearance and a more relaxed hands-free profile. The choice of strap configuration is therefore not only functional; it also changes the character of the outfit.

    How to style it across the day

    For a refined everyday look, pair the bag with black, charcoal, navy or soft grey. The dark Monogram Eclipse pattern will sit comfortably within a tonal wardrobe, while the bold white lettering and woven strap can provide a controlled point of contrast. Keep the rest of the outfit clean if you want the bag’s branding to remain the main visual accent.

    A cross-body arrangement works especially well with relaxed separates: a simple shirt, knitwear, straight-leg trousers or a casual jacket. Adjust the textile strap so the bag rests securely and naturally against the body, then keep additional accessories restrained to preserve the compact silhouette. Because the strap itself carries a woven “Louis Vuitton” detail, it can function as part of the outfit rather than disappear into it.

    For a more polished setting, remove the strap and use the detachable handle. Hand-carrying gives the bag a quieter, more composed attitude that pairs well with tailored trousers, a dark overshirt or a neat coat. The black colour makes coordination easy, while the rounded softness of the Polochon form prevents the look from becoming overly formal.

    The bag can also anchor a lighter weekend palette. Consider white, cream, stone or muted denim with black footwear or a black outer layer to echo the bag’s colour. This creates visual connection without requiring an entirely dark outfit. For travel between casual and smarter settings, carrying the bag by hand and keeping the strap available offers a simple way to adjust the styling as needed.

    Before filling it, consider the bag’s compact measurements and intended contents. The inside flat pocket is useful for smaller essentials that benefit from separation, while the zip closure keeps the main area contained. Avoid treating the compact format as an invitation to overpack; its appeal is strongest when the shape remains neat and the details stay visible.

    What to consider before choosing

    Begin with your preferred carrying style. If you regularly alternate between hand-carry, shoulder and cross-body use, the detachable handle and removable, adjustable textile strap offer useful flexibility. If you mainly want a compact bag with a prominent strap detail, the jacquard “Louis Vuitton” wording will be an important part of the visual appeal.

    Next, assess scale against your daily routine. The listed measurements are 26 cm in width, 14 cm in height and 14 cm in depth. This compact profile may suit essentials-led dressing, but it should be considered carefully if you usually carry larger personal items. The interior flat pocket adds organisation, although the available information does not specify the full internal capacity.

    Style preference is another key selection point. Black Monogram Eclipse coated canvas offers a graphic, recognisable appearance. It is versatile with dark neutrals and effective alongside lighter pieces, but it remains a branded design rather than a completely minimal one. Choose it if you want an accessory that contributes visible character to an outfit.

    For coordination, decide whether you prefer the strap to be a prominent feature or a removable option. Worn across the body, it adds texture and identity; removed, the handle presents a more pared-back look. The removable name tag provides an additional detail that can be appreciated when the bag is carried by hand.

    Care should begin with preservation rather than experimentation. Store the bag in a clean, dry place and avoid placing it against rough or dirty surfaces. Keep the coated canvas, cowhide leather trimming, fabric lining and metal details in mind when handling it, and use gentle, appropriate care rather than unverified cleaning methods. Always review the current product page for the most reliable purchase information and any care guidance provided there.

    Frequently asked questions

    What carrying options does LOUIS VUITTON Soft Polochon PM offer?
    It has a detachable handle for hand-carrying and a removable, adjustable textile strap for shoulder or cross-body wear.

    What are its listed measurements?
    The listed dimensions are 26 cm wide, 14 cm high and 14 cm deep.

    What storage details are specified?
    The bag has a zip closure and an inside flat pocket. It also includes a removable name tag.

    What material and colour are listed?
    The product data lists Éclipse reverse Monogram fabric, cowhide leather trimming, a fabric lining and metal details. The colour is black.

    How can it be coordinated?
    Its black base suits tonal dressing, tailored looks and lighter outfits with black accents. Use the strap for a relaxed finish or remove it for a cleaner hand-carried appearance.

    Where is it manufactured?
    The supplied product information lists France as the country of manufacture.

    Please verify current product details, measurements, condition, packaging and purchase information on the product page before purchase.

    View LOUIS VUITTON Soft Polochon PM at THANKS KAI to explore its details and styling potential.

    Product: LOUIS VUITTON Soft Polochon PM

  • A 15-Minute Short-Trip Packing Routine

    A 15-Minute Short-Trip Packing Routine

    작성자: Kai Life Editorial Team

    For a short trip, you can build a useful packing list in 15 minutes by first checking the trip basics, then sorting items into a few categories, packing only what supports the plan, and reviewing the list once before leaving. This travel planning organization routine is designed for independent travelers who want a quick system that works across different kinds of local visits and short journeys.

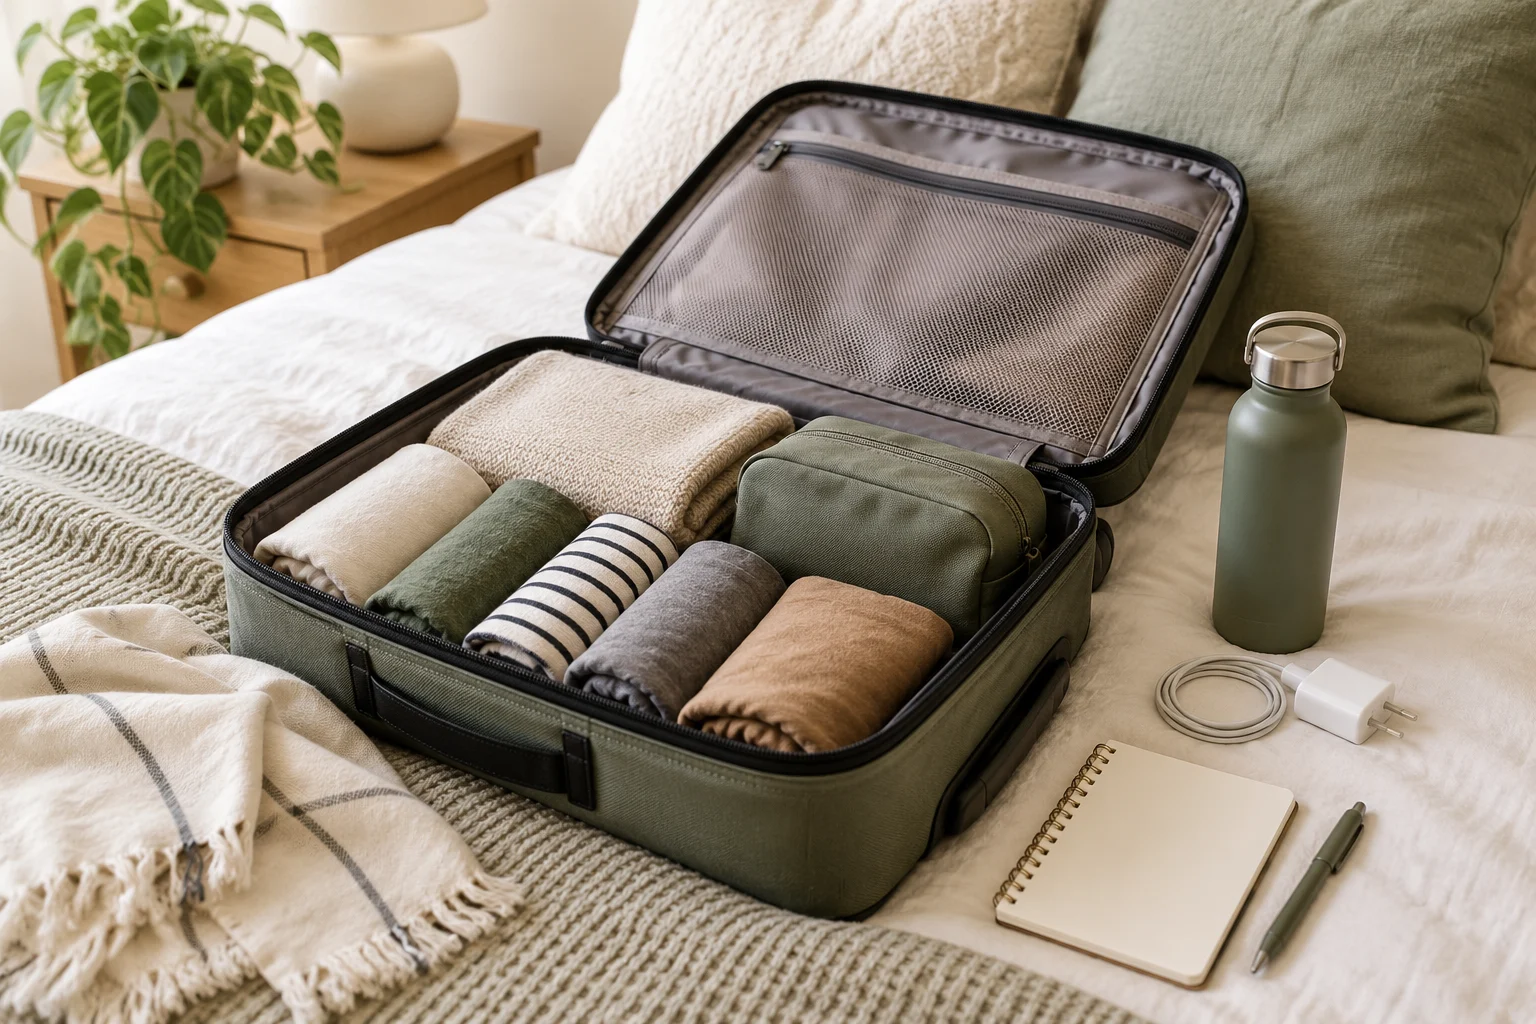
    A compact bag with clothes and essentials arranged for a short trip

    Why a short-trip packing list can become complicated

    Packing often takes longer when the decision is treated as one large question: “What might I need?” A better approach is to connect each item to a real part of the trip. Your transport, accommodation, planned activities, access to basic supplies, and personal requirements all affect the list.

    The goal is not to create a universal list. A city visit, an overnight stay, a family visit, and a day of outdoor activities can require different items. The goal is to create a repeatable decision process that helps you notice important needs without adding unnecessary objects.

    Use four stages:

    • Prepare: collect the few facts that affect packing.
    • Sort: group possible items by purpose.
    • Act: place the selected items together and record what is still missing.
    • Review: check the packed set against your departure and return plans.

    Minute 0–3: Prepare the trip information

    Start with your itinerary, booking details, calendar, or trip notes. You do not need to rewrite the entire plan. Look for information that changes what you carry.

    1. Write the departure and return dates or times.
    2. Note how many nights you will be away, if applicable.
    3. List the main activities in short phrases, such as walking, dining, swimming, work, or visiting family.
    4. Check the accommodation and transport information for practical constraints.
    5. Record any personal items that cannot be replaced easily during the trip.

    At this stage, avoid browsing for additional places or building a detailed itinerary. New research can expand the scope of the trip and make the packing decision less clear. Keep the preparation focused on information already relevant to this visit.

    A compact trip snapshot

    Question Short note Packing effect
    When am I leaving and returning? Dates or time window Clothing, food, medication, and charging needs may change
    Where will I sleep? Accommodation type Check what is already available and what you prefer to bring
    How will I travel? Walking, public transport, car, or another option Consider carrying comfort, access, and document storage
    What will I do? Short activity list Pack items that support the actual plan
    What is personally important? Health, accessibility, work, or routine needs Set these aside before optional items

    Minute 3–7: Sort possible items into four groups

    Place possible items into four groups. You can use a table, notes app, open bag, or a clear surface. The sorting step separates decisions that are often mixed together.

    1. Essentials

    Essentials are items linked to identity, access, communication, health, or the ability to complete the trip. Examples may include identification, required payment methods, keys, medication, glasses, and a phone. The exact items depend on your circumstances and destination.

    2. Clothing and personal care

    Choose clothing based on the number of days, planned activities, and available washing or changing options. Personal care items should reflect what you use and what is available at your destination. Smaller quantities can reduce bulk, but personal health and comfort take priority over saving space.

    3. Activity-specific items

    These are objects needed because of a particular plan, such as work materials, exercise clothing, a reusable water container, or equipment for a hobby. If an item is connected to no activity in your trip notes, pause before adding it.

    4. Convenience items

    Convenience items can make a trip more comfortable but are less central to completing it. Examples include entertainment, an extra accessory, or a backup item. Select these after the first three groups, so they do not crowd out essentials.

    Group Decision question Action
    Essentials Would access, health, or communication be affected without it? Set aside early
    Clothing and personal care Does the trip length or activity plan support bringing it? Choose a reasonable quantity
    Activity-specific Which planned activity requires it? Match it to a trip note
    Convenience Will it provide enough value to justify carrying it? Review last

    Minute 7–11: Act with a focused packing list

    Now turn the sorted groups into a list you can use immediately. Write one line per item or item group. Avoid vague entries such as “everything I need,” because they are difficult to check. Use clear phrases like “charging cable,” “sleepwear,” or “work document.”

    Pack or place together the items already available. For anything missing, record a short follow-up action rather than leaving it in your memory. For example, write “collect key from desk,” “wash clothing,” or “check booking message.” This turns packing into a visible task list.

    Use this copyable checklist as a starting structure:

    • Trip information: dates, route, accommodation details, and planned activities reviewed
    • Access: identification or required documents, keys, payment method, and tickets or booking details
    • Communication: phone, charging equipment, and any needed work or contact information
    • Health and routine: medication, glasses, accessibility items, and personal care needs
    • Clothing: clothing for the trip length and activities, sleepwear, and suitable footwear
    • Activity items: only the equipment or materials linked to the actual plan
    • Comfort: a small selection of optional items after the essential groups are complete
    • Before leaving: keys, lights or appliances, rubbish, notifications, and transport timing checked according to your situation

    For a reusable digital version, create a note titled Short trip packing with the same headings. Copy it for each journey, then remove sections that do not apply. A consistent structure reduces the need to start from a blank page.

    Minute 11–13: Connect packing with itinerary organization

    A packing list is more useful when it sits beside your itinerary organization system. Keep three short lists together:

    • Plan: places, appointments, and activities you intend to visit or attend.
    • Pack: items that support those plans.
    • Notes: useful details such as opening information, meeting points, or questions to confirm.

    This separation prevents a place list from becoming a packing list. A restaurant, museum, park, or shop may belong in your place list, but it does not automatically require a special item. Add an item only when the plan creates a clear practical need.

    You can also use a small connection table:

    Trip note Possible preparation Status
    Planned activity Relevant clothing or equipment To pack, packed, or not needed
    Transport detail Document, ticket, timing, or carrying adjustment To check or complete
    Accommodation detail Personal item not provided or preferred Confirm or pack
    Personal routine Health, work, or accessibility item Set aside early

    Minute 13–15: Review and close the task

    The final review should be short. Compare the packed items with the trip snapshot, then check the items most likely to be forgotten. Review your actual departure situation rather than adding more possibilities.

    1. Confirm that essential documents, keys, communication items, and personal requirements are accounted for.
    2. Check that clothing and activity items match the length and purpose of the trip.
    3. Look for missing actions, such as charging a device or collecting an item from another room.
    4. Remove duplicates and optional items that no longer seem worthwhile.
    5. Place the bag, outerwear, and departure-day items where they are easy to find.

    Then close the note. If a future trip reveals a repeated omission, update the template after returning rather than constantly adding items before every departure.

    Common packing decisions that need a pause

    “I might need it” items

    Uncertainty is a useful signal, but it is not a decision by itself. Ask whether the item supports a known activity, a personal requirement, or a realistic contingency. If not, place it in the convenience group and review it at the end.

    Weather-dependent items

    Weather can affect clothing and equipment, but conditions vary by destination and date. Check a reliable forecast or local information when it is relevant to your trip, then adjust the list. Do not treat a generic packing template as a substitute for current conditions.

    Shared items

    If you are traveling with another person, clarify who is carrying shared items. Record the owner beside the item in your trip notes. This can reduce duplicate packing while keeping responsibility visible.

    Health and accessibility needs

    Personal health and accessibility requirements should be handled before optional convenience items. This article does not replace advice from a qualified professional. If a prescribed treatment, medical device, or accessibility arrangement is part of your routine, use the instructions that apply to you and confirm destination-related requirements when relevant.

    A reusable 15-minute routine

    Save the following sequence as a note or calendar description:

    1. Prepare for 3 minutes: review dates, transport, accommodation, activities, and personal requirements.
    2. Sort for 4 minutes: separate essentials, clothing and personal care, activity items, and convenience items.
    3. Act for 4 minutes: gather selected items and write follow-up actions for anything unavailable.
    4. Review for 2 minutes: compare the bag with the trip snapshot and remove duplicates.
    5. Close: save the updated trip notes and put departure-day items in one visible place.

    Conclusion

    A short-trip packing list does not need to be a long inventory. The practical value comes from using a repeatable structure: prepare with the trip facts, sort by purpose, act on clear items, and review against the itinerary. Keeping a place list, trip notes, and packing list close together can make decisions easier without turning every journey into a large planning project.

    FAQ

    How many items should a short-trip packing list contain?

    There is no useful universal number. The list should reflect the trip length, activities, accommodation, transport, and personal requirements. Start with essentials, then add activity and convenience items only when they have a clear role.

    Should I use a paper list or an app?

    Use the format you can check easily during preparation. A paper list works well for a visible packing surface, while a note app can be copied for future trips and connected with itinerary details.

    How can I avoid overpacking?

    Link each nonessential item to a known activity or realistic need. Review convenience items last, remove duplicates, and distinguish between an item that would be pleasant and one that supports the actual trip.

    What should I do if my plans change?

    Update the trip snapshot first, then revise the activity-specific section. Recheck clothing, documents, and transport-related items after the change instead of rebuilding the entire list from the beginning.


  • 타비 토와 뮬, 데일리 스타일링 가이드

    블랙 타비 토와 원통형 블록 힐이 돋보이는 Maison Margiela Tabi Decollete mules

    Maison Margiela Tabi Decollete mules는 블랙 컬러와 타비 토가 돋보이는 슬립온 뮬입니다. 발끝이 자연스럽게 나뉘어 보이는 타비 토, 원통형 블록 힐, 매끈한 가죽 구성이 한눈에 특징을 드러냅니다. 앞서가는 장식보다 실루엣 자체로 스타일의 방향을 잡고 싶은 날에 어울리는 디자인입니다.

    이 제품은 오빈 가죽 겉감과 송아지 가죽 안감, 송아지 가죽 밑창으로 구성되며 이탈리아에서 제작되었습니다. 블랙이라는 차분한 색상 덕분에 데님, 테일러드 팬츠, 스커트처럼 서로 다른 분위기의 옷과도 조율하기 좋습니다. 신기 전에는 상품 페이지의 이미지와 현재 안내 정보를 함께 확인해 자신의 옷장과 원하는 착화 장면에 잘 맞는지 살펴보세요.

    디자인과 구성에서 확인할 점

    • 타비 토: 발끝의 독특한 분할 실루엣이 룩에 선명한 포인트를 더합니다.
    • 블랙 컬러: 색상 자체가 절제되어 있어 의상의 색과 패턴을 폭넓게 받아들이기 좋습니다.
    • 원통형 블록 힐: 가느다란 장식 힐과는 다른 구조적인 인상을 만들어 뮬의 형태를 강조합니다.
    • 슬립온 스타일: 끈이나 버클이 보이지 않는 간결한 인상으로, 발끝 디자인에 시선이 모입니다.
    • 가죽 구성: 겉감은 Ovine Leather (top grain) 100%, 안감은 Calf Leather 100%, 밑창은 Calf Leather 100%로 안내되어 있습니다.
    • 제작 정보: Made in Italy로 표기되어 있으며, 상품 정보에는 S58WP0302P3753 코드가 함께 안내됩니다.

    선택할 때는 먼저 타비 토처럼 개성이 분명한 앞코가 평소 스타일과 조화를 이루는지 확인하는 것이 좋습니다. 또한 뮬 특유의 오픈된 착화 방식과 블록 힐의 비율이 자신이 자주 입는 바지 길이, 스커트 실루엣과 어울리는지도 이미지로 비교해 보세요.

    상황별 스타일링 아이디어

    정돈된 데일리룩: 블랙 팬츠와 셔츠처럼 선이 분명한 조합에 매치하면 타비 토가 과하지 않게 드러납니다. 상의와 하의를 단순하게 구성할수록 신발의 앞코와 힐 형태가 자연스럽게 중심이 됩니다.

    데님 중심의 OOTD: 데님 팬츠에 뮬을 더하면 편안한 아이템 사이에서 독특한 앞코가 룩의 분위기를 바꿉니다. 발목이 보이는 길이의 팬츠라면 슬립온 실루엣과 타비 토를 보다 또렷하게 보여줄 수 있습니다.

    스커트와의 균형: 스커트와 함께 입을 때는 신발의 블랙 컬러를 가방이나 상의의 어두운 요소와 연결해 보세요. 의상에 장식이 많다면 다른 액세서리는 간결하게 선택해 타비 토와 원통형 블록 힐이 가진 조형미를 살리는 편이 좋습니다.

    스타일 선택 기준: 이 제품은 로고를 크게 드러내기보다 실루엣으로 포인트를 주고 싶은 사람에게 잘 맞는 방향입니다. 반대로 전통적인 라운드 토 슈즈의 단정함만을 원하는 경우라면, 상품 이미지에서 타비 토의 형태를 먼저 충분히 확인한 뒤 선택하는 것이 좋습니다.

    가죽 제품인 만큼 보관과 관리는 제품 페이지에 안내된 최신 정보를 우선으로 확인하세요. 착용 전후에는 눈에 보이는 상태를 살피고, 관리 방법이 불확실할 때는 임의의 세정이나 처리를 하기보다 전문적인 안내를 확인하는 방식이 안전합니다.

    구매 전 체크리스트

    1. 앞코 확인: 상품 이미지를 여러 각도에서 살펴 타비 토의 분할감과 라운드 토의 전체 인상을 확인합니다.
    2. 힐과 밑창 확인: 원통형 블록 힐과 가죽 밑창의 디자인이 평소 선호하는 신발 비율에 맞는지 봅니다.
    3. 착화 방식 고려: 슬립온 스타일을 선호하는지, 자신의 일상적인 움직임과 옷차림에 자연스럽게 활용할 수 있는지 생각해 보세요.
    4. 소재 정보 대조: 겉감, 안감, 밑창의 소재 표기를 상품 페이지에서 다시 확인하고 가죽 제품에 필요한 관리 안내를 함께 살펴봅니다.
    5. 현재 정보 확인: 상품 이미지, 상세 설명, 구매 조건은 확인 시점에 따라 달라질 수 있으므로 구매 직전에 최신 내용을 확인합니다.

    색상은 블랙으로 안내되어 있어 옷장 속 기본색과 연결하기 쉽지만, 개성 있는 앞코가 전체 룩의 중심이 될 수 있습니다. 따라서 단순히 무난한 블랙 슈즈를 찾기보다는, 일상적인 코디에 구조적인 변화를 더할 신발을 찾는지 기준을 세우면 선택이 더욱 분명해집니다.

    자주 묻는 질문

    Q. 어떤 디자인이 가장 눈에 띄나요?
    A. 발끝이 나뉘어 보이는 타비 토가 가장 distinctive한 요소이며, 원통형 블록 힐과 함께 조형적인 인상을 만듭니다.

    Q. 어떤 옷과 매치하기 좋나요?
    A. 블랙 팬츠, 데님, 셔츠, 스커트처럼 실루엣이 분명한 아이템과 조합하기 좋습니다. 의상을 단순하게 구성하면 신발의 앞코가 더욱 잘 드러납니다.

    Q. 소재는 무엇인가요?
    A. 겉감은 Ovine Leather (top grain) 100%, 안감과 밑창은 Calf Leather 100%로 안내되어 있습니다.

    Q. 구매 전 무엇을 확인해야 하나요?
    A. 타비 토의 형태, 슬립온 착화 방식, 블록 힐의 비율, 소재 안내와 현재 구매 정보를 상품 페이지에서 확인하세요.

    상품의 소재, 구성, 이미지, 현재 구매 조건 및 기타 상세 정보는 구매 전 THANKS KAI의 상품 페이지에서 최신 내용을 반드시 확인해 주세요.

    Maison Margiela Tabi Decollete mules의 상세 이미지와 최신 상품 정보를 THANKS KAI에서 확인해 보세요.

    Product: Maison Margiela Tabi Decollete mules

  • How to Organize Your Phone Home Screen in 15 Minutes

    How to Organize Your Phone Home Screen in 15 Minutes

    작성자: Kai Life Editorial Team

    If you lose time looking for work apps, files, or saved links, you can improve the situation with a short home-screen reset. In 15 minutes, prepare a temporary holding area, sort items by how you use them, place the most important tools where your hand and attention reach them easily, and schedule a brief review. The goal is not a visually perfect phone. It is a home screen that helps you find the next useful item with fewer decisions.

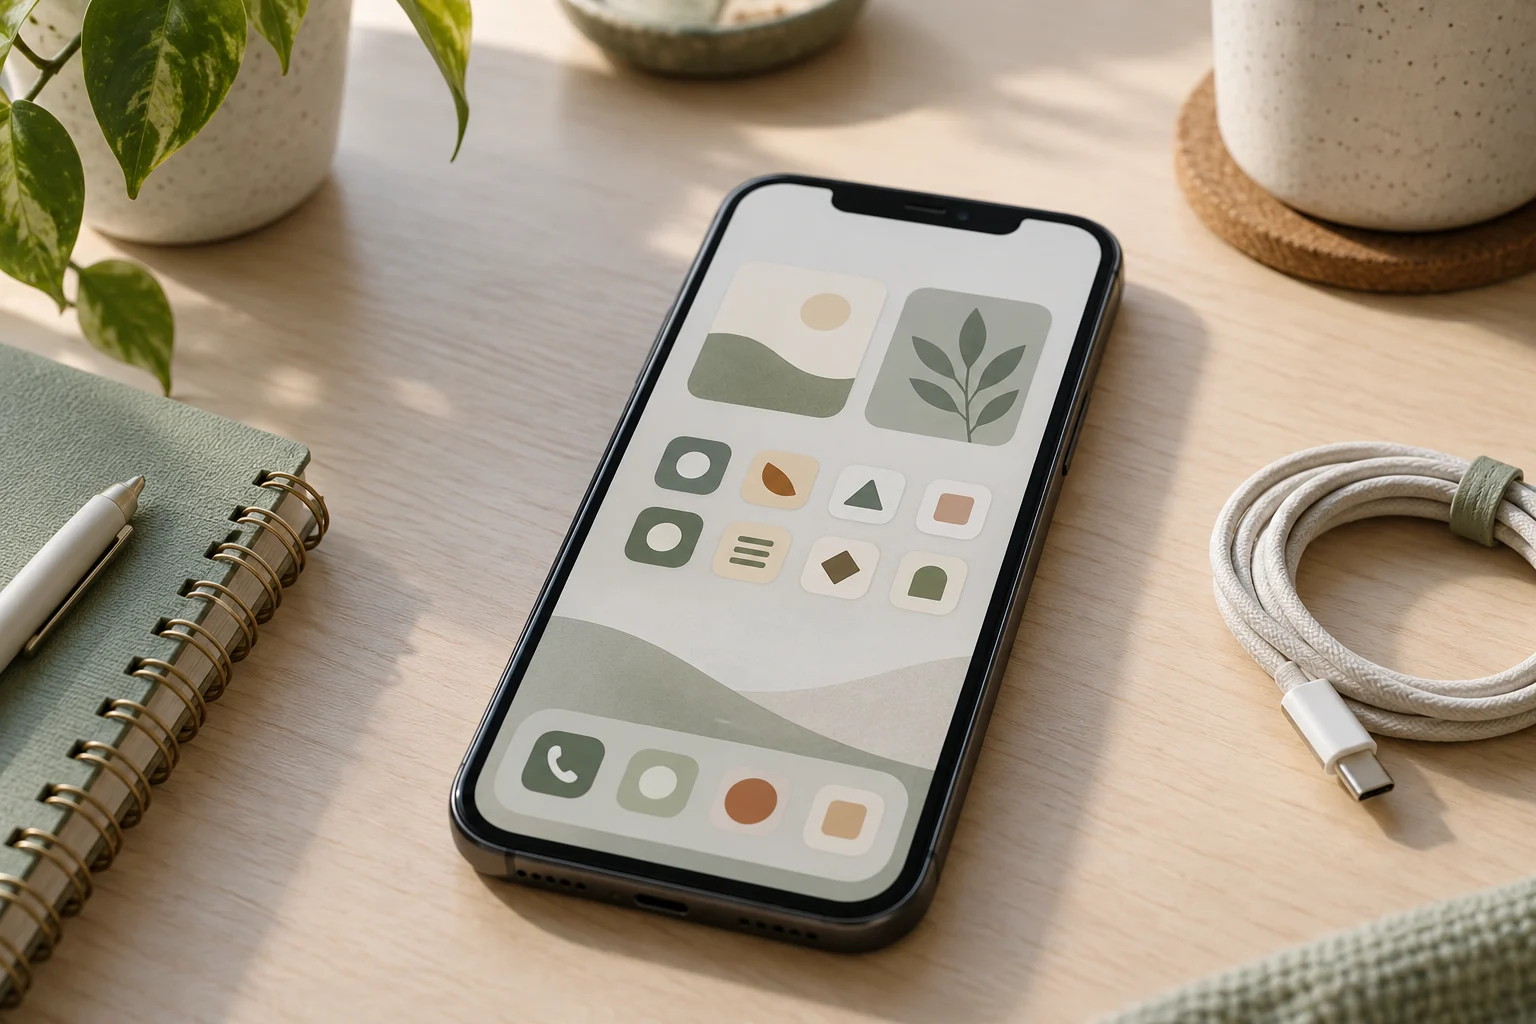
    A simplified smartphone home screen with grouped app icons

    Before You Start: Define What “Easy to Find” Means

    Phone organization becomes easier when you organize around actions rather than app names. A worker may need to check a calendar, respond to a message, open a document, and visit a project link. A solo business owner may need a payment dashboard, customer messages, a camera, an expense folder, and a social publishing tool. These items do not belong together because they come from the same company or have similar icons. They belong together because they support a task.

    Choose one practical definition of success for this reset:

    • Work tools are visible without searching through several pages.
    • Frequently used personal tools do not compete with work tools.
    • Files and links have a predictable place outside the home screen.
    • Unused apps and distracting shortcuts create less visual noise.

    Keep the scope narrow. This routine is for the home screen and the routes connected to it. It is not a complete photo archive, email cleanup, or cloud-storage migration. If you find a larger problem, write it down for a later session instead of allowing it to consume the 15-minute reset.

    The Prepare–Sort–Act–Review Routine

    1. Prepare: create a temporary holding area

    Start by choosing a simple holding area for items you are unsure about. Depending on your phone, this could be a second screen, an existing utility folder, or a temporary note that lists items for later review. The holding area is not a permanent filing system. It gives you somewhere to move items while you decide.

    Next, write down three to five actions you perform on the phone during a normal workday. For example:

    • Check today’s schedule.
    • Reply to an important message.
    • Open a current project file.
    • Review a business dashboard.
    • Capture a photo, note, or receipt.

    These actions will guide placement. They are more useful than a generic rule such as “put similar apps together,” because similar-looking apps can serve very different purposes.

    2. Sort: separate essential, occasional, and uncertain items

    Look at the first home-screen page and classify each item into three groups:

    • Essential: used frequently or needed quickly when a task appears.
    • Occasional: useful, but not part of the normal daily route.
    • Uncertain: unfamiliar, duplicated, distracting, or no longer connected to a current task.

    Move occasional and uncertain items away from the primary screen temporarily. This creates space for a clearer decision. Avoid deleting an app simply because it is not used every day. Check whether it supports travel, security, payments, accessibility, work continuity, or another occasional need. If you are unsure, leave it in the holding area and review it later.

    Use folders when they reduce decisions, not merely because they make the screen look compact. A folder called “Work” may be useful if it contains a small set of tools you open together. A very large folder can become another place to search, so consider splitting it by action, such as “Communicate,” “Create,” or “Manage,” if that matches your routine.

    3. Act: place tools by frequency, urgency, and context

    Place high-use tools on the primary screen, but give them different positions according to the way you reach for them. A tool used several times a day can stay visible. A tool used only when a notification arrives may work better in a folder or search route. A tool containing sensitive information may deserve a less exposed location, depending on your device and privacy needs.

    A practical layout can include:

    • Primary action area: calendar, messages, notes, tasks, or another daily starting point.
    • Work area: project, document, communication, or business tools.
    • Capture area: camera, voice notes, scanning, or quick-entry tools.
    • Occasional area: travel, shopping, finance, settings, and other less frequent tools.

    Keep the bottom dock or equivalent persistent area for tools you open across multiple contexts. If your phone offers widgets, use them only when they answer a repeated question, such as “What is next?” or “What needs attention?” A widget that adds visual information without reducing a decision may increase clutter.

    Do not place every work-related item on the first page. The purpose of digital organization is a reliable route, not maximum exposure. A simple folder, a device search shortcut, or a pinned document may be faster than scanning a crowded page.

    4. Review: test the route with real tasks

    Test the new layout using the actions you wrote down at the beginning. Start from the locked or idle state of the phone and try to reach each item. Notice where you hesitate. If an app is visible but its related file or link remains difficult to reach, the home-screen change is incomplete.

    Record the remaining friction in a short note:

    • Which app was difficult to locate?
    • Which file needed a clearer folder or name?
    • Which link is trapped in a message, email, or browser tab?
    • Which folder contains more items than you can scan comfortably?

    Make only one or two final changes during the 15-minute session. A later review can handle deeper cleanup without turning this routine into an open-ended project.

    Connect the Home Screen to Files and Links

    An organized home screen cannot compensate for unclear file and link storage. Use a small set of consistent destinations for the items you reach from your phone.

    File organization

    Choose folder names that describe the work or decision connected to the file. Names such as “Current Clients,” “Tax Records,” “Content Drafts,” or “Receipts to Review” may be more useful than vague labels such as “Miscellaneous.” Match the names to your actual responsibilities rather than copying a system that does not fit.

    For active work, consider separating files by status, such as “In Progress,” “Waiting,” and “Reference,” if those stages help you decide what to do next. Avoid creating a new folder for every individual file. The structure should make retrieval easier without requiring a long series of taps.

    Link management

    Saved links often become invisible inside browser bookmarks, messages, or email threads. Collect links that support recurring work in one intentional place, such as a bookmark folder, a note, or a project document. Give the link a descriptive label that explains its purpose. “Weekly order report” is easier to recognize than a raw address or a label copied from a page title.

    Review saved links for access and relevance. A link may require an account, redirect to a different page, or depend on information that has changed. If it is important, add enough context to help your future self understand why it was saved.

    A Copyable 15-Minute Action Plan

    Time Action Output
    0–2 minutes List three to five phone tasks you perform during work. A task-based placement guide
    2–5 minutes Move occasional and uncertain items to a temporary holding area. More space for daily tools
    5–9 minutes Place essential apps by frequency, urgency, and context. A clearer primary screen
    9–12 minutes Group related tools and check nearby files or links. A connected route from app to information
    12–15 minutes Test the layout with real tasks and note remaining friction. A short follow-up list

    Use this checklist during the reset:

    • [ ] I listed the phone tasks that matter most during work.
    • [ ] I moved occasional or uncertain items away from the primary screen.
    • [ ] I placed frequently used tools where they are easy to reach.
    • [ ] I used folders only where they reduce searching.
    • [ ] I checked the route from key apps to related files.
    • [ ] I collected important links in a recognizable location.
    • [ ] I tested the layout with real tasks.
    • [ ] I wrote down deeper cleanup for another session.

    Keep the System Useful Without Constant Rearranging

    After the reset, resist changing the layout every time you install an app. Let new items stay in a secondary location until their role becomes clear. This creates a small review point instead of allowing every download to reshape the home screen.

    Set a short review interval that fits your routine, such as once a week or at the end of a project. During the review, ask whether the primary screen still reflects your current work. If a tool has become central, move it closer. If an app has become occasional, move it away. If a file or link repeatedly causes hesitation, improve its name or storage location.

    Also consider notification settings as part of digital organization. A crowded home screen and a crowded notification stream can create similar friction. Review which alerts support timely action and which can wait for a scheduled check. Device menus vary, so use the notification controls available on your phone and change them gradually.

    FAQ

    Should every app be on the first screen?

    No. The first screen should support the actions you perform most often or need to reach quickly. Occasional tools can remain in folders, on another page, or in the device’s search system.

    Is it better to organize apps by category or by task?

    Task-based organization is often easier when you use several tools together to complete an activity. Category folders can still work for occasional tools or when your app collection is small. Choose the structure that reduces hesitation for your own routine.

    How can I organize work links without adding many shortcuts?

    Store recurring links in a small bookmark folder, note, or project document with descriptive labels. Add context when the purpose is not obvious, and review links that no longer support current work.

    What should I do with apps I rarely use?

    Move them away from the primary screen first. Before deleting anything, consider whether it supports an occasional need, account access, security process, or work continuity. If the decision is unclear, put it on a later review list.

    Conclusion

    A useful phone home screen is a navigation system for your actual work, not a display of every available app. In 15 minutes, you can list your key actions, separate essential from occasional tools, connect apps with files and links, and test the route with real tasks. Keep the layout modest, review it after your work changes, and let deeper cleanup happen in separate sessions.


  • A Refined Guide to Choosing a Monogram Baseball Cap

    Beige LOUIS VUITTON LV First Cap with tone-on-tone Monogram jacquard crown, leather visor and natural cowhide back belt

    LOUIS VUITTON LV First Cap brings a polished finish to the relaxed language of a baseball cap. Introduced as a new-for-2023 design, it combines a classic summer shape with a considered mix of textures: a tone-on-tone Monogram jacquard crown, a leather visor and top button, and a natural cowhide back belt.

    In beige, the overall effect is understated rather than overstated. The signature pattern remains integrated into the colour story, making this an adaptable accessory for everyday dressing, travel-inspired outfits, and casual looks that benefit from a more refined final layer. Its 100% cotton material and classic proportions also make it easy to approach as a wardrobe piece rather than a one-occasion statement.

    The design is described as helping keep the face cool and shaded, while the back belt is intended to provide a snug, secure fit. For a closer assessment, review the stated measurements and size guide on the product page before purchase.

    Design details that define the look

    • Tone-on-tone Monogram jacquard crown: The pattern is woven into a restrained beige presentation, giving the cap a recognisable signature while preserving a quiet visual balance.
    • Leather visor and top button: These details introduce a sharper contrast of texture and help frame the classic baseball-cap silhouette.
    • Natural cowhide back belt: The rear belt contributes to the design and supports a snug, secure fit that can be adjusted according to preference.
    • 100% cotton material: The listed material suits the cap’s light, summer-oriented character and complements its relaxed everyday styling.
    • Classic summer shape: The profile is easy to coordinate with casual wardrobes, from simple daywear to more carefully assembled off-duty looks.
    • Beige colour: This neutral shade can sit comfortably alongside denim, white, black, navy, tan, and other natural tones without dominating the outfit.

    The listed item measurements are 29 cm in width, 15 cm in height, and 15 cm in depth. The product information also states that the item is manufactured in Italy and delivered in 24S packaging. These details are useful reference points when considering the cap’s scale, presentation, and place within an accessories collection.

    Ways to style it across the day

    For an understated daily look, pair the beige cap with a white shirt, a simple knit, or a clean T-shirt and denim. Keeping the rest of the outfit quiet allows the tone-on-tone Monogram jacquard to remain visible without making the styling feel overly formal. Neutral trainers or simple leather accessories can continue the balanced mood.

    For a relaxed summer combination, use the cap with light separates in cotton or similarly easy textures. The leather visor and top button add definition to an outfit built from softer pieces, while the natural cowhide belt echoes warm tan details elsewhere in the look. A tonal palette of beige, cream, ecru, and denim creates a cohesive finish.

    For travel and outdoor-leaning plans, the classic shape offers a practical finishing touch for casual layers. Try it with a lightweight jacket, an overshirt, or a relaxed sweatshirt. The cap can also provide visual continuity when the outfit includes several neutral pieces: the Monogram pattern supplies subtle detail without requiring additional prominent logos.

    For a more elevated off-duty outfit, contrast the casual silhouette with tailored trousers, a structured blazer, or polished loafers. The result works best when the colours remain controlled and the cap is treated as the single relaxed element. Its beige tone and mixed materials make that contrast feel deliberate rather than accidental.

    When coordinating accessories, consider repeating either the warm beige family or the leather and cowhide accents, rather than matching every element exactly. The design already contains several textural cues, so a restrained approach will keep the overall appearance refined.

    What to consider before choosing

    1. Check the colour role in your wardrobe. Beige is versatile, but its soft presence will work best if you regularly wear neutrals, denim, or warm earth tones. If your wardrobe is built around strong, contrasting colours, consider whether you want the cap to blend in or serve as a quieter counterpoint.
    2. Review the fit information carefully. The natural cowhide back belt is described as providing a snug, secure fit, and the product page includes a size guide. Use that guide alongside the listed item measurements before ordering.
    3. Decide how visible you want the signature pattern to be. The Monogram jacquard is tone-on-tone, so it offers a subtler expression than a high-contrast motif. This makes it suitable for buyers looking for recognisable detailing with a restrained finish.
    4. Assess the material mix. The 100% cotton crown, leather visor and top button, and natural cowhide back belt create a varied surface. If you enjoy accessories where texture contributes as much as colour, this combination may suit your styling preferences.
    5. Plan its place in your accessories rotation. Its classic summer shape is naturally suited to everyday and warm-weather outfits. Consider the occasions on which a baseball cap complements your wardrobe, and whether the beige colour will extend the range of your existing looks.
    6. Preserve the presentation. Store and handle the cap in a way that respects its mixed materials, and consult the product page for any current care guidance before cleaning or treating it. Avoid relying on assumptions about leather, cowhide, or cotton care.

    Frequently asked questions

    What is the exact product name?
    It is LOUIS VUITTON LV First Cap.

    What colour is the cap?
    The listed colour is BEIGE.

    What materials are specified?
    The material is listed as 100% cotton, with a leather visor and top button and a natural cowhide back belt.

    Is the fit adjustable?
    The product description identifies the natural cowhide back belt as supporting a snug, secure fit. Review the size guide on the product page for current fit information.

    What are the listed item measurements?
    The stated measurements are width 29 cm, height 15 cm, and depth 15 cm.

    Where is it manufactured?
    The product information lists Italy as the country of manufacture.

    Product details, measurements, packaging, sizing information, and purchase conditions may change. Please verify the current product details and purchase information on the product page before purchase.

    View LOUIS VUITTON LV First Cap at THANKS KAI to explore its current details and styling potential.

    Product: LOUIS VUITTON LV First Cap

THANKS KAI CONTACT

WeChat

위챗에서 QR코드를 스캔해 주세요.
Scan the QR code in WeChat.

Thanks Kai WeChat contact QR code위챗 열기 / Open WeChat