Author: n8n-publisher

  • A 15-Minute Shopping List by Store Route

    A 15-Minute Shopping List by Store Route

    작성자: Kai Life Editorial Team

    The simplest way to arrange a shopping list by store route is to begin with your meal notes, remove items you do not need, and then sort the remaining items in the order you normally move through the store. A 15-minute routine can be divided into four parts: prepare the notes, sort items by route, act on the finished list, and review what should carry forward.
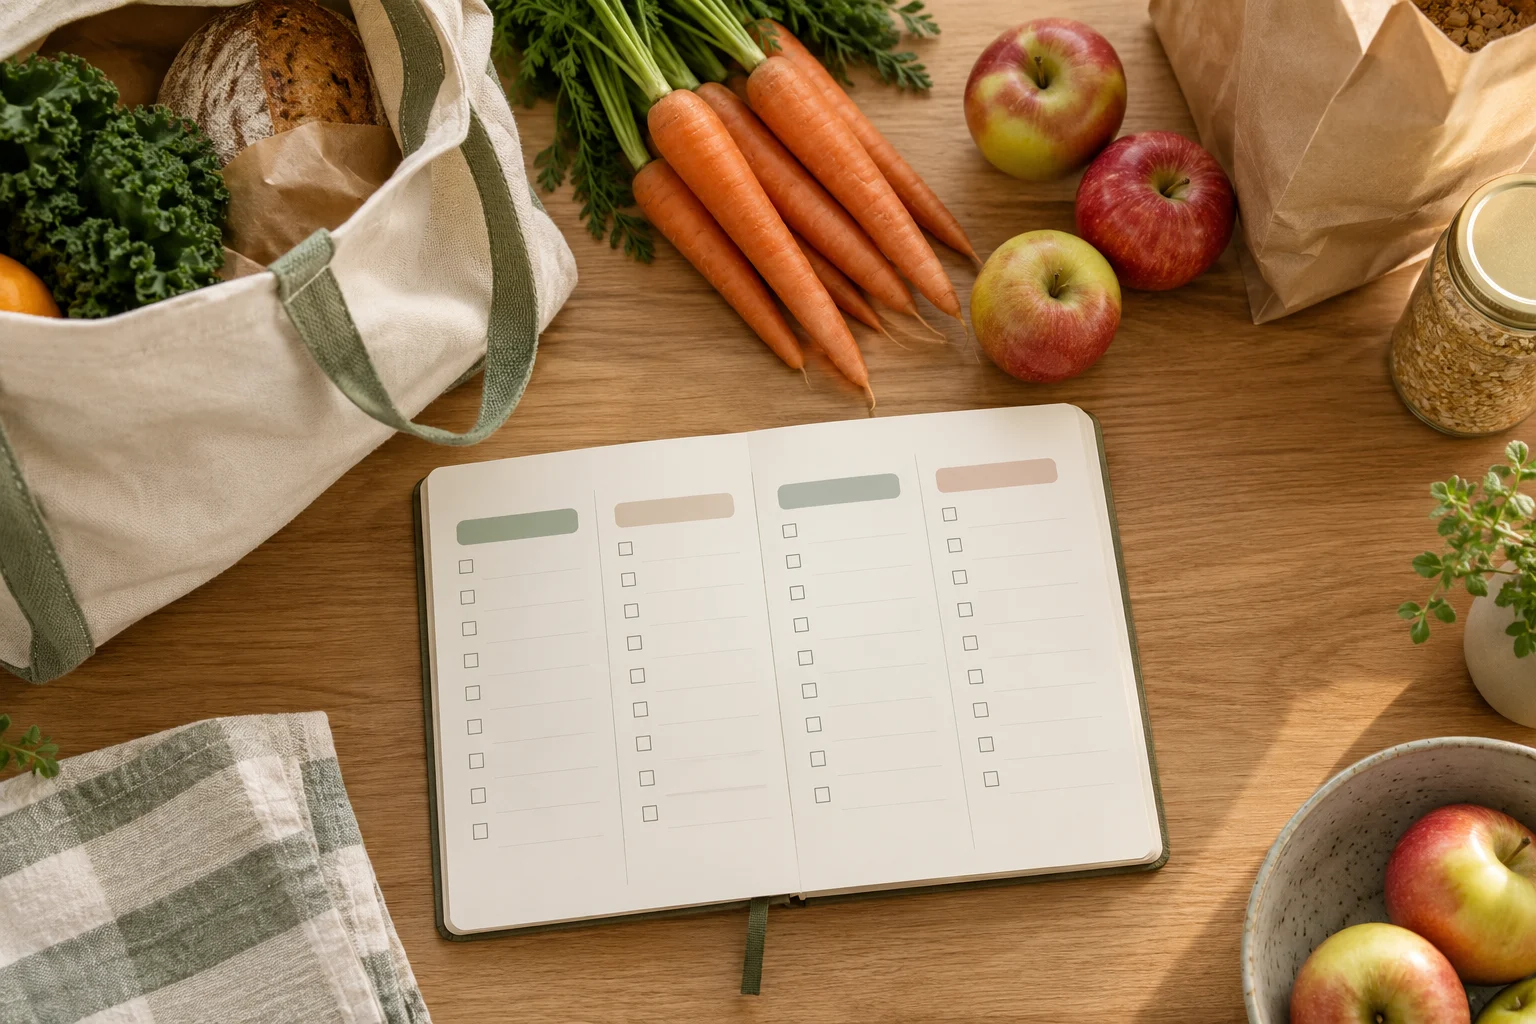
    A grocery list grouped by store section alongside ingredients

    This approach is useful when your shopping list contains a mixture of meal ingredients, household items, and reminders. Instead of grouping everything only by recipe or food type, you create a list that matches the physical sequence of your shopping trip.

    Why a store-route list can simplify kitchen organization

    A meal-based list answers the question, “Which recipe uses this item?” A route-based list answers a different question: “What do I need to pick up next?” Both views can be useful, but the route view is often easier to follow while you are moving through a familiar store.

    For example, your notes may contain ingredients for two meals, breakfast items, cleaning supplies, and a reminder to check the freezer section. If these notes remain in the order they were written, you may need to scan the whole list repeatedly. Sorting them into route sections creates a short sequence of decisions.

    The goal is not to build a detailed inventory system. It is to create a usable bridge between three kinds of notes:

    • Meal notes: dishes, ingredients, or portions you are considering.
    • Shopping items: things you actually need to look for.
    • Route cues: the sections or stops where those items are usually found.

    The prepare, sort, act, and review framework

    1. Prepare: collect the notes in one place

    Set a timer for three minutes. Gather the notes you are using for this trip, such as a phone note, paper list, recipe reminder, or message to yourself. Do not try to organize each item yet. The first aim is to create one working list.

    As you collect items, write them in plain language. “Ingredients for soup” is less useful during a trip than the individual items you expect to buy. If a meal note is still undecided, mark it with a question rather than treating it as a confirmed purchase.

    Use a quick decision label beside each item:

    • Buy: needed for the current plan.
    • Check: confirm whether you already have it.
    • Optional: useful if convenient, but not central to the plan.
    • Skip: an old note or an item that no longer fits the plan.

    2. Sort: arrange items by your actual route

    Spend about five minutes sorting the confirmed items. Use the route you usually take, not a generic store layout. One person may begin with produce, while another may enter near pantry goods or household supplies.

    Create broad route sections such as:

    • First section after entering
    • Produce or fresh items
    • Pantry and dry goods
    • Refrigerated section
    • Frozen section
    • Household or non-food items
    • Checkout-area reminders or items from another stop

    Keep the sections broad enough to scan quickly. A list with too many tiny categories can become another form of clutter. If two items are usually close together, place them in the same section even when they belong to different meal notes.

    3. Act: turn the sorted list into shopping instructions

    Spend four minutes making the list easy to use while walking. Put a square or other simple marker beside each item. Add a quantity only when it helps distinguish what you need. You can also add a short meal tag, such as “breakfast” or “Tuesday dinner,” if the purpose of the item is easy to forget.

    Keep extra information out of the main line when it slows scanning. For example, write “tomatoes — dinner” rather than adding a long explanation. If an item has a specific requirement, use one short note below it.

    Separate optional items from the main list. This protects the essential route while leaving room for flexible choices. A small “if convenient” section at the bottom can be useful for items that do not justify backtracking.

    4. Review: close the loop after the trip

    Use the final three minutes after shopping, or before your next planning session, to review the list. Mark items that were unavailable, unnecessary, or difficult to place on the route. This is not a performance score. It is a way to improve the next version of the routine.

    Ask three questions:

    • Which item was hard to find because its section was unclear?
    • Which note was not specific enough to act on?
    • Which item should be moved to an optional or recurring reminder?

    A copyable 15-minute action plan

    Use the following sequence when you want a repeatable kitchen organization routine. Adjust the time blocks if your notes are unusually long.

    Time Task Result
    0–3 minutes Collect meal notes and shopping reminders One rough list
    3–5 minutes Remove old notes and label uncertain items Buy, check, optional, and skip decisions
    5–10 minutes Group confirmed items by store route Route-based sections
    10–12 minutes Add quantities, meal tags, or short clarifications Action-ready list
    12–15 minutes Check for duplicates and create a small optional section Compact final list

    Reusable shopping-list template

    Copy this structure into a note or write it on paper. Replace the section names with the route you actually use.

    SHOPPING TRIP: __________    DATE: __________
    
    FIRST SECTION
    [ ] ____________________
    [ ] ____________________
    
    PRODUCE OR FRESH ITEMS
    [ ] ____________________   meal: __________
    [ ] ____________________   meal: __________
    
    PANTRY OR DRY GOODS
    [ ] ____________________
    [ ] ____________________
    
    REFRIGERATED
    [ ] ____________________
    [ ] ____________________
    
    FROZEN
    [ ] ____________________
    
    HOUSEHOLD OR OTHER STOP
    [ ] ____________________
    
    CHECK BEFORE BUYING
    [ ] ____________________
    
    OPTIONAL IF CONVENIENT
    [ ] ____________________
    
    AFTER THE TRIP
    Unavailable: ____________________
    Move or remove next time: ____________________

    Small adjustments for different shopping styles

    If you shop for several meals at once

    Keep the route as the main structure and add a short meal label after each item. This preserves the movement order while helping you remember why an item is on the list. A separate meal section can be added only for ingredients that require a decision before buying.

    If your shopping trip includes more than one store

    Separate the list by stop before sorting each store internally. Use headings such as “Store A,” “market,” or “household stop.” Within each heading, keep the route order that matches that location. This prevents items from different stops from blending into one long list.

    If you often change your plan while shopping

    Leave space for substitutions or optional choices. The main list can contain the planned items, while a small flexible section holds alternatives. This keeps a change from forcing you to rewrite the whole list.

    Quick checklist before you leave

    • Have all current meal notes been collected?
    • Have old or duplicate items been removed?
    • Are uncertain items marked for checking?
    • Do the headings follow your usual store route?
    • Are optional items separated from the main list?
    • Can each line be understood at a quick glance?
    • Is there a short space for unavailable items or next-trip notes?

    FAQ

    Should I organize the list by recipe or by store section?

    Use the structure that supports the task in front of you. Recipe grouping helps during meal planning, while store-route grouping helps during shopping. A practical compromise is to use store sections as the main headings and add a brief meal label beside items that need context.

    What if I do not know the store layout?

    Start with broad areas rather than exact aisles. After the trip, note where misplaced items were found and adjust the headings gradually. The route can become more specific as you learn what is useful to you.

    Do I need a shopping-list app?

    No special tool is required for this method. A paper list, phone note, or other simple format can work if it lets you group items and mark them as you go. Choose the format that is easiest to update before and during the trip.

    Conclusion

    A route-based shopping list is a small kitchen organization system: prepare the notes, sort items by movement, act on a concise list, and review what to change next time. The 15-minute routine works best when it stays lightweight. Use broad route sections, separate optional items, and keep meal context short so the list remains easy to scan when your attention is divided.



  • 데일리룩을 돋보이게 하는 오픈 스톤 링 선택 가이드

    골드와 플래티넘 톤, 밀키 화이트 및 블루 터쿼이즈 스톤 옵션의 오픈 링

    Open Quartz Stone Ring Waterproof Vintage 18K Gold Plated Adjustable Copper Stone Band for Women Gift는 손가락 위에 여유 있는 오픈 밴드 실루엣과 스톤 포인트를 더하는 데일리 링입니다. 상품 정보에는 구리 소재와 지르콘 메인 스톤, 클로 세팅, 18K 골드 도금 및 플래티넘 도금 옵션이 안내되어 있습니다.

    컬러는 골드와 플래티넘으로 나뉘며, 스톤은 밀키 화이트 스톤과 블루 터쿼이즈 계열 중 선택할 수 있습니다. 네 가지 조합이 있어 평소 착용하는 주얼리 톤과 옷의 분위기에 맞춰 고르기 좋습니다. 과하게 많은 액세서리를 더하기보다 하나의 링으로 손끝에 포인트를 주고 싶은 날에 특히 잘 어울리는 방향입니다.

    모델 번호는 AJ745이며, 상품 정보상 남녀 모두를 위한 링으로 소개됩니다. 기념일, 파티, 웨딩, 생일, 졸업, 집들이 등 다양한 선물 및 행사 상황이 안내되어 있어, 받는 사람의 평소 스타일을 고려한 주얼리 선택지로 살펴볼 수 있습니다.

    디자인과 옵션 살펴보기

    • 오픈 밴드 디자인: 밴드가 완전히 닫히지 않은 형태로, 손끝에 가볍고 현대적인 인상을 연출합니다.
    • 두 가지 메탈 톤: 골드는 따뜻하고 빈티지한 분위기를, 플래티넘은 비교적 차분하고 깔끔한 분위기를 표현하기 좋습니다.
    • 두 가지 스톤 컬러: 밀키 화이트 스톤은 부드럽고 단정한 느낌을, 블루 터쿼이즈 계열은 룩에 선명한 색감을 더하는 선택입니다.
    • 지르콘 메인 스톤: 상품 정보에 메인 스톤으로 ZIRCON이 기재되어 있으며, 클로 세팅 방식이 안내되어 있습니다.
    • 데일리 중심의 트렌디 스타일: 스타일 항목은 Trendy로 안내되어 있어 캐주얼한 데일리룩부터 행사 중심의 차림까지 폭넓게 조합할 수 있습니다.
    • 모델 번호 AJ745: 옵션을 확인하거나 상품 페이지에서 상세 정보를 대조할 때 활용할 수 있는 식별 정보입니다.

    상품 정보에는 플래티넘 플레이트, 로즈 골드 플레이트, 18K 골드 플레이트가 도금 항목으로 함께 기재되어 있습니다. 실제 선택 화면에서 제공되는 옵션과 표기를 구매 전 다시 확인하는 것이 좋습니다.

    스타일링과 활용 아이디어

    출근과 일상에는 골드·밀키 화이트 조합이 무난합니다. 아이보리 셔츠, 베이지 니트, 브라운 재킷처럼 따뜻한 색감의 옷과 매치하면 링의 골드 톤이 자연스럽게 이어집니다. 시계나 얇은 팔찌를 함께 착용할 때는 비슷한 메탈 계열을 선택하면 손목과 손가락의 인상이 정돈됩니다.

    데님과 티셔츠에는 플래티넘·블루 터쿼이즈 조합을 시도해 보세요. 차가운 메탈 톤과 블루 계열 스톤이 캐주얼한 옷차림에 색 포인트를 만들어 줍니다. 액세서리를 여러 개 레이어링하기보다 이 링을 중심으로 두고, 나머지는 작은 디자인으로 줄이면 스톤이 더 잘 보입니다.

    행사나 선물용으로는 받는 사람의 취향을 우선으로 살펴보는 것이 좋습니다. 미니멀하고 차분한 스타일을 선호한다면 플래티넘과 밀키 화이트, 색감 있는 포인트를 좋아한다면 골드와 블루 터쿼이즈를 후보로 비교해 볼 수 있습니다. 기념일, 생일, 졸업, 웨딩 등 상황에 맞춰 포장이나 카드와 함께 준비하면 선택의 의미를 더하기 좋습니다.

    착용 후에는 화장품이나 향수 등이 묻은 상태로 오래 두지 말고, 부드러운 천으로 가볍게 닦은 뒤 다른 주얼리와 부딪히지 않도록 따로 보관하는 방식이 안전합니다. 도금 제품인 만큼 세척제, 거친 표면, 강한 마찰을 피하고, 스톤과 밴드의 상태를 가끔 확인해 주세요.

    구매 전 체크 포인트

    1. 먼저 색 조합을 정하세요. 메탈 톤과 스톤 컬러가 각각 분위기를 크게 좌우하므로, 자주 입는 옷과 기존 주얼리 색을 기준으로 비교해 보세요.
    2. 오픈 링의 착용감을 확인하세요. 조절 가능한 디자인으로 소개되어 있지만, 손가락에 너무 느슨하거나 압박감이 생기지 않는지 상품 페이지의 최신 옵션 및 안내를 확인해야 합니다.
    3. 소재 표기를 구분하세요. 주얼리 주요 소재는 Copper로, 메인 스톤은 ZIRCON으로 안내되어 있습니다. 도금 항목과 실제 선택 옵션의 표기를 혼동하지 않도록 확인하세요.
    4. 착용 목적을 정하세요. 데일리룩의 포인트인지, 선물이나 행사 착장용인지에 따라 스톤 색과 메탈 톤을 고르면 선택이 쉬워집니다.
    5. 관리 환경을 고려하세요. 물, 땀, 화장품, 마찰에 노출되는 상황이 잦다면 착용 후 닦고 건조한 곳에 보관하는 관리 습관을 함께 준비하세요.
    6. 상품 페이지의 최신 정보를 확인하세요. 사이즈, 옵션 구성, 구매 조건처럼 제공된 자료에 없는 세부 사항은 결제 전에 반드시 상품 페이지에서 확인해야 합니다.

    자주 묻는 질문

    어떤 스톤 옵션이 있나요?

    밀키 화이트 스톤과 블루 터쿼이즈 계열이 안내되어 있습니다. 각각 골드 또는 플래티넘 톤과 조합할 수 있습니다.

    소재와 세팅 방식은 무엇인가요?

    주얼리 주요 소재는 구리이며, 메인 스톤은 지르콘, 세팅 방식은 클로 세팅으로 안내되어 있습니다.

    남성도 착용할 수 있나요?

    상품 정보의 성별 항목에는 남성용과 여성용이 모두 기재되어 있습니다. 다만 실제 착용감과 옵션은 상품 페이지의 최신 안내를 확인하세요.

    선물용으로 적합한가요?

    상품 정보에는 기념일, 생일, 졸업, 웨딩, 집들이 등 여러 선물 및 행사 상황이 안내되어 있습니다. 받는 사람의 메탈 톤과 색상 취향을 먼저 고려해 보세요.

    관리할 때 주의할 점은 무엇인가요?

    착용 후 부드러운 천으로 가볍게 닦고, 강한 마찰이나 거친 세척을 피하며 다른 액세서리와 분리해 보관하는 방법을 권합니다.

    구매 전 상품 페이지에서 현재 옵션, 소재 및 세부 상품 정보, 사이즈, 구매 조건을 반드시 확인해 주세요.

    스타일에 맞는 옵션과 최신 상품 정보를 확인하려면 THANKS KAI에서 제품을 살펴보세요.

    Product: Open Quartz Stone Ring Waterproof Vintage 18K Gold Plated Adjustable Copper Stone Band for Women Gift

  • A 15-Minute Home Organization Routine for Seasonal Items

    A 15-Minute Home Organization Routine for Seasonal Items

    작성자: Kai Life Editorial Team

    For a short seasonal tidy-up, use one visible staging area, sort items into four decisions, and give each group a specific storage destination. A practical 15-minute home organization routine is: prepare for 2 minutes, sort for 5 minutes, act for 6 minutes, and review for 2 minutes. The aim is not to reorganize the entire home; it is to create a clear next step for the seasonal items currently taking up space.

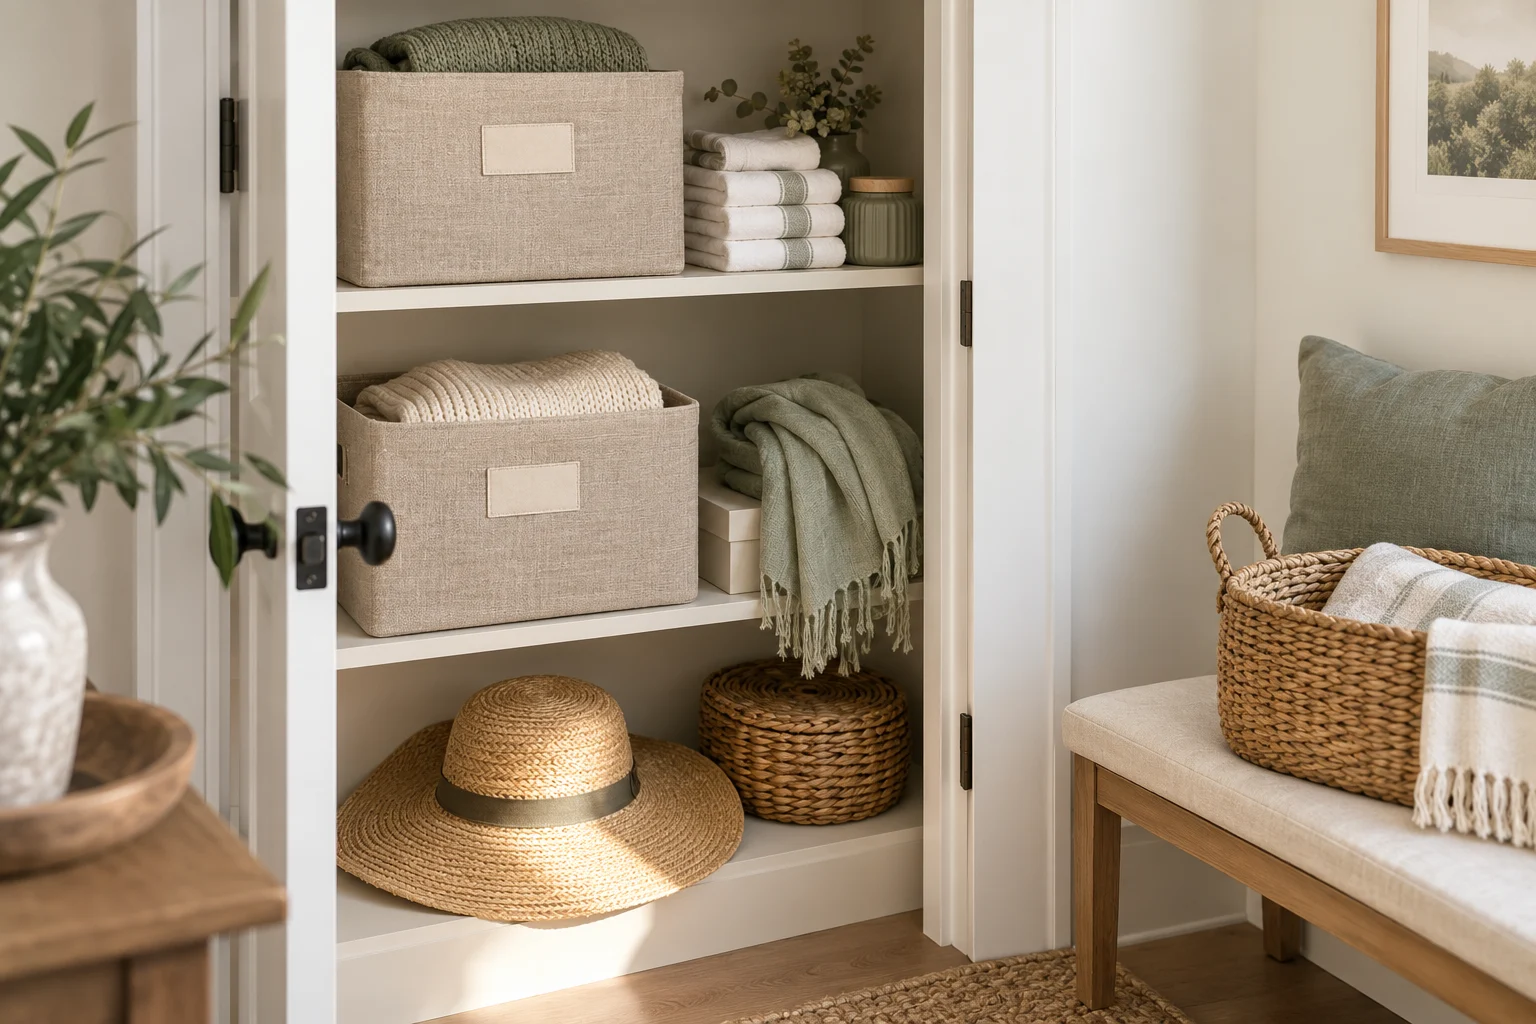
    Seasonal clothes and accessories sorted into storage baskets

    Why seasonal items create friction in small homes

    Seasonal household items often move between useful and unused states. A fan, blanket, picnic set, humidifier, holiday decoration, or rain gear may be needed later, but it does not need to occupy the easiest-to-reach space today. When these items are stored without a shared rule, several small problems appear:

    • Items from different seasons become mixed together.
    • A container is opened repeatedly because its contents are unclear.
    • Useful items are stored too far away, while rarely used items occupy convenient space.
    • One item is kept in a different place from its accessories.
    • A short tidy-up turns into a full-room project.

    A calmer home flow comes from reducing decisions at the moment of putting something away. The system below focuses on four questions: What is this for? When will it be used? How often will it be accessed? Where can it return without blocking daily movement?

    The four-part storage rule

    1. Prepare: define the small project

    Choose one seasonal category or one storage zone. Examples include cold-weather bedding, warm-weather accessories, outdoor meal items, or holiday decorations. Avoid combining several unrelated categories in the same 15-minute session.

    Set out one temporary staging area, such as a clear section of the floor, a table corner, or an empty chair. Gather only what you need to move the items: a cloth if dust is visible, labels or a marker, and an empty bag or box for items that need a different decision. You do not need to buy new storage equipment before testing the system.

    2. Sort: make four decisions

    Handle each item once when possible and place it into one of these groups:

    • Use soon: The item is likely to be needed in the next part of the season or within the next few weeks.
    • Store away: The item is useful but not part of the current routine.
    • Move elsewhere: The item belongs with another category, room, or household member.
    • Review later: The item needs a separate decision because it is damaged, duplicated, incomplete, or no longer relevant.

    The “review later” group prevents a storage session from becoming a difficult decluttering session. Put those items together and give them a visible note or a later review date. The purpose is to contain the uncertainty, not to hide it inside a box.

    3. Act: match access to storage

    Place “use soon” items where they can be reached without disturbing other stored items. Place “store away” items in a less convenient location, provided the area is dry, stable, and suitable for the item. Keep sets together when a part is difficult to replace or easy to lose.

    For each container, use a label that answers a useful question. “Winter” may be too broad if the container holds several unrelated objects. “Winter bedding—guest room” or “Outdoor picnic items” gives a clearer retrieval cue. If you do not have labels, write the category on a piece of paper and place it where the contents can be seen.

    4. Review: check the home flow

    Stand back and look at the route you use most often. Check whether the stored items block a doorway, drawer, cleaning tool, laundry path, or frequently used shelf. Then ask whether the next person in the household could find the category without an explanation. If not, change the location or improve the label.

    The 15-minute action plan

    Time Action Decision rule
    0–2 minutes Prepare one category and one staging area. Keep the project narrow enough to finish a visible part.
    2–7 minutes Sort each item into use soon, store away, move elsewhere, or review later. Do not solve every uncertain item during the sorting phase.
    7–13 minutes Return items to destinations and group accessories. Place frequent-use items closer to the point of use.
    13–15 minutes Label, remove the staging area, and check the walking route. Leave no temporary pile without a next action.

    Use a timer if it helps you stop at the planned point. When the timer ends, unfinished work can become the next session’s starting point. A short routine stays useful when it has a clear stopping boundary.

    Storage rules that work in a one- or two-person home

    Give each category a home

    Choose one primary location for each seasonal category. The location can be a shelf, drawer, cabinet section, under-bed area, or another suitable storage zone. A primary home reduces the chance that similar items will be distributed across several places.

    Store by retrieval effort, not only by size

    A small item may deserve an easy-to-reach location if it is used often. A large item may be acceptable in a harder-to-reach location if it is used briefly during one part of the year. Consider both physical size and retrieval frequency before assigning a space.

    Keep components with the main item

    Place cables, covers, spare parts, attachments, and related instructions with the item they support when practical. If a component needs a separate location, add a note to the main container. This reduces the chance of finding the main item but not the part needed to use it.

    Leave a little decision space

    Do not fill a storage area so tightly that returning one item requires removing several others. Some open space makes future seasonal changes easier and provides room for items that genuinely belong in the category.

    Use visible cues for shared spaces

    In a two-person home, a clear label or category name can be more useful than relying on memory. Use familiar words and avoid labels that describe the storage container rather than its contents. “Rainy-day entry items” communicates more than “blue box.”

    Copyable seasonal storage checklist

    Copy this checklist into a note or print it for the next short tidy-up:

    • [ ] Choose one seasonal category.
    • [ ] Select one staging area.
    • [ ] Gather a marker, label, cloth, and review bag or box.
    • [ ] Set a 15-minute boundary.
    • [ ] Sort items into use soon, store away, move elsewhere, or review later.
    • [ ] Keep important accessories with the main item.
    • [ ] Move frequent-use items closer to their point of use.
    • [ ] Place stored items in a dry, stable, suitable location.
    • [ ] Label the container or shelf with a clear category name.
    • [ ] Give review-later items a separate follow-up note.
    • [ ] Remove the staging area.
    • [ ] Check that doors, drawers, walkways, and daily-use surfaces remain clear.

    What to do when the routine does not fit

    Some items need special handling. Fragile objects may need protective packing. Fabrics may need to be clean and fully dry before storage. Items affected by moisture, heat, weight, or pests should be placed only in a location suitable for their material. If you are unsure whether a location is appropriate, pause the storage decision and check the item’s care guidance.

    If the category cannot be sorted in 15 minutes, reduce the scope. Work on one shelf, one drawer, or one type of item instead of extending the session indefinitely. If the same category repeatedly creates confusion, the issue may be the storage rule rather than the amount of storage. Consider separating items by point of use or by season instead of adding another mixed container.

    FAQ

    Should I buy storage containers first?

    Not necessarily. Sort the items and test a destination with the storage already available. This reveals the category’s actual shape and access needs before you choose any additional container.

    What if I cannot decide whether to keep an item?

    Place it in the review-later group rather than making a rushed decision. Keep that group separate from active seasonal storage and record the follow-up action. A contained delay is easier to manage than an unclear box.

    Where should items used every season go?

    Keep them in a location that is easy to reach during the relevant period. If the item is used frequently, point-of-use storage may be more useful than a distant storage area, even when the item is seasonal.

    How often should I repeat the routine?

    Repeat it when the season changes, when a storage zone becomes difficult to use, or when a category gains several new items. The routine can also be used after returning from a trip or completing a temporary household project.

    Conclusion

    A practical home organization system for seasonal items does not need a large reset. Start with one category, sort by the next useful decision, return items to a clear home, and review the walking route before stopping. The four-part sequence—prepare, sort, act, and review—keeps a 15-minute tidy-up focused while creating storage rules that can be repeated across the home.


  • A Refined Butterfly Necklace for Everyday Styling

    Gold-colour butterfly pendant necklace with a heart-shaped detail and link chain

    The French luxury 18K gold titanium steel necklace for women heart-shaped butterfly pendant collar chain trendy stainless steel brings a playful motif into a polished everyday jewellery wardrobe. Its visual identity is built around a butterfly pendant, a heart-shaped detail, a gold-colour finish and a link chain, creating a piece that can move easily between relaxed daytime dressing and more considered evening looks.

    Listed by Yuanchen as a women’s pendant necklace, it belongs naturally in a rotation of daily accessories. The design is expressive without relying on an elaborate setting: the butterfly remains the focal point, while the collar-chain silhouette gives the necklace a defined presence around the neckline. It is a thoughtful choice for anyone who prefers jewellery with a recognisable shape and a modern, trend-led mood.

    The product information lists stainless steel as the jewellery main material, gold-colour plating, a link-chain construction and a bezel setting. The listing also identifies the application as casual, making this an adaptable accent for everyday outfits, personal styling, and OOTD-inspired looks.

    Design details that define the look

    • Butterfly focal point: The butterfly shape gives the necklace its signature character and introduces a light, feminine note to simple outfits.
    • Heart-shaped pendant detail: The heart and butterfly imagery work together to create a romantic visual language while remaining clearly trend-oriented.
    • Gold-colour finish: The warm-toned appearance pairs naturally with neutral clothing and can be coordinated with other gold-colour accessories.
    • Link-chain structure: The link chain adds definition around the neck and supports the pendant-led composition.
    • Necklace category: The listing classifies it as a pendant necklace for women, making the styling intention immediately clear.
    • Casual versatility: Its stated application is casual, so it can serve as an everyday finishing touch rather than an occasion-specific piece.
    • Recognisable styling language: The butterfly motif, gold-colour plating and trendy style create a cohesive accessory statement without requiring a heavily layered look.

    These details make the necklace particularly appealing when an outfit needs one central accent. The pendant can carry the visual interest on its own, while the chain offers enough structure to keep the overall impression composed.

    Ways to wear it through the week

    With a clean everyday uniform: Pair the necklace with a plain top, knitwear or a simple shirt when you want a small but visible point of distinction. The butterfly pendant can soften minimal clothing and give a familiar daily outfit a more personal finish.

    For an OOTD-focused look: Let the necklace become the detail that ties the outfit together. A restrained base allows the heart-shaped butterfly pendant to stand out, while a coordinated gold-colour watch, bracelet or small earrings can create visual continuity.

    With feminine styling: The heart and butterfly motifs suit dresses, softly shaped blouses and other romantic wardrobe pieces. Keep the rest of the jewellery considered so the pendant remains the clearest focal point.

    With casual layers: The necklace can be worn against a T-shirt, fine knit or open neckline to add definition without changing the relaxed character of the outfit. When layering clothing, use the pendant as a neat centre point rather than competing with busy prints.

    For a polished contrast: Style the gold-colour necklace with tailored separates, a dark top or a crisp monochrome palette. The contrast between a structured outfit and a playful butterfly motif can make the overall look feel deliberate and contemporary.

    When coordinating accessories, begin with the pendant’s colour and shape. Gold-colour pieces can echo its finish, while simpler accessories help preserve balance. If you choose to layer necklaces, consider keeping neighbouring chains visually understated so the heart-shaped butterfly remains easy to read.

    How to decide if it suits your collection

    Start with the motif. A butterfly is a distinctive choice, so this necklace will suit a jewellery collection that welcomes expressive symbols rather than only discreet, geometric forms. The additional heart-shaped detail gives it a romantic direction, making it especially relevant if your wardrobe includes soft, feminine or playful elements.

    Next, consider colour coordination. The listing specifies gold-colour plating, which is most straightforward to integrate with warm-toned jewellery and clothing palettes such as cream, beige, brown, black and denim. If your existing accessories are primarily silver-colour, decide whether you want this necklace to introduce contrast or whether you prefer to build a coordinated gold-colour grouping.

    Review the intended setting. The product information describes the application as casual and the style as trendy. That positioning makes it a natural candidate for daily outfits, weekend dressing and OOTD styling. It may be less suitable if you are specifically seeking a restrained, formal or highly traditional necklace.

    Finally, check the product page for the current presentation and purchase information before ordering. The listing identifies stainless steel as the jewellery main material and provides the model number jf110526, brand name yuanchen and origin as Guangdong, China. Use the current product page to confirm any details you need for your selection.

    Frequently asked questions

    What is the main motif?
    The necklace features a butterfly pendant with a heart-shaped design detail.

    What finish is listed?
    The product information lists gold-colour plating.

    What material is specified?
    The jewellery main material is listed as stainless steel. The product title also uses the wording “titanium steel,” so readers should consult the current product page for the latest material presentation.

    What type of chain does it use?
    The listing identifies the chain type as a link chain.

    Is it intended for everyday wear?
    The application is listed as casual, and the product appears in a daily necklace collection, making it suited to everyday styling.

    Does it include a certificate?
    The supplied product information lists the certificate type as none.

    Which jewellery category does it belong to?
    It is classified as a women’s pendant necklace.

    Please verify the current product details, material description, finish, presentation and purchase information on the product page before purchase.

    View the French luxury 18K gold titanium steel necklace for women heart-shaped butterfly pendant collar chain trendy stainless steel at THANKS KAI and consider how its butterfly detail could complement your everyday styling.

    Product: French luxury 18K gold titanium steel necklace for women heart-shaped butterfly pendant collar chain trendy stainless steel

  • 셀프케어 루틴을 위한 15분 휴식 계획 메모법

    셀프케어 루틴을 위한 15분 휴식 계획 메모법

    작성자: Kai Life 편집팀

    바쁜 날에도 쉬는 시간을 확보하려면 하루 전체를 완벽하게 재설계하기보다, 일정 메모에 15분짜리 휴식 한 칸을 먼저 표시하는 방법이 현실적입니다. 이때 휴식은 남는 시간에 하는 보상이 아니라, 다른 일정처럼 미리 적어 두고 상황에 따라 조정하는 작은 약속으로 다루면 됩니다. 아래의 준비·분류·실행·점검 4단계를 사용해 오늘의 셀프케어 루틴을 만들어 보세요.

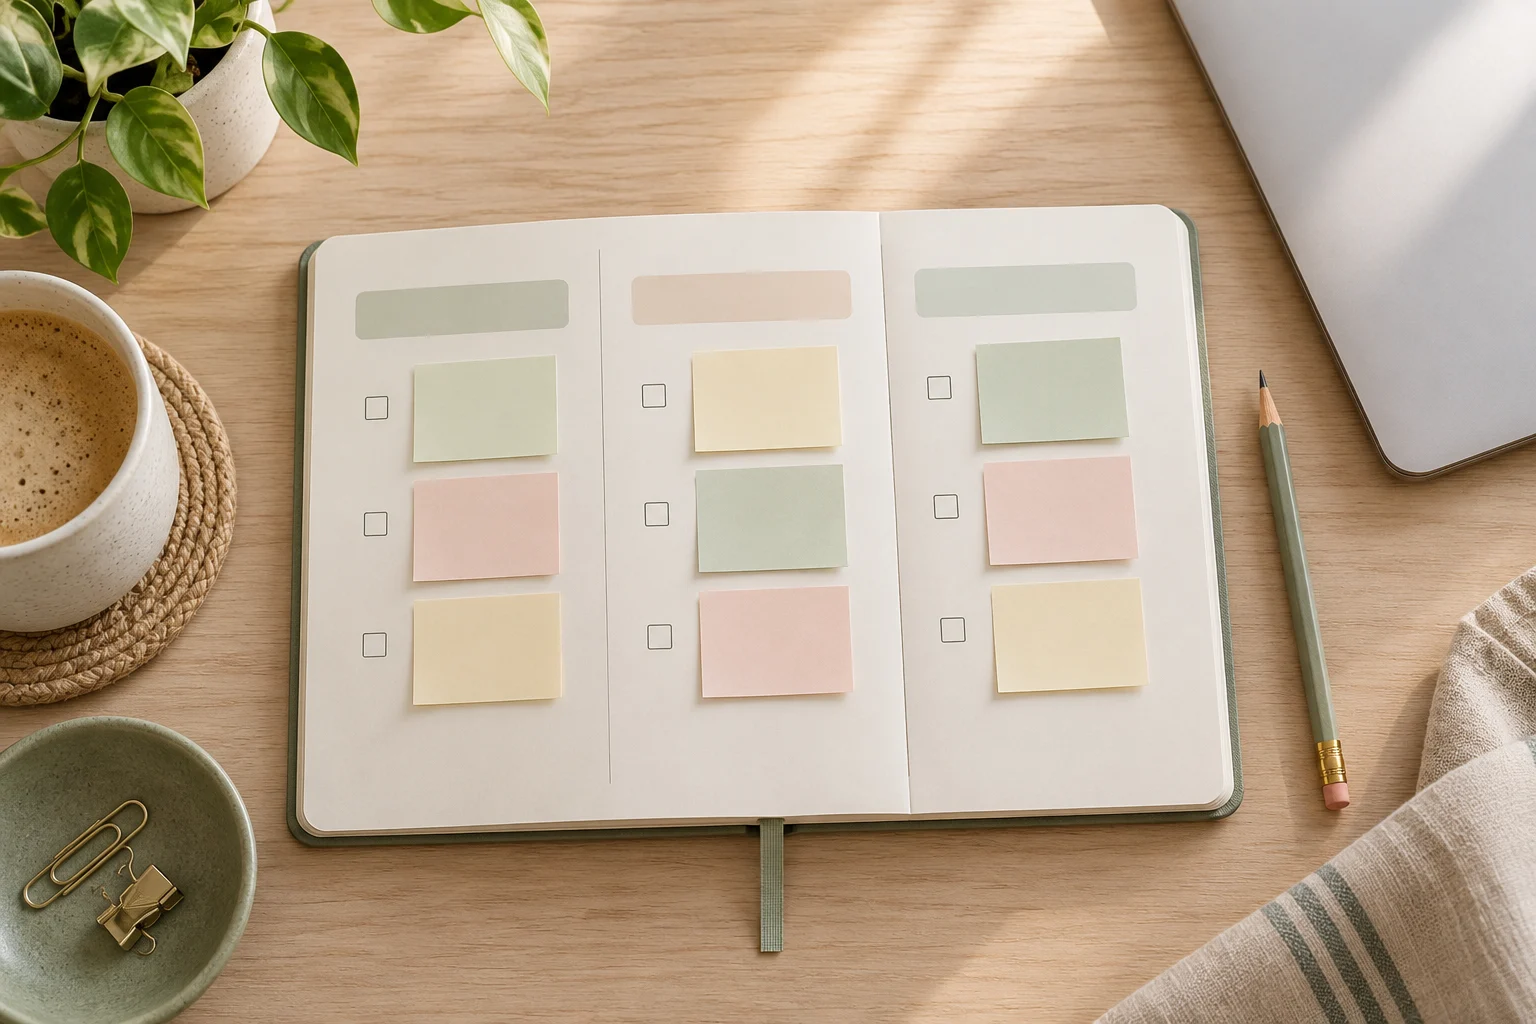
    휴식 시간을 표시한 일정표와 창가의 찻잔

    왜 15분 단위로 휴식을 메모할까

    ‘충분히 쉬어야지’처럼 범위가 넓은 계획은 바쁜 날에 쉽게 밀릴 수 있습니다. 반면 15분은 시작과 종료 시점을 정하기 쉽고, 긴 준비가 필요한 활동보다 선택지가 많습니다. 다만 15분이 모든 사람에게 충분한 휴식량이라는 뜻은 아닙니다. 일정이 매우 빽빽한 날에는 짧은 회복 시간을 확보하는 출발점으로 활용하고, 여유가 있는 날에는 더 긴 휴식이나 수면을 별도로 계획해야 합니다.

    핵심은 휴식의 질을 평가하기 전에 휴식 시간을 눈에 보이게 만드는 것입니다. 캘린더, 메모 앱, 종이 수첩처럼 이미 사용하는 도구 하나만 골라도 됩니다. 도구를 새로 정하고 꾸미는 데 시간을 쓰기보다, 오늘 실제로 확인할 수 있는 곳에 간단히 기록하세요.

    4단계 셀프케어 루틴: 준비·분류·실행·점검

    1. 준비: 오늘의 고정 일정을 먼저 적기

    먼저 업무, 이동, 식사, 약속처럼 변경하기 어려운 일정을 적습니다. 이 목록을 바탕으로 빈 시간이 아니라 전환이 끝난 직후나 다음 일정까지 방해가 적은 구간을 찾습니다. 예를 들어 귀가 직후에는 바로 집안일을 시작하기보다 15분을 비워 둘 수 있고, 점심 뒤에는 화면을 보지 않는 짧은 시간을 둘 수 있습니다.

    • 오늘 반드시 해야 하는 일정
    • 시간이 정해진 약속과 이동
    • 미뤄도 되는 일
    • 이미 지친다고 느끼는 시간대

    마지막 항목은 자기 상태를 진단하려는 목적이 아니라, 휴식이 필요한 구간을 찾기 위한 참고 메모입니다.

    2. 분류: 휴식 메뉴를 세 가지로 나누기

    휴식 활동을 그때그때 고르면 선택 자체가 피곤할 수 있습니다. 아래처럼 세 가지 메뉴를 미리 만들어 두면 일정에 넣기 쉽습니다.

    분류 활동 예시 적합한 상황
    정지형 눈을 감고 앉기, 창밖 보기, 조용히 차 마시기 자극을 줄이고 싶을 때
    가벼운 움직임 목과 어깨 풀기, 천천히 걷기, 물 마시러 이동하기 오래 앉아 있었을 때
    정리형 내일 할 일 한 줄 적기, 책상 한 구역 정리하기 생각이 많아 마무리가 필요할 때

    정리형 활동은 생산성을 높이기 위한 추가 업무가 되지 않도록 범위를 작게 정합니다. ‘방 정리’ 대신 ‘책상 위 컵과 종이 치우기’처럼 종료 조건을 분명히 적는 방식입니다.

    3. 실행: 일정 메모에 휴식의 시작과 종료를 적기

    휴식 메모는 짧고 구체적으로 작성합니다. ‘셀프케어’라고만 쓰기보다 시간·장소·행동을 함께 적으면 실행 여부를 확인하기 편합니다.

    19:30–19:45 / 거실 의자 / 휴대전화 없이 차 마시며 앉기

    휴식 중 다른 일을 함께 처리하지 않는 것이 기본이지만, 모든 상황에서 지키기 어려울 수 있습니다. 가족의 연락이나 안전 확인처럼 대응이 필요한 경우에는 휴식 시간을 다시 잡아도 됩니다. 중요한 것은 계획을 지키지 못한 날을 실패로 기록하기보다, 변경된 시간을 다시 표시하는 것입니다.

    4. 점검: 활동보다 부담의 변화를 짧게 기록하기

    실행 후에는 긴 감상문을 쓰지 말고 한 줄만 남깁니다. 예를 들어 ‘조용한 활동이 편했다’, ‘이동 직후에는 바로 앉기 어려웠다’, ‘화면을 보면 쉬는 느낌이 적었다’처럼 관찰 가능한 내용이면 충분합니다. 만족도를 숫자로 평가해도 되지만, 점수 자체를 목표로 삼을 필요는 없습니다.

    • 예정한 시간에 시작했는가?
    • 활동이 실제로 부담을 줄였는가?
    • 다음에는 시간을 앞당기거나 늦출 필요가 있는가?
    • 휴식 활동이 또 다른 할 일이 되지는 않았는가?

    15분 실행표: 오늘 바로 복사해 쓰기

    아래 표는 하루 계획을 세울 때 그대로 옮겨 적을 수 있는 기본 양식입니다. 모든 칸을 채울 필요는 없으며, 일정이 불확실한 날에는 휴식 후보 하나만 표시해도 됩니다.

    단계 기록할 내용 예시
    준비 휴식 전 일정 18:30 귀가, 19:00 저녁
    분류 휴식 메뉴 정지형: 음악 없이 앉기
    실행 시간·장소·행동 18:35–18:50, 의자, 물 마시며 쉬기
    점검 한 줄 관찰 귀가 직후 5분 정리가 먼저 필요함

    복사 가능한 체크리스트

    • [ ] 오늘의 고정 일정과 이동 시간을 적었다.
    • [ ] 15분 휴식 후보를 한 곳에 표시했다.
    • [ ] 휴식 활동을 하나만 골랐다.
    • [ ] 시작과 종료 시간을 적었다.
    • [ ] 휴대전화나 알림을 어떻게 할지 정했다.
    • [ ] 실행 후 한 줄만 점검했다.
    • [ ] 놓쳤다면 다른 시간으로 다시 옮겼다.

    상황별 조정 방법

    일정이 계속 바뀌는 날

    고정된 시각 대신 조건으로 기록하세요. ‘회의가 끝난 뒤 15분’, ‘저녁 식사 전’, ‘귀가 후 가방을 내려놓은 다음’처럼 적으면 일정이 조금 바뀌어도 휴식의 위치를 찾기 쉽습니다. 단, 다음 약속 직전에는 예상치 못한 지연을 고려해 여유를 남겨 두는 편이 안전합니다.

    저녁에 할 일이 많은 날

    저녁 루틴 전체를 바꾸려 하지 말고, 가장 먼저 시작되는 행동 앞에 15분을 붙입니다. 예를 들어 설거지나 정리 전에 앉아서 호흡을 가다듬고, 이후 해야 할 일을 한 가지씩 진행합니다. 휴식 뒤 집안일을 해야 한다는 사실이 부담스럽다면, 휴식 메모에 ‘이후 설거지 10분’처럼 다음 행동을 하나만 덧붙여 전환을 돕습니다.

    휴식 중에도 불안하거나 집중이 어려운 날

    가만히 있는 활동이 맞지 않을 수 있습니다. 이때는 천천히 걷기, 물 마시기, 창문을 여는 등 몸을 가볍게 움직이는 메뉴로 바꿔 보세요. 특정 활동이 반복해서 불편하거나 일상 기능에 영향을 주는 상태가 이어진다면, 이 메모법으로 해결하려 하기보다 적절한 전문적인 도움을 검토하는 것이 좋습니다.

    일주일 점검은 세 문장으로 끝내기

    매일 기록을 자세히 분석할 필요는 없습니다. 일주일에 한 번 아래 세 문장만 완성하면 다음 계획을 조정할 수 있습니다.

    1. 가장 실행하기 쉬웠던 시간대는 ________였다.
    2. 가장 부담이 적었던 휴식 메뉴는 ________였다.
    3. 다음 주에는 휴식 시간을 ________ 방식으로 바꾸겠다.

    점검의 목적은 잘한 날과 못한 날을 가르는 것이 아니라, 본인의 생활 흐름에 맞는 조건을 찾는 데 있습니다. 어떤 날에는 15분을 지키기 어렵고, 다른 날에는 더 긴 휴식이 필요할 수 있습니다. 기록은 그 차이를 확인하기 위한 도구로 사용하세요.

    FAQ

    휴식 시간을 매일 꼭 같은 시각에 넣어야 하나요?

    아닙니다. 일정이 일정한 사람은 같은 시각이 편할 수 있지만, 변동이 큰 사람은 ‘귀가 후’나 ‘점심을 먹은 뒤’처럼 조건형 메모가 더 적합할 수 있습니다.

    15분 동안 무엇을 해야 할지 모르겠어요.

    처음에는 세 가지 메뉴만 정해 두세요. 조용히 앉기, 가볍게 걷기, 한 줄 기록처럼 준비물이 적고 종료가 분명한 활동부터 시작하면 선택 부담을 줄일 수 있습니다.

    휴식 시간을 놓치면 계획이 실패한 것인가요?

    그렇지 않습니다. 일정이 바뀌었다면 메모를 취소하거나 다른 시간으로 옮기면 됩니다. 다만 다음 일정에 늦지 않도록 이동과 준비 시간을 함께 고려하세요.

    셀프케어 루틴을 더 길게 만들고 싶다면 어떻게 하나요?

    처음부터 활동을 많이 추가하기보다, 15분 메모가 생활에 맞는지 먼저 확인하세요. 실행이 비교적 편해진 뒤 수면, 식사, 운동, 사람과의 연락처럼 다른 돌봄 요소를 별도로 검토하는 편이 관리하기 쉽습니다.

    마무리

    바쁜 날의 셀프케어 루틴은 거창한 계획보다 일정 안에 표시된 작은 휴식에서 시작할 수 있습니다. 오늘 고정 일정 하나를 적고, 실행 가능한 15분을 골라 시간·장소·행동으로 메모해 보세요. 실행하지 못한 날에는 계획을 조정하고, 실행한 날에는 한 줄만 점검하면 됩니다. 이 과정을 반복하면서 자신의 생활 리듬에 맞는 휴식 계획을 찾아가는 것이 핵심입니다.


  • 데일리 레이어드 링, 심플한 3mm 볼 포인트 스타일링 가이드

    3mm 볼 디테일이 있는 S925 Silver 및 Gold Filled 표기 링

    Cute Stacking Ring 14K Gold Filled Women Simple 3mm Ball S925 Silver Band Ring은 일상적인 옷차림에 가볍게 더하기 좋은 클래식 링입니다. 3mm 볼 디테일이 밴드 위에 또렷한 포인트를 만들면서도 디자인의 방향은 단정하게 유지해, 하나만 착용하거나 다른 링과 함께 레이어드하기 좋습니다.

    제품 데이터에는 S925 Silver와 Gold Filled가 함께 안내되어 있으며, 주얼리 메인 소재는 925 SILVER로 표기되어 있습니다. 여성용으로 안내되지만 어린이와 유니섹스 카테고리도 함께 기재되어 있으므로, 실제 선택 시에는 제품 페이지의 옵션과 상세 정보를 먼저 확인하는 것이 좋습니다.

    화려한 장식보다 손끝의 작은 리듬을 살리고 싶은 날, 데일리룩에 자연스러운 포인트를 더하고 싶은 날에 어울리는 아이템입니다. 아래에서는 디자인 특징을 바탕으로 어울리는 착용 장면과 선택 기준, 다른 액세서리와의 조합 아이디어를 정리했습니다.

    디자인과 소재를 살펴보는 포인트

    3mm 볼 디테일이 만드는 선명한 포인트

    이 링의 가장 눈에 띄는 요소는 3mm 볼 형태의 장식입니다. 매끈한 밴드 위에 반복감 있는 볼 디테일이 더해져, 손을 움직일 때 단순한 밴드와는 다른 인상을 줍니다. 다만 전체적인 형태는 클래식 스타일로 소개되어 있어, 포인트가 지나치게 복잡한 디자인을 원하지 않는 경우에도 비교적 쉽게 코디 방향을 잡을 수 있습니다.

    하나의 링부터 레이어드까지

    제품명에 ‘Stacking Ring’이 포함된 만큼 여러 링을 함께 연출하는 구성이 잘 어울립니다. 먼저 한 손가락에 단독으로 착용해 3mm 볼 장식의 존재감을 확인한 뒤, 폭이 다른 심플한 링을 인접한 손가락에 더하는 방식이 자연스럽습니다. 이미 손에 착용하는 액세서리가 있다면 장식이 많은 제품끼리 겹치기보다, 한쪽은 이 링으로 포인트를 주고 나머지는 간결한 디자인으로 정리하면 균형을 맞추기 좋습니다.

    소재 표기는 구매 전 교차 확인

    상세 정보에는 S925 Silver, Gold Filled, 그리고 Jewelry Main Material: 925 SILVER가 표기되어 있습니다. 소재에 민감하거나 특정 표기를 중요하게 보는 경우에는 이 안내를 바탕으로 제품 페이지의 최신 상세 설명과 옵션을 다시 확인하세요. 표기만으로 내구성이나 관리 필요성을 단정하기보다, 착용 환경에 맞는 관리가 가능한지 살펴보는 편이 안전합니다.

    일상 속 스타일링과 활용 장면

    단정한 데일리룩에 한 점으로

    셔츠, 니트, 티셔츠처럼 기본 아이템을 중심으로 입는 날에는 이 링을 한 손가락에 단독 착용해 손끝에 작은 포인트를 줄 수 있습니다. 3mm 볼 장식이 시선을 모으므로 여러 장식을 한꺼번에 더하지 않아도 룩의 마무리가 심심하지 않습니다. 출근이나 일상 외출처럼 과한 장식보다 정돈된 인상을 원하는 장면에서 활용하기 좋은 방향입니다.

    캐주얼한 OOTD와 함께

    데님이나 편안한 상의로 구성한 캐주얼 룩에는 링을 여러 개 착용하는 레이어드 방식이 잘 맞습니다. 이 링을 중심에 두고 다른 손가락에는 장식이 적은 링을 배치하면, 볼 디테일은 살리면서 전체 손가락이 복잡해 보이는 것을 줄일 수 있습니다. 손목시계나 팔찌를 함께 착용할 때에는 금속감이 지나치게 분산되지 않도록 손가락 액세서리의 개수를 먼저 조절해 보세요.

    선물이나 공유 착용을 고려할 때

    상품 정보에는 여성용, 어린이용, 유니섹스가 함께 기재되어 있습니다. 따라서 특정 연령이나 성별에 한정하기보다 실제 착용자의 취향과 손가락에 맞는지 확인하는 것이 중요합니다. 선물로 고를 때에는 디자인이 클래식한지, 평소 착용하는 링과 조화로운지, 그리고 필요한 사이즈나 옵션이 제품 페이지에 안내되어 있는지를 순서대로 살펴보세요.

    선택과 관리 전 확인할 체크리스트

    1. 착용 목적을 먼저 정하세요. 하나만 착용할지, 여러 링과 레이어드할지에 따라 원하는 존재감이 달라집니다. 단독 착용이라면 3mm 볼 디테일을 중심으로 보고, 레이어드라면 함께 놓을 링의 폭과 장식 정도를 고려하세요.
    2. 손가락과 기존 액세서리를 비교하세요. 자주 착용하는 손가락, 시계나 팔찌를 두는 손목, 평소 선호하는 금속감에 따라 어울리는 배치가 달라집니다. 처음에는 한 손가락에만 착용한 뒤 다른 링을 하나씩 더하면 조합을 쉽게 점검할 수 있습니다.
    3. 소재와 옵션을 확인하세요. S925 Silver, Gold Filled, 925 SILVER 관련 표기가 함께 보이므로 제품 페이지에서 현재 소재 안내, 사이즈, 옵션을 구매 전에 확인하세요. 제공된 정보만으로 세부 사양을 추정하지 않는 것이 좋습니다.
    4. 착용 후에는 깔끔하게 보관하세요. 제품에 별도의 관리법이 제공된 것은 아니므로, 사용 후에는 표면의 상태를 확인하고 다른 액세서리와 부딪히거나 엉키지 않도록 따로 정리하는 방식이 무난합니다. 물, 화장품, 땀 등 일상 환경에 노출되는 상황을 줄이고, 이상이 느껴지면 착용을 중단한 뒤 제품 페이지의 안내를 확인하세요.

    이 링은 특별한 장식보다 반복 착용하기 쉬운 형태와 조합 가능성을 중시하는 사람에게 적합합니다. 반대로 크기, 색상, 세부 마감처럼 구체적인 조건이 중요하다면 이미지와 표기만으로 결정하지 말고 구매 페이지의 최신 정보를 기준으로 선택하세요.

    자주 묻는 질문

    Q. 단독 착용도 가능한가요?

    A. 가능합니다. 3mm 볼 디테일이 단독으로도 포인트가 되며, 기본적인 데일리룩에는 한 개만 착용해 정돈된 인상을 만들 수 있습니다.

    Q. 레이어드할 때 어떤 링과 어울리나요?

    A. 장식이 적고 형태가 간결한 링과 조합하면 이 링의 볼 디테일을 중심으로 균형을 잡기 좋습니다. 손가락별 배치와 착용 개수는 평소 스타일에 맞춰 조절하세요.

    Q. 소재는 무엇인가요?

    A. 상세 정보에는 S925 Silver와 Gold Filled가 안내되어 있고, 주얼리 메인 소재는 925 SILVER로 표기되어 있습니다. 정확한 현재 사양은 구매 전 제품 페이지에서 확인해 주세요.

    Q. 누구에게 어울리나요?

    A. 상품 정보에는 여성용, 어린이용, 유니섹스가 모두 기재되어 있습니다. 실제로는 착용자의 취향과 사이즈, 평소 액세서리 스타일을 기준으로 선택하는 것이 좋습니다.

    소재, 옵션, 사이즈, 관리 방법 및 구매 관련 정보는 변경될 수 있으니, 구매 전 반드시 제품 페이지에서 현재 상세 정보와 구매 조건을 확인해 주세요.

    디자인과 최신 제품 정보를 더 자세히 확인하고 싶다면 THANKS KAI에서 제품을 살펴보세요.

    Product: Cute Stacking Ring 14K Gold Filled Women Simple 3mm Ball S925 Silver Band Ring

  • 구독 서비스 목록을 한눈에 점검하는 15분 생활비 정리 루틴

    구독 서비스 목록을 한눈에 점검하는 15분 생활비 정리 루틴

    작성자: Kai Life 편집팀

    생활비 정리를 어렵게 만드는 항목 중 하나는 매달 반복되지만 자주 확인하지 않는 구독 서비스와 정기 결제입니다. 이 글의 방법은 결제 수단이나 가계부 앱을 바꾸지 않고도, 최근 결제 내역을 모아 15분 동안 확인하고 다음 행동을 정하는 루틴입니다. 핵심은 모든 지출을 완벽하게 기록하는 것이 아니라, 계속 유지할 항목과 다시 확인할 항목을 구분하는 데 있습니다.

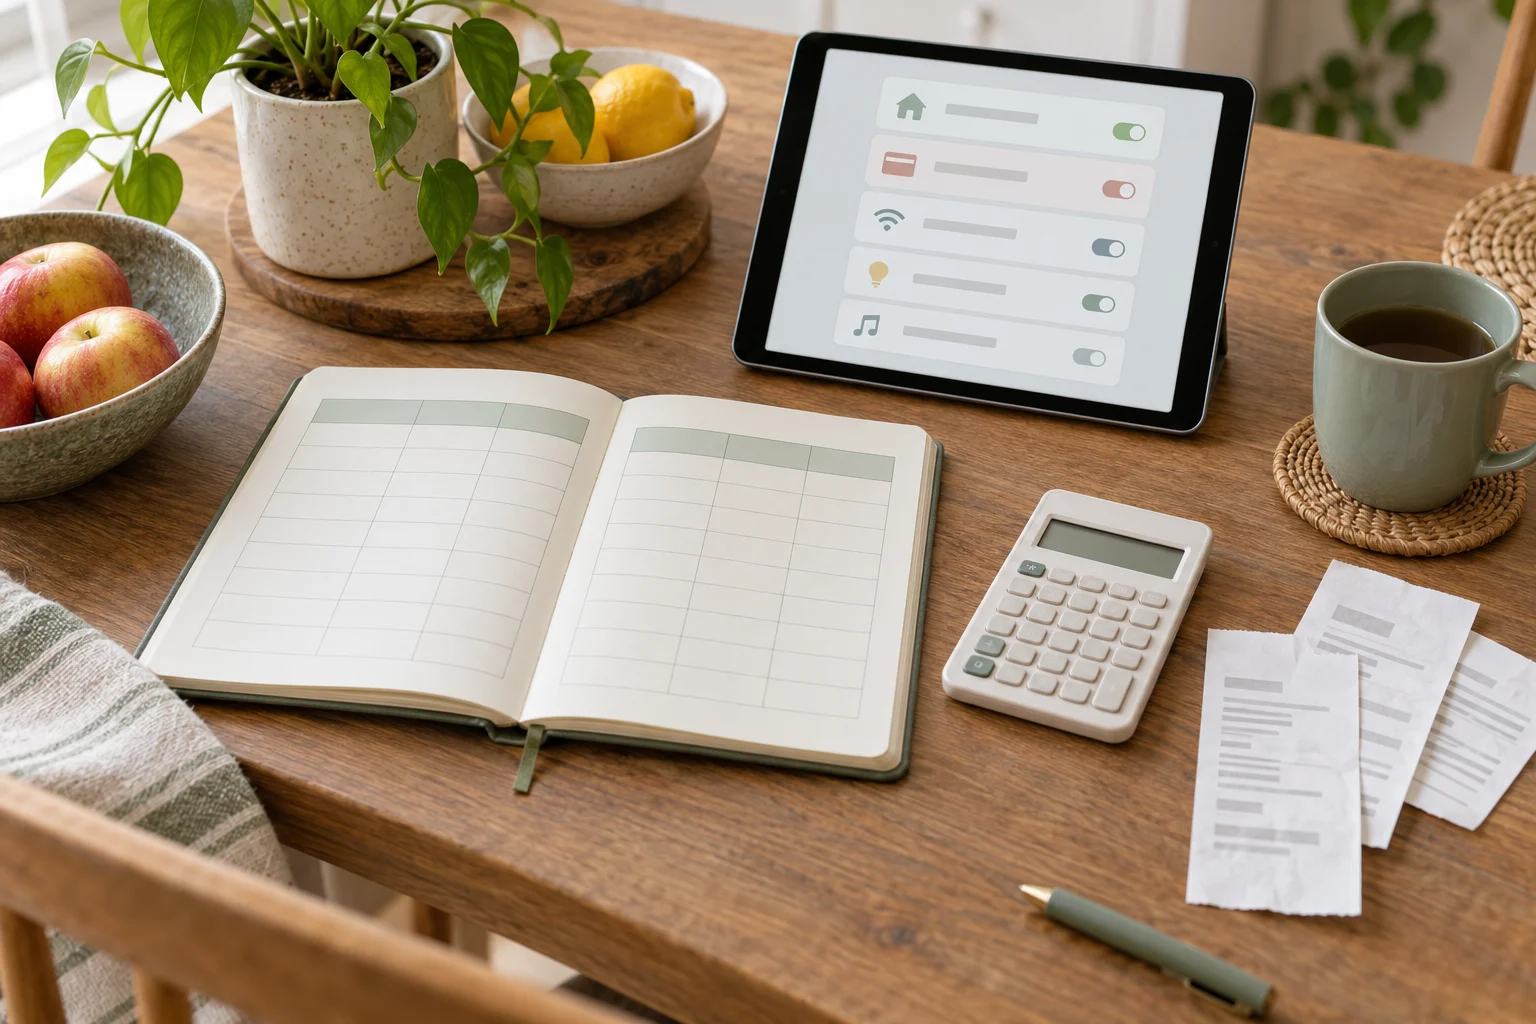
    생활비 기록표와 반복 결제 항목을 확인하는 태블릿

    먼저 준비할 것: 15분 동안 확인할 자료

    시작 전에 자료를 한곳에 모으면 검색하느라 시간을 쓰는 일을 줄일 수 있습니다. 종이와 펜, 메모 앱, 스프레드시트 중 편한 도구 하나만 사용하세요. 처음부터 완성된 가계부를 만들 필요는 없습니다.

    • 최근 결제 내역을 확인할 수 있는 카드 또는 계좌 기록
    • 휴대전화의 앱스토어·플레이스토어 구독 관리 화면
    • 이메일이나 문자로 받은 결제 알림
    • 가족이 함께 사용하는 서비스의 목록
    • 다음 확인일을 적을 메모 공간

    여러 결제 수단을 사용한다면 모두 확인하되, 한 번에 오래 붙잡지 않는 것이 좋습니다. 이번 루틴에서 빠진 자료는 다음 점검 때 보완하면 됩니다. 중요한 것은 누락 가능성을 인정하면서도 정기적으로 확인하는 구조를 만드는 것입니다.

    4단계 프레임워크로 구독 목록 정리하기

    1단계 준비: 이름과 결제 흔적 모으기

    결제 내역에 표시된 이름을 그대로 적고, 실제로 어떤 서비스인지 모르면 물음표를 남깁니다. 결제처 이름만 보고 서비스의 용도를 단정하지 말고, 이메일이나 앱의 구독 화면에서 다시 확인하세요. 같은 서비스가 카드, 계좌, 앱스토어 등 서로 다른 이름으로 표시될 수 있으므로 이름이 다르다고 곧바로 중복 결제로 판단하지 않습니다.

    2단계 분류: 사용 여부와 필요성을 나누기

    각 항목을 다음 네 가지 중 하나로 표시합니다. 이 분류는 서비스를 평가하는 최종 결론이 아니라, 다음 행동을 정하기 위한 임시 표입니다.

    분류 판단 기준 다음 행동
    유지 최근에도 사용했고 앞으로도 필요함 다음 점검일만 기록
    확인 사용 여부나 결제 조건이 불분명함 서비스 화면과 결제 내역 재확인
    정리 검토 최근 사용이 드물거나 대체 방법이 있음 해지·일시정지·요금제 변경 조건 확인
    중복 의심 비슷한 목적의 서비스가 여러 개임 사용 목적을 비교한 뒤 하나씩 검토

    ‘정리 검토’는 즉시 해지하라는 뜻이 아닙니다. 해지 시점, 저장 자료, 가족 공유 여부, 재가입 조건처럼 먼저 확인할 내용이 있을 수 있습니다. 무료 기간이 끝난 항목이나 결제 주기가 긴 항목도 ‘확인’으로 두고 실제 조건을 살펴보세요.

    3단계 실행: 한 번에 한 가지 행동 정하기

    15분 루틴에서는 항목마다 행동을 길게 고민하지 않습니다. 각 서비스 옆에 다음 중 하나만 적습니다.

    1. 유지한다.
    2. 다음 결제 전에 다시 확인한다.
    3. 공식 관리 화면에서 해지 또는 변경 조건을 확인한다.
    4. 가족과 사용 여부를 확인한다.
    5. 무엇인지 추가로 조사한다.

    해지나 변경을 실행할 때는 결제 관리 화면에서 완료 여부를 확인하고, 확인 화면이나 이메일을 보관할지 결정합니다. 이 글에서는 특정 서비스의 해지 절차나 환불 가능성을 단정하지 않습니다. 서비스마다 조건과 화면이 다를 수 있으므로 해당 서비스의 공식 안내를 기준으로 확인하세요.

    4단계 점검: 다음 확인일을 남기기

    정리를 끝냈다면 목록을 버리지 말고 다음 확인일을 남깁니다. 날짜는 생활 패턴에 맞춰 정하면 됩니다. 매달 생활비를 확인하는 날, 카드 명세서를 보는 날, 급여일 이후처럼 이미 존재하는 일정과 연결하면 별도의 습관을 만들 부담을 줄일 수 있습니다.

    바로 복사해 쓰는 15분 실행표

    아래 표를 메모 앱이나 문서에 복사한 뒤, 알고 있는 항목부터 채워 보세요. 금액을 반드시 적어야 하는 것은 아니지만, 금액을 확인할 수 있다면 결제 내역과 함께 기록하면 비교가 쉬워집니다.

    서비스 또는 결제처 결제 수단 사용 목적 분류 다음 행동 확인일
    유지·확인·정리 검토·중복 의심
    유지·확인·정리 검토·중복 의심
    유지·확인·정리 검토·중복 의심

    시간별 진행 순서

    1. 0~3분: 카드·계좌·앱 구독 화면에서 목록을 모읍니다.
    2. 3~8분: 서비스 이름과 목적을 적고 네 가지 분류 중 하나를 표시합니다.
    3. 8~12분: 각 항목에 유지, 재확인, 조건 확인, 가족 확인 중 하나의 행동을 정합니다.
    4. 12~15분: 다음 확인일과 추가로 확인할 자료를 남깁니다.

    생활비 기록을 오래 유지하는 체크리스트

    • 결제처 이름을 모를 때 추측하지 않고 ‘확인’으로 표시했는가?
    • 가족이 함께 쓰는 서비스인지 확인했는가?
    • 비슷한 목적의 서비스만 ‘중복 의심’으로 비교했는가?
    • 해지나 변경을 결정하기 전에 저장 자료와 이용 조건을 확인했는가?
    • 다음 확인일을 기존 생활비 기록 일정과 연결했는가?
    • 이번에 확인하지 못한 결제 수단을 별도 메모했는가?

    목록을 작성할 때 모든 지출을 같은 수준으로 관리하려 하면 금방 피로해질 수 있습니다. 반복 결제처럼 자동으로 빠져나가는 항목을 우선 확인하고, 일회성 지출은 별도의 기록 방식으로 나누는 편이 실용적입니다. 생활비 기록의 목적은 숫자를 많이 모으는 데 있지 않고, 다음 달에 다시 확인할 수 있는 정보를 남기는 데 있습니다.

    자주 묻는 질문

    구독 서비스가 많지 않아도 이 루틴이 필요한가요?

    필수는 아니지만, 결제 수단이 여러 개이거나 가족이 함께 사용하는 서비스가 있다면 목록을 한 번 만들어 두는 데 도움이 될 수 있습니다. 항목이 적다면 15분보다 짧게 끝내도 괜찮습니다.

    금액을 모르면 어떻게 기록하나요?

    서비스 이름, 결제처, 사용 목적만 먼저 적고 금액은 ‘확인’ 상태로 남기세요. 결제 내역을 다시 확인한 뒤 보완하면 됩니다. 확인하지 않은 금액을 추정해 입력하지 않는 것이 좋습니다.

    사용하지 않는 서비스는 바로 해지해야 하나요?

    반드시 그렇지는 않습니다. 저장된 자료, 가족 사용 여부, 해지 후 이용 가능 범위, 결제 조건을 먼저 확인해야 할 수 있습니다. 확인이 끝난 뒤 유지, 변경, 해지 중 상황에 맞는 결정을 하세요.

    비교표에는 무엇을 넣어야 하나요?

    서비스명, 사용 목적, 이용자, 결제 수단, 사용 빈도, 다음 확인일 정도면 충분합니다. 가격이나 조건을 기록할 때는 현재 확인한 공식 결제 화면이나 명세서를 기준으로 날짜를 함께 적으면 나중에 정보가 바뀌었을 때 구분하기 쉽습니다.

    마무리

    구독 서비스 목록을 정리하는 핵심은 복잡한 가계부를 새로 만드는 것이 아니라, 흩어진 정기 결제를 한 표에 모으고 각 항목의 다음 행동을 정하는 데 있습니다. 오늘 15분 동안 준비·분류·실행·점검 순서로 진행한 뒤, 다음 확인일을 기존 생활비 기록 일정에 연결해 보세요. 모든 항목을 한 번에 완벽하게 정리하지 못해도, 모르는 항목을 표시하고 다시 확인할 자리를 남기면 목록은 점차 관리 가능한 자료가 됩니다.


  • A Refined Pear-Cut Necklace for Everyday Styling

    Pear-cut lab-grown diamond solitaire pendant necklace shown in a gold finish

    The Starsgem Fine Jewelry Solitaire 1ct Pear Brilliant Cut Pendant 10k 14k Gold Pear Shape Lab Diamond Necklace brings a clear, graceful focal point to a considered jewellery wardrobe. Its solitaire pear-cut pendant is designed to read as elegant rather than elaborate, making it a natural companion for daily dressing as well as more formal occasions.

    The design is offered in 10k and 14k gold, with yellow gold, white gold, and rose gold options. That range makes the necklace easy to approach from different styling directions: warm and traditional in yellow gold, crisp and understated in white gold, or softly romantic in rose gold. The listed main stone is a synthetic, lab-grown diamond in a pear shape, with a listed white diamond colour of D.

    With occasions listed including gifting, parties, weddings, anniversaries, and engagements, this piece can be selected as either a personal finishing touch or a meaningful present. Its unisex designation also encourages a broader interpretation of the pendant: wear it as a delicate statement, layer it with other necklaces, or let it stand alone against a clean neckline.

    Design Details and Selection Points

    A distinctive solitaire silhouette

    The pear cut combines a rounded end with a tapered point, giving the pendant an elegant directional shape. As a solitaire design, it keeps attention on the central stone rather than on a busy arrangement. This makes the necklace especially useful when the rest of an outfit is intentionally restrained.

    Six gold combinations

    • 14k yellow gold: a classic, luminous choice for warm neutrals, cream tailoring, denim, and traditional jewellery combinations.
    • 14k white gold: a cooler option that pairs naturally with monochrome dressing, silver-toned accessories, and clean contemporary lines.
    • 14k rose gold: a softer, warmer interpretation suited to blush, ivory, taupe, and feminine tonal styling.
    • 10k yellow gold: a familiar golden finish for everyday wardrobes built around earthy or warm colours.
    • 10k white gold: a streamlined alternative for understated outfits and mixed cool-metal looks.
    • 10k rose gold: a gentle colour direction for subtle contrast against neutral or softly coloured clothing.

    The supplied product information identifies the main jewellery material as gold and lists precious-metal purity at 58.5%. It also identifies the diamond type as synthetic, lab grown, with no diamond certificate or certificate type listed. These details are important selection points for anyone comparing the six available gold combinations.

    Style language

    The listed style is vintage and fashionable jewellery. In practice, the pear silhouette can bridge both moods: it has a classic outline that works with a polished blouse, while its clean solitaire presentation can also suit a modern T-shirt, knit, or tailored jacket.

    How to Wear It Across the Wardrobe

    For daily looks

    For an everyday outfit, allow the pendant to sit against a simple neckline so its shape remains visible. A white shirt, fine knit, plain crew neck, or uncomplicated dress creates a calm background. Yellow gold works particularly well with beige, camel, chocolate, olive, and denim; white gold complements black, grey, navy, and bright white; rose gold can soften stone, cream, dusty pink, or warm grey.

    For an OOTD-ready finish

    When building a carefully styled daily look, use the necklace as the final point of balance. If the outfit has strong volume in the sleeves or shoulders, keep other jewellery minimal and let the solitaire provide vertical emphasis. For a more layered approach, combine it with fine chains of different lengths while keeping the additional pieces visually quiet, so the pear pendant remains the focal point.

    For occasion dressing

    The product information lists party, wedding, anniversary, and engagement occasions. For these settings, the pendant can accompany a clean neckline, a slip-style silhouette, or tailored evening separates. White gold offers a restrained, polished effect; yellow gold adds warmth; rose gold introduces a softer romantic note. The choice should follow the rest of the outfit and the wearer’s existing jewellery rather than a strict rule.

    For gifting

    A solitaire pendant is a versatile gift direction because it can mark a personal milestone without relying on an overly ornate design. Consider the recipient’s usual metal preference, the colours in their wardrobe, and whether they typically wear classic, contemporary, or softly romantic accessories. The listed occasion range makes the necklace relevant to both celebratory and relationship-focused gifting.

    A Considered Buying Guide

    Begin with the metal colour. Look at the jewellery already worn most often: yellow gold suggests continuity with warm-toned pieces, white gold provides a cooler and more neutral visual language, while rose gold offers a distinct but gentle alternative. If the necklace is intended as a gift, observing the recipient’s everyday accessories can be more useful than choosing solely by personal taste.

    Next, compare 10k and 14k options as listed. The supplied data identifies both purity options and states a precious-metal purity of 58.5%; confirm the exact purity and variant information on the product page before placing an order. The product is presented as a pear brilliant cut pendant with a listed 1ct description, while the available product details should be checked for any additional variant information.

    Consider how the pendant will function in the wardrobe. Choose a colour that can move between daily outfits if versatility is the priority. For a special-event or gift-led purchase, choose the finish that best expresses the intended mood. Since the product information lists no certificate type and no diamond certificate, readers who require particular documentation should verify what is included directly on the product page.

    For coordination, keep the pear shape central. A small, refined earring or a slim bracelet can support the necklace without competing with it. When storing the piece, use a clean, separate jewellery space and avoid placing it where it may become tangled with other chains. Before wearing, check the pendant and chain visually and follow any care instructions provided on the product page.

    Frequently Asked Questions

    What is the stone shape?

    The listed diamond shape is pear cut, presented as a solitaire pendant.

    Is the diamond lab grown?

    Yes. The supplied details identify the diamond type as synthetic, lab grown.

    Which gold options are listed?

    The necklace is listed in 10k and 14k gold, each with yellow gold, white gold, and rose gold options.

    Is a diamond certificate listed?

    No. The supplied information lists no diamond certificate and no certificate type.

    Can it suit formal occasions?

    Yes. The listed occasions include parties, weddings, anniversaries, and engagements, as well as gifting and daily wear.

    Please verify the current product details, available gold variant, purity information, documentation, care guidance, and purchase information on the product page before purchase.

    View the Starsgem Fine Jewelry Solitaire 1ct Pear Brilliant Cut Pendant 10k 14k Gold Pear Shape Lab Diamond Necklace at THANKS KAI to explore the listed options.

    Product: Starsgem Fine Jewelry Solitaire 1ct Pear Brilliant Cut Pendant 10k 14k Gold Pear Shape Lab Diamond Necklace

  • 오늘 할 일을 세 칸으로 나누는 업무 정리법

    오늘 할 일을 세 칸으로 나누는 업무 정리법

    작성자: Kai Life 편집팀

    업무 정리가 막막할 때는 해야 할 일을 더 많이 적는 것보다, 오늘 어떤 일을 먼저 움직일지 세 칸으로 나누는 편이 실용적입니다. 메모의 세 칸은 오늘 끝낼 일, 진행 중인 일, 나중에 검토할 일입니다. 여기에 15분 동안 준비·분류·실행·점검을 순서대로 진행하면 긴 업무 목록을 당장 행동할 수 있는 작은 단위로 바꿀 수 있습니다.

    오늘 할 일을 세 칸으로 구분한 우선순위 노트

    세 칸 업무 정리의 기본 구조

    세 칸 메모법의 핵심은 모든 업무를 같은 무게로 보지 않는 것입니다. 이메일, 회의 후속 조치, 자료 작성, 장기 과제처럼 성격이 다른 일을 한 목록에 섞어두면 무엇부터 해야 할지 판단하는 데 시간이 걸립니다. 먼저 업무를 세 가지 상태로 나누고, 각 칸에 들어갈 기준을 정합니다.

    칸 넣을 업무 작성 기준
    오늘 끝낼 일 오늘 마무리하거나 다음 사람에게 넘겨야 하는 일 완료 조건이 한 문장으로 설명되는가
    진행 중인 일 이미 시작했거나 여러 단계로 나뉜 과제 다음 행동이 구체적으로 정해져 있는가
    나중에 검토할 일 기한이 멀거나 추가 정보가 필요한 일 오늘 바로 결정하지 않아도 되는가

    여기서 ‘오늘 끝낼 일’은 중요도가 높은 업무를 일률적으로 많이 넣는 칸이 아닙니다. 실제로 오늘 처리할 수 있는 양을 고려해 제한적으로 적어야 합니다. ‘진행 중인 일’은 완료되지 않았다는 이유로 실패한 업무가 아니라, 다음 단계가 필요한 업무를 모아두는 영역입니다. ‘나중에 검토할 일’은 잊지 않기 위한 보관 칸이므로 하루 종일 계속 바라보지 않아도 됩니다.

    15분 실행 루틴: 준비·분류·실행·점검

    1단계: 준비하기 3분

    새로운 목록을 만들기 전에 메일, 메신저, 회의 메모, 전날의 미완료 항목을 빠르게 확인합니다. 이때 업무를 자세히 해결하려고 하지 말고, 오늘 판단해야 할 항목만 한곳에 모읍니다. 머릿속에만 있는 할 일도 짧은 동사 형태로 적습니다.

    • 자료 확인하기
    • 회의 참석자에게 일정 보내기
    • 초안의 빠진 항목 표시하기
    • 고객 문의에 현재 확인 상황 회신하기

    ‘보고서’, ‘회의’, ‘메일’처럼 명사만 적으면 실제 행동이 불분명합니다. 가능하면 ‘보고서 목차 정리하기’, ‘회의 안건 세 가지 확인하기’처럼 행동과 대상이 함께 보이도록 씁니다.

    2단계: 분류하기 4분

    모은 항목을 세 칸에 배치합니다. 먼저 기한이나 다른 사람의 업무와 연결된 항목을 살펴보고, 오늘 처리해야 할 최소 결과를 정합니다. 그다음 진행 중인 업무에서 오늘 할 수 있는 다음 행동을 하나씩 뽑습니다. 즉시 중요도를 판단하기 어려운 항목은 억지로 오늘 칸에 넣지 말고 검토 칸으로 보냅니다.

    1. 오늘 마감되거나 오늘 결정이 필요한 항목을 찾습니다.
    2. 다른 사람의 작업이 시작되려면 먼저 처리해야 하는 항목을 확인합니다.
    3. 큰 과제는 오늘 할 수 있는 한 단계로 잘라 진행 중인 일에 적습니다.
    4. 기한과 다음 행동이 불분명한 항목은 나중에 검토할 일로 이동합니다.

    업무 우선순위를 정할 때 ‘중요함’만 보지 말고 기한, 의존 관계, 소요 시간, 중단 비용을 함께 살펴보면 좋습니다. 예를 들어 짧게 끝나는 회신이라도 다른 사람이 그 답을 기다리고 있다면 먼저 처리할 이유가 생깁니다. 반대로 중요해 보이는 장기 과제라도 오늘의 다음 행동이 정해지지 않았다면 별도 검토 시간을 잡는 편이 낫습니다.

    3단계: 실행하기 5분

    세 칸을 만든 뒤에는 ‘오늘 끝낼 일’에서 첫 번째 행동을 바로 시작합니다. 5분 안에 완성되지 않는 업무라면 결과 전체가 아니라 시작 동작을 실행합니다. 문서를 열고 제목을 적거나, 관련 자료 세 개를 모으거나, 회의 안건의 빈칸을 채우는 식입니다.

    실행 항목은 다음처럼 적으면 좋습니다.

    • 나쁜 예: 프로젝트 자료 정리
    • 바꾼 예: 공유 폴더에서 최신 파일 세 개를 찾아 파일명에 날짜 표시하기
    • 나쁜 예: 회의 준비
    • 바꾼 예: 회의 목적과 결정이 필요한 질문 두 개를 메모에 적기

    첫 행동을 마친 뒤에도 업무가 길게 이어진다면 다음 행동을 한 줄 더 남깁니다. 이렇게 하면 다음에 다시 시작할 때 업무의 맥락을 처음부터 복원하는 시간을 줄이는 데 도움이 됩니다.

    4단계: 점검하기 3분

    마지막 3분은 오늘의 메모를 고치는 시간입니다. 완료한 항목은 지우거나 완료 표시를 하고, 끝나지 않은 항목은 이유를 짧게 적습니다. ‘못 함’처럼 결과만 쓰기보다 ‘자료 대기’, ‘결정권자 확인 필요’, ‘예상보다 범위가 큼’처럼 다음 판단에 도움이 되는 상태를 기록합니다.

    점검할 때는 다음 질문을 사용합니다.

    • 오늘 끝낼 일 중 완료 조건이 모호한 항목은 없는가?
    • 진행 중인 일마다 다음 행동이 하나씩 적혀 있는가?
    • 나중에 검토할 일에 다시 볼 날짜나 조건이 있는가?
    • 내일 첫 번째로 시작할 항목이 보이는가?

    복사해서 쓰는 15분 업무 체크리스트

    아래 표를 메모 앱이나 문서에 복사한 뒤, 하루의 시작 또는 업무 전환 시점에 사용해 보세요. 모든 칸을 채우는 것보다 실제로 판단하고 실행하는 것이 우선입니다.

    시간 할 일 기록할 내용
    0~3분 준비 메일·메신저·회의 메모에서 오늘 판단할 항목 모으기
    3~7분 분류 오늘 끝낼 일 / 진행 중인 일 / 나중에 검토할 일로 나누기
    7~12분 실행 첫 항목의 구체적인 다음 행동 시작하기
    12~15분 점검 완료 상태, 보류 이유, 다음 시작점 기록하기

    메모 템플릿

    오늘의 업무 정리
    날짜:
    
    [오늘 끝낼 일]
    - [ ] 업무 / 완료 조건:
    - [ ] 업무 / 완료 조건:
    
    [진행 중인 일]
    - [ ] 업무 / 다음 행동:
    - [ ] 업무 / 다음 행동:
    
    [나중에 검토할 일]
    - [ ] 업무 / 다시 볼 날짜 또는 조건:
    - [ ] 업무 / 필요한 추가 정보:
    
    오늘의 첫 행동:
    업무 종료 전 점검:
    - 완료한 일:
    - 보류 이유:
    - 내일 시작할 일:

    회의 메모와 주간 점검에 적용하는 방법

    회의 메모는 ‘논의 내용’보다 ‘후속 행동’을 먼저 분리하기

    회의 중에는 모든 발언을 그대로 옮기기보다 결정 사항, 담당자, 기한, 확인이 필요한 질문을 구분합니다. 회의가 끝난 뒤 각 후속 항목을 세 칸 중 하나에 배치합니다. 담당자와 기한이 정해진 항목은 오늘 끝낼 일 또는 진행 중인 일로 옮기고, 추가 확인이 필요한 주제는 나중에 검토할 일에 둡니다.

    • 결정 사항: 무엇이 정해졌는가
    • 내 담당 행동: 내가 직접 해야 하는 것은 무엇인가
    • 대기 항목: 누구의 답이나 자료를 기다리는가
    • 다음 확인 시점: 언제 다시 확인할 것인가

    ‘회의 내용 정리’처럼 넓은 표현 대신 ‘결정 사항 세 가지를 회의록 상단에 옮기기’처럼 작성하면 회의 후 업무가 더 분명해집니다.

    주간 점검은 금요일 또는 다음 주 시작 전에 짧게 진행하기

    주간 점검에서는 하루 단위의 완료 여부보다 업무 흐름을 살펴봅니다. 반복해서 미뤄진 업무가 있다면 의지가 부족하다고 결론 내리기보다 범위, 담당자, 정보, 기한 중 무엇이 막고 있는지 확인합니다.

    1. 이번 주에 실제로 완료한 업무를 확인합니다.
    2. 진행 중인 업무 중 다음 주에도 이어질 항목을 표시합니다.
    3. 더 이상 필요하지 않은 항목은 목록에서 제거합니다.
    4. 결정이나 자료를 기다리는 항목은 상대방과 확인할 내용을 적습니다.
    5. 다음 주 첫날 바로 시작할 업무 한두 개를 정합니다.

    주간 점검은 새로운 업무를 일률적으로 추가하는 시간이 아닙니다. 현재 목록을 줄이고, 멈춘 업무의 이유를 파악하고, 다음 시작점을 남기는 시간에 가깝습니다.

    잘 맞지 않을 때 조정하는 방법

    세 칸을 사용해도 업무가 계속 밀린다면 메모 칸의 개수보다 업무의 크기와 외부 조건을 먼저 확인해야 합니다. 긴 업무를 하나의 항목으로 적으면 하루 안에 완료하기 어렵고, 갑작스러운 요청이 많은 직무에서는 ‘오늘 끝낼 일’을 너무 많이 고정하기도 어렵습니다.

    • 큰 업무가 계속 남는 경우: 결과물이 아니라 20~30분 안에 할 수 있는 다음 행동으로 쪼갭니다.
    • 긴급 요청이 자주 생기는 경우: 오늘 일정에 빈 시간을 남기고, 기존 업무를 미룬 이유를 함께 기록합니다.
    • 우선순위가 자주 바뀌는 경우: 오전에 한 번, 중요한 회의나 요청 뒤에 한 번만 다시 분류합니다.
    • 목록이 지나치게 길어진 경우: 나중에 검토할 일은 별도 보관하고 오늘 화면에는 두 핵심 칸만 보이게 합니다.
    • 팀 업무와 개인 업무가 섞이는 경우: 담당자와 대기 상태를 표시해 내가 직접 할 일과 기다릴 일을 구분합니다.

    이 방법은 모든 일을 정해진 시간 안에 끝내게 해주는 도구가 아닙니다. 업무량이 근무 가능 시간을 넘거나, 결정권자와 자료가 계속 지연되는 상황에서는 상급자 또는 관련 담당자와 범위와 기한을 조정해야 합니다. 메모는 문제를 숨기는 장치가 아니라 문제를 보이게 하는 장치로 사용하는 편이 좋습니다.

    자주 묻는 질문

    세 칸마다 업무를 몇 개씩 적어야 하나요?

    정해진 개수보다 실제 처리 가능성을 기준으로 정하는 것이 좋습니다. 특히 오늘 끝낼 일은 완료 조건이 분명한 항목 위주로 적고, 양이 많다면 핵심 항목과 여유가 있을 때 할 항목을 구분하세요.

    중요하지만 급하지 않은 업무는 어디에 넣나요?

    오늘 바로 다음 행동을 할 수 있다면 진행 중인 일에 넣고, 별도 조사나 결정이 필요하다면 나중에 검토할 일에 넣습니다. 단순히 중요하다는 이유만으로 오늘 끝낼 일에 넣으면 하루 계획이 과도해질 수 있습니다.

    어제 못 끝낸 업무는 그대로 오늘로 옮기면 되나요?

    그대로 복사하기보다 미완료 이유를 먼저 적습니다. 범위가 컸다면 다음 행동으로 쪼개고, 자료나 답변을 기다리는 중이라면 대기 상태로 표시합니다. 더 이상 필요하지 않다면 목록에서 제거하는 것도 업무 정리의 일부입니다.

    종이 메모와 디지털 메모 중 어느 쪽이 좋은가요?

    빠르게 분류하고 자주 확인할 수 있는 도구가 적합합니다. 회의 자료나 팀 업무와 연결해야 한다면 디지털 메모가 편할 수 있고, 짧은 계획을 세우는 데 집중하려면 종이 메모가 간단할 수 있습니다. 도구를 바꾸는 것보다 세 칸과 다음 행동을 꾸준히 유지하는 것이 중요합니다.

    마무리: 업무 목록보다 다음 행동을 선명하게 만들기

    업무 정리는 해야 할 일을 모두 한 번에 해결하는 기술이 아니라, 지금 처리할 일과 나중에 판단할 일을 구분하는 과정입니다. 오늘 끝낼 일, 진행 중인 일, 나중에 검토할 일을 나눈 뒤 15분 동안 준비·분류·실행·점검을 반복해 보세요. 하루가 끝났을 때 완벽한 목록이 남지 않더라도, 무엇을 끝냈고 무엇이 막혔으며 내일 어디서 시작할지는 확인할 수 있어야 합니다.

    처음에는 세 칸을 모두 채우려 하지 말고, 오늘의 첫 행동 하나를 명확하게 적는 것부터 시작하면 됩니다.


  • 넉넉한 실루엣으로 완성하는 데일리 숄더백 가이드

    포레스트 그린 컬러의 LEMAIRE large Croissant shoulder bag 정면 이미지

    LEMAIRE large Croissant shoulder bag는 포레스트 그린 컬러와 부드러운 곡선형 실루엣이 돋보이는 숄더백입니다. 코팅 마감과 그레인 텍스처가 어우러져 가방 표면에 자연스러운 깊이를 더하며, 전면의 매듭 디테일이 디자인에 포인트를 줍니다.

    폭 60cm, 높이 28cm, 깊이 11cm의 넉넉한 형태로 구성되어 작은 숄더백보다 여유 있는 수납 구성을 선호하는 분에게 잘 어울립니다. 42cm 스트랩을 활용해 어깨에 걸치기 좋고, 메인 수납공간과 내부 슬립 포켓으로 소지품을 나누어 정리할 수 있습니다.

    차분한 그린 컬러는 블랙, 그레이, 네이비처럼 무게감 있는 기본 색상과 자연스럽게 연결되며, 데님이나 베이지 계열의 캐주얼한 옷차림에도 색감 있는 포인트가 됩니다. 출근 전후의 데일리룩부터 여유로운 주말 스타일링까지, 넉넉한 크기와 단정한 구조를 함께 원하는 상황을 중심으로 살펴보면 좋습니다.

    디자인과 구성 살펴보기

    LEMAIRE large Croissant shoulder bag의 핵심은 넉넉한 가로 비율과 소재감이 만들어내는 균형입니다. 포레스트 그린 컬러가 전체 인상을 차분하게 잡아주고, 그레인 텍스처는 표면에 자연스러운 결을 보여줍니다. 코팅 마감은 디자인의 인상을 또렷하게 정리하며, 매듭 디테일은 단순한 형태에 시선을 모으는 요소로 작용합니다.

    • 형태: 폭 60cm, 높이 28cm, 깊이 11cm로 가로로 넉넉한 실루엣입니다.
    • 착용 방식: 하나의 숄더 스트랩으로 어깨에 걸어 연출하는 구조입니다. 스트랩 길이는 42cm입니다.
    • 수납: 메인 수납공간과 내부 슬립 포켓으로 소지품을 구분할 수 있습니다.
    • 여밈: 상단 지퍼 여밈으로 입구를 정돈할 수 있습니다.
    • 내부: 전체 안감과 내부 로고 패치가 구성되어 있습니다.
    • 소재 구성: 겉감과 안감 모두 코튼 100%로 안내되어 있습니다.

    새 제품이면서도 Lemaire의 가죽 제품에 적용되는 전문적인 복원 및 태닝 과정의 특성상, 소재 본연의 그레인과 부드러움, 주름감이 드러날 수 있습니다. 따라서 표면의 자연스러운 결이나 미세한 크리즈는 제품의 소재감으로 이해하는 것이 좋습니다.

    스타일링과 활용 아이디어

    가방의 폭이 넉넉하므로 옷차림 전체에 여유 있는 인상을 더하고 싶을 때 활용하기 좋습니다. 상의와 하의를 모두 어두운 톤으로 맞춘 뒤 포레스트 그린 가방을 더하면 컬러 대비가 과하지 않으면서도 스타일의 중심이 생깁니다. 반대로 화이트 셔츠, 베이지 팬츠처럼 밝은 기본 조합에는 그린 컬러가 자연스러운 포인트가 됩니다.

    1. 데일리룩: 데님과 니트, 셔츠처럼 편안한 아이템에 매치해 가방의 곡선과 매듭 디테일을 돋보이게 해보세요. 전체 색상은 네이비, 아이보리, 브라운처럼 가방과 조화를 이루는 톤으로 정리하면 안정적입니다.
    2. 오피스 캐주얼: 블랙 재킷이나 그레이 팬츠와 함께 구성하면 컬러감은 살리면서도 단정한 분위기를 유지할 수 있습니다. 넉넉한 가로 형태는 간결한 옷차림에 실용적인 인상을 더합니다.
    3. 주말 외출: 코튼 셔츠, 가벼운 아우터, 데님처럼 질감이 있는 소재와 연결하면 그레인 텍스처가 자연스럽게 어우러집니다. 가방 자체의 디테일이 충분하므로 액세서리는 간결하게 선택하는 편이 좋습니다.

    수납할 때는 자주 꺼내는 물건을 내부 슬립 포켓에 배치하고, 형태가 흐트러질 수 있는 물건은 무리하게 채우지 않는 방식이 알맞습니다. 코튼 소재의 겉감과 안감, 코팅 마감이 안내된 제품인 만큼 보관 전에는 표면에 묻은 오염 여부를 확인하고, 다른 색상의 의류나 가방과 장시간 밀착시키지 않는 편이 안전합니다.

    구매 전 체크할 기준

    이 제품을 고를 때는 먼저 가로로 긴 실루엣이 자신의 수납 습관과 잘 맞는지 확인해보세요. 폭 60cm의 넉넉한 비율은 소지품을 여유 있게 넣고 싶은 경우 장점이 될 수 있지만, 작고 컴팩트한 가방을 선호한다면 실제 착용 시 존재감이 크게 느껴질 수 있습니다. 구매 전 평소 사용하는 물건을 대략적으로 떠올리고, 가방의 폭과 깊이를 비교하면 선택에 도움이 됩니다.

    • 어깨에 걸치는 숄더백을 찾고 있는지 확인합니다.
    • 포레스트 그린을 옷장 속 블랙, 네이비, 베이지, 데님과 조합할 수 있는지 살펴봅니다.
    • 상단 지퍼 여밈과 내부 슬립 포켓처럼 원하는 정리 방식이 포함되어 있는지 확인합니다.
    • 가죽 제품의 전문적인 복원 및 태닝 과정에 따른 자연스러운 그레인, 부드러움, 주름감이 보일 수 있다는 점을 고려합니다.
    • 겉감과 안감이 코튼 100%라는 안내를 확인하고, 소재 특성에 맞는 관리가 가능한지 생각해봅니다.

    관리 시에는 제품 표면을 거칠게 문지르거나 임의의 세정제를 사용하는 것보다, 오염이 생겼을 때 제품 페이지의 안내와 소재에 적합한 방법을 우선 확인하는 것이 좋습니다. 보관할 때는 형태를 누르지 않는 공간을 선택하고, 습기와 마찰이 많은 환경은 피하는 방식으로 제품의 결을 오래 살펴볼 수 있습니다.

    자주 묻는 질문

    가방의 크기는 어느 정도인가요?

    폭 60cm, 높이 28cm, 깊이 11cm이며 스트랩 길이는 42cm입니다.

    어떤 방식으로 착용하나요?

    싱글 숄더 스트랩을 이용해 어깨에 걸치는 디자인입니다.

    내부 수납 구성은 어떻게 되어 있나요?

    메인 수납공간과 내부 슬립 포켓이 있으며, 전체 안감과 내부 로고 패치가 구성되어 있습니다.

    표면에 자연스러운 주름이나 결이 보일 수 있나요?

    네. 안내된 소재 공정의 특성에 따라 소재 본연의 그레인, 부드러움, 주름감이 나타날 수 있습니다.

    소재는 무엇인가요?

    겉감과 안감 모두 코튼 100%로 안내되어 있습니다.

    구매 전 상품 페이지에서 현재의 제품 상세 정보와 구매 관련 정보를 반드시 확인해 주세요.

    LEMAIRE large Croissant shoulder bag의 상세 이미지와 제품 정보를 THANKS KAI에서 확인해 보세요.

    Product: LEMAIRE large Croissant shoulder bag

THANKS KAI CONTACT

WeChat

위챗에서 QR코드를 스캔해 주세요.
Scan the QR code in WeChat.

Thanks Kai WeChat contact QR code위챗 열기 / Open WeChat