Tag: n8n-managed

n8n 자동화가 관리하는 글

  • A 10-Minute Desk Reset Within a 15-Minute Self-Care Routine

    A 10-Minute Desk Reset Within a 15-Minute Self-Care Routine

    작성자: Kai Life Editorial Team

    A calmer workspace can begin with a short, defined reset rather than a long cleaning session. Set aside 15 minutes: use the first 2 minutes to prepare, the next 10 minutes to sort and act, and the final 3 minutes to review and choose one small break or evening activity. This self-care routine is designed for adults who want more room for rest without adding pressure to the end of the day.

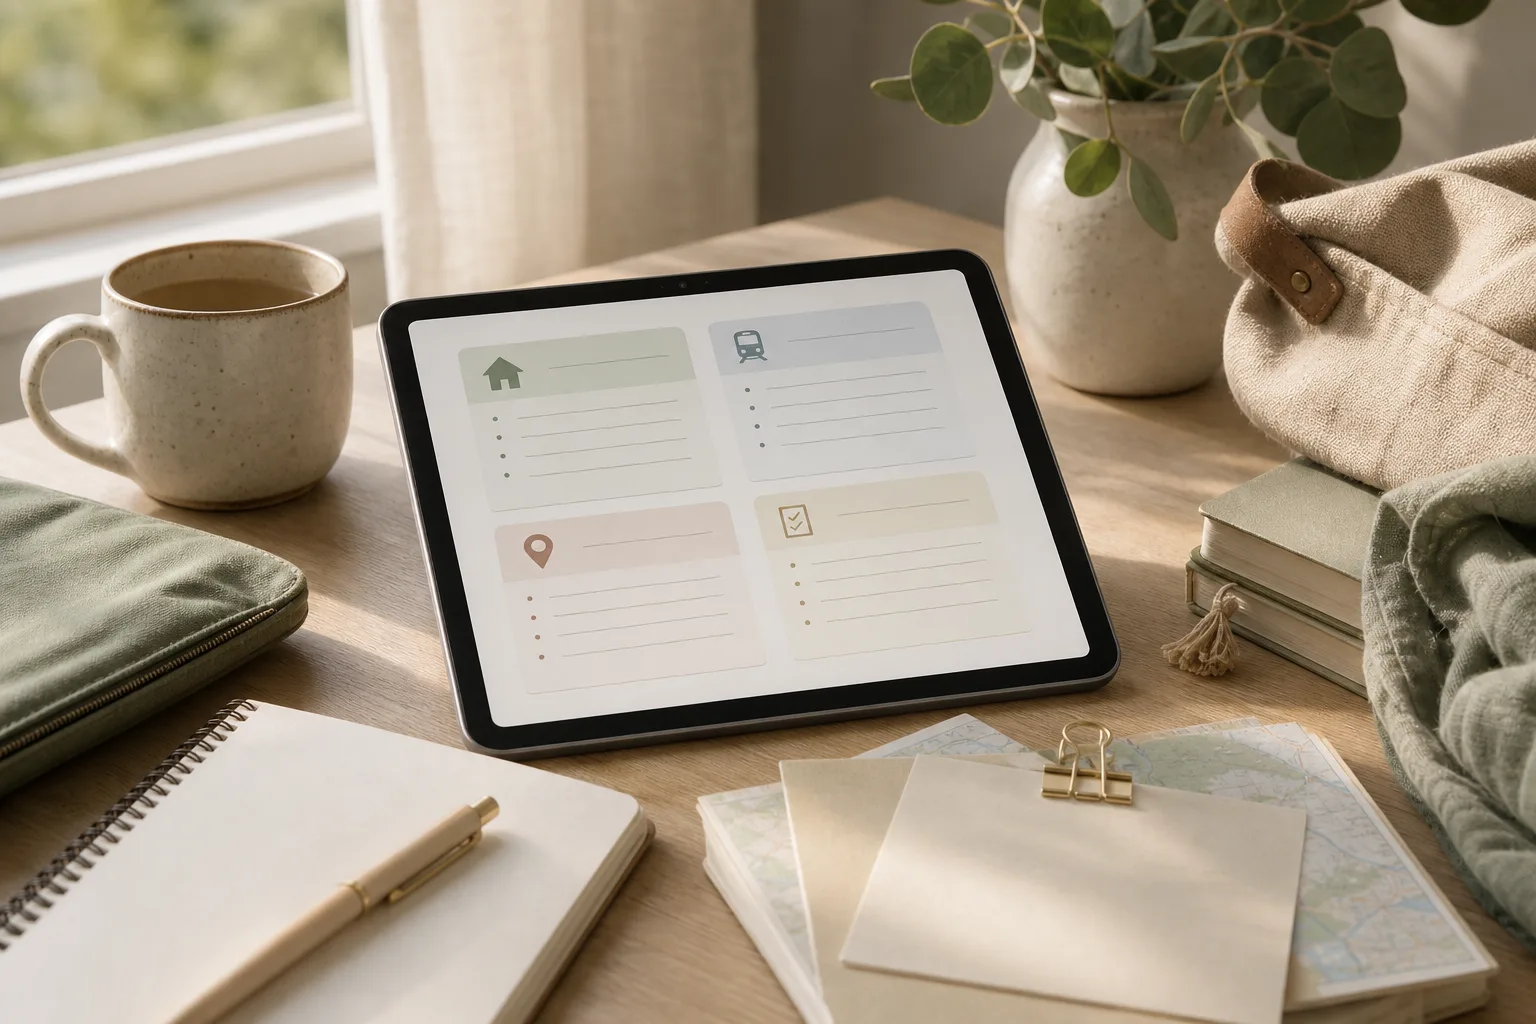
    A 10-Minute Desk Reset Within a 15-Minute Self-Care Routine — topic illustration

    Why use a short desk reset?

    A desk often holds several kinds of unfinished business at once: papers to file, dishes to return, open notebooks, charging cables, and reminders competing for attention. Trying to handle everything can turn a transition into another work block. A time-limited reset gives the task a clear boundary.

    The aim is not to create a display-ready desk. The aim is to make the next use of the space easier and to mark a change in activity. You can stop after the 10-minute core reset if that is all your schedule allows. The remaining minutes are for a brief review, a break plan, or journaling.

    The four-part framework: prepare, sort, act, review

    Use these four stages as a repeatable structure. Each stage has a different purpose, which reduces the temptation to make decisions about every object in the room.

    1. Prepare: define the finish line

    Choose a timer and decide what “reset” means for this session. A useful finish line could be:

    • the main work surface is visible;
    • items that belong elsewhere are grouped together;
    • important papers have one temporary home;
    • the chair and immediate floor area are usable; and
    • tomorrow’s first item is easy to find.

    Keep the finish line modest. If you begin with a broad goal such as “organize the office,” the routine can expand beyond its time limit. A narrow goal helps the desk support your next activity instead of becoming a new project.

    2. Sort: use a few practical categories

    During the reset, place each visible item into one of four categories:

    • Keep here: items needed for the desk’s next use.
    • Return: items that belong in another room or location.
    • Decide later: items that need a longer decision than this routine allows.
    • Discard or recycle: obvious rubbish or materials that no longer have a use.

    The “decide later” category is important. It prevents a single uncertain object from consuming the entire reset. Put those items in one temporary container, tray, or clearly defined corner so they remain visible without spreading across the work surface.

    Avoid creating many detailed piles. More categories can feel precise, but they can also turn a quick reset into a filing system redesign. The purpose here is movement and clarity, not a complete solution to every storage question.

    3. Act: make the smallest useful changes

    Once items are sorted, take actions that change how the desk functions. Return the easiest objects first. Put rubbish and recycling together. Stack papers that need attention rather than rereading them. Coil or move cables so the main working area is open. If a cup or plate needs washing, take it to the kitchen without starting a full kitchen task.

    For papers and notes, use a simple next-step rule. If an item requires action, write the next action in a short phrase, such as “reply to Sam,” “check the date,” or “add to weekend list.” Avoid writing a complete plan during the reset. The note only needs to preserve the next step so your desk does not have to act as a memory system.

    If the desk is shared, choose one small zone for your own materials instead of spreading them across the whole surface. If the space is used for more than work, leave room for the next activity, such as reading, stretching, eating, or journaling.

    4. Review: close the loop

    At the end, look at the desk from the position where you usually sit. Ask three questions:

    1. What is easier to begin now?
    2. What item or decision still needs a later time?
    3. What would help me transition into rest?

    Write down only the unfinished items that genuinely need a reminder. A short note can be enough: “Review receipts on Thursday” or “Choose storage for cables this weekend.” The review is not a prompt to continue working. It is a signal that the reset has reached its boundary.

    A 15-minute self-care routine

    The following plan keeps the desk reset at the center while adding a small transition afterward. Adjust the sections if you have less time. The routine still works if you complete only the first 10 minutes.

    Time Focus Action
    0–2 minutes Prepare Set a timer, define the finish line, and gather one temporary container for uncertain items.
    2–6 minutes Sort Move items into keep here, return, decide later, and discard or recycle groups.
    6–12 minutes Act Clear the main surface, return easy items, group papers, and create a small tomorrow area.
    12–15 minutes Review and transition Record one later task, choose a break, and step away from the desk if possible.

    The table includes a 12-minute action window, but the central desk work can be treated as a 10-minute reset by combining the sorting and action stages. The extra minutes provide room for a slower start, a shared space, or a brief pause before the next part of the evening.

    Choose a break that does not create more work

    After the desk is reset, select one low-friction break. The best option depends on your energy, surroundings, and responsibilities. Consider:

    • drinking water away from the desk;
    • standing by a window for a few minutes;
    • listening to one short piece of music;
    • reading a few pages of a book already within reach;
    • doing a brief, comfortable movement break; or
    • sitting somewhere other than the work chair without opening another task list.

    A break does not need to be productive to be useful. If you are tired, choose the option with the fewest decisions. If you still have energy, you might use the time for a personal routine such as skincare, preparing tea, or writing a short journal entry.

    Optional journaling prompts for the final three minutes

    Journaling can help separate work concerns from personal time, but it should remain brief in this routine. Pick one prompt:

    • “The task I am carrying forward is…”
    • “One thing I can leave unfinished tonight is…”
    • “For the next part of my evening, I would like…”
    • “The desk feels easier to use because…”

    One or two sentences are enough. If writing makes you feel more activated, skip it and use the review questions verbally or mentally instead.

    Copyable desk reset checklist

    Save or copy this checklist for the next transition from work to personal time:

    • Prepare: Set a 15-minute timer and choose a narrow finish line.
    • Sort: Create keep here, return, decide later, and discard or recycle groups.
    • Act: Clear the main surface and return the easiest items.
    • Act: Group papers and write a short next action only when needed.
    • Act: Leave tomorrow’s first item in one visible place.
    • Review: Record one later decision instead of continuing to organize.
    • Transition: Choose one break that does not require a new project.

    When the routine needs adjusting

    A busy or shared desk may not become visually clear in 10 minutes. In that case, focus on one zone, such as the keyboard area, the space beside the monitor, or the surface needed for journaling. A small usable area can be a more realistic finish line than the entire desk.

    If you are working under a deadline, skip nonessential sorting and gather materials for the next morning. If the desk is already fairly clear, use the time for a paper check, cable check, or review of tomorrow’s first step. If you miss several days, restart without trying to compensate with a longer session.

    The routine is also optional. Rest can begin without cleaning, and a desk reset is not a measure of personal discipline. Use it when a small environmental change would make the transition easier.

    FAQ

    Is this a 10-minute or 15-minute routine?

    It is a 15-minute routine with a 10-minute desk reset at its center. The first 2 minutes prepare the task, about 10 minutes handle sorting and action, and the final 3 minutes close the loop and support a break. You can stop after the core reset when time or energy is limited.

    What if I cannot decide where something belongs?

    Use the “decide later” category. Keep uncertain items together and write a reminder only if the decision has a real next step. This keeps the short routine from becoming a larger organizing session.

    Should I do this in the morning or evening?

    Either can work. An evening reset can create a boundary after work, while a morning reset can prepare the space for the first task. Choose the transition that currently feels most cluttered or difficult.

    What if I do not want to journal?

    Skip journaling. The review can be a quick look at the desk and one spoken or mental sentence about what comes next. The routine is meant to reduce friction, not add a required self-care activity.

    Conclusion

    A short desk reset can support a calmer transition when it has a clear boundary. Prepare the space, sort items into a few useful categories, act on the easiest changes, and review without reopening every decision. With the 15-minute plan, the desk receives 10 minutes of practical attention and the remaining time protects a small break or personal routine. The result does not need to be dramatic; it only needs to make the next part of your day a little easier to enter.




  • A Refined Corduroy Cap for Everyday Styling

    CELINE Triomphe baseball cap in corduroy in rose poudr with a hexagonal design and Triomphe patch

    The CELINE Triomphe baseball cap in corduroy brings a polished finish to relaxed dressing. Its distinctive hexagonal design gives the familiar baseball cap silhouette a more considered character, while the Triomphe patch creates a clear focal point without requiring elaborate styling. In rose poudr, the colour reads as soft, expressive, and easy to use as an accent within a neutral wardrobe.

    Made from 100% cotton, this design balances casual appeal with the visual texture of corduroy. The visor measures 2.8 in (7 cm), offering a defined line at the front, and the adjustable tab allows the fit to be adapted. Manufactured in France, it is a versatile accessory for women looking to add a recognisable luxury detail to everyday outfits, travel looks, or carefully pared-back weekend dressing.

    Why This Cap Works in a Refined Wardrobe

    • Distinctive hexagonal design: The structured shape gives the cap a more individual profile than a basic rounded style, making it effective as a finishing piece.
    • Triomphe patch: The prominent patch adds visual identity at the front and can anchor a simple outfit built around understated separates.
    • Corduroy texture: The 100% cotton corduroy construction introduces tactile interest and a softly elevated feel suited to cooler-season or transitional styling.
    • Defined visor: The 2.8 in (7 cm) visor contributes to the cap’s proportions and offers stylish shading while maintaining a clean, recognisable baseball-cap outline.
    • Adjustable tab: The fastening allows the fit to be adjusted, an important consideration when selecting a cap intended for regular outfit coordination.
    • Rose poudr colour: The soft pink-toned shade can work as a gentle contrast against black, white, navy, denim, grey, and other restrained wardrobe colours.
    • French manufacture: The product information identifies France as the country of manufacture, adding a clear point of provenance to the design.

    Together, these details create a cap that feels intentional rather than purely functional. It can soften tailoring, give proportion to casual layers, or add a subtle colour note to an otherwise monochrome ensemble.

    Ways to Wear It from Weekday to Weekend

    For an understated everyday look, pair the cap with a crisp shirt, straight-leg denim, and low-profile trainers. Allow the rose poudr colour to remain the only noticeable accent, keeping the rest of the palette quiet so the Triomphe patch and hexagonal form stay visually clear.

    To create a more tonal outfit, coordinate it with soft neutrals such as cream, oatmeal, light grey, or warm beige. A fine knit, relaxed trousers, and a structured shoulder bag can make the cap feel integrated into the look rather than added at the last moment. This approach is especially effective when the outfit benefits from a touch of texture.

    For a sharper contrast, use the cap with navy or black outerwear. The pale colour can lighten a darker coat or blazer, while the corduroy surface introduces a relaxed note to more tailored pieces. Keep jewellery and other visible accessories edited so the front patch remains the principal branded detail.

    On casual days, style it with a sweatshirt, denim jacket, or simple cotton layers. The cap’s design provides enough definition to keep an easy outfit looking composed. It can also be useful when building a travel wardrobe: choose garments in a compact, compatible palette and let the cap serve as a soft colour highlight.

    When wearing the cap, consider the angle and proportion of the visor. A straight, clean placement emphasises the structured design; a slightly relaxed position can make the overall styling feel more informal. Since the fastening is adjustable, take time to find a secure, comfortable fit before coordinating the rest of the outfit.

    What to Consider Before Choosing It

    1. Start with the colour. Rose poudr is expressive but gentle. If your wardrobe is dominated by black, white, denim, navy, or grey, it can function as an accent. If you prefer strongly tonal dressing, consider whether you already own knitwear, footwear, or small accessories that can echo the shade.
    2. Assess the shape. The hexagonal design is a defining feature. Choose it if you want a baseball cap with a more distinctive silhouette rather than a completely minimal everyday style.
    3. Think about texture. Corduroy adds surface interest and may feel particularly natural alongside denim, knitwear, brushed fabrics, and seasonal outerwear. It can also create a deliberate contrast with smooth cotton shirts or tailored wool-look pieces.
    4. Check the fit information. The adjustable tab supports personal adjustment, but the available size and measurements should still be reviewed through the size guide before purchase. This is especially important when the cap will be worn for extended periods.
    5. Plan practical care. Keep the corduroy surface protected from unnecessary friction, moisture, and compression. Store the cap so the hexagonal form and visor are not bent, and consult the product’s care information for appropriate cleaning guidance rather than assuming a treatment.
    6. Confirm the product details. Review the current colour description, measurements, product code, and purchase information on the product page. These checks help ensure the selected item matches your intended wardrobe use.

    The strongest reason to choose this design is its balance: a recognisable CELINE identity, a textured cotton construction, and a flexible colour that can move between relaxed and more polished settings.

    Frequently Asked Questions

    What is the material?

    The product information lists the material as 100% cotton.

    What colour is the cap?

    It is described as rose poudr, a soft pink-toned colour.

    Can the fit be adjusted?

    Yes. The design includes an adjustable tab. Please consult the size guide for current size and measurement information.

    What design details define it?

    Key details include the hexagonal design, Triomphe patch, 2.8 in (7 cm) visor, and adjustable tab.

    Where is it manufactured?

    The listed country of manufacture is France.

    How should I care for the corduroy?

    Follow the care guidance supplied with the product and avoid making assumptions about washing or cleaning methods. Store it carefully to help preserve its shape and texture.

    Please verify current product details, size and measurement information, colour description, and purchase information on the product page before purchase.

    View the CELINE Triomphe baseball cap in corduroy at THANKS KAI to explore its current product details.

    Product: CELINE Triomphe baseball cap in corduroy

  • A 15-Minute Calendar Rule for Tracking Recurring Payments

    A 15-Minute Calendar Rule for Tracking Recurring Payments

    작성자: Kai Life Editorial Team

    If recurring payments are easy to forget, use a calendar rule that gives each payment a clear date, label, and review point. In a 15-minute routine, collect the payment information you already have, enter each due date into one calendar, group entries by timing, and review upcoming items before they become urgent. This approach is for household spending organization rather than detailed budgeting: the goal is to make recurring payment dates visible and easier to maintain.

    A 15-Minute Calendar Rule for Tracking Recurring Payments — topic illustration

    Why a calendar can simplify spending records

    Recurring payments are different from occasional purchases. A streaming service, utility bill, membership, insurance installment, school-related charge, or other regular expense may appear in a different account or message, yet each can affect the same household cash-flow picture. When the dates are scattered across email, paper notices, and banking apps, a small record can become difficult to check.

    A calendar does not replace account records. It provides a forward-looking view of what may need attention. The useful information is often limited to:

    • the payment name or household category;
    • the expected date or date range;
    • the payment method or account label;
    • the amount, if it is known and useful;
    • the next date to review the entry.

    Keep the calendar entry short. Detailed notes can remain in the original statement or account. The calendar should answer a practical question quickly: “What recurring payment should I check next?”

    The prepare-sort-act-review framework

    1. Prepare: collect only the information needed

    Set a timer for 15 minutes and gather the sources you already use to track household payments. These may include recent statements, payment notifications, a household notebook, or a banking app. You do not need to reconstruct every past purchase. Look for recurring items and record the information that will help with the next payment.

    If a payment date changes from month to month, record a date range or a reminder window instead of forcing it into a precise date. For example, “around the third week” may be more honest and useful than a date that looks exact but is not dependable.

    2. Sort: use a small set of calendar labels

    Sort entries by timing rather than by a long list of categories. A simple system can use labels such as:

    • Early month: payments near the beginning of the month;
    • Middle month: payments around the middle of the month;
    • Late month: payments near the end of the month;
    • Variable: payments whose date or amount needs checking.

    You can also add a short category label, such as “home,” “communication,” “membership,” or “education.” Use labels that make sense to your household. The system should remain readable when viewed on a small screen.

    3. Act: create one reminder before the payment date

    Enter the recurring payment on the calendar and add one reminder early enough for a practical check. The reminder is not a command to pay immediately. It is a prompt to confirm the date, amount, account, or available record.

    For a variable bill, the reminder can say “check amount.” For a fixed payment, it can say “confirm recurring payment.” If two household members manage different payments, include an owner label such as “Alex check” or “shared check.” Avoid putting sensitive account numbers or login details into a general calendar.

    4. Review: remove uncertainty from the next few weeks

    At the end of the 15-minute session, scan the next several weeks. Look for duplicate entries, missing payment methods, and dates that are only estimates. Mark entries that require another source for confirmation. This review makes the calendar a working record rather than a one-time list.

    A copyable recurring-payment table

    Use the table below in a notes app, spreadsheet, or household notebook. Keep one row per recurring payment. If the exact amount is not stable, write “varies” or leave the field for later review.

    Payment or category Expected date Amount Payment method Next action
    Example: internet Early month Known or varies Account or card label Confirm date and amount
    Example: membership Specific date Known or varies Account or card label Check renewal note
    Example: utility Variable Varies Account or card label Review latest notice

    For privacy, use a short payment-method label rather than a full account or card number. If the table is shared, decide which details are appropriate for everyone who can access it.

    The 15-minute action plan

    1. Minutes 1–3: choose the calendar. Select one shared calendar or notebook as the main location for recurring payment dates.
    2. Minutes 4–7: collect entries. Write down recurring payments that appear in your current records. Focus on the next payment date and the payment name.
    3. Minutes 8–10: sort entries. Group each item by early, middle, late, or variable timing. Add a short household category if it helps.
    4. Minutes 11–13: add reminders. Create one reminder before each payment date. Add “check amount” where the amount can change.
    5. Minutes 14–15: review. Scan the next few weeks, flag uncertain entries, and remove duplicates.

    If the list is longer than the available time, record the entries that are closest to their next date first. Continue with the rest during another short session. A partial, clearly marked record can be easier to improve than an ambitious system that is difficult to maintain.

    Copyable checklist

    • Choose one main calendar or notebook.
    • List recurring payments from current household records.
    • Record an exact date or a realistic date range.
    • Add a short category or household owner when useful.
    • Record a payment-method label without sensitive account details.
    • Mark amounts as known, variable, or needing review.
    • Create a reminder before the expected payment date.
    • Scan the next several weeks for duplicates or missing entries.
    • Review the calendar at a regular household check-in.

    How to keep the system manageable

    Use a maintenance rule that fits your household. One option is a short weekly scan of the next two weeks and a longer monthly review of the full recurring-payment list. The weekly scan focuses on upcoming dates. The monthly review focuses on changes: a new payment, a canceled service, a changed date, or an amount that now needs checking.

    Separate “recording” from “deciding.” Recording says what is expected and when. Deciding whether to continue a service or change a payment method is a separate household conversation. Keeping those activities distinct can make the calendar easier to update without turning every review into a larger financial project.

    When a payment is canceled, do not delete the history immediately if the record may help explain an older entry. Instead, mark it as canceled and remove future reminders after confirming that the calendar no longer needs them. When a payment changes, update the next date and add a short note about what needs confirmation.

    FAQ

    Should every household purchase go on the calendar?

    No. This method is intended for recurring or expected payments. One-time purchases can remain in ordinary spending records unless they need a separate reminder.

    What if the payment date changes each month?

    Use a reminder window, such as a week or part of the month, and label the entry as variable. The reminder can prompt you to check the latest statement or notification.

    Should the amount be included?

    Include it when the amount is stable and useful for a quick review. For bills that change, write “varies” and use the reminder to check the current amount. Avoid treating an old amount as a prediction.

    Can two people share the same calendar?

    Yes, if the household agrees on what information can be shared. Use clear labels for responsibility, and keep account numbers, passwords, and other sensitive details outside the calendar.

    How often should the list be updated?

    A short upcoming-date scan can happen weekly or at another interval that suits the household. A fuller review can happen monthly or when a payment, service, or account changes.

    Conclusion

    A recurring-payment calendar works best as a small visibility tool. In 15 minutes, prepare a short list, sort entries by timing, act by adding useful reminders, and review the next few weeks. The result is a clearer set of spending records without requiring a complicated budgeting system. Adjust the labels, reminder timing, and review schedule to match the way your household already manages payments.


  • 사각 버클 체인 오픈 링 스타일링 가이드

    사각 버클과 체인 디자인의 18K 골드 도금 스테인리스 스틸 오픈 링

    Square Buckle Chain Open Ring Stainless Steel Jewelry Simple Chain Ring Women’s Party Gift는 사각 버클과 체인 모티프를 하나의 실루엣으로 표현한 오픈 링입니다. 제품 정보에는 스테인리스 스틸을 주 소재로 하고, 18K 골드 도금으로 마감한 주얼리로 안내되어 있습니다. 별도의 메인 스톤 없이 기하학적인 형태와 빈티지 스타일에 집중한 디자인이 특징입니다.

    손가락을 완전히 감싸는 일반적인 밴드형 링과 달리, 오픈 링 특유의 여백이 있어 손가락 위에서 형태가 또렷하게 보입니다. 사각 장식의 구조적인 인상과 이어진 체인의 리듬이 함께 드러나므로, 단독 착용 시에도 손이 심심해 보이지 않는 액세서리를 찾을 때 살펴보기 좋습니다. 데일리룩부터 파티, 기념일, 선물용 주얼리까지 다양한 장면을 고려할 수 있는 디자인입니다.

    제품 모델 번호는 JDR201684이며 브랜드명은 JD입니다. 남성용, 여성용, 유니섹스로 안내되어 있어 착용자의 스타일에 따라 폭넓게 선택할 수 있습니다. 다만 오픈 링은 손가락에 놓이는 방식과 여유감이 중요하므로, 구매 전 상품 페이지에서 현재 선택 정보와 상세 내용을 먼저 확인하는 것이 좋습니다.

    디자인과 제품 특징

    • 사각 버클 포인트: 정돈된 사각형 디테일이 링의 중심 인상을 만들며, 단순한 원형 링과 다른 기하학적 분위기를 보여줍니다.
    • 체인 모티프: 체인 형태가 이어져 빈티지 무드와 캐주얼한 포인트를 함께 연출합니다. 셔츠, 니트, 재킷처럼 선이 분명한 옷과도 조화롭게 맞출 수 있습니다.
    • 오픈 링 실루엣: 양끝이 완전히 닫히지 않은 구조로 소개된 제품입니다. 손가락 위에 보이는 여백까지 디자인 요소로 활용하고 싶은 경우 어울립니다.
    • 소재와 마감: 주 소재는 스테인리스 스틸이며, 18K 골드 도금으로 안내되어 있습니다. 메인 스톤은 없는 제품으로, 반짝이는 보석보다 형태와 표면의 인상을 중심으로 감상할 수 있습니다.
    • 스타일 방향: 기하학적 셰이프 패턴과 빈티지 스타일이 결합된 링입니다. 포멀한 옷에는 작은 포인트로, 편안한 데일리룩에는 개성 있는 액세서리로 활용할 수 있습니다.
    • 활용 장면: 데일리 착용은 물론 파티, 기념일, 약혼 관련 자리, 선물용 아이템으로 안내되어 있습니다.

    상황별 스타일링 아이디어

    일상적인 데일리룩에는 절제된 조합이 잘 어울립니다. 단색 티셔츠나 셔츠, 데님처럼 기본적인 아이템을 입은 날에는 이 링을 한 손에 단독으로 착용해 사각 버클과 체인 디테일을 중심 포인트로 잡아보세요. 다른 액세서리를 많이 더하지 않아도 손끝에 구조적인 인상이 생깁니다.

    오피스 캐주얼에는 선명한 실루엣을 활용할 수 있습니다. 재킷이나 깔끔한 셔츠처럼 형태가 분명한 옷과 매치하면 기하학적 패턴이 자연스럽게 연결됩니다. 18K 골드 도금의 따뜻한 색감이 강조되는 디자인이므로, 비슷한 톤의 시계나 얇은 팔찌를 선택하되 전체 액세서리 수는 가볍게 유지하면 링이 중심에 남습니다.

    파티나 기념일에는 포인트 액세서리로 연출해보세요. 메인 스톤이 없는 대신 사각형과 체인 구조가 시선을 끄는 제품이므로, 장식이 많은 의상보다는 한두 가지 포인트가 있는 스타일과 조합하는 편이 디자인을 잘 보여줍니다. 검정, 아이보리, 데님처럼 색이 정돈된 의상과도 매치하기 쉽습니다.

    링 레이어드 시에는 간격을 두는 방식을 고려할 수 있습니다. 여러 개를 촘촘하게 겹치기보다 얇고 단순한 링과 함께 착용해 사각 버클의 형태가 가려지지 않도록 해보세요. 손가락마다 다른 디자인을 배치하면 체인 디테일과 기하학적 요소가 각각 살아납니다. 단, 편안한 착용감과 손가락 움직임을 우선해 조합을 결정하는 것이 좋습니다.

    선택 전 확인 포인트와 관리 아이디어

    1. 오픈 구조가 나에게 맞는지 확인하기: 일반적인 폐쇄형 밴드 링과 착용감이 다를 수 있으므로, 손가락 위에서 양끝이 어떻게 보이는 디자인을 선호하는지 먼저 생각해보세요.
    2. 도금 색감과 옷장 톤 맞추기: 18K 골드 도금으로 안내된 제품인 만큼 골드 계열 시계, 팔찌, 안경테 또는 따뜻한 색상의 의상과 조화시키기 좋습니다. 반대로 실버 중심의 액세서리와 매치할 때는 링 하나만 골드 포인트로 두는 방법도 있습니다.
    3. 장식의 존재감을 고려하기: 메인 스톤이 없는 대신 사각 버클과 체인 형태가 핵심입니다. 큼직한 장식보다 선과 구조가 살아 있는 액세서리를 선호하는지 확인해보세요.
    4. 사용 후 정리하기: 착용을 마친 뒤에는 부드러운 천으로 가볍게 표면을 정돈하고, 다른 액세서리와 부딪히지 않도록 분리해 보관하는 방법을 권합니다. 물기나 화장품이 묻었다면 오래 남지 않도록 부드럽게 닦아주세요.
    5. 구매 전 상품 페이지 확인하기: 제공된 정보에는 상세 사이즈나 선택 가능한 규격이 포함되어 있지 않습니다. 손가락에 맞는 선택 정보, 현재 판매 조건, 상품 상세 이미지를 구매 전에 반드시 확인하세요.

    스테인리스 스틸 주얼리라도 18K 골드 도금 표면을 오래 깔끔하게 유지하려면 거친 마찰을 줄이는 것이 좋습니다. 착용과 보관 환경에 따라 표면 상태가 달라질 수 있으므로, 운동이나 물 사용이 많은 상황에서는 제품 페이지의 안내를 함께 확인한 뒤 보관 여부를 결정하세요.

    자주 묻는 질문

    Q. 어떤 소재의 링인가요?
    A. 제품 정보에는 주 소재가 스테인리스 스틸이며, 18K 골드 도금으로 안내되어 있습니다.

    Q. 메인 스톤이 있나요?
    A. 메인 스톤은 ‘NONE’으로 안내되어 있습니다. 사각 버클과 체인 형태가 디자인의 중심입니다.

    Q. 남성도 착용할 수 있나요?
    A. 성별 항목에는 남성용, 여성용, 유니섹스로 안내되어 있습니다. 실제 선택 가능한 규격과 착용 정보는 상품 페이지에서 확인하세요.

    Q. 어떤 자리에서 활용할 수 있나요?
    A. 데일리룩뿐 아니라 기념일, 약혼 관련 자리, 파티, 선물용으로 안내된 링입니다.

    Q. 사이즈는 어디서 확인하나요?
    A. 제공된 제품 정보에 상세 치수가 없으므로, 구매 전 상품 페이지의 최신 사이즈 및 선택 정보를 확인하는 것이 좋습니다.

    상품 정보와 구매 조건은 변경될 수 있으므로, 구매 전 상품 페이지에서 현재 소재, 도금, 사이즈, 선택 옵션 및 구매 관련 정보를 반드시 확인해 주세요.

    Square Buckle Chain Open Ring Stainless Steel Jewelry Simple Chain Ring Women's Party Gift의 상세 이미지와 현재 상품 정보를 THANKS KAI에서 확인해 보세요.

    Product: Square Buckle Chain Open Ring Stainless Steel Jewelry Simple Chain Ring Women's Party Gift

  • A 15-Minute Project-Based Rule for Better Work Organization

    A 15-Minute Project-Based Rule for Better Work Organization

    작성자: Kai Life Editorial Team

    For practical work organization, keep active files, notes, and tasks connected to a project, then use a short routine to decide what needs attention next. A useful 15-minute version has four parts: prepare your workspace, sort items by project and action, act on one or two priorities, and review what remains. The goal is not to create a complicated productivity system. It is to make important information easier to locate and the next step easier to recognize.

    A 15-Minute Project-Based Rule for Better Work Organization — topic illustration

    Why organize work files by project?

    Files named only by date, department, or document type can become difficult to interpret later. A project-based rule adds context. Instead of placing every document in a general folder such as “Work” or “Notes,” connect it to the work it supports.

    A simple structure might look like this:

    Work
    ├── Project A
    │   ├── 01_Admin
    │   ├── 02_Notes
    │   ├── 03_Working
    │   └── 04_Final
    ├── Project B
    └── Reference

    The exact folder names are less important than using a structure that matches how you think about current work. A project folder can contain meeting notes, drafts, decisions, reference material, and a short task list. When a file supports more than one project, place it in the project where it is actively used and add a clear link or reference elsewhere when needed.

    Use filenames that answer three questions: what is it, which project does it support, and what stage is it in? For example:

    • ProjectA_2025-03-MeetingNotes_Draft
    • ProjectA_ClientQuestions_Open
    • ProjectA_Proposal_ReviewNeeded

    Choose one naming pattern and keep it readable. Dates can help with sorting, while a short status label can make unfinished work visible. Avoid adding so many labels that filenames become difficult to scan.

    The 15-minute prepare, sort, act, and review routine

    1. Prepare: collect the loose items

    Set a timer for 15 minutes and open the places where work is currently scattered. This may include your downloads folder, desktop, email follow-ups, calendar, chat messages, notebook, and task list. Do not try to process every old item. Focus on items that could affect a current priority, scheduled commitment, or repeated task.

    Create a temporary list called Today’s work items. Add short descriptions rather than copying full messages. For example, write “Confirm delivery date for Project B” instead of pasting an entire email thread. This keeps the review focused on decisions and actions.

    2. Sort: connect each item to a project and state

    For each item, make two decisions:

    1. Which project, area, or reference category does it belong to?
    2. What state is it in: action needed, waiting, reference, or archive?

    Move or rename the related file when the answer is clear. For a meeting note, keep the original discussion record in the relevant project folder and extract action items into the project task list. If an item has no clear project, place it in a temporary review area rather than forcing a misleading category.

    Sorting is also a chance to separate information from action. A document can be useful without requiring work today. Marking it as reference prevents a long list of reading material from competing with an actual deadline.

    3. Act: choose a small number of next actions

    After sorting, select the actions that deserve attention in the current work period. A next action should describe a visible step that can be started without another round of interpretation.

    • “Open the draft and add the missing introduction” is clearer than “Work on report.”
    • “Send two questions to the supplier” is clearer than “Handle supplier issue.”
    • “Compare the three submitted options” is clearer than “Review proposals.”

    Use priorities to distinguish urgency, importance, and dependency. A task may be important but blocked by another person. In that case, the next action may be sending a request or recording a waiting status. A task may be urgent but small enough to complete quickly. Treat these differences as planning information rather than as a reason to assign every item the same priority.

    During the 15-minute routine, act on one quick item or start one meaningful next step. The routine is not intended to replace focused work. It prepares the next work block so that you can begin with less searching.

    4. Review: leave a useful trail

    Use the final minutes to record what changed. Update the task status, add a due date when one is known, and note who is responsible for a waiting item. If a decision was made in a meeting, record the decision in the project notes rather than leaving it buried in a chat thread.

    End with a short “next review” note. This can say when you will check the project again or what condition will trigger the next action. A review note is especially helpful for repeated tasks that do not need daily attention but can be forgotten when they remain outside the main workflow.

    A copyable work organization checklist

    Use the checklist below for a daily reset, a project handoff, or part of a weekly review.

    Step Question Action
    Prepare Where are today’s loose items? Check files, messages, calendar, notes, and task lists.
    Sort Which project or category owns each item? Move, rename, link, or place the item in temporary review.
    Clarify Is this an action, waiting item, reference, or archive? Give it a state that explains what happens next.
    Prioritize What deserves attention in the next work block? Choose a small number of clear next actions.
    Record What decision or status could be forgotten? Update the project note or task list.
    Review When should this be checked again? Add a review point or waiting condition.

    How to handle meeting notes

    Meeting notes become more useful when they separate discussion from follow-up. A compact project note can use four headings:

    • Purpose: why the meeting happened.
    • Decisions: what was agreed or changed.
    • Open questions: what still needs clarification.
    • Actions: the next step, owner, and timing when known.

    Save the note inside the related project folder and use a searchable title with the project name and date. After the meeting, transfer action items to the place where you track work. This avoids relying on the meeting document as the only reminder.

    If a meeting covers several projects, keep one main note with clear subsections or create linked project notes. The better choice depends on how often each project is revisited. The useful test is whether someone can find the decision from the project area without knowing which meeting contained it.

    Make the routine work for repeated tasks

    Repeated tasks often create clutter because the same steps are rewritten from memory. Create a lightweight checklist for recurring work, then keep project-specific details separate. For example, a recurring monthly report may have a general checklist, while the current project folder holds the reporting period, source files, and exceptions.

    Review repeated tasks during a weekly review:

    1. Look for tasks that recur but have no consistent location.
    2. Write the repeatable steps in the order they are normally completed.
    3. Note the information needed to start without searching through old messages.
    4. Keep exceptions and one-time decisions in the relevant project record.

    This approach keeps a reusable checklist from becoming a storage place for every possible detail. General steps belong in the checklist; current facts belong with the active project.

    Common problems and practical adjustments

    Too many folders

    If choosing a folder takes longer than finding the file, reduce the number of categories. Start with active projects, reference, and archive. Add a subfolder only when a project has enough material to benefit from it.

    Unclear ownership

    When an item depends on another person, record the request date and the expected follow-up point if known. Use a waiting label rather than leaving the item mixed with tasks that you can complete immediately.

    Old files mixed with current work

    Move completed material to an archive within the project or to a dated archive area. Keep the active project view focused on files that are still relevant to current decisions.

    Overplanning

    A 15-minute routine can become another project if it includes extensive renaming and redesign. Process the items that affect current work first. Improve the structure gradually when a repeated obstacle appears.

    FAQ

    Should every file belong to a project?

    No. Some material is general reference, personal administration, or temporary information. Use a reference or review category when a project connection is not clear. Revisit temporary items during a weekly review.

    What if one file supports several projects?

    Keep one working copy in the project where it is actively maintained, then link to it from other project notes when your tools support links. If linking is not practical, use a clear filename and record where the current version lives.

    How often should the 15-minute routine happen?

    Use it when scattered items begin to slow decisions, before a busy work block, or as part of a weekly review. The useful frequency depends on how often files, meetings, and priorities change.

    Is a separate task app required?

    No. A document, spreadsheet, notebook, or existing workplace tool can hold the task list. The important features are clear next actions, project context, and a visible review point.

    Conclusion

    A project-based file rule gives work information a clear home, while the prepare, sort, act, and review routine turns that structure into a repeatable habit. Start with the files and priorities that affect current work. Use searchable names, separate actions from reference material, and finish with a short note about what happens next. Over time, this lightweight system can make repeated tasks and meeting follow-ups easier to handle without requiring a large productivity framework.


  • A Personalised Pendant for Layered Everyday Styling

    3D double-layer personalised letter pendant necklace with a plated finish

    3D Pendant 18K Gold Plated Double Layer Name Pendant Custom Cartoon Character Luxury Necklace Women’s Children’s Necklace Fashion brings personal expression to an easy-to-style necklace format. Designed around a letter or name motif, it combines a cute character-led sensibility with a double-layer pendant arrangement and a link chain. The result is a piece that can read as playful, polished, or thoughtfully personal depending on how it is worn.

    Its appeal lies in the balance between everyday versatility and individual detail. The necklace is listed with a 3D pendant, a letter shape pattern, no main stone, and a choice of 18K gold plated, 14K gold plated, or rose gold plated finishes. Whether selected for a daily outfit, an anniversary gesture, or a coordinated look shared across generations, it offers a straightforward way to make a familiar wardrobe feel more considered.

    Because the pendant is the visual focus, styling works best when the surrounding outfit allows its lettering and character detail to remain easy to see. A simple neckline, a clean knit, or an open shirt can provide an effective backdrop. For a more expressive approach, pair it with other delicate chains while keeping the layers varied in length and restrained in number.

    Design Details That Shape the Look

    The necklace is defined by several elements that work together rather than by a single decorative stone. Understanding each one can help you choose the right finish and styling direction.

    • Personalised letter character: The listed shape pattern is a letter, while the product title highlights a custom name pendant and cartoon character influence. This gives the piece a personal, light-hearted identity suited to outfits that benefit from a small point of conversation.
    • Double-layer construction: The two-level pendant arrangement creates visual dimension at the centre of the necklace. It can be worn as the principal accessory or used as the focal point within a carefully edited necklace stack.
    • Choice of plated finish: The supplied details list 18K gold plated, 14K gold plated, and rose gold plated options. Gold-toned finishes coordinate naturally with warm neutrals, while rose gold can offer a softer contrast against cool or pastel styling. Confirm the available selection on the product page before ordering.
    • Link chain: The link chain gives the design a familiar necklace profile and supports both casual and occasion-led dressing. Its presence also makes it easier to coordinate with other chain styles without introducing an unrelated texture.
    • No main stone: With no main stone listed, the emphasis remains on the name, letter, pendant shape, and finish rather than sparkle. This makes the necklace particularly suitable for graphic, personalised, or character-inspired outfits.
    • Stated material information: The specifications list stainless steel as the jewellery main material and zinc alloy as the material type. As these entries appear together in the supplied data, review the product page for the current material description and any variant-specific information.

    The overall effect is best understood as jewellery with a personal, cute styling language. It is less about formal decoration and more about making an everyday look feel recognisably yours.

    Ways to Wear It Across the Day

    For daily dressing, let the pendant sit against a plain T-shirt, fine-gauge jumper, or uncomplicated blouse. These foundations keep attention on the lettering and layered centre without making the outfit feel overworked. Denim, tailored trousers, or a simple skirt can each support the necklace while allowing the selected plating to set the mood.

    For an OOTD-focused look, build the outfit around one clear colour story. A gold-toned finish can sit comfortably with cream, camel, chocolate, olive, or black. Rose gold can complement blush, grey, white, and other softened shades. These are coordination ideas rather than rules; the most important consideration is keeping enough contrast between the pendant and the neckline so its shape remains visible.

    The necklace also suits coordinated styling. A parent and child, or two people with a shared name or initial, may choose related finishes or complementary letter details. Since the supplied listing presents the piece as a women’s and children’s necklace, it may be considered for family-oriented styling, but the exact customisation and suitability should be confirmed before purchase.

    For an anniversary-oriented presentation, the personal name or letter element can make the necklace feel more intentional than a generic accessory. Pair it with a handwritten note, a neat jewellery box, or an understated outfit that keeps the focus on the pendant. For a playful fashion direction, combine it with a character-themed colour accent, a small charm, or a graphic accessory, while avoiding too many competing motifs.

    Layering is another natural option. Start with this necklace as the most distinctive piece, then add one or two simpler chains with different lengths. Keep the additional necklaces visually quiet so the double-layer pendant remains the centre of the composition. If the outfit already includes a statement collar or bold print, wearing the necklace alone may create the more refined result.

    How to Select and Care for Your Necklace

    Begin with the personal detail. Check the intended letter or name carefully, including spelling, order, and any character selection offered on the product page. Customised jewellery is most successful when the central detail feels deliberate, so take a moment to compare the chosen design with the way you expect to wear it.

    Next, consider the finish in relation to your wardrobe. Choose among the listed plated options according to the jewellery tones you already wear most often. If your collection is largely warm gold, an 18K or 14K gold plated appearance may create continuity. If you prefer a gentler, slightly different accent, rose gold plated may be the more suitable direction. Confirm which finishes and customisation choices are currently offered.

    Think about scale and visibility before ordering. The supplied data does not provide dimensions, so use the product images and current product-page information to judge the pendant’s visual proportion. Consider the necklines in your wardrobe, how much space you prefer between layers, and whether the lettering should be a subtle personal detail or the primary focal point.

    For care, handle the necklace thoughtfully and keep it separate from other jewellery when not being worn to help reduce tangling and surface contact. Store it in a clean, dry place. Since the item is plated and the supplied information does not state care or wear-resistance instructions, consult the current product page for specific guidance before exposing it to moisture, cosmetics, fragrance, or other substances. Avoid assuming that any plated finish is interchangeable with solid precious metal.

    Finally, review all listing information before purchase. The supplied specification identifies Kumi as the brand, lists the occasion as anniversary and the application as daily life, and states that no certificate is provided. Check the current product page for the exact variant, personalisation process, product details, and purchase conditions.

    Frequently Asked Questions

    What is the main design feature?
    The necklace centres on a 3D, double-layer pendant with a letter or name-led design and a cute cartoon character influence.

    Which finishes are listed?
    The supplied details list 18K gold plated, 14K gold plated, and rose gold plated options. Confirm current availability and variant details on the product page.

    Does it include a gemstone?
    No main stone is listed. The visual emphasis is on the pendant shape, lettering, layering, and plated finish.

    What materials are specified?
    The data lists stainless steel as the jewellery main material and zinc alloy as the material type. Review the product page for the current material description and any variant-specific information.

    Is it suitable for layering?
    Yes, its double-layer centre can be styled with simpler chains. Use varied lengths and keep additional pieces restrained so the personalised pendant remains visible.

    How should I choose the personal detail?
    Check the spelling, letter order, and selected character or name carefully before submitting an order, then verify the available customisation options on the product page.

    Product details, materials, plating options, customisation choices, care guidance, and purchase information may change. Please verify the current details and purchase information on the product page before purchase.

    View 3D Pendant 18K Gold Plated Double Layer Name Pendant Custom Cartoon Character Luxury Necklace Women's Children's Necklace Fashion at THANKS KAI.

    Product: 3D Pendant 18K Gold Plated Double Layer Name Pendant Custom Cartoon Character Luxury Necklace Women's Children's Necklace Fashion

  • A 15-Minute Travel Planning Organization Routine for Lodging and Transit

    A 15-Minute Travel Planning Organization Routine for Lodging and Transit

    작성자: Kai Life Editorial Team

    For practical travel planning organization, use one trip note with four sections: lodging, transit, places, and action items. In 15 minutes, gather the details you are likely to need soon, label each item by timing, and turn important information into a short checklist. The aim is not to record every possibility. It is to make the next useful detail easy to find when you are moving, checking in, or deciding where to go.

    A 15-Minute Travel Planning Organization Routine for Lodging and Transit — topic illustration

    Why a single trip note helps

    Travel information often arrives in different forms: a booking message, a map pin, a transport page, a saved post, or a message from someone who has visited before. When these details stay in separate places, the difficult part is often retrieval rather than research.

    A central note gives each detail a home. It can be a document, note, or workspace that you already know how to use. The specific tool matters less than a clear structure and a title that you can recognize quickly.

    Use a title format such as Trip — place — dates. If the trip has several bases, add a short label for each one. Keep factual details separate from ideas. For example, a confirmed lodging address belongs in the lodging section, while a restaurant you may visit belongs in the place list.

    The four-part note system

    1. Prepare: create the note skeleton

    Start with empty headings before you search. This reduces the temptation to collect information without deciding where it belongs.

    TRIP — [place] — [dates]
    
    LODGING
    - Name:
    - Address:
    - Check-in and check-out:
    - Arrival instructions:
    - Booking reference:
    - Contact method:
    
    TRANSIT
    - Arrival route:
    - Local transport:
    - Departure route:
    - Tickets or reservations:
    - Payment or access notes:
    
    PLACES
    - Near lodging:
    - Near arrival or departure points:
    - Time-sensitive options:
    - Weather or energy alternatives:
    
    ACTION ITEMS
    - [ ]
    
    OPEN QUESTIONS
    - 

    Use placeholders instead of leaving information in an unstructured paragraph. A blank field also shows what still needs confirmation.

    2. Sort: label details by use

    As you review messages and saved pages, place each detail in the relevant section. Add a short label that tells you when or why it matters:

    • Before leaving: information needed during preparation, such as a reservation reference or departure point.
    • Arrival: directions, access instructions, check-in timing, or a meeting location.
    • During the stay: nearby places, local transport notes, and flexible options.
    • Departure: checkout steps, the route to the next stop, and any timing constraint.
    • Confirm: information that is incomplete, changed, or based on an older message.

    These labels help distinguish a useful fact from a future possibility. A place can remain in the note without receiving the same priority as a confirmed booking or a time-sensitive connection.

    3. Act: convert research into small decisions

    After sorting, make the note operational. Write the next action beside any item that could otherwise remain vague. “Check arrival transport” is less useful than “Compare the route from the arrival point to the lodging and record the preferred option.”

    For each important item, capture the smallest usable set of information:

    • What: the name of the lodging, station, stop, or place.
    • Where: the address, meeting point, or map reference.
    • When: the relevant date, time window, or opening condition if known.
    • What next: the action needed from you.

    For transit, separate the route from the decision. The route may be a sequence of stops, while the decision might be which arrival option is easier with luggage or which departure option leaves more time. Avoid turning uncertain information into a firm plan; mark it as an open question or an option to compare.

    4. Review: create a quick-use version

    At the end of the routine, scan the note as if you were already on the trip. Move the most time-sensitive items near the top or create a short “quick view” section:

    • Lodging name and address
    • Arrival instructions
    • First transport step
    • Important reference numbers
    • Next unresolved question

    Keep the detailed research below this quick view. The detailed sections preserve context, while the quick view reduces scrolling when your attention is divided.

    A 15-minute action plan

    Use a timer if that helps you keep the session focused. The time blocks are a guide rather than a rule; a complex trip may need more than one session.

    Minutes Focus Output
    0–2 Prepare Create the note, add the trip title, and paste the four main headings.
    2–7 Collect and sort Move confirmed lodging and transit details into the correct sections.
    7–11 Prioritize Mark arrival, departure, and time-sensitive items. Separate ideas from commitments.
    11–14 Act Write the next action for open questions and add any missing reference details.
    14–15 Review Build the quick view and check that the first arrival step is understandable.

    If the note contains too much material, do not solve that by adding more categories. First remove duplicates, group similar place ideas, and move low-priority research under a heading such as “Maybe later.” The main note should support decisions, not preserve every search result.

    Copyable checklist for each trip

    • [ ] Create one note with a recognizable trip title.
    • [ ] Record the lodging name, address, and relevant arrival instructions.
    • [ ] Add booking or reservation references in a clearly labeled field.
    • [ ] Record the first transport step after arrival.
    • [ ] Separate confirmed plans from possible places to visit.
    • [ ] Group place ideas by area, timing, or purpose.
    • [ ] Mark details that need confirmation.
    • [ ] Write one next action for each unresolved item.
    • [ ] Create a short quick view for arrival and departure.
    • [ ] Review the note after a major booking or route change.

    Ways to keep the system usable

    Use consistent labels

    Choose a small set of labels and use them throughout the note. For example, “Arrival,” “Departure,” “Confirm,” and “Option” are more useful when they have one meaning each. Avoid creating a new label for every kind of detail.

    Keep places connected to a reason

    A place list becomes easier to use when each entry has a short reason: near the lodging, suitable for a short visit, useful in poor weather, or convenient before departure. This turns a list of names into a set of choices.

    Record uncertainty honestly

    Use wording such as “check,” “possible,” or “not confirmed” when the information may change. This protects the note from becoming misleading as plans evolve. For changing transport information, consult the relevant operator or official local source when making a final decision.

    Review after changes, not constantly

    A short review is useful after a lodging change, a new reservation, or a significant route decision. Repeatedly rewriting the entire itinerary can consume attention without improving it. Update the affected section and check whether the quick view still matches the plan.

    FAQ

    Should every travel detail go into the main note?

    No. Keep details that support a decision or help with retrieval. Move background research and low-priority ideas to a separate section so confirmed information remains visible.

    What if I have several lodging locations?

    Keep the same four-part structure, then add a small subsection for each lodging location. Record the dates beside each location and keep inter-location transit in the transit section or beside the relevant move.

    How should I handle places that are not confirmed?

    Put them in the place list with a reason and a clear “Option” label. If visiting depends on time, weather, or opening conditions, record that condition instead of treating the place as part of the fixed itinerary.

    Can this system work with paper notes?

    Yes. Use one page or a small set of pages with the same headings. A paper version may be useful for a short quick view, while detailed references can remain in the original messages or documents.

    Conclusion

    A useful travel planning organization system does not need many tools. Start with one structured note, sort details by when they matter, turn open questions into actions, and finish with a quick view for arrival and departure. This 15-minute routine creates a practical base for itinerary organization while leaving room for flexible choices during the trip.


  • 데일리부터 파티까지, 레이어드 주얼리 링 가이드

    기하학적 지르콘 장식과 골드 또는 로듐 도금 옵션이 안내된 여성용 925 실버 링

    Peishang Factory Custom Topaz Zircon Four Step Ring 14k Gold Plated Jewelry Bulk Stacking 925 Silver Finger Ring for Women은 기하학적인 형태와 라운드 브릴리언트 컷 지르콘, 파베 세팅이 어우러진 여성용 링입니다. 상품 정보에는 주 소재가 925 SILVER로 안내되어 있으며, 골드 도금 또는 로듐 도금 옵션이 제시되어 있어 취향에 따라 분위기를 선택할 수 있습니다.

    이 제품은 단독으로 포인트를 주는 칵테일 링 스타일은 물론, 여러 링을 함께 연출하는 스태킹 주얼리로도 살펴볼 만합니다. 실버 계열은 깔끔하고 차분한 데일리룩에, 골드 계열은 따뜻하고 선명한 포인트가 필요한 스타일에 매치하기 좋습니다. 다만 실제 색감과 옵션 구성은 상품 페이지의 이미지와 선택 항목을 기준으로 확인하는 것이 좋습니다.

    디자인과 사양에서 확인할 포인트

    • 기하학적 실루엣: 정형화된 라인이 모던한 인상을 만들어 캐주얼부터 포멀한 코디까지 폭넓게 살펴볼 수 있습니다.
    • 지르콘 포인트: 메인 스톤은 지르콘이며, 다이아몬드 형태는 라운드 브릴리언트 컷으로 기재되어 있습니다. 파베 세팅과 클로 세팅이 함께 안내되어 반짝임을 강조한 디자인 구성이 돋보입니다.
    • 두 가지 도금 표기: 상품 정보에는 Gold Plated와 Rhodium Plated가 모두 기재되어 있습니다. 골드 톤과 실버 톤 중 원하는 옷장 분위기와 액세서리 조합을 먼저 정한 뒤 옵션을 확인해 보세요.
    • 925 SILVER 베이스: 주얼리 메인 소재가 925 SILVER로 안내된 제품입니다. 소재 및 도금 관련 세부 조건은 구매 전 상품 페이지의 최신 정보를 다시 확인하는 편이 안전합니다.
    • 다양한 착용 상황: 기념일, 약혼, 선물, 웨딩, 파티가 상품 정보의 활용 상황으로 제시되어 있습니다. 일상적인 스타일링뿐 아니라 특별한 날의 손끝 포인트로도 고려할 수 있습니다.
    • 브랜드 및 모델: 브랜드명은 PEISHANG, 모델 번호는 DR1306으로 안내되어 있어 문의나 옵션 확인 시 참고하기 좋습니다.

    상황별 스타일링 아이디어

    깔끔한 데일리룩에는 단독 착용
    셔츠, 니트, 블라우스처럼 손목과 손끝의 선이 단정하게 보이는 옷에는 링 하나만 착용해 디자인을 또렷하게 보여줄 수 있습니다. 실버 계열은 흰색, 블랙, 데님처럼 기본 색상과 자연스럽게 어우러지고, 골드 계열은 베이지나 브라운 톤의 코디에 따뜻한 포인트를 더하는 방향으로 연출할 수 있습니다.

    레이어드 룩에는 간격을 조절
    상품명에 Stacking이 포함된 만큼 여러 링과의 조합을 생각해 볼 수 있습니다. 이때 모든 손가락을 빽빽하게 채우기보다 한 손가락에 중심 링을 두고 인접한 손가락에는 단순한 밴드형 링을 더하는 식으로 균형을 맞춰 보세요. 지르콘과 기하학적 형태가 이미 시선을 끄는 편이므로, 함께 착용하는 액세서리는 형태가 간결할수록 주얼리의 특징이 잘 드러납니다.

    약속이나 파티에는 포인트 아이템으로
    칵테일 링 타입으로 안내된 제품인 만큼 원피스, 재킷, 깔끔한 셋업과 함께 손끝에 시선을 모으는 스타일을 구성할 수 있습니다. 귀걸이나 목걸이까지 모두 화려하게 고르기보다는 메탈 톤을 맞추고, 다른 주얼리는 크기와 장식을 낮춰 전체 인상을 정돈해 보세요.

    선물로 고려할 때
    기념일, 웨딩, 약혼, 선물 용도가 안내되어 있으므로 받는 사람의 평소 메탈 톤과 반지 사이즈를 먼저 확인하는 것이 좋습니다. 사이즈 정보와 옵션, 포장 관련 내용은 제공된 자료만으로 판단하기 어려우므로 구매 전 상품 페이지에서 확인해야 합니다.

    선택 전 체크리스트와 관리 방향

    1. 메탈 톤을 먼저 정하기: 옷장에 실버 액세서리가 많다면 로듐 도금 표기를, 골드 톤 액세서리를 자주 착용한다면 골드 도금 표기를 우선 비교해 보세요. 실제 선택 가능 여부는 상품 페이지의 최신 옵션을 기준으로 확인해야 합니다.
    2. 손가락별 역할을 정하기: 단독 포인트로 착용할지, 스태킹 조합의 중심으로 사용할지에 따라 어울리는 손가락이 달라질 수 있습니다. 함께 착용할 링의 폭과 장식이 비슷한지 살펴보면 조합을 계획하기 쉽습니다.
    3. 반지 사이즈 확인하기: 제공된 정보에는 사이즈 수치가 포함되어 있지 않으므로, 평소 착용하는 반지의 사이즈와 상품 페이지에 표시된 사이즈 체계를 대조해 보세요. 사이즈 선택이 필요한 경우 구매 전에 판매 페이지의 안내를 확인하는 것이 중요합니다.
    4. 소재 및 도금 정보 확인하기: 925 SILVER, Gold Plated, Rhodium Plated가 안내되어 있지만 옵션별 적용 내용이나 세부 조건은 페이지에서 다시 확인해야 합니다. 피부에 직접 닿는 주얼리인 만큼 소재 표기를 꼼꼼히 읽고 선택하세요.
    5. 사용 후 보관에 신경 쓰기: 도금 제품의 상태를 오래 유지하고 싶다면 사용 후 상품 페이지에서 안내하는 관리 방법을 따르는 것이 좋습니다. 물, 화장품, 마찰 등에 관한 구체적인 관리 기준은 제공된 자료에 없으므로 임의로 단정하지 말고 판매 페이지의 최신 안내를 확인하세요.
    6. 구성품과 구매 조건 점검하기: 인증, 구성, 가격, 배송 및 반품 조건은 제공된 상품 정보만으로 확인할 수 없습니다. 구매 전 제품 페이지에서 현재 조건과 상세 정보를 함께 살펴보세요.

    자주 묻는 질문

    Q. 어떤 소재의 링인가요?
    A. 주얼리 메인 소재는 925 SILVER로 안내되어 있습니다. 도금 종류와 세부 조건은 상품 페이지에서 확인해 주세요.

    Q. 어떤 스톤이 사용되었나요?
    A. 메인 스톤은 ZIRCON이며, 라운드 브릴리언트 컷과 파베 세팅이 상품 정보에 기재되어 있습니다.

    Q. 색상은 어떤 선택지가 있나요?
    A. 이미지 설명에는 Silver와 Gold가 각각 표시되어 있고, 사양에는 로듐 도금과 골드 도금이 안내되어 있습니다. 실제 선택 가능한 옵션은 제품 페이지에서 확인해야 합니다.

    Q. 일상용으로만 착용할 수 있나요?
    A. 상품 정보에는 데일리 스타일링과 함께 기념일, 약혼, 웨딩, 파티, 선물 등의 활용 상황이 안내되어 있습니다. 착용 환경과 관리 방법은 최신 상품 안내를 참고하세요.

    Q. 여러 개를 함께 착용해도 되나요?
    A. 상품명에 Bulk Stacking이 포함되어 있어 스태킹 스타일을 고려할 수 있습니다. 함께 착용할 링의 메탈 톤과 장식 정도를 맞추면 보다 정돈된 조합을 만들 수 있습니다.

    상품의 소재, 도금, 옵션, 사이즈, 구성, 가격 및 구매 조건은 변경될 수 있으므로 구매 전 THANKS KAI의 제품 페이지에서 현재 상세 정보와 구매 정보를 반드시 확인해 주세요.

    PEISHANG의 디자인과 최신 옵션을 확인하고 싶다면 THANKS KAI에서 제품을 살펴보세요.

    Product: Peishang Factory Custom Topaz Zircon Four Step Ring 14k Gold Plated Jewelry Bulk Stacking 925 Silver Finger Ring for Women

  • A 15-Minute Digital Organization Routine for Searchable File Names

    A 15-Minute Digital Organization Routine for Searchable File Names

    작성자: Kai Life Editorial Team

    If you want to find everyday documents more easily, use one consistent naming pattern: date, project or topic, document type, and status. For example, 2025-03-08_ClientA_Proposal_Draft is easier to scan than final proposal new. You can introduce the rule in a 15-minute routine by preparing a small workspace, sorting a limited group of files, renaming the most useful items, and reviewing what should happen next.

    A 15-Minute Digital Organization Routine for Searchable File Names — topic illustration

    The goal is not to rebuild your entire digital life in one sitting. It is to create enough structure that a future search gives you useful clues: when the file was created, what it concerns, what kind of item it is, and whether it is ready to use.

    Why file names become difficult to search

    Digital clutter often grows through small decisions. A download receives a vague name, an attachment is saved without its project context, and a revised copy gains another version of “final.” After several months, the folder may contain files that are technically present but difficult to identify.

    Common problems include:

    • Dates are written in different formats, such as 3-8-25, March 8, and 080325.
    • Project names are shortened inconsistently, so related documents do not appear together in search results.
    • Status words such as draft, review, approved, and archived are missing or used differently.
    • Duplicate files are renamed with unclear endings such as new, latest, or final2.
    • Apps and saved links are managed separately from the files and tasks they support.

    A useful naming rule reduces the number of decisions you need to make later. It also makes a file’s purpose visible before you open it.

    The searchable naming rule

    Use this pattern for documents that relate to work, clients, household administration, or recurring projects:

    YYYY-MM-DD_Project-or-Topic_Document-Type_Status

    Examples:

    • 2025-03-08_ClientA_Proposal_Draft
    • 2025-03-10_Tax_Receipt_Review
    • 2025-03-12_Website_ContentPlan_Approved
    • 2025-03-15_Home_InsurancePolicy_Reference

    Not every file needs every field. A short reference document might use 2025-03-15_Warranty_Reference. A recurring spreadsheet may benefit from a period instead of a day, such as 2025-03_MonthlyExpenses_Working.

    How to choose each part

    • Date: Choose the date that helps you identify the file. This may be the creation date, meeting date, invoice date, or reporting period. Use the same date format within a folder.
    • Project or topic: Use a short, recognizable label. Prefer ClientA or KitchenRepair over an abbreviation that only makes sense today.
    • Document type: Describe what the item is, such as Invoice, Notes, Contract, Proposal, Receipt, Brief, or Checklist.
    • Status: Add a simple state when it affects your next action. Useful options may include Draft, Review, Approved, Sent, Paid, or Reference.

    Use underscores or hyphens consistently. Avoid adding private information to names when the file may be shared or stored in a location with broad access. If your system has restrictions on certain characters, use plain letters, numbers, underscores, or hyphens.

    A 15-minute Prepare, Sort, Act, and Review routine

    1. Prepare: minutes 0–3

    Select one small target. Good choices include the Downloads folder, documents from one client, this month’s receipts, or files for one active project. Do not begin with every folder on every device.

    Write down the naming pattern where you can see it:

    YYYY-MM-DD_Project_Document-Type_Status

    Then choose a temporary holding folder such as 00_ToSort or a short list in your notes app. This gives uncertain files a place to wait instead of forcing a decision you may later regret.

    2. Sort: minutes 3–7

    Scan the selected files and place each into one of four groups:

    • Keep and rename: The file is useful and its identity is clear.
    • Keep for review: The file may matter, but its purpose or retention needs checking.
    • Move: The file belongs in another project or folder.
    • Delete or archive: The file is a duplicate, temporary export, or obsolete copy, subject to your own records needs.

    Sorting before renaming prevents you from spending time polishing names for files you will not keep. If you cannot identify a file from its contents or context, place it in the review group rather than guessing.

    3. Act: minutes 7–13

    Rename the files with the highest future value first. Prioritize items you search for repeatedly, files connected to active work, and documents that are likely to be confused with similar versions.

    Use a short, stable vocabulary. For example, select one term between Invoice and Bill for the same document category. Select one status between Working and Draft if they mean the same thing in your system.

    When two files have the same date and topic, add a distinguishing field:

    • 2025-03-08_ClientA_Proposal_Draft
    • 2025-03-08_ClientA_Proposal_Comments

    If you create a new version, update the status or date rather than relying on vague labels. Keep the original when it may be needed for comparison, and apply your own retention rules to older versions.

    4. Review: minutes 13–15

    Look at the renamed group as if you were searching for one item next month. Ask:

    • Can I tell what this file is without opening it?
    • Would I use the same project or topic label next time?
    • Does the status describe a real next step?
    • Are any files still sitting in a temporary location without a review date?

    Record one small rule for the next session, such as “Use ClientA, not CA” or “Receipts include the purchase date.” A visible rule is easier to repeat than a vague intention.

    Copyable 15-minute checklist

    Time Action Done
    0–3 minutes Choose one folder or project and write the naming pattern □
    3–7 minutes Group files into keep, review, move, and delete/archive □
    7–13 minutes Rename the most useful files using consistent terms □
    13–15 minutes Check searchability and record one rule for next time □

    Connect files with apps and links

    File names solve only part of the retrieval problem. Apps and saved links can become another layer of friction when they are arranged by installation order or saved without context.

    App organization

    Group apps by the action you take rather than by the company that made them. Possible groups include Write, Communicate, Finance, Design, Admin, and Reference. Keep the groups small enough that you can scan them quickly.

    For apps you use only occasionally, consider a separate folder or secondary screen. The exact layout depends on your device, but the principle is consistent: frequently used tools should be close to the task they support, while occasional tools should not compete for attention.

    Link management

    Save a link with a useful title and a short reason. Instead of Interesting article, use a label such as Invoice checklist — reference for monthly admin. Add the topic, project, or intended action when your bookmarking tool allows notes or tags.

    Create a small set of link categories, such as Current Work, Reference, To Read, and Services. Review the To Read group during a scheduled session. If a link no longer supports a current need, remove it or move it to a clearly labeled archive according to your own preference.

    Rules for keeping the system usable

    • Start with active material. New and frequently used files provide more immediate value than a complete historical cleanup.
    • Limit status terms. A short vocabulary makes searches and folder scans easier.
    • Separate storage from action. A file can be safely stored without being an active task.
    • Use a review area for uncertainty. Ambiguous files need a decision date, not a guessed label.
    • Adapt the pattern to the tool. Some services sort naturally by date, while others rely heavily on tags or folders.
    • Protect sensitive information. Avoid putting unnecessary personal, financial, or confidential details in filenames.

    FAQ

    Should the date be the first part of every file name?

    No. A date-first format is useful when chronological sorting matters, but a topic-first format may suit a system organized primarily by client or project. Choose one pattern for a defined group and apply it consistently.

    What should I do with files I cannot identify?

    Move them to a review location and note when you will inspect them. Check the file contents, surrounding folder, email context, or related task before renaming or deleting it.

    Do I need a separate folder for every project?

    Not necessarily. A small number of broad folders combined with descriptive filenames may be easier to maintain than many deeply nested folders. Use a structure that matches how you search.

    How often should I repeat the routine?

    Repeat it when a particular folder becomes difficult to scan or when a recurring administrative task creates a batch of files. A short, regular review can be more manageable than waiting for a large cleanup session.

    Conclusion

    Digital organization becomes more practical when it is treated as a repeatable decision process rather than a one-time makeover. Start with one small group of files, use YYYY-MM-DD_Project_Document-Type_Status, and spend 15 minutes preparing, sorting, acting, and reviewing. Then connect the same ideas to app groups and saved links so that your digital workspace reflects the way you actually work.


  • A Refined Guide to Choosing a Daily Chain Necklace

    RINNTIN 1mm 925 sterling silver cable chain necklace in a 14K gold-plated finish

    BSC06 RINNTIN Thin Chains 1mm 925 Sterling Silver 14K Gold Plated Cable Chain Necklace 16, 18, 20, 22, 24 Inch is a quietly versatile piece for wardrobes that favour clean lines and considered detail. Its 1mm cable-chain profile gives the necklace a slender visual presence, while the 925 sterling silver base and stated 14K gold plating create a warm, polished direction. The design is also listed with rhodium-plated and rose-gold-plated options, allowing the overall finish to work with different jewellery palettes.

    With five listed length choices—16, 18, 20, 22, and 24 inches—the necklace invites a more deliberate approach to styling. A shorter selection can sit close to the neckline, while a longer option can create a relaxed vertical line over clothing. The result is a classic chain intended to move easily between everyday outfits, layered looks, gifting occasions, and more dressed-up settings.

    Rather than relying on a prominent pendant or main stone, this necklace places its emphasis on the chain itself. That makes it a useful foundation for a minimal jewellery edit, a coordinated set of fine-looking layers, or a restrained finishing touch for an outfit. The guide below focuses on choosing the most suitable length and finish, then incorporating the piece into daily dressing with clarity.

    What Defines the Necklace

    • Slender 1mm profile: The thin cable-chain construction is visually light and suited to styling where the necklace should complement rather than dominate an outfit.
    • 925 sterling silver: The listed purity of precious metals is 925 silver, with a stated precious-metal weight range of 0.78–1.11g.
    • 14K gold-plated presentation: The supplied product name identifies a 14K gold-plated version, giving the piece a warm-toned direction for gold jewellery wardrobes.
    • Additional finish listings: The product information also references rhodium-plated and rose-gold-plated versions. Consider the finish as part of the overall styling plan rather than treating length as the only choice.
    • Five length choices: The listed options are 16, 18, 20, 22, and 24 inches. This range supports close-to-neckline styling, balanced everyday proportions, and longer layered arrangements.
    • Classic cable-chain design: The necklace type is listed as chains, with cable chain given as both chain type and shape. Its uncomplicated structure supports a broad range of outfits.
    • No main stone: The product data lists no main stone and no inlay technology, keeping the visual focus on the line, finish, and proportion of the chain.
    • Broad occasion profile: The supplied occasions include anniversary, engagement, gift, party, wedding, and other events, while the listed gender category is children’s, men’s, unisex, and women’s.

    Styling Scenarios for Everyday Wear

    For a refined daily uniform. Pair the warm gold-plated finish with simple separates, a fine knit, or a crisp shirt when you want the neckline to feel finished without adding visual weight. The 16-inch option is the most close-fitting choice in the listed range, making it a natural starting point for high necklines or a neat, contained look. The 18-inch length offers a little more ease while maintaining a polished, familiar proportion.

    For open collars and relaxed necklines. A 20-inch chain can create a balanced line beneath an open shirt, soft collar, or uncomplicated crew-neck layer. It remains understated, but its additional length gives the cable pattern more room to register against the fabric. This is a practical choice when you want the necklace to be visible without making it the centre of the outfit.

    For longer lines and layering. The 22-inch and 24-inch options provide a more extended silhouette. Wear one on its own over a plain top for a quiet vertical accent, or coordinate it with a shorter chain for a layered composition. To keep the arrangement intentional, vary the lengths clearly and let the slender 1mm profile maintain visual space between the pieces.

    For finish coordination. The 14K gold-plated version sits naturally alongside warm-toned accessories, from gold earrings to a watch with a similarly coloured case. If your wardrobe is built around cooler metals, the listed rhodium-plated option may offer a more coherent direction; rose gold can introduce a softer, blended note. Keeping the metal family consistent is an easy way to make simple outfits appear more considered.

    For gifting and occasion dressing. Its classic chain form and absence of a main stone make the necklace a relatively restrained choice for anniversaries, engagements, weddings, parties, or gifting. When selecting for someone else, focus first on their usual jewellery finish and preferred neckline proportions, then use the five listed lengths to refine the choice.

    How to Choose the Right Version

    1. Begin with the finish. Choose the stated 14K gold-plated direction if warm metallics dominate the wearer’s jewellery. Review the available product presentation for rhodium-plated or rose-gold-plated alternatives when a cooler or softer tone would coordinate more naturally.
    2. Choose length by styling intention. Select 16 inches for a closer neckline effect, 18 inches for a slightly more relaxed everyday proportion, and 20 inches for a balanced middle ground. Consider 22 or 24 inches when a longer line or layered arrangement is the priority.
    3. Consider the wardrobe before the occasion. A chain that works with the wearer’s regular collars, knitwear, and open-neck shirts will likely be used more often than one chosen only for a formal event. The listed occasion range makes the necklace adaptable, but the best selection remains the one that matches personal dressing habits.
    4. Use the design as a foundation. Since the necklace has no main stone or inlay technology, decide whether you prefer its clean chain character alone or as part of a layered look. Its classic construction can support either approach without introducing a competing motif.
    5. Plan care around preservation. Keep the necklace’s finish in mind when organising your jewellery. Store it separately enough to preserve its neat presentation, avoid unnecessary tangling, and return it to its storage place after wear. Before using any cleaning method, confirm suitable care guidance on the product page or with the seller, especially for a plated finish.

    Frequently Asked Questions

    What material is listed for the necklace?
    The product data lists silver as the main jewellery material and 925 silver as the precious-metal purity. The named version is 14K gold plated.

    Which lengths are available?
    The listed choices are 16, 18, 20, 22, and 24 inches.

    Is there a pendant or main stone?
    No. The supplied specifications list no main stone and describe the item as a cable chain necklace.

    Are other finishes referenced?
    Yes. The product information references rhodium-plated and rose-gold-plated versions in addition to the 14K gold-plated presentation.

    Which length is best for layering?
    Longer options such as 22 or 24 inches can create separation from a shorter chain, while 16, 18, or 20 inches can provide a closer base. The best combination depends on the intended neckline and personal styling preference.

    Can it suit different wearers?
    The supplied gender specification includes children’s, men’s, unisex, and women’s. Selection should still be based on the wearer’s preferred finish, neckline proportions, and desired length.

    Please verify the current product details, available finishes and lengths, care guidance, and purchase information on the product page before purchase.

    View BSC06 RINNTIN Thin Chains 1mm 925 Sterling Silver 14K Gold Plated Cable Chain Necklace 16, 18, 20, 22, 24 Inch at THANKS KAI and explore the finish and length that best suit your wardrobe.

    Product: BSC06 RINNTIN Thin Chains 1mm 925 Sterling Silver 14K Gold Plated Cable Chain Necklace 16, 18, 20, 22, 24 Inch

THANKS KAI CONTACT

WeChat

위챗에서 QR코드를 스캔해 주세요.
Scan the QR code in WeChat.

Thanks Kai WeChat contact QR code위챗 열기 / Open WeChat