Tag: lang-en

English content

  • A Refined Guide to an Olive Leather Bucket Bag

    COACH Bleeker bucket bag in B4/MUTED OLIVE smooth cow leather with a single handle, adjustable strap, visible topstitching, and gold-finish accents

    COACH Bleeker bucket bag brings a composed, versatile presence to everyday dressing. Its bucket silhouette is defined by smooth 100% cow leather, a single handle, and a wide adjustable strap that allows the bag to be styled in more than one way. In B4/MUTED OLIVE, it offers a considered alternative to familiar neutrals while remaining easy to coordinate across a wardrobe.

    The proportions are generous without appearing overstated: 27.9 cm wide, 29.5 cm high, and 17.4 cm deep. That vertical profile gives the design its distinctive bucket-bag character, while visible topstitching and gold-finish accents add definition to the clean leather surface. It is a piece suited to relaxed daily looks, polished city dressing, and occasions when a practical silhouette should still feel refined.

    Rather than relying on excessive decoration, the design focuses on the relationship between shape, handle, strap, and finish. The result is an accessory with a clear visual identity and adaptable styling potential. For anyone selecting a leather bucket bag, this piece offers a useful balance of structure, ease, and understated colour.

    Design Details That Define the Silhouette

    A distinctive bucket profile

    The tall, rounded bucket format gives COACH Bleeker bucket bag a relaxed yet polished outline. Its width of 27.9 cm, height of 29.5 cm, and depth of 17.4 cm create a noticeable presence while preserving the uncomplicated character associated with the style. The proportions can complement both tailored separates and softer, more casual layers.

    Smooth cow leather

    Made from 100% cow leather, the exterior is described as smooth leather. This surface keeps the overall impression clean and lets the olive colour, stitching, and hardware provide the visual interest. As with any leather accessory, its finish is best appreciated as part of a considered wardrobe rather than treated as an incidental detail.

    Flexible carrying options

    A single leather handle gives the bag a classic hand-carried look. The wide adjustable strap introduces another styling option and can make the silhouette feel more relaxed when worn with everyday clothing. The contrast between the neat handle and broader strap is also a practical design detail, allowing the bag to shift naturally between more polished and more casual settings.

    Quietly refined finishing

    Visible topstitching traces the construction with subtle definition, while gold-finish accents bring warmth to the muted olive colour. Together, these elements create a restrained finish that can sit comfortably beside gold jewellery, warm-toned footwear, or simple metal accessories without demanding that every detail match exactly.

    • Colour: B4/MUTED OLIVE
    • Material: 100% cow leather
    • Format: bucket bag with a single handle
    • Strap: wide and adjustable
    • Details: visible topstitching and gold finish
    • Measurements: 27.9 cm wide, 29.5 cm high, and 17.4 cm deep
    • Product code: COA5VC6TGEEZZZZZ00

    Ways to Style It Through the Day

    For an elevated daily look

    Pair COACH Bleeker bucket bag with a clean shirt, fine knit, and tailored trousers for an understated weekday combination. The muted olive colour adds depth without the formality of black, while the gold-finish accents can echo a watch, earrings, or a slim belt detail. Carry it by the single handle when you want the outfit to read as especially composed.

    For relaxed weekend dressing

    Use the wide adjustable strap with denim, a simple top, and a lightweight outer layer. The bucket shape brings polish to a casual outfit, while the olive tone works naturally with ecru, cream, navy, brown, and washed blue. This approach allows the bag to act as the considered element in an otherwise uncomplicated look.

    For tonal coordination

    Muted olive is particularly effective when placed beside related natural shades. Try it with khaki, stone, taupe, or warm grey for a quiet tonal palette. Alternatively, use the bag to soften a darker outfit in charcoal, chocolate, or deep navy. The visible topstitching can be echoed through textured knitwear, contrast seams, or a structured jacket.

    For day-to-evening flexibility

    When moving from daytime plans to an evening setting, keep the surrounding pieces simple and let the bag’s proportions and gold-finish details provide the refinement. A fluid dress or streamlined separates can give the silhouette room to stand out. The adjustable strap offers a more relaxed option earlier in the day, while the single handle creates a sharper finish later.

    When selecting accessories to accompany it, consider balance rather than exact repetition. Gold jewellery can complement the hardware, but silver or mixed-metal pieces may also work when the rest of the outfit is intentionally restrained. Because the bag has a clear shape and a distinctive colour, a small number of well-chosen accessories will usually create the most harmonious result.

    What to Consider Before Choosing It

    Begin with the silhouette. A bucket bag is a strong choice if you appreciate a taller profile and an accessory that feels relaxed rather than rigidly formal. The stated dimensions make this a visually substantial design, so consider how its proportions will sit alongside your usual coats, jackets, trousers, and dresses.

    Next, consider the carrying style you prefer. The single handle supports a classic hand-carried presentation, while the wide adjustable strap offers additional versatility. If you regularly change between polished and casual outfits, this combination may be more useful than a design limited to one carrying approach.

    Colour is another central decision. B4/MUTED OLIVE is less expected than a standard dark neutral, yet it remains adaptable. It can blend with natural shades, ground brighter colours, or introduce contrast to monochrome dressing. Review the colour in relation to your existing footwear and outerwear rather than considering it in isolation.

    The smooth 100% cow leather finish is part of the bag’s appeal. To keep the accessory looking considered, handle it with clean hands where possible, avoid placing it on rough or wet surfaces, and protect it from unnecessary contact with liquids. Store it in a clean, dry environment when not in use and avoid overfilling, which can affect the intended bucket shape.

    For ongoing care, follow the material-specific guidance supplied with the product or provided on the product page. Do not apply cleaners, conditioners, or treatments unless they are appropriate for smooth cow leather and have been confirmed as suitable. Before purchase, compare the listed measurements with your preferred daily carry and review all available product imagery for the details most important to you.

    A considered choice comes down to the balance of colour, scale, carrying options, and care expectations. Here, the muted olive leather and adaptable strap give the bucket silhouette a particularly versatile character.

    Frequently Asked Questions

    What material is COACH Bleeker bucket bag made from?

    It is made from 100% cow leather and described as having a smooth leather finish.

    What colour is the bag?

    The listed colour is B4/MUTED OLIVE.

    How can it be carried?

    It has a single leather handle and a wide adjustable strap, offering hand-carried and more relaxed strap styling.

    What are its measurements?

    The listed measurements are 27.9 cm in width, 29.5 cm in height, and 17.4 cm in depth.

    How should I coordinate the olive colour?

    It can be paired with natural tones such as cream, khaki, taupe, and brown, or used to soften darker shades such as navy and charcoal.

    Please verify the current product details, measurements, colour information, care guidance, and purchase information on the product page before purchase.

    View COACH Bleeker bucket bag at THANKS KAI to explore its details and consider how the silhouette could complement your wardrobe.

    Product: COACH Bleeker bucket bag
  • A 15-Minute Routine for Organizing Local Places to Visit

    A 15-Minute Routine for Organizing Local Places to Visit

    작성자: Kai Life Editorial Team

    If you have a long list of cafés, museums, walks, markets, or neighborhoods but cannot decide what belongs in your trip, use a short four-step routine: prepare your notes, sort places by practical value, act on the highest-priority options, and review the list for gaps. In 15 minutes, you can create a ranked place list that supports travel planning without turning your itinerary into a rigid schedule.

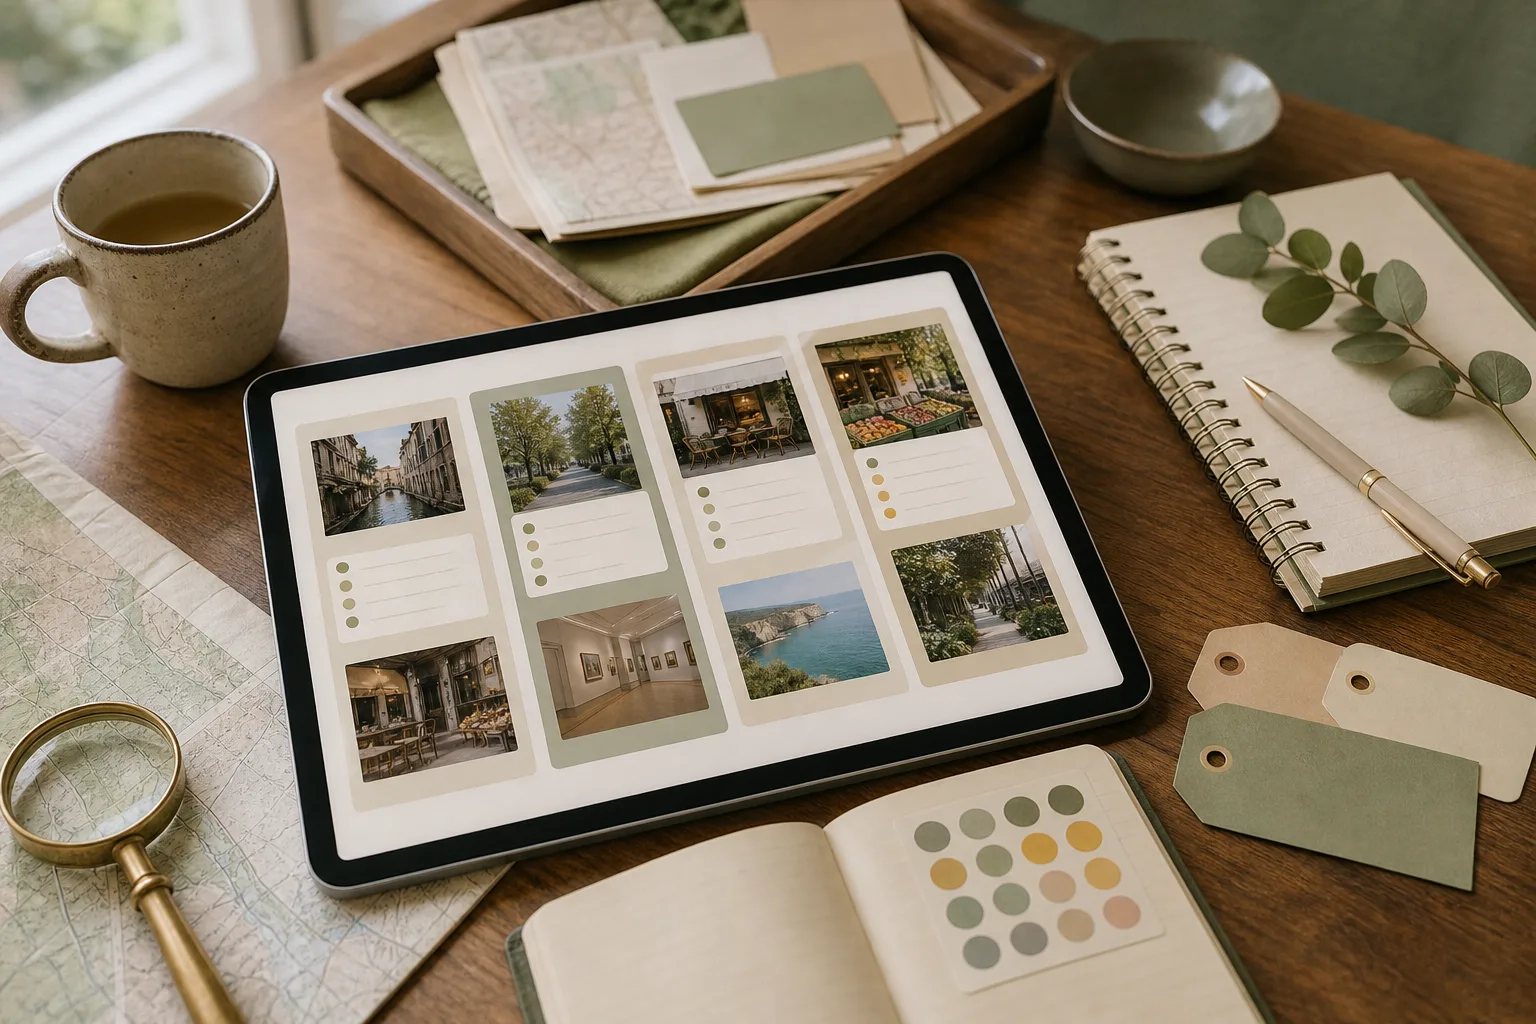
    A 15-Minute Routine for Organizing Local Places to Visit — topic illustration

    Why a ranked place list helps

    Unsorted travel ideas create a different problem from having no ideas at all. A saved map pin, a message from a friend, and a half-remembered article may all be interesting, but they do not tell you what to do first. A ranked list gives each place a role in your planning.

    The aim is not to predict every detail of a trip. It is to make the next decision easier. A useful list can show which places are central to your plans, which ones are convenient backups, and which ideas need more research before you spend time on them.

    Keep the ranking flexible. Opening hours, weather, energy, transport, and local conditions can change your choices. Treat the list as a decision aid rather than a promise to follow a fixed route.

    The four-part travel planning framework

    1. Prepare: gather the raw ideas

    Start with one temporary list. Bring together place names from your notes, saved links, map pins, messages, and guidebook pages. Do not research every place at this stage. The purpose is to see what you already have.

    For each item, record only the details that help you recognize it:

    • Place name and area
    • Reason it caught your attention
    • Possible trip day or time, if known
    • Any question that still needs checking

    Remove obvious duplicates and unclear entries. For example, combine two notes that refer to the same market, and mark a vague entry such as “old town food” for later clarification. This prevents your list from looking more complete than it really is.

    2. Sort: rank by usefulness, not excitement alone

    Give each place a quick score using four practical factors. You can use a simple scale from 0 to 2:

    Factor 0 points 1 point 2 points
    Personal interest Little appeal Some appeal Strong reason to visit
    Fit with the trip Does not match the trip Could fit Fits the trip purpose well
    Practical access Unclear or difficult Needs checking Seems easy to combine with other plans
    Timing flexibility Very limited Some flexibility Works across several possible times

    Add the points for a rough priority score. The number is not a verdict; it is a prompt for comparison. A place with high personal interest but limited opening hours may deserve attention before a convenient place that you would only visit if nearby.

    Use three labels alongside the score:

    • Anchor: a place that gives the day a clear purpose.
    • Pair: a place that works well near another plan.
    • Backup: a flexible option for a change in weather, energy, or timing.

    These labels make itinerary organization more useful than a single long ranking. They help you build days with a main idea and alternatives rather than trying to visit every saved location.

    3. Act: convert the top options into next steps

    Choose a small number of high-priority places for immediate follow-up. For each one, write the next action rather than a vague instruction such as “research more.” A next action could be checking the official opening information, confirming whether reservations are relevant, comparing its location with another place, or noting the best part of the day to consider it.

    Record the result in a compact planning table:

    Place Role Why it matters Next action Fallback
    Place A Anchor Main interest Check current access details Nearby indoor option
    Place B Pair Fits the same area Compare walking distance Move to another day
    Place C Backup Flexible timing Save location and notes Unplanned local walk

    Use official or current local information when a detail could affect your visit, such as closures, reservations, access rules, or operating times. If you cannot verify a detail during the 15-minute session, label it as an open question instead of guessing.

    4. Review: test the list against real travel conditions

    Finish by looking at the list as a traveler with limited time and energy. Ask whether the places are spread across too many areas, whether every day depends on one specific condition, and whether the list includes options for a slower day.

    A short review can reveal problems that scores do not show. Three highly rated places may all require separate journeys. A lower-ranked place may be easier to combine with a planned activity. The review is where you add balance and reduce unnecessary movement.

    Your 15-minute action plan

    1. Minutes 0–3: collect place ideas into one temporary list.
    2. Minutes 3–6: remove duplicates and clarify vague names.
    3. Minutes 6–10: score each place for interest, trip fit, access, and timing flexibility.
    4. Minutes 10–12: label the leading places as anchors, pairs, or backups.
    5. Minutes 12–14: write one next action for the leading options.
    6. Minute 14–15: check area, timing, and fallback balance.

    If the list is large, do not try to score every saved idea in detail. Move uncertain or low-priority items into a “later review” section. This protects the short planning session from becoming a research project.

    Copyable travel planning checklist

    • [ ] I collected place ideas in one list.
    • [ ] I removed duplicate or unclear entries.
    • [ ] I noted why each promising place interests me.
    • [ ] I considered how each place fits the trip purpose.
    • [ ] I considered access and how the place could combine with nearby plans.
    • [ ] I considered timing flexibility rather than relying on one narrow window.
    • [ ] I marked anchors, pairs, backups, and items needing research.
    • [ ] I wrote a concrete next action for the leading places.
    • [ ] I included at least one option for a change in weather or energy.
    • [ ] I left uncertain facts marked for verification.

    Common mistakes in place-list planning

    Ranking only by popularity

    A popular place may be useful for your trip, but popularity does not describe your personal interest, timing, or route. Add your own reason for considering it.

    Confusing research with planning

    Collecting more links can feel productive while leaving the main decision unresolved. Set a stopping point, rank what you have, and identify the next question that matters.

    Building a list with no flexible options

    A schedule based entirely on outdoor activities, distant locations, or narrow time windows can become difficult to use. Backups give the list room to adapt.

    Turning the ranking into a strict itinerary

    A ranking shows preference; it does not account for every local condition. Keep room for rest, spontaneous discoveries, and information that becomes available closer to the visit.

    FAQ

    How many places should be on the final list?

    Use the number that you can realistically compare and revisit. For a short session, a focused shortlist plus a later-review section is more useful than a large list with no priorities.

    What if I do not know the travel dates yet?

    Rank by personal interest, general trip fit, area, and flexibility. Leave date-specific questions open until the dates and other commitments are clearer.

    Should I use a spreadsheet, notes app, or paper?

    Choose the format that makes sorting and reviewing easy for you. The framework works with a simple table, a note, or a paper checklist. The structure matters more than the tool.

    What should I do with places that score poorly?

    Do not delete them immediately if they still interest you. Move them to a later-review section with a note explaining what would change their priority, such as being in the same area as another plan.

    Conclusion

    Travel planning organization does not require a detailed itinerary for every hour. A 15-minute routine can turn scattered place ideas into a ranked, adaptable list. Prepare the information you already have, sort it by personal and practical value, act on a few next steps, and review the result against real travel conditions. The finished list should help you choose with less friction while leaving space for the trip to change.


  • A 15-Minute Routine to Sort Photo Folders by Date and Subject

    A 15-Minute Routine to Sort Photo Folders by Date and Subject

    작성자: Kai Life Editorial Team

    If your photo folders are difficult to search, use a two-part system: place photos in date-based folders and add a short subject label to the folder or file name when the subject matters. In 15 minutes, prepare one working location, sort only the photos you can identify quickly, act on uncertain items with a temporary holding folder, and review the result before stopping.

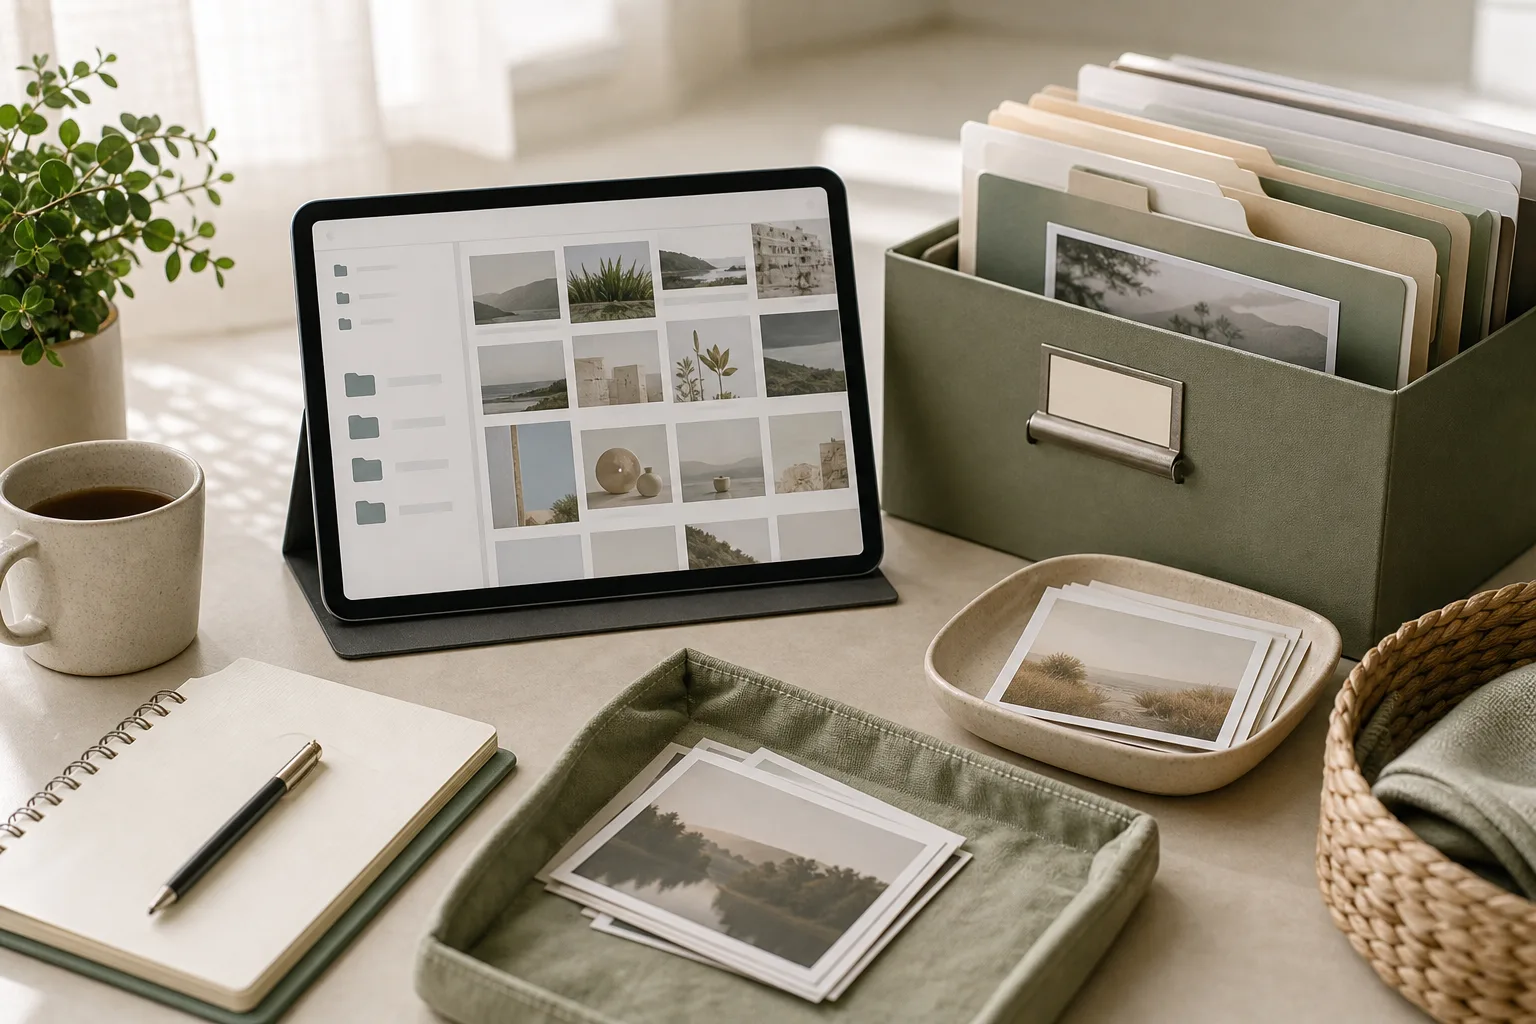
    A 15-Minute Routine to Sort Photo Folders by Date and Subject — topic illustration

    Why date and subject work well together

    Date gives you a predictable order. Subject gives you context. A folder named 2025-04-12_Client-Workshop is easier to scan than a folder named Workshop, especially when you have attended several workshops or saved images from different projects.

    The goal is not to create a detailed archive for every image. The goal is to make common retrieval tasks less frustrating. A useful structure should help you answer questions such as:

    • When was this image created or received?
    • What project, client, event, or personal topic does it belong to?
    • Where should a new photo go if I have only a minute?

    Keep the number of categories small enough to remember. For example, you might use subject labels such as Client, Admin, Product, Travel, and Personal. Adjust them to your work and life rather than copying a generic taxonomy.

    The prepare step: set up a small working area

    Begin with one photo source or one folder. Mixing a phone library, cloud drive, messaging app, and desktop at the same time can make a short routine feel larger than it is. Choose the location where you most often look for images.

    1. Create a temporary folder called 00_To-Sort if you need a safe holding area.
    2. Choose a date format and use it consistently. A practical format is YYYY-MM-DD, such as 2025-04-12.
    3. Choose a small set of subject labels. Write them in a note if you are likely to forget them.
    4. Set a timer for 15 minutes. The timer is a boundary, not a promise that the entire library will be finished.

    If your device already groups images by date, do not rebuild information that the device provides. You can focus on adding useful subject context and moving only the images that need attention.

    The sort step: make quick decisions first

    Sort in passes rather than trying to solve every detail at once. Look at the first image and ask which of three groups it belongs to:

    • Keep and identify: You know the date and subject, so it can move to a named folder.
    • Keep but unclear: The image may matter, but the date or subject is uncertain. Place it in 00_To-Sort.
    • Review later: The image is a duplicate, blurry, unnecessary screenshot, or possible deletion candidate. Do not spend the routine debating it.

    For a known photo, use a folder or filename pattern such as:

    2025-04-12_Client-Workshop
    2025-04-12_Product-Prototype_01.jpg

    Use the subject label only when it adds retrieval value. A personal snapshot may need only a date and a broad event name. A work image may benefit from a project or client label. Avoid putting long descriptions into every filename because the extra effort can make the routine difficult to repeat.

    The act step: use a repeatable 15-minute plan

    The following schedule provides a practical starting point. You can change the time blocks when your library or device behaves differently.

    Time Action Decision rule
    Minutes 0–2 Choose one source and open the working folder. Do not add another source during this session.
    Minutes 2–5 Create or confirm the date and subject naming pattern. Use labels you can recognize without a reference guide.
    Minutes 5–11 Move obvious photos into named folders. Decide quickly; place uncertain items in 00_To-Sort.
    Minutes 11–13 Rename a small number of high-value files. Prioritize images linked to current work or frequent searches.
    Minutes 13–15 Review the folders and note the next action. Stop at the timer and leave a clear starting point for next time.

    A useful rule is “one decision, one destination.” Each photo should either go into a named folder, remain in the temporary holding folder, or join a later review list. This prevents the same file from being reconsidered repeatedly during one session.

    The review step: keep the system easy to continue

    Before finishing, check whether your new folders can be understood at a glance. Look for inconsistent dates, labels that mean the same thing, and folders that are too broad or too detailed.

    • Are dates written in the same order?
    • Are subject labels short and distinct?
    • Can you identify the location of a recent work photo?
    • Does 00_To-Sort contain a manageable number of items?
    • What single folder or date range should you handle next?

    If the temporary folder grows, give it a separate short session. Do not treat uncertainty as a failure. Some files require context, and forcing a guess can make later searches harder.

    Copyable photo-folder checklist

    Copy this checklist into a note or task app:

    • [ ] Choose one photo source.
    • [ ] Create or open 00_To-Sort.
    • [ ] Use the date format YYYY-MM-DD.
    • [ ] Select a small set of subject labels.
    • [ ] Start a 15-minute timer.
    • [ ] Move obvious photos to date-and-subject folders.
    • [ ] Put uncertain photos in 00_To-Sort.
    • [ ] Rename only high-value files during this session.
    • [ ] Check for inconsistent names.
    • [ ] Write down the next folder or date range to review.

    How this routine connects with wider digital organization

    Photo folders are only one part of digital organization. The same logic can support documents, apps, and links. Use a predictable primary order, add a small amount of context, and create a temporary place for items that need more thought.

    • Files: Use a date or project folder first, then add a concise subject label.
    • Apps: Group them by activity, such as communication, finance, design, or travel, rather than by download date.
    • Links: Save pages with a short purpose label, such as Read-Later_Client-Research.
    • Digital routines: Schedule a brief review when a folder becomes difficult to scan, instead of waiting for a large cleanup.

    Keep each system separate enough that you can understand it quickly, but use similar principles across systems. Consistency reduces the number of decisions required when you are busy.

    FAQ

    Should I sort by date taken or date downloaded?

    Use the date that best matches how you search. Date taken is useful for events and original photos. Date downloaded can be useful for work assets received during a project. If the two dates differ significantly, include a short subject label so the folder context remains clear.

    What should I do with screenshots?

    Keep screenshots that support a task, record a decision, or contain information you may need. Move them into a subject folder or a temporary review folder. Screenshots with no clear future use can remain on a later review list rather than interrupting the 15-minute routine.

    How many subject labels should I create?

    Start with only the labels you can apply confidently. Add a label when an existing category repeatedly makes searching difficult. Too many labels can create extra decisions and reduce consistency.

    What if I cannot identify the date?

    Use the available metadata if it is reliable. Otherwise, place the file in a folder such as Unknown-Date_To-Review and add a subject label when possible. Avoid guessing a precise date when you do not have evidence.

    Conclusion

    A manageable photo system does not require a complete library overhaul. Start with one source, use a consistent date format, add a short subject label, and give uncertain files a temporary home. The prepare, sort, act, and review cycle creates a small repeatable routine for photo folders and can also inform broader file organization, app organization, and link management.


  • A Refined Guide to Modern Driving Moccasin Style

    LOUIS VUITTON LV Driver Mocassin in embossed grained Monogram cowhide leather with hand-stitched vamp and rubber-pad outsole

    LOUIS VUITTON LV Driver Mocassin brings the relaxed ease of a driving shoe into a distinctly considered Louis Vuitton design. Created as Virgil Abloh’s first driving shoe, this model is reinterpreted in embossed grained cowhide leather with the house’s signature Monogram pattern. Its character comes from the balance of tactile detail and understated structure: a hand-stitched vamp, lightweight tubular construction, flexible rubber-pad outsole and tonal LV Initials lace tips.

    Presented within a collection of loafers for women, it is a versatile choice for wardrobes that move between polished daytime dressing and quieter, refined off-duty looks. The low 1 cm heel height and flexible construction support its visual lightness, while the Monogram detailing gives even simple outfits a recognisable finish. Rather than relying on excess ornament, the design makes craftsmanship, texture and proportion the focus.

    Design Details Worth Noticing

    The appeal of LOUIS VUITTON LV Driver Mocassin lies in how its functional driving-shoe language is translated into a luxury wardrobe piece. Each design element contributes to an easy, composed appearance.

    • Embossed grained cowhide leather: The leather surface is embossed with the Louis Vuitton Monogram pattern, giving the upper texture and a subtle branded rhythm rather than a flat finish.
    • Hand-stitched vamp: The vamp is hand-stitched, with the product description noting one hour of work per pair. This detail brings a crafted, visible definition to the front of the shoe.
    • Lightweight tubular construction: The construction keeps the silhouette visually streamlined and supports the flexible character associated with a moccasin.
    • Flexible rubber-pad outsole: Large rubber pads and the Monogram pattern on the tread add a considered finishing detail beneath the shoe.
    • Tonal LV Initials lace tips: The lace tips provide a restrained signature accent, maintaining tonal harmony with the rest of the design.
    • Low-profile proportion: With a listed heel height of 1 cm / 0.39 inches, the shoe retains a close-to-the-ground profile that works naturally with casual and tailored styling alike.

    The colour is listed as 1ABZ7, and the country of manufacture is Italy. For fit decisions, consult the available size guide and compare the product details with your usual preferences before purchase.

    How to Style and Wear It

    This moccasin is especially effective when the rest of the outfit is clean, relaxed and proportion-conscious. Its textured Monogram leather can act as the defining detail in an otherwise quiet look, or it can be coordinated with accessories that echo its refined finish.

    1. Polished everyday dressing: Pair it with straight-leg trousers and a neat knit for an understated daily look. Keep the trouser break clean enough to reveal the hand-stitched vamp and the low profile of the shoe.
    2. Soft tailoring: Use the moccasin to temper a tailored jacket and trousers. The driving-shoe construction introduces ease, while the embossed leather preserves a composed, elevated impression.
    3. Denim with intention: A simple denim look benefits from the shoe’s tactile surface. Choose a clean silhouette and let the Monogram texture provide the visual interest at ground level.
    4. Warm-weather coordination: With lighter separates, the flexible tubular shape can create a relaxed transition between casual and polished dressing. Echo the shoe’s tonal details with a restrained belt or bag rather than adding competing patterns.
    5. Travel and daytime plans: The design is suited to occasions where a refined appearance is desired without the visual formality of a structured dress shoe. Coordinate it with practical, well-edited layers and keep the overall palette controlled.

    For care, handle the embossed grained leather thoughtfully and protect the shoe from unnecessary abrasion. Store it so the upper and lace details are not pressed against sharp or rough surfaces. Pay attention to the rubber-pad outsole and tread after wear, and follow appropriate product-specific leather-care guidance where available. Before using any cleaning or conditioning product, confirm that it is suitable for embossed cowhide leather and test it according to the care instructions.

    What to Consider Before Choosing

    Start with the role you want the shoe to play in your wardrobe. LOUIS VUITTON LV Driver Mocassin is a strong option if you value a low-profile moccasin with visible craftsmanship, a flexible construction and a distinctive Monogram leather surface. It can work as an everyday anchor, but its detailing also gives it enough presence for more carefully styled occasions.

    • Check the fit information: Review the size guide and product measurements before ordering. A moccasin should be assessed not only by length but also by how its shape feels across the foot.
    • Consider texture: The embossed grained leather is a central part of the design. Choose it if you enjoy tactile surfaces and a patterned finish that remains integrated with the shoe.
    • Assess wardrobe compatibility: The tonal lace tips and low heel height make coordination straightforward with trousers, denim and relaxed tailoring. Consider whether these are silhouettes you regularly wear.
    • Review the product reference: The product code is LVUN3K5NBL1U711A01. Keep this information with the current listing details when checking the item before purchase.
    • Think about maintenance: Leather footwear rewards careful handling. If you prefer pieces that can be worn without attention to surface care, consider whether the embossed cowhide construction suits your routine.

    The strongest styling approach is selective rather than crowded: allow the Monogram texture, crafted vamp and tonal finishing details to remain visible. A pared-back outfit will make the shoe feel intentional, while accessories in related tones can create cohesion without duplicating every design element.

    Frequently Asked Questions

    What kind of shoe is LOUIS VUITTON LV Driver Mocassin?
    It is a driving moccasin with a hand-stitched vamp, lightweight tubular construction and a flexible rubber-pad outsole.

    What material is used?
    The product is described as embossed grained cowhide leather with a Monogram pattern.

    What is the heel height?
    The listed heel height is 1 cm / 0.39 inches.

    Where is it manufactured?
    The product details list Italy as the country of manufacture.

    How should I choose a size?
    Review the available size guide and current product measurements before purchase, then compare them with your usual fit preferences.

    Product details may change. Please verify the current specifications, size information, condition, price and purchase information on the product page before purchase.

    View LOUIS VUITTON LV Driver Mocassin at THANKS KAI to explore the current product details.

    Product: LOUIS VUITTON LV Driver Mocassin

  • A 15-Minute Frequency-Based Kitchen Organization Routine

    A 15-Minute Frequency-Based Kitchen Organization Routine

    작성자: Kai Life Editorial Team

    If your kitchen feels disorganized because frequently used tools, occasional equipment, meal notes, and shopping reminders are mixed together, try organizing by frequency of use. In a 15-minute session, prepare one work area, sort items into three use levels, act on the most important changes, and review the result before stopping. This approach keeps the system practical for busy people without requiring a full kitchen reset.

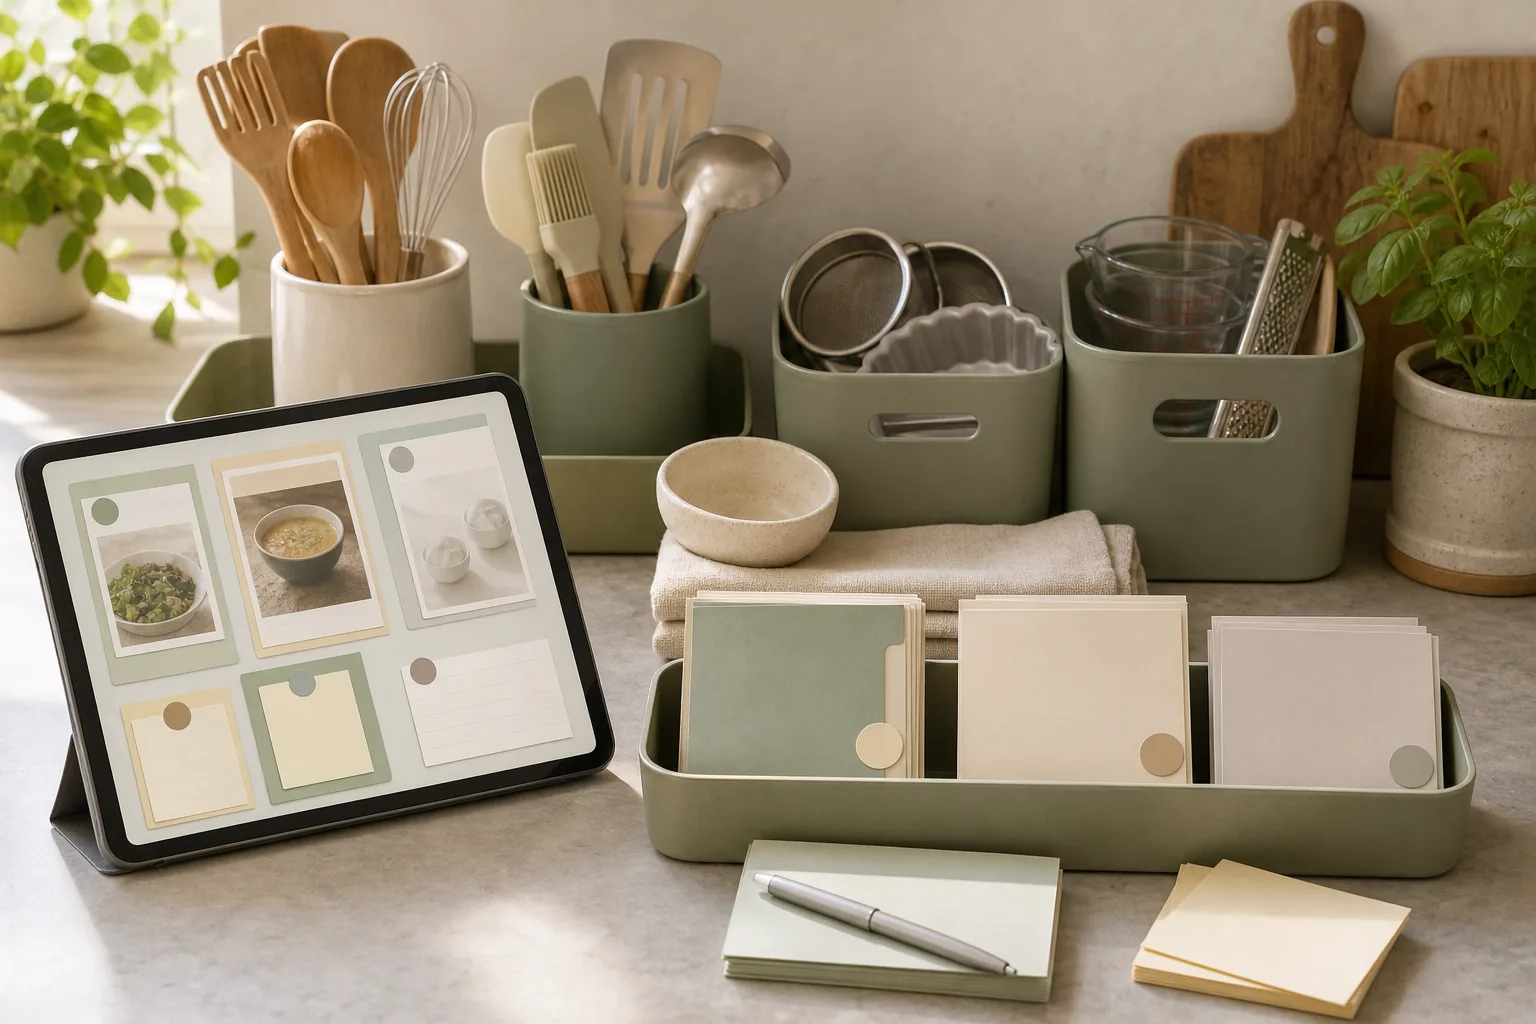
    A 15-Minute Frequency-Based Kitchen Organization Routine — topic illustration

    Why frequency can be a useful kitchen organization rule

    Many kitchen organization systems begin with item type: utensils together, containers together, and notes in one place. Categories can help, but they do not answer a daily question: “What should be easiest to reach right now?” A frequency-based rule adds that missing layer.

    Items used often can stay in the most convenient locations. Items used sometimes can move to a nearby drawer, shelf, or cabinet. Items used rarely can be placed farther away, provided you can still identify and retrieve them when needed. The same idea can apply to meal notes and shopping lists: information that guides today’s decisions should be easier to find than information kept for occasional reference.

    This is not a rule about discarding useful tools. It is a way to reduce the number of decisions made during ordinary meal preparation and shopping planning. The arrangement can change as your schedule, cooking habits, or household needs change.

    The three frequency levels

    Use simple labels rather than trying to estimate exact numbers of uses. The goal is a workable decision, not a precise measurement.

    Level Use pattern Suggested location Examples of information
    Frequent Used as part of ordinary meal or cleanup routines Visible, frontmost, or easiest to reach This week’s meal notes, current shopping list
    Occasional Useful for selected meals or periodic tasks Nearby drawer, shelf, or cabinet Recipe ideas, special-purpose tools
    Rare Used infrequently or kept for a specific situation Higher, lower, or less central storage Seasonal notes, infrequently used equipment

    These labels describe use, not value. A rarely used item may still deserve a clear storage place. The important distinction is that its location does not need to compete with items used during ordinary routines.

    The 15-minute prepare, sort, act, and review routine

    1. Prepare: choose one small zone

    Set a timer for 15 minutes and choose one limited area: a utensil drawer, one shelf, a counter corner, or the place where meal and shopping notes collect. A small zone is easier to finish than an entire kitchen, and it gives you a clear boundary for the session.

    Gather a few temporary labels or pieces of paper marked “frequent,” “occasional,” and “rare.” You can also use three spaces on the counter. Keep a recycling or discard container nearby only if you already know there are papers or packaging materials that no longer serve a purpose. The routine does not require you to make disposal decisions about every item.

    2. Sort: assign items by current use

    Move through the selected zone one item at a time. Ask, “How often do I reach for this during my current routine?” Place the item in one of the three frequency groups. For notes, ask a similar question: “Does this help me decide a meal or shopping action soon, or is it reference material for later?”

    Try not to solve every storage problem while sorting. If an item belongs somewhere else, place it in a temporary “relocate” group and continue. This keeps the first part of the routine from turning into a tour of the whole kitchen.

    • Frequent: items and notes that support repeated daily or weekly actions.
    • Occasional: items and notes that are useful but not part of the current default routine.
    • Rare: items and notes that are kept for less common situations.
    • Relocate: items that belong outside the selected zone.

    3. Act: change access before changing ownership

    Use the next few minutes to move frequent items closer to the point of use. For example, a frequently used tool can move to the front of a drawer, while an occasional tool can move behind it or to a nearby shelf. If the zone contains meal notes and shopping lists, give the current list one clearly defined location instead of allowing several active lists to spread across the kitchen.

    For paper notes, choose one current working area and one reference area. A current working area might hold the meal ideas and shopping items you are actively considering. A reference area can hold notes you may revisit later. If you use digital notes, apply the same distinction with a current list and a reference folder or note.

    When two items are used with the same frequency, place the one used at the point of greatest inconvenience in the easier location. This keeps the system connected to actual movement rather than to an abstract category.

    4. Review: check whether the arrangement is obvious

    Use the final minutes to look at the zone as if you were starting a normal kitchen task. Can you identify the current shopping list? Can you find the tool needed for a common meal without moving several unrelated items? Is anything in the zone clearly waiting to be relocated?

    Write down one adjustment for the next session if you find a problem. Avoid expanding the session simply because you noticed other areas. A short review protects the boundary of the routine and creates a useful starting point for the next 15 minutes.

    A copyable 15-minute action plan

    Time Action Question to answer
    0–2 minutes Choose one zone and gather temporary labels What small area will I finish reviewing?
    2–7 minutes Sort tools and notes by frequency How often is this used in my current routine?
    7–12 minutes Move frequent items closer and group current notes What should be easiest to reach or read?
    12–15 minutes Review the zone and record one follow-up What still feels unclear or out of place?

    How to connect tools, meal notes, and shopping lists

    Kitchen organization becomes easier to maintain when physical items and planning information support the same routine. Start by identifying the action that connects them. A meal note may lead to a shopping-list entry. A shopping-list entry may lead to a tool being used during preparation. Keeping these related steps visible can reduce the need to search in several places.

    • Current planning: keep the meal notes and shopping items under active consideration together.
    • Preparation: place frequently used tools in the easiest-to-reach part of the selected zone.
    • Reference: move older ideas, occasional recipes, and less-used tools to a nearby but separate location.
    • Review: remove completed planning notes from the current area so the active list remains readable.

    “Remove” here can mean archive, recycle, file, or simply move the note to its proper reference location. The choice depends on how you keep records. The useful principle is to separate active decisions from information that is not currently guiding an action.

    Checklist for the next session

    • Choose one drawer, shelf, counter area, or note location.
    • Set a 15-minute timer.
    • Label three groups: frequent, occasional, and rare.
    • Place misplaced items in a separate relocate group.
    • Move frequently used tools to the most convenient available location.
    • Keep the current meal notes and shopping list in one defined working place.
    • Separate active notes from reference notes.
    • Review the zone before the timer ends.
    • Write down one follow-up adjustment instead of expanding the task.

    Common mistakes to avoid

    Organizing by category only

    Keeping similar items together can still leave the most-used item buried. After grouping by type, apply the frequency rule to decide which items should be closest.

    Making every item visible

    Visibility is useful for active items, but displaying everything can make the work area harder to read. Use convenient access for frequent items and defined storage for occasional and rare items.

    Creating several active lists

    Multiple shopping lists or scattered meal notes can make it unclear which information is current. Choose one active location or note and treat the others as reference material until they are reviewed.

    Trying to finish the whole kitchen

    A 15-minute routine works best when its scope remains small. Stop at the boundary you selected, even if another area needs attention. You can record it as the next zone rather than interrupting the current review.

    FAQ

    What if my use pattern changes from week to week?

    Use your current routine as the reference point. A tool can move from occasional to frequent during a particular period and move back later. Frequency-based organization is intended to be adjusted rather than treated as a permanent classification.

    Should rare items be removed?

    Not necessarily. The rule concerns access and location, not automatic disposal. Keep a rare item if it has a useful role for your household, and give it a storage place that does not interfere with frequent tasks.

    Can this routine work with digital meal notes?

    Yes. Create a distinction between an active meal or shopping note and a reference area. The exact app or format matters less than having a clear current location and a review step.

    What should I do when I cannot decide an item’s frequency?

    Place it in an undecided or occasional group and note the question for later. You can observe whether you reach for it during ordinary routines before changing its location again.

    Conclusion

    A frequency-based kitchen organization routine gives priority to the actions that happen most often. In 15 minutes, you can prepare one small zone, sort tools and notes, act on access, and review the result. The system does not depend on a specific kitchen layout or storage product. It depends on making current tools and planning information easier to identify while giving occasional and rare items a defined place. Repeat the routine on another small zone when the next adjustment becomes useful.


  • A 15-Minute Room-by-Room Home Organization Routine

    A 15-Minute Room-by-Room Home Organization Routine

    작성자: Kai Life Editorial Team

    If you have only 15 minutes, begin with the room that affects your next useful activity, not necessarily the room that looks worst. Use this order: prepare your collection points, sort visible items, act on one category, and review what should happen next. A short room-by-room routine can reduce decision fatigue and give your home organization efforts a clear direction without turning the session into a full-house cleaning project.

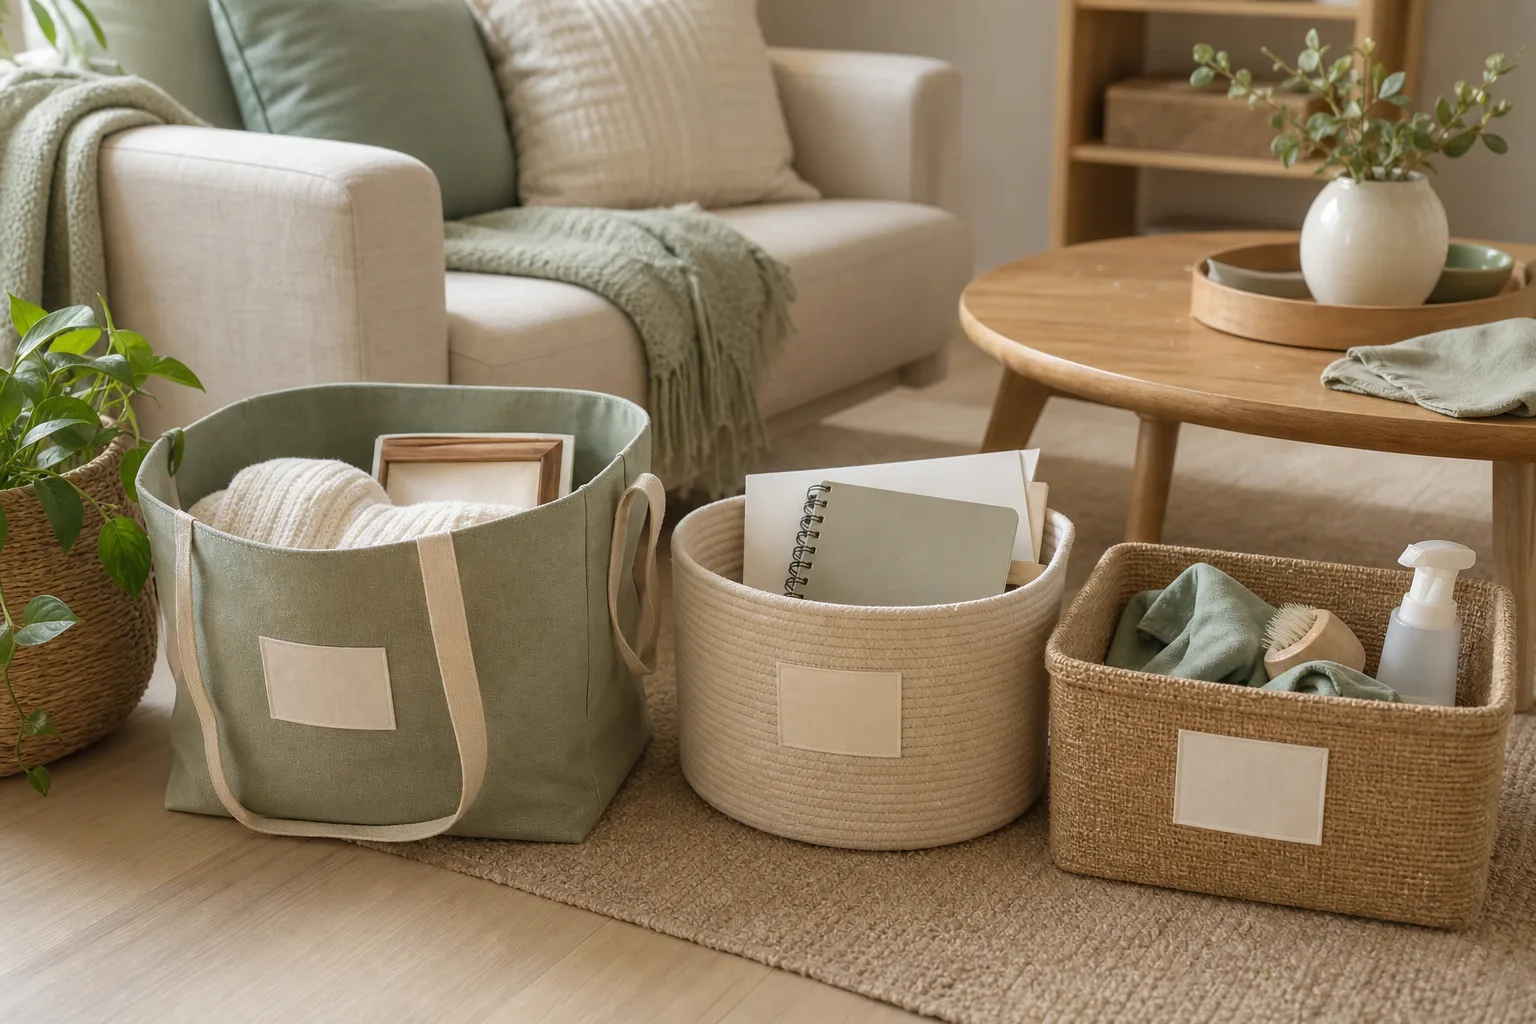
    A 15-Minute Room-by-Room Home Organization Routine — topic illustration

    The four-part method: prepare, sort, act, review

    A tidy-up becomes easier to start when each stage has a narrow purpose. The aim is not to finish every room in one session. The aim is to create a small, visible improvement and leave a clear next action.

    1. Prepare

    Choose a 15-minute window and collect three temporary destinations:

    • Return: items that belong in another room or another area.
    • Decide: items that need a later decision, such as whether to keep, donate, recycle, or discard them.
    • Action: items that need a simple next step, such as laundry, washing, filing, or charging.

    You can use bags, boxes, or clearly marked floor areas. These containers are temporary sorting tools, not new storage. Keep the number of categories small so that sorting does not become a separate organizing project.

    2. Sort

    Work from visible surfaces and walkways. Pick up one item at a time and give it a destination. If you are uncertain, place it in the Decide group rather than interrupting the routine with a long judgment.

    For a short session, avoid opening every drawer or cupboard. Hidden storage can wait until the visible flow of the room is easier to use.

    3. Act

    Choose one category that will make the next part of the day easier. Return items to their homes, take rubbish or recycling to the appropriate place, start a small laundry action, or clear one useful surface. Acting on one category creates a concrete finish line for the session.

    4. Review

    Use the last minute to return containers, identify items that need a later decision, and write down the next starting point. A review prevents temporary piles from becoming permanent features of the room.

    Which room should you start with?

    Use the following room order when you do not know where to begin. It follows daily function rather than visual drama.

    Order Room or area Reason to begin there Useful first target
    1 Entryway It controls the movement of items into and out of the home. Shoes, bags, keys, mail, and outerwear
    2 Kitchen It supports frequent daily tasks and benefits from clear working space. One counter section or the sink area
    3 Living area It often collects items from several activities. One table, sofa zone, or walking path
    4 Bathroom Small visible surfaces can be sorted quickly. Countertop items or used towels
    5 Bedroom It supports the next rest period and often has recurring clothing clutter. Floor, bedside area, or one clothing group

    This is a starting order, not a rule for every home. If your next important task happens in the kitchen, begin there. If the entryway is blocked, clearing it may improve the home flow before you work elsewhere.

    The 15-minute action plan

    Use a timer if it helps you keep the session contained. The following plan gives each stage a defined role.

    1. Minutes 0–2: Prepare. Choose one room or one zone. Place three bags, boxes, or baskets nearby and remove obvious rubbish if doing so is quick.
    2. Minutes 2–7: Sort. Move through visible surfaces and walkways. Sort items into Return, Decide, and Action. Do not reorganize closed storage during this stage.
    3. Minutes 7–13: Act. Complete one practical category. For example, return items to their homes, clear one counter, or take a collection to its next destination.
    4. Minutes 13–15: Review. Empty the temporary containers where possible, label unresolved items mentally or on a note, and choose the next zone.

    If one category is larger than expected, stop at the end of the time block rather than expanding the session by default. You can record the unfinished category as the next starting point.

    Storage rules that support home flow

    Storage works best when it reflects how people use an item. Consider these simple rules while returning belongings:

    • Store frequent-use items near the point of use. Keep daily entry items near the entrance and cooking tools near the preparation area.
    • Give recurring items a visible home. If keys, chargers, or bags regularly land in the same place, consider whether that location can become their designated home.
    • Group by activity. Keep items used together together where practical, such as a small set of cleaning supplies or a work-from-home group.
    • Protect useful surfaces. A clear section of a counter, table, or bedside surface can serve as a landing area for the next activity.
    • Use temporary containers only for sorting. If a basket repeatedly holds unresolved items, schedule a separate decision session or reduce the number of items entering it.

    These rules do not require new products. They are ways to test whether an existing home can support the actions you already perform.

    A copyable 15-minute tidy-up checklist

    Copy this checklist into a note, print it, or adapt it for your home:

    • Choose one room or zone.
    • Set a 15-minute limit.
    • Prepare Return, Decide, and Action containers.
    • Clear visible rubbish or recycling.
    • Sort items from one surface or walkway.
    • Return items that already have a home.
    • Complete one Action category.
    • Keep uncertain items in Decide instead of stopping to research or debate.
    • Remove temporary containers from the active area.
    • Write down the next room, surface, or category.

    How to handle common sticking points

    When every room needs attention

    Choose the room connected to the next activity or the main movement path. A small improvement in a functional area can be more useful than a larger change in a room you will not use soon.

    When an item has no home

    Place it in Decide and continue. During a later session, ask where the item is used, how often it is used, and whether its current storage location makes retrieval and return reasonably easy. If no location supports those actions, the item may need a separate keep, move, donate, recycle, or discard decision.

    When sorting creates more piles

    Reduce the number of categories. Return, Action, and Decide are enough for a short session. More detailed categories can be useful during a dedicated organizing project, but they may slow down a quick tidy-up.

    When another person shares the home

    Start with shared surfaces and common paths rather than personal storage. If an item belongs to someone else, place it in a clearly identified Return area instead of deciding on that person’s behalf.

    FAQ

    Should I clean or organize first?

    For a 15-minute tidy-up, begin with basic sorting and movement. Once items are off the chosen surface, you can decide whether a quick wipe or another cleaning task fits the remaining time. Separating sorting from detailed cleaning helps keep the session focused.

    What if I cannot finish a room?

    Stop at the planned time and leave a short note about the next visible target. Finishing a defined zone, category, or step is enough for one session. The next routine can continue from that note.

    How often should I use this routine?

    Use it when a short reset would help, such as before a busy part of the day or after several activities have accumulated. The useful frequency depends on your home, schedule, and the amount of shared activity.

    Do I need special storage products?

    No. The routine can begin with existing bags, boxes, baskets, or clearly separated areas. Consider storage products only after you understand what needs to be stored and where it is used.

    Conclusion

    A practical home organization routine can start with one room, three temporary categories, and 15 minutes. Begin where the next activity or the main home flow will benefit, sort visible items, act on one category, and review the next step. Repeating this small framework can make tidying easier to resume without requiring a full-home project every time.


  • A Styling Guide to Multicolour Beige Velcro Sneakers

    ISABEL MARANT Balskee sneakers in Multicolor Beige with a round toe, thick outer sole, Velcro fastening and logo tongue detail

    ISABEL MARANT Balskee sneakers bring a distinctive fashion attitude to everyday dressing through a considered mix of proportion, texture and colour. The multicolour beige palette gives them visual softness, while the round toe and thick outer sole create a substantial silhouette that can anchor both relaxed and more polished outfits.

    The design is defined by its closed construction, Velcro fastening and logo detail on the tongue. Together, these elements create a sneaker that feels recognisable without relying on excessive ornament. Made in Portugal, the pair combines a main material of 100% cowhide leather velvet with a 100% pig leather lining and a 100% rubber sole. The listed heel height is 4 cm, adding a gently elevated profile to the look.

    For a wardrobe built around versatile separates, this is a useful starting point: the beige-led colour story can sit comfortably beside denim, neutral tailoring and soft knitwear, while the multicolour character keeps simple outfits from appearing flat.

    Why ISABEL MARANT Balskee sneakers stand out

    • Multicolour Beige finish: A nuanced colour direction that can complement both tonal outfits and contrasting casual looks.
    • Round toe: The rounded front supports the design’s relaxed, contemporary character and balances the thicker sole.
    • Thick outer sole: A defining visual feature that gives the sneaker a grounded, substantial presence. The listed heel height is 4 cm / 1.57 inches.
    • Velcro fastening: The fastening adds a clear functional detail and contributes to the sneaker’s modern, sporty styling.
    • Logo on the tongue: A signature finish placed where it remains visible when the shoe is worn with cropped trousers, skirts or dresses.
    • Material composition: The main material is listed as 100% cowhide leather velvet, with a 100% pig leather lining and a 100% rubber sole.
    • Made in Portugal: The product information identifies Portugal as the country of manufacture.

    These details make the pair especially adaptable for shoppers who prefer a sneaker with more visual structure than a minimal low-profile style. The combination of texture, colour variation and a raised sole allows it to play either a quiet supporting role or a deliberate focal point.

    How to style them across the week

    For an understated daily look, pair the sneakers with straight-leg denim and a relaxed shirt. Keep the upper half in white, cream or pale beige to echo the shoe’s lighter tones, then let the multicolour finish add dimension. A simple shoulder bag can keep the outfit balanced without competing with the tongue logo.

    For a contemporary city uniform, try tailored trousers with a neat knit or an oversized blazer. The thicker outer sole introduces contrast against cleaner tailoring, while the rounded toe keeps the overall effect approachable rather than formal. Choose trousers that allow the shoe to remain visible, particularly around the fastening and tongue.

    For a tonal wardrobe, build around ecru, oatmeal, stone and warm grey. This approach highlights the Multicolor Beige colour description and creates a polished, low-contrast outfit. A textured knit or softly structured outer layer can echo the tactile character suggested by the leather velvet main material.

    For a relaxed dress or skirt combination, use the sneakers to bring an easy, modern counterpoint to a more fluid silhouette. A midi length can frame the 4 cm heel height, while a shorter hemline can draw attention to the Velcro fastening and substantial sole. Keep accessories restrained if the outfit already includes a print.

    For weekend dressing, combine them with wide-leg jeans, a simple sweatshirt and a compact jacket. The proportions work best when the outfit has at least one relaxed element; the sneaker’s defined shape then provides structure. Because the colour is beige-led, it can connect naturally with tan, brown, black or denim accents.

    When coordinating, consider the balance between the shoe’s thicker sole and the volume of the rest of the outfit. More generous trousers can create a deliberate, contemporary silhouette, while cleaner hems make the shoe’s shape more immediately noticeable.

    What to consider before choosing

    Start with the colour story. Multicolor Beige is flexible, but it is not entirely neutral in effect. Review your existing wardrobe and consider whether you want the sneakers to blend with cream and stone tones or introduce contrast to darker denim, black and saturated colour.

    Assess the silhouette. The round toe and thick outer sole give the pair a visibly substantial profile. If your usual footwear is very slim or minimal, this design will create a stronger change in proportion. That can be an advantage when you want casual outfits to feel more styled and intentional.

    Think about fastening preference. The Velcro fastening is central to the look as well as to the listed design. Consider how you like your sneakers to appear when worn: the fastening and tongue logo are details that can be emphasised through cropped hems, or partially softened beneath longer trousers.

    Check the stated sizing information. The product details state that the sneakers fit true to size and recommend taking your normal size. Use the available size guide before purchase, particularly if you are comparing measurements or purchasing a gift.

    Review the composition. The listed materials are 100% cowhide leather velvet for the main material, 100% pig leather for lining 1 and 100% rubber for the sole. If material composition is important to your selection, read these details alongside your own preferences before deciding.

    Consider the role they will play. These sneakers suit a wardrobe that moves between everyday, casual and fashion-led styling. Their logo detail, thick sole and multicolour beige finish offer more presence than a plain basic, while the neutral direction keeps coordination relatively open.

    Frequently asked questions

    What colour are ISABEL MARANT Balskee sneakers?
    The listed colour is Multicolor Beige, a beige-led palette with a multicolour character.

    What fastening do they have?
    They feature a Velcro fastening.

    What is the heel height?
    The listed heel height is 4 cm / 1.57 inches.

    Do they fit true to size?
    The product information states that they fit true to size and recommends taking your normal size. Please consult the size guide before purchasing.

    Where are they made?
    The country of manufacture is listed as Portugal.

    What materials are listed?
    The main material is 100% cowhide leather velvet, the lining is 100% pig leather, and the sole is 100% rubber.

    Please verify the current product details, sizing information, materials, and purchase information on the product page before purchase.

    View ISABEL MARANT Balskee sneakers at THANKS KAI and consider how their multicolour beige palette and structured profile could complement your wardrobe.

    Product: ISABEL MARANT Balskee sneakers

  • A Refined Guide to a Modern Leather Slide

    LOEWE Pebble slide in soft calfskin in rust with square open toe, low heel, visible stitching and gold finish

    LOEWE Pebble slide in soft calfskin brings a considered finish to the everyday sandal wardrobe. Its rust colour, square open toe and low heel create a silhouette that feels polished without appearing overworked, while the gold finish and engraved logo provide a discreet signature accent. Designed in Italy, this slide is an adaptable choice for warm-weather dressing, relaxed city looks and refined holiday styling.

    The appeal lies in its balance. Smooth calfskin gives the design a clean visual surface, visible stitching adds definition and the open construction keeps the overall impression light. Rather than competing with an outfit, the slide can act as a warm, richly toned punctuation mark—especially when paired with neutral tailoring, denim or softly coordinated earth tones.

    For a wardrobe built around versatile pieces, this is a style to consider when you want the ease of a slide with a more elevated, directional finish. Its low 1 cm heel keeps the profile understated, allowing the square toe and carefully placed details to lead the look.

    Why This Slide Stands Out

    A warm rust palette: Rust brings depth to simple outfits and works naturally with cream, white, black, tan, olive and denim. It can be worn as a tonal accent with other earthy shades or used to add warmth to a monochrome look.

    A defined square toe: The open, square-toe shape gives the slide a contemporary outline. It offers a sharper alternative to rounded casual silhouettes, making even a simple combination of trousers and a shirt feel more intentional.

    Refined material contrast: The outer is 100% calfskin, with a 100% lambskin internal and a 100% cowhide leather sole. Together with the smooth leather finish, these details support the product’s considered, premium character.

    Quietly recognisable details: Visible stitching, an engraved logo and gold finish add visual interest without relying on excessive ornament. These elements are particularly effective when the rest of the outfit is pared back.

    A low-profile heel: At 1 cm, the heel remains subtle and easy to integrate into relaxed styling. It preserves the uncomplicated spirit of a slide while giving the design a more finished stance than a completely flat, minimal sandal.

    Clear sizing guidance: The product is described as fitting true to size, with the recommendation to take your normal size. Reviewing the available size guide before purchase remains a sensible final step.

    Styling and Wear Scenarios

    For an understated daily look, pair the rust slide with straight-leg denim and a crisp white shirt. Add a compact leather accessory in a related warm tone to echo the footwear without creating a matched appearance. The square toe keeps this simple combination modern.

    For relaxed tailoring, wear it with wide-leg trousers or softly structured suit separates. Cream, sand and charcoal provide a calm backdrop for the rust shade, while the gold finish can be repeated through a restrained jewellery detail or hardware on a bag.

    For a weekend city wardrobe, combine the slide with a midi skirt and a clean knit top. This allows the open construction to remain visible while the low heel keeps the styling grounded and uncomplicated. A tonal rust, terracotta or chocolate layer can make the look feel deliberate without becoming overly coordinated.

    For travel and warm-weather dressing, consider lightweight trousers, a relaxed shirt and a structured tote. The slide’s uncomplicated shape suits outfits that need to transition from daytime plans to a more polished casual setting. Keep accessories edited so that the engraved logo and gold finish remain subtle points of focus.

    For a softer, feminine direction, balance the defined toe with fluid fabrics and gentle volume. A flowing dress in cream, black or muted olive lets the footwear introduce structure at ground level. For a stronger fashion contrast, try the rust colour with pale blue denim or a clean white dress.

    When coordinating, focus on texture as much as colour. Smooth leather sits well beside denim, cotton shirting, fine knits and softly draped fabrics. Because the slide already includes visible stitching and a gold finish, a restrained outfit often gives its construction the clearest stage.

    What to Consider Before Choosing

    1. Check the intended wardrobe role. This design is best suited to shoppers looking for a refined open slide that can move between daily dressing, relaxed tailoring and warm-weather occasions. Its rust colour is distinctive, so consider whether it complements the neutrals and earth tones already present in your wardrobe.
    2. Assess the silhouette. The square open toe creates a crisp, contemporary line, while the low heel keeps the overall profile modest. If you prefer a more sculptural or visually prominent shoe, the understated heel may feel deliberately restrained rather than dramatic.
    3. Review the fit information. The product is listed as true to size, with guidance to take your normal size. Compare this information with the size guide and your usual preference for an open shoe before completing a selection.
    4. Think about finish and coordination. The gold finish and engraved logo make the design easy to dress up, but they also work with casual clothing when the rest of the styling is kept clean. Repeat one warm or metallic detail if desired, rather than matching every accessory.
    5. Plan for considered care. The product uses leather across the outer, internal and sole components. Keep it away from unnecessary moisture and rough surfaces, store it in a clean, dry place and follow appropriate leather-care guidance. Avoid applying an unverified product that could alter the colour or finish.

    A final wardrobe check can be useful: lay out two or three outfits in advance and consider whether the rust tone adds contrast, warmth or tonal continuity. This simple exercise helps clarify how frequently the slide will be worn and whether its distinctive details suit your personal styling language.

    Frequently Asked Questions

    What is the exact product name?
    It is LOEWE Pebble slide in soft calfskin.

    What colour is the slide?
    The listed colour is RUST, a warm shade that can coordinate with neutrals, denim and earthy tones.

    What materials are specified?
    The outer is 100% calfskin, the internal is 100% lambskin and the sole is 100% cowhide leather.

    What is the heel height?
    The listed heel height is 1 cm / 0.39 inches.

    Does it fit true to size?
    The product information states that it fits true to size and recommends taking your normal size. Consult the size guide before purchase.

    Where is it made?
    The stated country of manufacture is Italy.

    How can it be styled?
    Try it with denim, relaxed tailoring, midi skirts, lightweight trousers or simple warm-weather dresses. Neutral and earthy colours allow the rust tone to stand out elegantly.

    Product details, sizing information and purchase conditions may change. Please verify the current product details and purchase information on the product page before purchase.

    View LOEWE Pebble slide in soft calfskin at THANKS KAI and explore how its refined rust tone and modern silhouette could complement your wardrobe.

    Product: LOEWE Pebble slide in soft calfskin

  • A Refined Guide to Beige Suede Mules

    Beige Prada suede mules with enamel triangle logo, almond toe and flat sole

    Prada suede mules offer a considered take on everyday slip-on dressing. Their beige colour, suede outer and flat sole create a quietly polished foundation, while the enamel triangle logo adds a recognisable Prada signature without overwhelming the silhouette. Designed with an almond toe and an easy slip-on style, they sit comfortably between relaxed dressing and more composed city looks.

    The appeal lies in their balance. The shape is streamlined rather than ornate, the tone is versatile rather than stark, and the flat sole keeps the overall impression grounded. For a wardrobe built around useful, repeatable pieces, Prada suede mules can provide an elegant finishing touch across a range of uncomplicated outfits.

    With a calf suede outer, calf leather lining and a sole composed of calf leather and rubber, the design brings together tactile texture and a clean profile. The result is a mule that can be styled with tonal neutrals, soft tailoring or casual separates, depending on the mood and setting.

    Design details that define the pair

    Every visible element contributes to the understated character of Prada suede mules. The beige colour is gentle and adaptable, making it an especially useful choice when you want footwear to complement an outfit rather than compete with it. It works naturally with cream, ecru, camel, denim and darker neutrals, while also offering a softer alternative to black footwear.

    • Suede outer: Calf suede gives the upper a velvety visual texture and a refined, tactile finish.
    • Slip-on construction: The mule format makes the design easy to place within a relaxed daily wardrobe.
    • Enamel triangle logo: The signature detail introduces a focused point of recognition at the upper.
    • Almond toe: The gently elongated toe keeps the profile elegant and streamlined.
    • Flat sole: The low-profile sole supports the pared-back character of the design.
    • Layered composition: The lining is calf leather, while the sole combines calf leather and rubber.

    These details make the pair visually versatile. The almond toe brings refinement, the flat sole keeps the mood modern and practical, and the logo supplies definition. Rather than relying on elaborate decoration, the design works through proportion, material and restraint.

    How to style them across the day

    For a polished everyday look, pair Prada suede mules with straight-leg trousers and a finely textured knit. Keep the palette close to the shoe’s beige tone for a quiet, tonal effect, or introduce a deeper brown or charcoal layer to create contrast. The almond toe will preserve a neat line beneath the trouser hem.

    For a more relaxed daily outfit, consider denim with a simple shirt or lightweight top. A straight or gently relaxed jean allows the slip-on shape to remain visible, while the suede finish elevates the informality of the denim. A structured bag or understated accessory can echo the refined mood without making the outfit feel overly formal.

    Soft tailoring is another natural setting. Wear the mules with tailored trousers, an unstructured blazer and a plain top for a look that feels composed but not rigid. Because the sole is flat, the outfit retains an easy attitude; because the toe is almond-shaped and the upper is suede, it still appears considered.

    In warmer styling, the beige tone pairs well with light dresses, midi skirts or fluid separates. Allow the shoe to act as a neutral anchor, especially when the clothing includes subtle pattern or texture. For a sharper finish, repeat the beige or a related neutral in one small accessory rather than matching every element exactly.

    When selecting outfits, consider the contrast between suede and the surrounding fabrics. Denim, cotton, fine knitwear and soft tailoring can all highlight the material’s texture. The most successful combinations are likely to be those that preserve the shoe’s clean proportions and leave the enamel triangle logo visible as a deliberate detail.

    What to consider before choosing

    Begin with the role you want the pair to play. If you are looking for an adaptable neutral that can move between casual and polished outfits, beige offers broad coordination potential. If you prefer footwear to make a strong colour statement, this understated tone may feel more restrained. Its strength is versatility and quiet definition.

    Next, consider the silhouette. The slip-on style suits those who appreciate a simple, streamlined format, while the almond toe gives the shape a more refined finish than a rounded profile. The flat sole reinforces an easy, grounded look, so it is worth assessing how that proportion fits with your existing trousers, denim, skirts and dresses.

    Material is also central to the decision. The outer is calf suede, the lining is calf leather, and the sole uses calf leather with rubber. Before purchase, review the product page for the most current care information and confirm that the material combination suits your preferred wardrobe routine. Suede is visually distinctive, so storing and handling the pair thoughtfully will help preserve the intended appearance.

    For coordination, map the shoes against your most-worn colours. Beige can sit comfortably beside cream, tan, brown, black, navy and denim, but the exact result depends on the tones already present in your wardrobe. Consider whether you would style them with clean neutrals, contrast them with darker clothing, or use them to soften a sharper outfit.

    Finally, check the current product details on the product page before purchase, including any information relevant to fit, composition and care. The product reference shown for this pair is 1D766NF010103, and the listed product number is 25748109.

    Frequently asked questions

    What colour are Prada suede mules?
    They are beige, a versatile neutral suited to tonal looks and contrasting darker outfits.

    What is the upper made from?
    The outer is calf suede 100%. The lining is calf leather 100%.

    What type of sole do they have?
    They have a flat sole composed of calf leather 70% and rubber 30%.

    What details define the design?
    Key features include a slip-on style, enamel triangle logo and almond toe.

    How can they be styled?
    They can be paired with denim, straight-leg trousers, soft tailoring, knitwear, skirts or dresses. Beige works particularly well with related neutrals and darker contrast tones.

    Where should I confirm care and purchase information?
    Review the product page for the latest available details before making a purchase.

    Product details, composition and purchase information may change. Please verify the current details on the product page before purchase.

    View Prada suede mules at THANKS KAI and consider how their refined beige profile could complement your wardrobe.

    Product: Prada suede mules

  • A Refined Twist Ring for Everyday Styling

    TIANYIDA twist band ring with round brilliant-cut zircon and a polished plated finish

    Tiandi Engagement Ring 925 Sterling Silver Twist Band Hip Hop Ring 4A Zirconia Diamond Ring brings together a sculptural band profile, a brilliant round-cut zircon main stone, and a polished finish designed to move between expressive and occasion-led styling. Listed under the TIANYIDA brand, this ring is presented as an eternity band ring with a prong setting and claw-setting inlay technology.

    Its visual identity is defined by contrast: the twist-band concept introduces movement, while the stone setting adds a focused point of sparkle. That balance makes it suitable for a considered everyday jewellery edit as well as anniversary, engagement, gift, party, and wedding occasions listed in the product information.

    The product data identifies silver as the jewellery main material and lists rhodium, 14K gold, 18K gold, and rose gold plating options. Before choosing a finish, consider whether you want the ring to blend quietly with a silver-toned collection or create a warmer accent against gold or rose-gold accessories.

    Design Details Worth Noting

    This ring is best understood through its interplay of line, light, and finish. The twist-band silhouette gives the design a more dynamic character than a plain band, while the round brilliant cut helps direct attention towards the centre or principal visible stone area. The supplied specifications identify zircon as the main stone, rather than diamond, so the product should be selected for its stated zircon design and overall styling appeal.

    • Material: Silver is listed as the jewellery main material.
    • Stone: The main stone is identified as zircon, with a round brilliant cut.
    • Setting: The product information lists both prong setting and claw-setting inlay technology.
    • Band type: It is described as an eternity band ring.
    • Finishes: Listed plating choices include rhodium, 14K gold, 18K gold, and rose gold.
    • Style direction: The stated style is Hiphop, giving the ring a confident, fashion-forward character.
    • Brand and model: TIANYIDA, model TYD-R-0008.

    The result is a piece with enough definition to stand alone, yet enough finish variation to support a wider jewellery wardrobe. The choice of plating can shift the mood: rhodium offers a cool-toned direction in the supplied options, while gold and rose-gold choices can create a warmer, more decorative impression. Confirm the currently available finish and exact product details on the product page before making a selection.

    How to Style It Across the Day

    For a polished daily look, let the ring act as the principal accent. Pair a cooler plated version with a clean watch, understated silver-toned pieces, or a monochrome outfit where the twist profile can be seen clearly. The round brilliant cut adds a concentrated point of light without requiring an elaborate jewellery combination.

    For a more expressive outfit-of-the-day composition, use the ring as part of a deliberately mixed arrangement. Its Hiphop style can sit comfortably beside bolder accessories, while the eternity-band format gives the hand a continuous, carefully framed appearance. Keep the rest of the combination intentional: one strong ring can anchor several quieter pieces, or multiple rings can be balanced by simpler bracelets and earrings.

    Warm finishes offer another route. A 14K gold, 18K gold, or rose gold plated option can coordinate with warm-toned details in clothing, bags, watches, or other accessories. Rather than matching every element exactly, repeat the same colour family once or twice for a cohesive finish.

    For engagement, anniversary, wedding, party, or gifting contexts, the ring’s stone and twist-band form provide a clear occasion-led presence. It may be styled alone for a focused presentation or combined with pieces that echo its rounded stone shape. Since sizing information is not included in the supplied product data, check the product page for the available size options and selection guidance before purchase.

    A Considered Selection Guide

    Begin with the finish. Decide whether your existing jewellery is primarily cool, warm, or mixed in tone, then review the listed plating options on the product page. A coordinated finish can create a restrained appearance, while a contrasting finish can make the ring feel more deliberately styled.

    Next, consider the visual role you want the ring to play. The twist band and Hiphop designation suggest a piece with noticeable character, whereas the round brilliant-cut zircon gives the design a more classic focal point. If you prefer a single statement detail, wear it independently. If you favour a layered look, choose supporting pieces with simpler silhouettes so the band remains legible.

    Pay attention to the setting language. The specifications refer to a prong setting and claw-setting inlay technology, details that contribute to the ring’s visible construction. Readers seeking a particular setting appearance should compare the product images and current listing information carefully.

    Finally, review all purchase information before ordering: finish, size, product description, and any currently displayed appraisal or specification details. The supplied data lists a third party appraisal under certificate type, but it does not provide further certification particulars. Use the product page as the final reference for the exact version you intend to buy.

    Frequently Asked Questions

    What is the main stone?

    The main stone is listed as zircon, with a round brilliant cut. The product title uses diamond-related wording, but the supplied specifications identify zircon as the main stone.

    Which finishes are listed?

    The product information lists rhodium plated, 14K gold plated, 18K gold plated, and rose gold plated options. Check the product page for the current selectable finish.

    What type of ring is it?

    It is identified as an eternity band ring with a twist-band design, prong setting, and claw-setting inlay technology.

    Is it suitable for gifting or formal occasions?

    The listed occasions include anniversary, engagement, gift, party, and wedding. Review the current listing details and sizing information before purchase.

    What is the brand and model?

    The brand is TIANYIDA and the model number is TYD-R-0008.

    Please verify the current product details, available finish and size options, specifications, and purchase information on the product page before purchase.

    Explore Tiandi Engagement Ring 925 Sterling Silver Twist Band Hip Hop Ring 4A Zirconia Diamond Ring at THANKS KAI and review the current product details.

    Product: Tiandi Engagement Ring 925 Sterling Silver Twist Band Hip Hop Ring 4A Zirconia Diamond Ring

THANKS KAI CONTACT

WeChat

위챗에서 QR코드를 스캔해 주세요.
Scan the QR code in WeChat.

Thanks Kai WeChat contact QR code위챗 열기 / Open WeChat