Tag: lang-en

English content

  • A 15-Minute Digital Organization Routine for Searchable File Names

    A 15-Minute Digital Organization Routine for Searchable File Names

    작성자: Kai Life Editorial Team

    If you want to find everyday documents more easily, use one consistent naming pattern: date, project or topic, document type, and status. For example, 2025-03-08_ClientA_Proposal_Draft is easier to scan than final proposal new. You can introduce the rule in a 15-minute routine by preparing a small workspace, sorting a limited group of files, renaming the most useful items, and reviewing what should happen next.
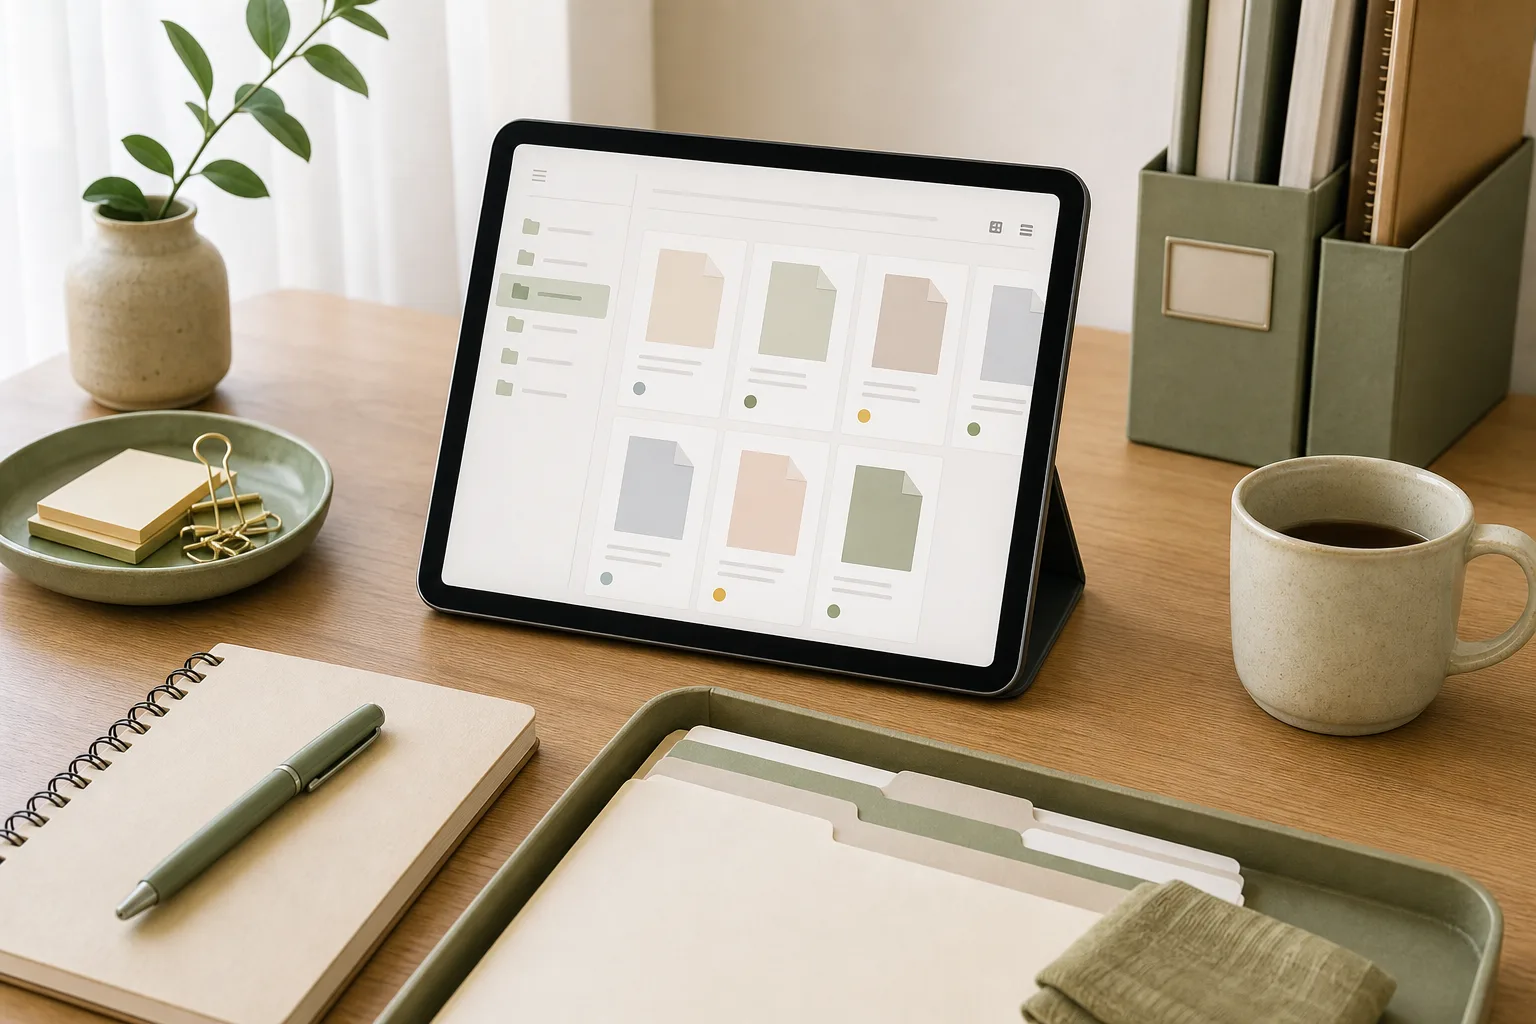
    A 15-Minute Digital Organization Routine for Searchable File Names — topic illustration

    The goal is not to rebuild your entire digital life in one sitting. It is to create enough structure that a future search gives you useful clues: when the file was created, what it concerns, what kind of item it is, and whether it is ready to use.

    Why file names become difficult to search

    Digital clutter often grows through small decisions. A download receives a vague name, an attachment is saved without its project context, and a revised copy gains another version of “final.” After several months, the folder may contain files that are technically present but difficult to identify.

    Common problems include:

    • Dates are written in different formats, such as 3-8-25, March 8, and 080325.
    • Project names are shortened inconsistently, so related documents do not appear together in search results.
    • Status words such as draft, review, approved, and archived are missing or used differently.
    • Duplicate files are renamed with unclear endings such as new, latest, or final2.
    • Apps and saved links are managed separately from the files and tasks they support.

    A useful naming rule reduces the number of decisions you need to make later. It also makes a file’s purpose visible before you open it.

    The searchable naming rule

    Use this pattern for documents that relate to work, clients, household administration, or recurring projects:

    YYYY-MM-DD_Project-or-Topic_Document-Type_Status

    Examples:

    • 2025-03-08_ClientA_Proposal_Draft
    • 2025-03-10_Tax_Receipt_Review
    • 2025-03-12_Website_ContentPlan_Approved
    • 2025-03-15_Home_InsurancePolicy_Reference

    Not every file needs every field. A short reference document might use 2025-03-15_Warranty_Reference. A recurring spreadsheet may benefit from a period instead of a day, such as 2025-03_MonthlyExpenses_Working.

    How to choose each part

    • Date: Choose the date that helps you identify the file. This may be the creation date, meeting date, invoice date, or reporting period. Use the same date format within a folder.
    • Project or topic: Use a short, recognizable label. Prefer ClientA or KitchenRepair over an abbreviation that only makes sense today.
    • Document type: Describe what the item is, such as Invoice, Notes, Contract, Proposal, Receipt, Brief, or Checklist.
    • Status: Add a simple state when it affects your next action. Useful options may include Draft, Review, Approved, Sent, Paid, or Reference.

    Use underscores or hyphens consistently. Avoid adding private information to names when the file may be shared or stored in a location with broad access. If your system has restrictions on certain characters, use plain letters, numbers, underscores, or hyphens.

    A 15-minute Prepare, Sort, Act, and Review routine

    1. Prepare: minutes 0–3

    Select one small target. Good choices include the Downloads folder, documents from one client, this month’s receipts, or files for one active project. Do not begin with every folder on every device.

    Write down the naming pattern where you can see it:

    YYYY-MM-DD_Project_Document-Type_Status

    Then choose a temporary holding folder such as 00_ToSort or a short list in your notes app. This gives uncertain files a place to wait instead of forcing a decision you may later regret.

    2. Sort: minutes 3–7

    Scan the selected files and place each into one of four groups:

    • Keep and rename: The file is useful and its identity is clear.
    • Keep for review: The file may matter, but its purpose or retention needs checking.
    • Move: The file belongs in another project or folder.
    • Delete or archive: The file is a duplicate, temporary export, or obsolete copy, subject to your own records needs.

    Sorting before renaming prevents you from spending time polishing names for files you will not keep. If you cannot identify a file from its contents or context, place it in the review group rather than guessing.

    3. Act: minutes 7–13

    Rename the files with the highest future value first. Prioritize items you search for repeatedly, files connected to active work, and documents that are likely to be confused with similar versions.

    Use a short, stable vocabulary. For example, select one term between Invoice and Bill for the same document category. Select one status between Working and Draft if they mean the same thing in your system.

    When two files have the same date and topic, add a distinguishing field:

    • 2025-03-08_ClientA_Proposal_Draft
    • 2025-03-08_ClientA_Proposal_Comments

    If you create a new version, update the status or date rather than relying on vague labels. Keep the original when it may be needed for comparison, and apply your own retention rules to older versions.

    4. Review: minutes 13–15

    Look at the renamed group as if you were searching for one item next month. Ask:

    • Can I tell what this file is without opening it?
    • Would I use the same project or topic label next time?
    • Does the status describe a real next step?
    • Are any files still sitting in a temporary location without a review date?

    Record one small rule for the next session, such as “Use ClientA, not CA” or “Receipts include the purchase date.” A visible rule is easier to repeat than a vague intention.

    Copyable 15-minute checklist

    Time Action Done
    0–3 minutes Choose one folder or project and write the naming pattern □
    3–7 minutes Group files into keep, review, move, and delete/archive □
    7–13 minutes Rename the most useful files using consistent terms □
    13–15 minutes Check searchability and record one rule for next time □

    Connect files with apps and links

    File names solve only part of the retrieval problem. Apps and saved links can become another layer of friction when they are arranged by installation order or saved without context.

    App organization

    Group apps by the action you take rather than by the company that made them. Possible groups include Write, Communicate, Finance, Design, Admin, and Reference. Keep the groups small enough that you can scan them quickly.

    For apps you use only occasionally, consider a separate folder or secondary screen. The exact layout depends on your device, but the principle is consistent: frequently used tools should be close to the task they support, while occasional tools should not compete for attention.

    Link management

    Save a link with a useful title and a short reason. Instead of Interesting article, use a label such as Invoice checklist — reference for monthly admin. Add the topic, project, or intended action when your bookmarking tool allows notes or tags.

    Create a small set of link categories, such as Current Work, Reference, To Read, and Services. Review the To Read group during a scheduled session. If a link no longer supports a current need, remove it or move it to a clearly labeled archive according to your own preference.

    Rules for keeping the system usable

    • Start with active material. New and frequently used files provide more immediate value than a complete historical cleanup.
    • Limit status terms. A short vocabulary makes searches and folder scans easier.
    • Separate storage from action. A file can be safely stored without being an active task.
    • Use a review area for uncertainty. Ambiguous files need a decision date, not a guessed label.
    • Adapt the pattern to the tool. Some services sort naturally by date, while others rely heavily on tags or folders.
    • Protect sensitive information. Avoid putting unnecessary personal, financial, or confidential details in filenames.

    FAQ

    Should the date be the first part of every file name?

    No. A date-first format is useful when chronological sorting matters, but a topic-first format may suit a system organized primarily by client or project. Choose one pattern for a defined group and apply it consistently.

    What should I do with files I cannot identify?

    Move them to a review location and note when you will inspect them. Check the file contents, surrounding folder, email context, or related task before renaming or deleting it.

    Do I need a separate folder for every project?

    Not necessarily. A small number of broad folders combined with descriptive filenames may be easier to maintain than many deeply nested folders. Use a structure that matches how you search.

    How often should I repeat the routine?

    Repeat it when a particular folder becomes difficult to scan or when a recurring administrative task creates a batch of files. A short, regular review can be more manageable than waiting for a large cleanup session.

    Conclusion

    Digital organization becomes more practical when it is treated as a repeatable decision process rather than a one-time makeover. Start with one small group of files, use YYYY-MM-DD_Project_Document-Type_Status, and spend 15 minutes preparing, sorting, acting, and reviewing. Then connect the same ideas to app groups and saved links so that your digital workspace reflects the way you actually work.


  • A Refined Guide to Choosing a Daily Chain Necklace

    RINNTIN 1mm 925 sterling silver cable chain necklace in a 14K gold-plated finish

    BSC06 RINNTIN Thin Chains 1mm 925 Sterling Silver 14K Gold Plated Cable Chain Necklace 16, 18, 20, 22, 24 Inch is a quietly versatile piece for wardrobes that favour clean lines and considered detail. Its 1mm cable-chain profile gives the necklace a slender visual presence, while the 925 sterling silver base and stated 14K gold plating create a warm, polished direction. The design is also listed with rhodium-plated and rose-gold-plated options, allowing the overall finish to work with different jewellery palettes.

    With five listed length choices—16, 18, 20, 22, and 24 inches—the necklace invites a more deliberate approach to styling. A shorter selection can sit close to the neckline, while a longer option can create a relaxed vertical line over clothing. The result is a classic chain intended to move easily between everyday outfits, layered looks, gifting occasions, and more dressed-up settings.

    Rather than relying on a prominent pendant or main stone, this necklace places its emphasis on the chain itself. That makes it a useful foundation for a minimal jewellery edit, a coordinated set of fine-looking layers, or a restrained finishing touch for an outfit. The guide below focuses on choosing the most suitable length and finish, then incorporating the piece into daily dressing with clarity.

    What Defines the Necklace

    • Slender 1mm profile: The thin cable-chain construction is visually light and suited to styling where the necklace should complement rather than dominate an outfit.
    • 925 sterling silver: The listed purity of precious metals is 925 silver, with a stated precious-metal weight range of 0.78–1.11g.
    • 14K gold-plated presentation: The supplied product name identifies a 14K gold-plated version, giving the piece a warm-toned direction for gold jewellery wardrobes.
    • Additional finish listings: The product information also references rhodium-plated and rose-gold-plated versions. Consider the finish as part of the overall styling plan rather than treating length as the only choice.
    • Five length choices: The listed options are 16, 18, 20, 22, and 24 inches. This range supports close-to-neckline styling, balanced everyday proportions, and longer layered arrangements.
    • Classic cable-chain design: The necklace type is listed as chains, with cable chain given as both chain type and shape. Its uncomplicated structure supports a broad range of outfits.
    • No main stone: The product data lists no main stone and no inlay technology, keeping the visual focus on the line, finish, and proportion of the chain.
    • Broad occasion profile: The supplied occasions include anniversary, engagement, gift, party, wedding, and other events, while the listed gender category is children’s, men’s, unisex, and women’s.

    Styling Scenarios for Everyday Wear

    For a refined daily uniform. Pair the warm gold-plated finish with simple separates, a fine knit, or a crisp shirt when you want the neckline to feel finished without adding visual weight. The 16-inch option is the most close-fitting choice in the listed range, making it a natural starting point for high necklines or a neat, contained look. The 18-inch length offers a little more ease while maintaining a polished, familiar proportion.

    For open collars and relaxed necklines. A 20-inch chain can create a balanced line beneath an open shirt, soft collar, or uncomplicated crew-neck layer. It remains understated, but its additional length gives the cable pattern more room to register against the fabric. This is a practical choice when you want the necklace to be visible without making it the centre of the outfit.

    For longer lines and layering. The 22-inch and 24-inch options provide a more extended silhouette. Wear one on its own over a plain top for a quiet vertical accent, or coordinate it with a shorter chain for a layered composition. To keep the arrangement intentional, vary the lengths clearly and let the slender 1mm profile maintain visual space between the pieces.

    For finish coordination. The 14K gold-plated version sits naturally alongside warm-toned accessories, from gold earrings to a watch with a similarly coloured case. If your wardrobe is built around cooler metals, the listed rhodium-plated option may offer a more coherent direction; rose gold can introduce a softer, blended note. Keeping the metal family consistent is an easy way to make simple outfits appear more considered.

    For gifting and occasion dressing. Its classic chain form and absence of a main stone make the necklace a relatively restrained choice for anniversaries, engagements, weddings, parties, or gifting. When selecting for someone else, focus first on their usual jewellery finish and preferred neckline proportions, then use the five listed lengths to refine the choice.

    How to Choose the Right Version

    1. Begin with the finish. Choose the stated 14K gold-plated direction if warm metallics dominate the wearer’s jewellery. Review the available product presentation for rhodium-plated or rose-gold-plated alternatives when a cooler or softer tone would coordinate more naturally.
    2. Choose length by styling intention. Select 16 inches for a closer neckline effect, 18 inches for a slightly more relaxed everyday proportion, and 20 inches for a balanced middle ground. Consider 22 or 24 inches when a longer line or layered arrangement is the priority.
    3. Consider the wardrobe before the occasion. A chain that works with the wearer’s regular collars, knitwear, and open-neck shirts will likely be used more often than one chosen only for a formal event. The listed occasion range makes the necklace adaptable, but the best selection remains the one that matches personal dressing habits.
    4. Use the design as a foundation. Since the necklace has no main stone or inlay technology, decide whether you prefer its clean chain character alone or as part of a layered look. Its classic construction can support either approach without introducing a competing motif.
    5. Plan care around preservation. Keep the necklace’s finish in mind when organising your jewellery. Store it separately enough to preserve its neat presentation, avoid unnecessary tangling, and return it to its storage place after wear. Before using any cleaning method, confirm suitable care guidance on the product page or with the seller, especially for a plated finish.

    Frequently Asked Questions

    What material is listed for the necklace?
    The product data lists silver as the main jewellery material and 925 silver as the precious-metal purity. The named version is 14K gold plated.

    Which lengths are available?
    The listed choices are 16, 18, 20, 22, and 24 inches.

    Is there a pendant or main stone?
    No. The supplied specifications list no main stone and describe the item as a cable chain necklace.

    Are other finishes referenced?
    Yes. The product information references rhodium-plated and rose-gold-plated versions in addition to the 14K gold-plated presentation.

    Which length is best for layering?
    Longer options such as 22 or 24 inches can create separation from a shorter chain, while 16, 18, or 20 inches can provide a closer base. The best combination depends on the intended neckline and personal styling preference.

    Can it suit different wearers?
    The supplied gender specification includes children’s, men’s, unisex, and women’s. Selection should still be based on the wearer’s preferred finish, neckline proportions, and desired length.

    Please verify the current product details, available finishes and lengths, care guidance, and purchase information on the product page before purchase.

    View BSC06 RINNTIN Thin Chains 1mm 925 Sterling Silver 14K Gold Plated Cable Chain Necklace 16, 18, 20, 22, 24 Inch at THANKS KAI and explore the finish and length that best suit your wardrobe.

    Product: BSC06 RINNTIN Thin Chains 1mm 925 Sterling Silver 14K Gold Plated Cable Chain Necklace 16, 18, 20, 22, 24 Inch

  • A 15-Minute Kitchen Organization Routine for Refrigerator Ingredients

    A 15-Minute Kitchen Organization Routine for Refrigerator Ingredients

    작성자: Kai Life Editorial Team

    If your refrigerator feels difficult to plan from, use a short routine rather than a detailed inventory. In about 15 minutes, prepare one place for notes, sort ingredients into a few practical groups, turn selected items into meal notes, and review the shopping list for gaps. The goal is not to record every detail. It is to create a current enough picture to support the next meal and the next shopping decision.

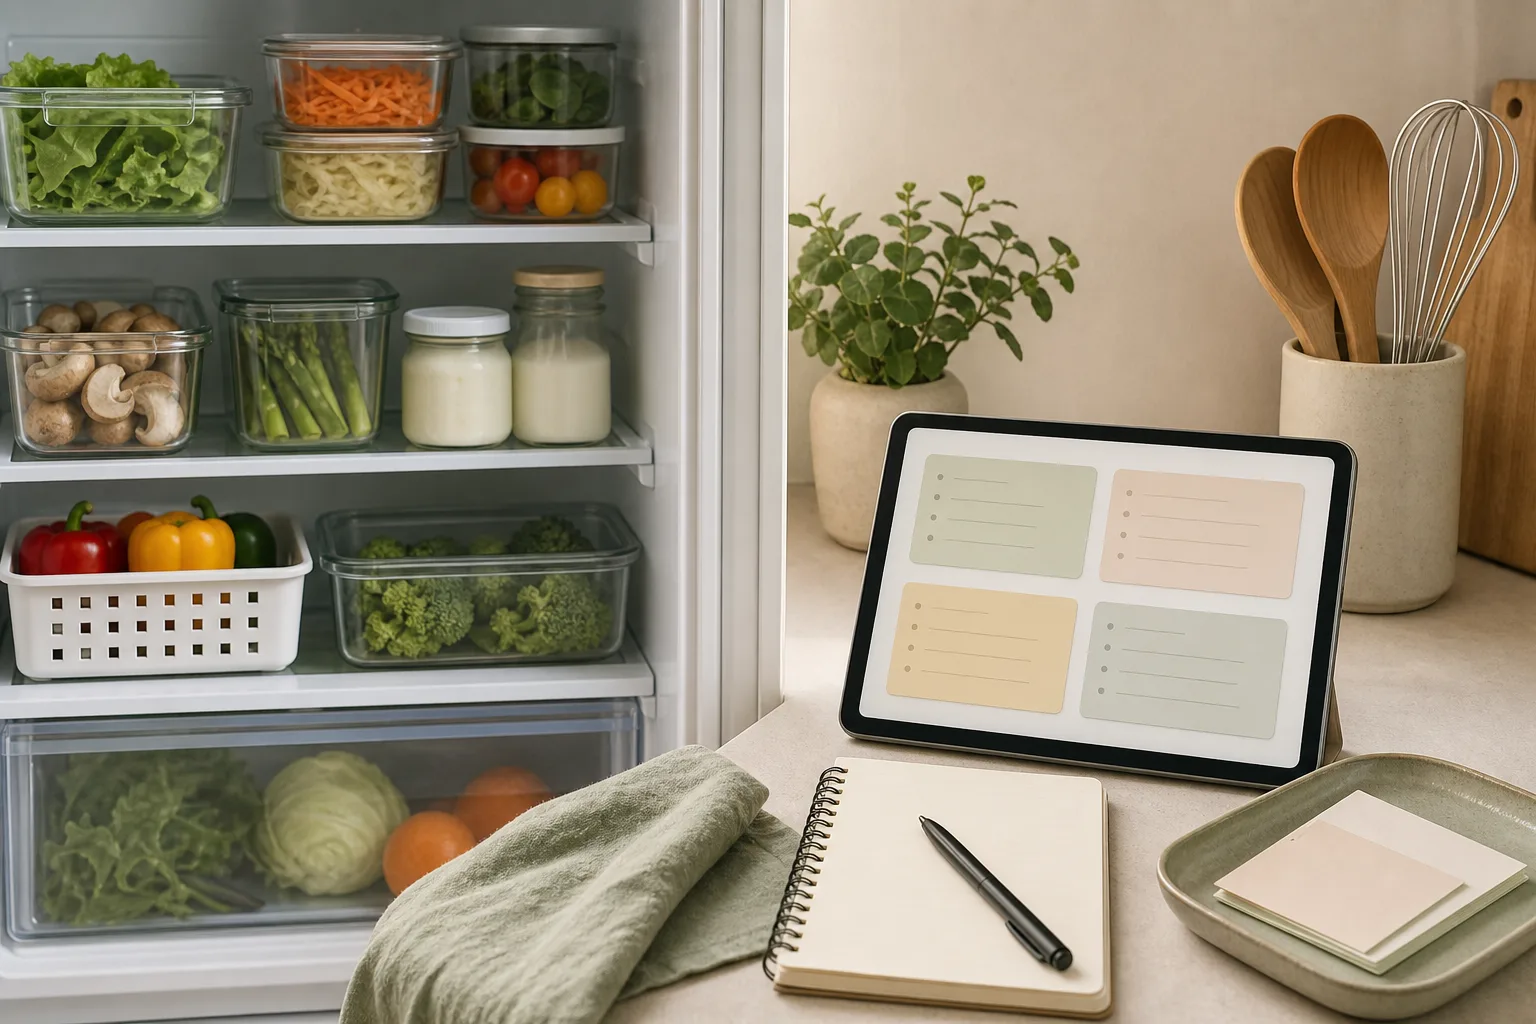
    A 15-Minute Kitchen Organization Routine for Refrigerator Ingredients — topic illustration

    Why a lightweight system works better than a full inventory

    A refrigerator list can become another task to maintain. Recording every package, quantity, and date may be more detail than a busy household can keep current. A lighter system focuses on decisions that are useful today:

    • What ingredients should be noticed soon?
    • What can be combined into a simple meal?
    • What is missing for a meal that is already being considered?
    • What should be added to the next shopping list?

    This approach treats the list as a working note, not a permanent database. Items can be added, crossed out, moved, or rewritten as plans change. Use paper, a notes app, or a shared household document—the method stays the same.

    The four-step refrigerator routine

    1. Prepare: create one visible capture point

    Choose one place for refrigerator notes before you begin. A single note is easier to update than several separate lists. Give it four headings:

    • Use soon: ingredients you want to consider first.
    • Meal ideas: combinations or dishes you may make.
    • Shopping list: items needed for planned meals or regular household use.
    • Check later: items that need a closer look or a decision.

    Keep the language short. “Greens,” “eggs,” or “leftover rice” is usually more useful during a quick review than a long description. If more than one person shops or cooks, use wording that another person can understand without asking for clarification.

    2. Sort: scan by decision, not by shelf

    Look through the refrigerator and place each noticeable item into one of three working groups:

    1. Use soon: ingredients you want to give attention to in the next planning window.
    2. Flexible: ingredients that can fit several meals or remain available for later planning.
    3. Needs a decision: items that are unclear, incomplete, or not connected to a current plan.

    This is an organization step, not a food-safety assessment. Do not use the routine to decide whether food is safe to eat. For safety questions, follow the relevant official guidance for your location and the product’s labeling.

    For each group, write only what changes your next action. For example, “vegetables—use in a bowl or stir-fry” is a useful planning note. A detailed count of every item may slow the routine without helping you choose what to do.

    3. Act: convert ingredients into small meal notes

    Choose one or two ingredients from the “use soon” group and connect them with a meal format. The format can remain broad:

    • grain bowl with a protein and vegetables
    • sandwich or wrap with a side
    • simple soup or one-pot meal
    • egg-based meal with vegetables
    • leftover combination for lunch

    Write a meal note using this structure:

    Meal idea: [main ingredient] + [supporting ingredient] + [simple format].
    Missing: [one or two items, if needed].
    Flexible swap: [another ingredient already available].

    The purpose is to reduce the number of decisions at mealtime. You are not committing to a fixed menu. You are creating a few starting points that can adapt to time, appetite, and what is available.

    4. Review: clean the note and stop

    Use the final minutes to review the note rather than continuing to reorganize the refrigerator. Remove items that are no longer relevant, combine duplicate shopping entries, and move unresolved questions to “check later.” Then stop at the end of the time block.

    A useful review asks:

    • Does the note show the ingredients I want to consider first?
    • Are meal ideas connected to ingredients already available?
    • Does the shopping list support a real plan rather than a vague possibility?
    • Can someone else understand the note quickly?

    A practical 15-minute action plan

    Time Action Output
    Minutes 0–2 Open one note or place one sheet where it is easy to find. One capture point with four headings
    Minutes 2–7 Scan the refrigerator and write short ingredient names. Use soon, flexible, and needs-a-decision groups
    Minutes 7–11 Choose one or two ingredients and write meal formats. Two or three adaptable meal notes
    Minutes 11–14 Add only the shopping items that support those notes or a known household need. Focused shopping list
    Minute 15 Remove duplicates, mark unclear items, and finish. A short note ready for the next decision

    If the refrigerator is crowded or the household has several meal planners, use the same structure across separate sections rather than creating a complicated database. The routine should fit the way decisions are made in your home.

    Copyable kitchen organization checklist

    Copy the following checklist into a notes app or print it for a weekly planning session:

    • Prepare: one note or page is ready.
    • Sort: I marked items as use soon, flexible, or needs a decision.
    • Meal notes: I connected one or two ingredients to simple meal formats.
    • Shopping list: I added only items connected to a plan or known need.
    • Review: I removed duplicates and moved unclear items to check later.
    • Stop: the routine is complete even if the note is not exhaustive.

    Ways to keep meal notes useful

    Use formats instead of rigid recipes

    A format leaves room for substitutions and changing schedules. “Wrap with vegetables and a filling” may remain useful when the original ingredient is unavailable. A detailed recipe note can be added later if the meal becomes a regular choice.

    Separate planning from safety decisions

    Organization notes can show what to consider, but they should not replace product labels, official food-safety guidance, or your own careful judgment. Avoid using a personal tracking note as proof that an item is suitable to eat.

    Make the shopping list action-oriented

    Instead of keeping a large list of possible purchases, group entries by the next decision. For example, list items needed for a planned meal separately from items that can wait for a broader shopping trip. This makes the list easier to review before leaving home.

    Record patterns only when they help

    After several routines, you may notice that certain ingredients repeatedly remain unused or that particular meal formats are easy to assemble. Record these observations only if they improve the next plan. The system should become clearer, not more demanding.

    Common problems and simple adjustments

    “My list becomes outdated quickly.”

    Use shorter notes and update them at the moment a plan changes. A list with fewer items is easier to correct. You can also keep a separate “later” section so unfinished ideas do not make the active list confusing.

    “I still cannot decide what to cook.”

    Start with a meal format rather than a recipe. Pick one ingredient from “use soon,” then add a familiar base and a supporting ingredient. The aim is to create a starting point, not to design a complete menu during the review.

    “Everyone uses a different note.”

    Agree on one shared location and four headings. Household members can add entries in their own words, but the shared structure reduces duplicate lists and missed information.

    “The routine takes longer than 15 minutes.”

    Limit the scan to items that affect an upcoming decision. Move uncertain details to “check later” and set them aside for a separate task. If the note requires extensive sorting, simplify the categories before adding more detail.

    FAQ

    Do I need a dedicated refrigerator inventory app?

    No. A paper list, phone note, or shared document can support this routine. Choose the option that is easiest for the people who will actually update and use it.

    How often should I use the routine?

    Use it whenever the current meal and shopping notes stop reflecting your choices. Some households may prefer a regular planning session, while others may use a short review before shopping. The useful frequency depends on how quickly plans change.

    Should I track exact quantities?

    Track quantities when they affect a decision, such as whether an item is enough for a planned meal. Otherwise, broad labels may be sufficient. Extra detail is helpful only when it remains easy to maintain.

    Can this system create a complete meal plan?

    It can support meal planning by turning visible ingredients into a few options, but it is not intended to predict every meal or manage every household preference. Add a separate calendar or recipe collection if those functions are important to you.

    Conclusion

    A practical kitchen organization system does not need a complete record of everything in the refrigerator. The prepare, sort, act, and review framework creates one clear place to notice ingredients, write adaptable meal notes, and update a shopping list. Start with the 15-minute version, keep only information that changes your next decision, and revise the structure when it becomes harder to use than the problem it is meant to solve.


  • A 15-Minute Home Organization Station for Cleaning Tools

    A 15-Minute Home Organization Station for Cleaning Tools

    작성자: Kai Life Editorial Team

    To group cleaning tools in one practical station, choose one easy-to-reach location, collect the tools from around the home, separate them by frequency and use, then return only the useful items to that station. A 15-minute tidy-up works best when the goal is not to redesign every cupboard, but to create a clear home base for the tools used most often.

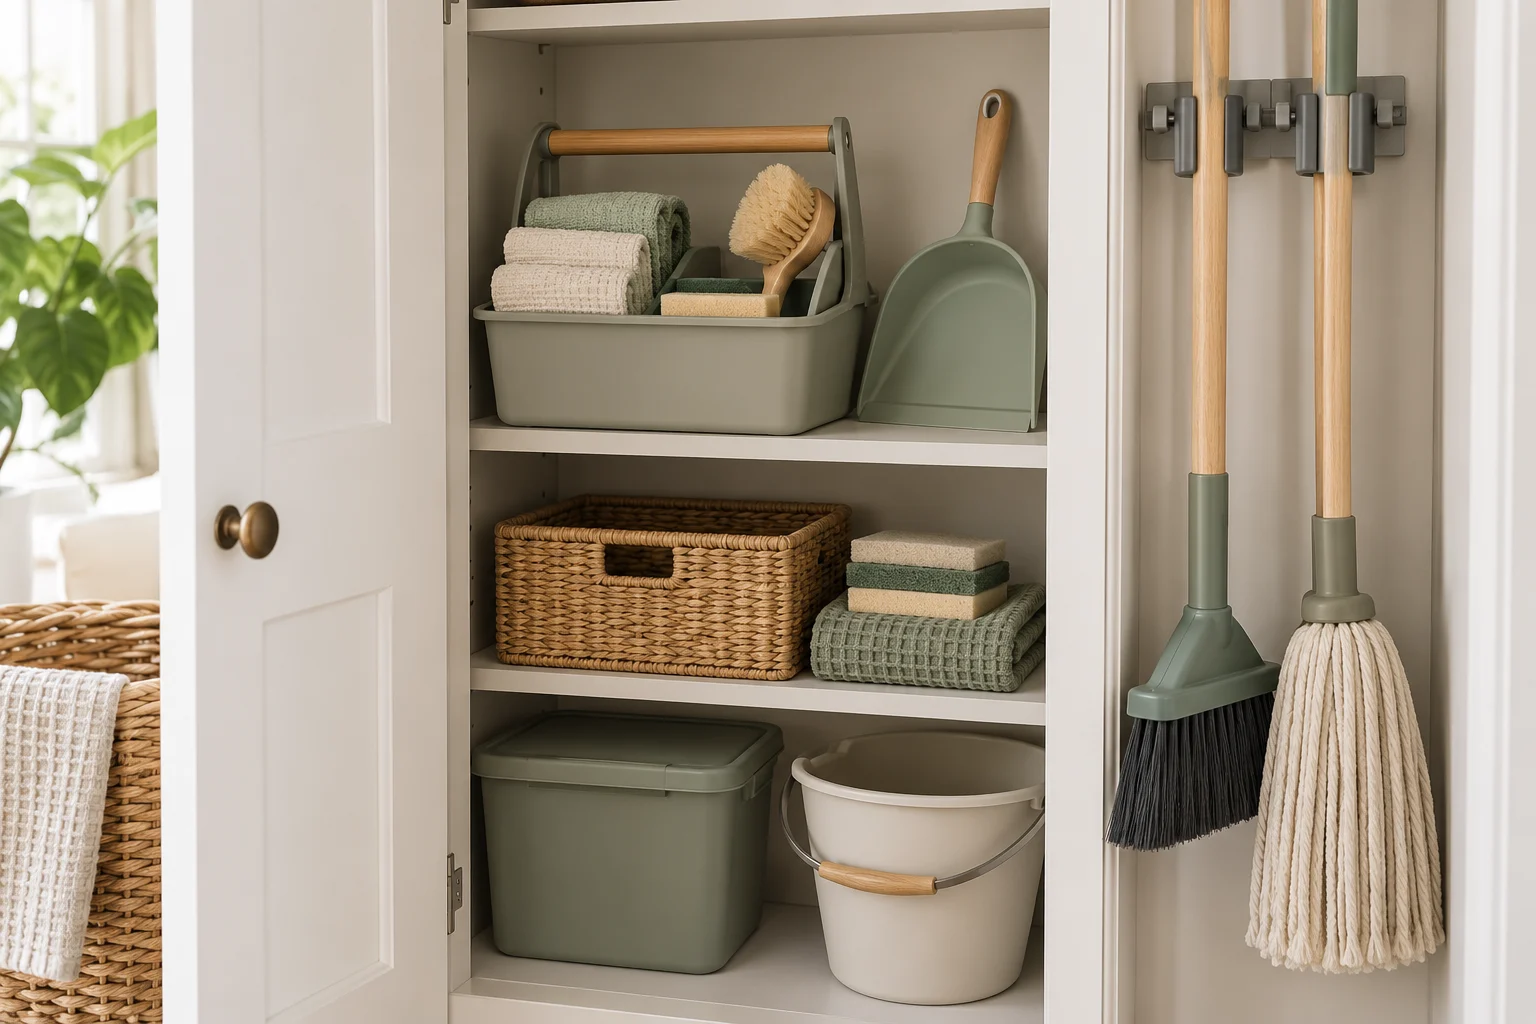
    Cleaning tools grouped in one accessible storage station

    What a practical cleaning station needs to do

    A cleaning station is a designated place for everyday cleaning supplies and tools. It can be a cupboard, a shelf, a narrow corner, a utility area, or another location that fits the home. The best location is not necessarily the largest one. It should reduce unnecessary walking and make it easy to put an item away after use.

    For a one- or two-person home, a small station often works better when it has a limited purpose. Keep frequently used items together, while storing occasional or specialist items elsewhere if the station becomes crowded. This creates a simple storage rule: the more often an item is used, the easier it should be to reach.

    • Daily or frequent items: place them at the front or at hand level.
    • Weekly items: place them behind or below the frequent-use group.
    • Occasional items: store them separately if they make the main station difficult to use.
    • Items with unclear purpose: pause before giving them space in the station.

    The 15-minute prepare, sort, act, review routine

    Minutes 0–3: Prepare the area

    Choose one station before moving anything. Open the cupboard or clear the shelf, then place a temporary collection spot nearby. A box, basket, or clean section of floor can work as a holding area. The collection spot keeps the process contained and makes it easier to see what you actually own.

    Gather a cloth or small bag for rubbish and a separate place for items that belong in another room. Avoid starting with several storage areas at once. One station and one collection spot are enough for this routine.

    Minutes 3–7: Sort by use, not by object type

    Bring cleaning tools from nearby rooms to the collection spot. Sort them into three practical groups:

    1. Use often: tools used for quick spills, surfaces, floors, or other regular tasks.
    2. Use sometimes: tools used during a longer weekly or occasional clean.
    3. Unsure or unused: items that are damaged, duplicated, empty, or not connected to a current task.

    Sorting by use helps the station support a home’s real cleaning flow. A tool that is useful but rarely needed does not have to occupy the easiest-to-reach position. If an item is used in a specific room, consider whether storing it near that room would save more effort than moving it to the central station.

    Minutes 7–12: Act and assign each group a place

    Return the frequent-use group first. Keep similar actions together where practical, such as surface-cleaning items, floor-care tools, and small touch-up tools. The exact categories can vary by home; the useful test is whether a person can find and return an item without opening several containers.

    Use existing containers when possible. A small basket can hold loose items, while taller tools may need an open side or a vertical space. Keep the arrangement visible enough that forgotten items do not disappear at the back. If a container hides the contents, label it with a plain description such as “floor care” or “quick clean.”

    Keep the station safe and suitable for the space. Follow the instructions on any cleaning product, keep incompatible products separate, and store supplies away from children or pets when relevant. Do not combine products merely to save space. If a container is leaking, damaged, or missing important information, set it aside for careful review rather than placing it back in the station.

    Minutes 12–15: Review the flow

    Test the station with a simple imaginary task: wiping a surface, handling a small spill, or cleaning a floor. Can you locate the relevant tool quickly? Is anything blocking the item you reach for most? Can the tool be returned without creating a new pile?

    Make one adjustment, then stop. The purpose of the 15-minute routine is to create a workable starting point. A short review later can improve the arrangement after the station has been used in real life.

    Storage rules that keep the station manageable

    A few repeatable rules are more useful than a complicated organizing system. Write the rules on a note inside the cupboard or save them with the checklist below.

    Situation Storage rule
    Used frequently Keep near the front or at an easy-to-reach height.
    Used in one specific room Consider local storage if carrying it back and forth adds effort.
    Used occasionally Place behind the everyday group or in a separate area.
    Duplicate items Keep only the quantity that fits the household’s routine; review the rest.
    Loose small tools Group them in one open or clearly labeled container.
    New item entering the station Decide where it belongs before putting it away.

    These rules protect the station from becoming a general dumping place. They also make the system easier to explain to another person in the home. Shared spaces work better when the storage decision is visible rather than dependent on one person remembering it.

    Copyable 15-minute checklist

    • Choose one cleaning-tool station.
    • Clear enough space to see the available storage.
    • Set up a temporary collection spot.
    • Collect cleaning tools from nearby rooms.
    • Sort items into frequent, occasional, and unsure or unused groups.
    • Return frequent-use tools first.
    • Group loose tools in an existing basket or container.
    • Move room-specific tools closer to their point of use when that makes sense.
    • Separate damaged, leaking, empty, or unclear items for review.
    • Test the station with one common cleaning task.
    • Make one final adjustment.
    • Set a short review point after the station has been used.

    Common problems and practical adjustments

    The station is too full

    Return to the use-based groups and remove occasional items from the easiest-to-reach area. A full station may need a second location for specialist tools, or it may contain duplicates that are not supporting the current routine.

    Tools keep moving around the home

    Look at where the tool is actually used. A central station can be helpful for shared supplies, but a frequently used room-specific tool may be easier to manage near its task. The aim is a sensible home flow, not a single location at any cost.

    The station looks tidy but is hard to use

    Reduce hidden layers. If reaching one item requires moving several others, change the order or use a more open container. A visually neat arrangement that slows down ordinary tasks will be difficult to maintain.

    Two people put items away differently

    Use broad labels and simple zones instead of detailed instructions. For example, separate “quick clean” from “floor care” if those categories match the household’s habits. Review the arrangement together after a few uses and change only the part that causes confusion.

    FAQ

    Does a cleaning station need special organizers?

    No. The station can begin with the storage already available at home. Containers are useful when they solve a specific problem, such as loose small tools or a difficult-to-see shelf, but buying supplies is not required for the routine.

    Should every cleaning tool be kept in one place?

    Not necessarily. Shared everyday tools can benefit from one station, while a tool used repeatedly in one room may be easier to store there. The decision should follow the home’s movement pattern and the tool’s actual frequency of use.

    How often should the station be reviewed?

    Review it after using the station for a short period and whenever the arrangement begins to slow down a routine. A brief reset is usually easier than waiting until the storage area becomes difficult to sort.

    What should happen to items in the unsure group?

    Keep them outside the main station while deciding what to do. Check whether they are usable, relevant to the household, and safe to store. Avoid forcing an uncertain item into the station simply because it already exists.

    Conclusion

    A practical cleaning-tool station starts with a clear location and a small set of storage rules. In 15 minutes, prepare one area, sort tools by use, return the most frequent items first, and review the flow with a real task in mind. The result does not need to be elaborate. It needs to make the next small cleaning job easier to begin and easier to finish.


  • A Refined Crystal Satin Mini Bag for Evening Styling

    JIMMY CHOO 봉 크리스털 장식 새틴 백 in silver with crystal embellishment and satin detailing

    The JIMMY CHOO 봉 크리스털 장식 새틴 백 is a compact silver accessory with a distinctly occasion-ready presence. Its satin exterior, mesh detailing and crystal embellishment create a layered finish that brings light and texture to a considered wardrobe. Made in Italy, this mini bag measures 14 cm in width, 15 cm in height and 9.5 cm in depth, offering a small but visually expressive format.

    Rather than competing with an outfit, a silver crystal bag can act as its finishing note. It can introduce a polished contrast to dark tailoring, complement the luminosity of a neutral ensemble or add a refined accent to a simple evening silhouette. The proportions also make it a useful choice when you want to carry only the essentials while keeping the overall look composed.

    As part of a mini-bag wardrobe, this design is best approached as a statement accessory with an elegant, decorative character. Its appeal lies in the balance between the soft appearance of satin, the structured impression of the compact shape and the reflective detail of the crystals.

    Details That Define the Design

    • Silver finish: The silver colour gives the bag a versatile evening palette, working naturally with black, white, grey and other understated tones.
    • Satin exterior: The 100% satin exterior contributes a smooth, softly lustrous surface and gives the design a refined textile character.
    • Crystal embellishment: The 100% crystal detailing provides the focal point, adding visual sparkle without requiring additional decorative accessories.
    • Mesh element: The 100% mesh component introduces a contrasting texture, helping the design feel detailed and dimensional.
    • Fabric lining: The interior is lined with 100% fabric, creating a considered finish for a compact accessory.
    • Compact proportions: At 14 cm wide, 15 cm high and 9.5 cm deep, the shape is designed for a deliberately edited carry.
    • Italian manufacture: The bag is manufactured in Italy, an important part of its product description and identity.

    The combination of satin, mesh and crystals makes this piece particularly effective when the rest of the outfit is visually restrained. It does not need elaborate coordination; the material contrast and silver tone already provide the styling interest.

    Ways to Style a Silver Mini Bag

    For an evening wardrobe: Pair the bag with a streamlined black dress or a dark, sharply cut suit. The silver surface can punctuate the look, while the crystal detail adds a formal accent. Keep jewellery selective so the bag remains the central point of light.

    For a modern neutral look: Ivory, cream, taupe and grey create a soft setting for the silver finish. A simple top and tailored trousers can give the accessory enough visual space, producing an appearance that feels polished without becoming overly styled.

    For tonal contrast: Use the bag against deep navy, charcoal or black. This approach emphasises the difference between the dark clothing and the reflective decoration, allowing the compact silhouette to read clearly.

    For a pared-back occasion look: Let the bag supply the decorative element while keeping shoes and other accessories clean in shape. This is especially effective when the outfit relies on strong fabric texture or a simple, uninterrupted line.

    For day-to-evening coordination: A minimal daytime base can be refined for an evening setting by introducing the bag as the final accessory. Because the format is compact, it works best when the contents are carefully edited rather than carried as an everyday large-volume tote.

    When coordinating colour, silver can be treated almost like a neutral metallic. It can sit beside monochrome clothing, echo cool-toned shades or provide a crisp counterpoint to warmer neutrals. The most successful pairings allow the bag’s satin and crystal surfaces to remain visible rather than surrounding them with competing shine.

    What to Consider Before Choosing

    Begin with the role you want the bag to play. The JIMMY CHOO 봉 크리스털 장식 새틴 백 is a mini bag with a decorative silver finish, so it is suited to an edited carry and a styling-led wardrobe. If you are looking for a piece that completes an outfit rather than replaces a larger daily bag, its compact proportions may be an appropriate fit.

    Next, review the dimensions: 14 cm in width, 15 cm in height and 9.5 cm in depth. These measurements are useful when considering what you intend to carry. Plan around essentials and check that your preferred items can be accommodated without putting pressure on the shape or embellishment.

    Material preference is another important consideration. The exterior combines 100% satin, 100% mesh and 100% crystal, with a 100% fabric lining. This combination creates its distinctive appearance, but it also means the bag should be treated as a carefully handled accessory rather than a casual, hard-wearing carryall.

    For coordination, consider the wardrobe you already own. Silver has broad styling potential, particularly with monochrome and neutral clothing, while the crystal finish suits occasions where a polished accent is welcome. If your clothing already includes substantial embellishment, compare the textures and tones carefully so the overall result remains balanced.

    For care, keep the bag away from avoidable friction, moisture and rough surfaces, and store it in a way that protects the satin, mesh and crystal details from contact with other accessories. Follow any care guidance supplied with the product and use the product page to confirm the current details before making a decision.

    Frequently Asked Questions

    What colour is the bag?
    The listed colour is silver.

    What materials are specified?
    The exterior is listed as 100% satin, 100% mesh and 100% crystal, with a 100% fabric lining.

    What are its dimensions?
    The stated measurements are 14 cm wide, 15 cm high and 9.5 cm deep.

    Where is it made?
    The product description states that it is manufactured in Italy.

    How should it be styled?
    It pairs naturally with restrained evening looks, monochrome tailoring and neutral outfits where its silver crystal detail can provide the finishing accent.

    What should I consider when caring for it?
    Because the design includes satin, mesh and crystal elements, handle it carefully, avoid unnecessary friction and refer to the product page for current care information.

    Please verify the current product details, dimensions, composition, care information and purchase information on the product page before purchase.

    View the JIMMY CHOO 봉 크리스털 장식 새틴 백 at THANKS KAI and consider how its silver crystal finish could complement your wardrobe.

    Product: JIMMY CHOO 봉 크리스털 장식 새틴 백

  • A Refined Guide to Taupe Round Ballet Pumps

    THE ROW Round ballerinas in taupe with a round toe, very thin sole and 1 cm flat heel

    THE ROW Round ballerinas distil the ballet pump into a particularly quiet, polished silhouette. In taupe, the design has a soft visual presence that works across a considered wardrobe, while the satin-finish leather gives the surface a discreet sheen. A closed round toe, very thin sole and 1 cm flat heel keep the profile graceful without introducing visual weight.

    Made in Italy, this pair is shaped for everyday styling as much as more composed occasions. Its neutral colour can sit comfortably beside tailoring, denim, fine knitwear or fluid separates, making it a useful choice when you want an outfit to feel finished without relying on a statement shoe. The product is described as fitting true to size, with the normal size recommended; readers should still consult the current size guide before ordering.

    This guide looks at the design details, the settings in which the shoes may work best, and the styling decisions that allow their understated character to remain central.

    The design details that define the silhouette

    • Satin-finish leather: The upper is made from 85% viscose and 15% silk, giving the taupe exterior a refined, lightly lustrous appearance rather than a strongly glossy effect.
    • Round closed toe: The rounded front establishes the classic ballet-pump identity and lends the shoe a gentle, balanced outline.
    • Flat 1 cm heel: The low heel preserves a close-to-the-ground stance while adding a small amount of structure to the profile.
    • Very thin sole: The slim sole keeps the overall look delicate and visually streamlined, especially when worn with cropped or ankle-length trousers.
    • Considered interior and sole materials: The lining is listed as 100% capra hircus, while the sole is listed as 100% calfskin.
    • Italian manufacture: The country of manufacture is Italy, an important reference point for shoppers assessing the product’s place within a premium footwear wardrobe.

    The appeal is in the relationship between these details. The round toe prevents the flat shape from feeling severe; the thin sole maintains elegance; and the restrained taupe colour allows the texture and proportions to do the work. Rather than competing with an outfit, the pair can act as a subtle finishing element.

    How to wear THE ROW Round ballerinas

    For an understated daily look, pair the taupe ballerinas with straight-leg denim and a fine knit in cream, charcoal or soft brown. Let the hem finish close to the ankle so the very thin sole remains visible. The result is relaxed but deliberate, with the shoe adding polish without shifting the outfit into formal territory.

    They also suit a tailored wardrobe. Try them with softly structured trousers, a crisp shirt and a compact jacket. A low, round ballet pump can temper the authority of tailoring, particularly when the trousers are slightly cropped. Keep the palette tonal—taupe, sand, ivory and grey—to highlight the shoe’s quiet character.

    For a more feminine direction, consider a midi skirt or a fluid dress with a clean hemline. The closed round toe provides definition beneath a softer silhouette, while the flat heel keeps the overall styling modern and unforced. A simple bag or understated jewellery can support the look without distracting from the satin-finish surface.

    On transitional days, the pair can be coordinated with a lightweight coat, long cardigan or relaxed blazer. Because taupe sits between warm and cool neutrals, it can connect different shades across an outfit. The most effective combinations are usually those that leave room for the shoe’s proportion and texture to be noticed.

    For occasion dressing, use the ballerinas as an alternative to a more pronounced heel. A streamlined dress, tailored separates or a polished skirt can all give the shoes a refined setting. The 1 cm heel and flat construction make the style visually restrained, so the rest of the outfit can carry colour, pattern or architectural detail if desired.

    What to consider before choosing this pair

    1. Assess the silhouette you want. This is a deliberately delicate ballet-pump shape, defined by a round toe, low heel and very thin sole. It is best suited to shoppers seeking a close-to-the-ground, understated profile rather than a substantial or platform-like shoe.
    2. Consider taupe within your existing wardrobe. The colour is versatile, but its effect will change according to the surrounding palette. It can blend into neutrals for a tonal outfit or provide a softened contrast against black, navy, denim and deeper brown.
    3. Look at the finish. Satin-finish leather introduces a gentle sheen. If you prefer footwear with a more visibly textured or matte appearance, compare that preference with the product images and current listing details before purchasing.
    4. Check the sizing information carefully. The listing states that the shoes fit true to size and recommends taking your normal size. Use the current size guide as an additional reference, particularly if your size varies between brands or shoe shapes.
    5. Plan for considered care. Keep the shoes protected from unnecessary friction, moisture and contact with rough surfaces, and store them so the satin-finish exterior is not pressed against abrasive items. For specific cleaning or storage instructions, follow the current product guidance rather than applying an unverified treatment.
    6. Review the product page before committing. Confirm the colour, listed composition, measurements, product code and purchase information on the live page, as these are the details most relevant to a considered selection.

    Frequently asked questions

    What colour are THE ROW Round ballerinas?

    The listed colour is TAUPE, a versatile neutral suited to tonal dressing and combinations with denim, black, ivory, grey and brown.

    What is the heel height?

    The heel height is listed as 1 cm, or 0.39 inches.

    What materials are listed?

    The upper is listed as 85% viscose and 15% silk. The lining is 100% capra hircus, and the sole is 100% calfskin.

    Do they fit true to size?

    The product information states that they fit true to size and recommends taking your normal size. Please consult the current size guide before purchase.

    Where are they made?

    The listed country of manufacture is Italy.

    What is the product code?

    The listed product code is ROWBSAJEGRYZZA1100.

    Product details, sizing, composition and purchase information may change. Please verify the current details on the product page before purchase.

    View THE ROW Round ballerinas at THANKS KAI and consider how their taupe tone and refined flat profile could complement your wardrobe.

    Product: THE ROW Round ballerinas

  • A Refined Bucket Bag for Everyday Styling

    DEMELLIER Large Siena bucket bag in D118 SMALL GRAIN TAN grained cowhide leather

    The DEMELLIER Large Siena bucket bag brings a composed, practical silhouette to everyday dressing. Made from 100% cowhide leather in D118 SMALL GRAIN TAN, it combines a softly textured surface with a clean, modern outline. The bucket-bag shape offers a spacious interior compartment, while the single leather handle keeps the design visually focused and easy to carry.

    With a width of 26 cm, a height of 30.5 cm and a depth of 10.5 cm, this is a generously proportioned accessory that can anchor a daily look without relying on excessive decoration. Sleek metal accents add a polished finish, balancing the natural character of grained leather with a distinctly contemporary mood. Manufactured in Spain, it is a considered choice for wardrobes built around quiet refinement and useful design.

    What Defines the Siena Silhouette

    Grained leather with a polished presence

    The bag is crafted from 100% cowhide leather. Its grained finish introduces subtle visual depth, allowing the warm tan colour to remain elegant rather than flat. This texture also gives the design a more relaxed, everyday attitude than a highly formal smooth surface, making it suitable for both tailored and casual combinations.

    A clear, functional profile

    The Siena is defined as a bucket bag with one handle and a spacious interior compartment. Its tall proportions create a distinctive vertical line, while the 26 cm width and 10.5 cm depth keep the profile neatly structured. The 30.5 cm height gives the design its characteristic presence and makes it an appealing option when a compact shoulder accessory would feel too limited.

    Details that keep the design modern

    A leather carry handle gives the bag a coherent, tonal appearance, and sleek metal accents provide a restrained point of contrast. Together, these details avoid visual clutter. The result is an accessory that can complement an outfit rather than compete with it, whether styled against neutral tailoring, soft knitwear or a simple day dress.

    Key details at a glance

    • Bucket-bag silhouette with a single handle
    • 100% cowhide leather
    • Colour: D118 SMALL GRAIN TAN
    • Spacious interior compartment
    • Sleek metal finish
    • Manufactured in Spain
    • Measurements: 26 cm wide, 30.5 cm high and 10.5 cm deep

    How to Style It Through the Day

    For a polished weekday wardrobe, pair the tan leather with cream, navy, charcoal or black. A sharply cut blazer and relaxed trousers will emphasise the Siena’s clean geometry, while the warm colour softens the overall look. Carry it by the single handle to keep the outfit’s lines intentional and refined.

    For a quieter daily ensemble, use the bag with a fine knit, straight-leg denim and understated flats or loafers. The grained leather adds texture to familiar basics, giving a simple outfit a finished quality without requiring additional statement accessories. Keep jewellery minimal if you want the metal accents to remain the only decorative note.

    The tall bucket-bag profile also works naturally with dresses. A fluid midi dress creates a gentle contrast with the structured accessory, while a crisp shirt dress brings out its more architectural side. In transitional weather, combine it with a lightweight coat or trench in a neutral shade so the D118 SMALL GRAIN TAN colour becomes a warm, grounding detail.

    For an accessory-led look, coordinate the bag with similarly warm elements such as tan shoes, a cognac belt or muted gold-toned details. Exact colour matching is not necessary; related tones can create a more considered result. Alternatively, place it against cool grey, denim or deep green for contrast that still feels sophisticated.

    Its proportions make it especially suited to days when you want a visibly substantial bag with a restrained finish. Before carrying it, consider the items you need and how they will sit within the interior compartment. This simple check helps you make the most of the spacious design while preserving a neat appearance.

    Selection and Care Considerations

    When choosing the DEMELLIER Large Siena bucket bag, begin with scale. At 30.5 cm high, it has a noticeable vertical presence, so it will appeal to those who prefer an accessory that is easy to see within an outfit rather than a small, discreet pouch. Its 26 cm width and 10.5 cm depth offer a balanced shape: generous enough for everyday organisation, while still clearly defined.

    Next, consider colour coordination. D118 SMALL GRAIN TAN is versatile with neutrals and denim, but it also introduces warmth to darker palettes. It can therefore work as a year-round wardrobe accent, particularly when paired with materials such as wool, cotton, denim or smooth tailoring fabrics. If your wardrobe already includes tan or natural accessories, the bag can extend that visual language; if not, it can serve as a single warm focal point.

    The single-handle construction is another important preference. It gives the bag a clean, edited appearance and encourages hand or forearm carrying. Choose it if that carrying style suits your daily routine and if you value a silhouette without multiple visible straps. The spacious interior compartment is practical, but the supplied details do not specify internal pockets or additional organisation, so review the product page carefully if those features are essential to you.

    For care, handle the grained leather thoughtfully and avoid exposing it unnecessarily to conditions that may mark or affect leather. Store it in a clean, dry place when not in use and avoid placing heavy or sharp items inside that could distort the form or scratch the interior. For cleaning or conditioning, follow care guidance appropriate to the product and leather finish, testing any product cautiously and consulting a qualified leather-care specialist when uncertain.

    Finally, review the listed measurements and product information before purchase. The model reference shown in the supplied details is 5ft 10in / 1.77m, which can help provide a visual sense of proportion, but personal styling preferences and carrying habits remain the best guide.

    Frequently Asked Questions

    What is the bag made from?

    It is made from 100% cowhide leather with a grained finish.

    What colour is the bag?

    The listed colour is D118 SMALL GRAIN TAN, a warm tan shade with a textured leather surface.

    How large is the bag?

    Its listed measurements are 26 cm in width, 30.5 cm in height and 10.5 cm in depth.

    How is it carried?

    The design has a single leather handle and is described as a carry-handle bucket bag.

    Where is it manufactured?

    The supplied product details state that it is manufactured in Spain.

    Does it have a spacious interior?

    Yes. The description identifies a spacious interior compartment, although further internal organisation details should be confirmed on the product page.

    Please verify the current product details, measurements, colour information and purchase information on the product page before purchase.

    View the DEMELLIER Large Siena bucket bag at THANKS KAI and consider how its refined tan leather and practical bucket-bag profile could complement your wardrobe.

    Product: DEMELLIER Large Siena bucket bag

  • A Refined Guide to Brown Leather Loafers

    Brown ACNE STUDIOS Leather loafers with round toes, visible stitching, logo details and low block heels

    ACNE STUDIOS Leather loafers offer a considered take on the classic loafer, combining a pull-on silhouette with carefully placed signature details. In brown, the design carries a warm, versatile presence that can move between polished daily dressing and more expressive styling. The round toe keeps the profile familiar, while the low block heel introduces a subtle lift without changing the understated character of the shoe.

    Visible stitching adds definition around the construction, and the engraved logo and prominent front logo bring a recognisable ACNE STUDIOS finish. Rather than relying on excessive ornament, the design builds its appeal through proportion, texture and small points of contrast. The result is a pair that can anchor an outfit while remaining easy to coordinate with existing wardrobe pieces.

    Made in Italy, the loafers feature an upper of 100% nylon, a lining of 100% calf leather and a sole of 100% cow leather. The listed heel height is 2 cm / 0.79 inch, and the product information states that the style fits true to size. Use the product page and its size guide as the final reference before selecting your usual size.

    Design Details That Define the Pair

    Pull-on construction

    The pull-on design keeps the silhouette clean and uninterrupted. It also gives the shoe an uncomplicated visual rhythm, making it especially suited to outfits where the accessories are intended to feel streamlined rather than heavily styled.

    Brown colourway

    Brown offers a softer alternative to black while retaining the composed character associated with a loafer. It coordinates naturally with denim, cream, beige, olive and deeper brown tones, and can also provide a warm counterpoint to grey or navy tailoring.

    Distinctive branding

    An engraved logo and a prominent front logo provide the main decorative focus. These details are balanced by visible stitching, allowing the craftsmanship-inspired elements to remain legible without overwhelming the round-toe shape.

    Practical proportions

    The round toe gives the design a classic outline, while the low block heel adds a defined base. At 2 cm / 0.79 inch, the heel remains a modest feature within the overall profile and supports the loafers’ versatile, everyday styling direction.

    Material composition

    The product details list 100% nylon for the upper, 100% calf leather for the lining and 100% cow leather for the sole. These specifications are useful reference points when considering wardrobe coordination, storage and the care guidance appropriate to each material.

    Ways to Style ACNE STUDIOS Leather loafers

    For a refined everyday look: Pair the brown loafers with straight-leg denim and a crisp shirt, fine knit or relaxed blazer. Keeping the denim hem clear of the shoe allows the visible stitching, round toe and front logo to remain part of the outfit rather than disappearing beneath a long trouser break.

    For understated office dressing: Use the loafers to soften a tailored combination of trousers and a fitted jacket. Charcoal, navy and stone shades create a measured contrast with brown, while a tonal brown belt or structured bag can connect the footwear to the rest of the look. If the dress code is formal, confirm that the loafer silhouette suits the setting.

    For a tonal wardrobe: Build around related earth tones. Camel knitwear, chocolate trousers or an ecru coat can make the brown colour feel deliberate and cohesive. Varying the depth of the shades prevents the outfit from looking flat while keeping the footwear at the centre of the composition.

    For a contemporary contrast: Combine the loafers with black trousers, a clean white top and one brown accessory. This approach frames the warm shoe colour as a deliberate accent. The low block heel and closed, round-toe shape keep the contrast polished rather than theatrical.

    For relaxed weekend dressing: Try the loafers with a midi skirt, loose denim or neatly cut casual trousers. A simple top and restrained accessories allow the logo details to add interest without requiring a highly elaborate outfit. The pull-on format also complements a straightforward, low-fuss wardrobe.

    When coordinating the pair, consider balance: the loafers have a recognisable branded front and visible construction details, so clothing with clear lines often creates the most harmonious result. Socks can introduce another layer of colour or texture, although the final choice should reflect the occasion and the proportions of the trousers or skirt.

    What to Consider Before Choosing

    1. Check the fit information. The product details state that the loafers fit true to size and recommend taking your normal size. Review the size guide on the product page before purchase, particularly if your preferred fit varies between footwear styles.
    2. Assess the silhouette. The round toe and low block heel create a classic, grounded profile. Choose this style if you want a loafer that feels composed and distinctive rather than sharply pointed or visibly high-heeled.
    3. Consider colour coordination. Brown is adaptable, but the depth of the shade should work with the colours already in your wardrobe. Think about whether you will wear the pair with denim, neutral tailoring, monochrome outfits or warm tonal combinations.
    4. Review the materials. The upper is listed as 100% nylon, with a 100% calf leather lining and 100% cow leather sole. Anyone selecting footwear according to material preference should use these details as a starting point and confirm the current product information before ordering.
    5. Plan simple care habits. Store the loafers in a clean, dry place and avoid treating the materials with an unverified product. Because the construction combines nylon and leather components, follow care instructions suited to the specific materials and test any approved product discreetly first.
    6. Think about frequency of wear. The design can support varied styling, from daily denim to tailored looks, but the best choice depends on how often the colour, shape and branding details will work with your existing wardrobe.

    Frequently Asked Questions

    What colour are the loafers?

    The listed colour is BROWN.

    What is the heel height?

    The heel height is listed as 2 cm / 0.79 inch.

    What materials are specified?

    The upper is 100% nylon, the lining is 100% calf leather and the sole is 100% cow leather.

    Where are they made?

    The stated country of manufacture is Italy.

    How should I choose a size?

    The product information says the loafers fit true to size and recommends taking your normal size. Review the product page’s size guide before purchase.

    What details distinguish the design?

    The loafers feature a pull-on design, engraved logo, prominent front logo, visible stitching, a round toe and a low block heel.

    Please verify the current product details, material information, sizing and purchase information on the product page before purchase.

    View ACNE STUDIOS Leather loafers at THANKS KAI to explore the full product details and styling potential.

    Product: ACNE STUDIOS Leather loafers

  • A Styling Guide to Sculptural Platform Sneakers

    MCQUEEN Oversized rubber sneakers in WHITE/BLACK/JET with a smooth leather upper, logo details and a robust platform sole

    MCQUEEN Oversized rubber sneakers bring a distinctly architectural attitude to everyday dressing. The design combines a smooth leather upper with a robust rubber platform sole, a rounded closed toe and a low 3 cm heel. In the WHITE/BLACK/JET colourway, the contrast-led appearance gives the pair an immediate presence while remaining easy to coordinate with a broad wardrobe.

    Details are deliberately recognisable without becoming overly ornate: secure laces are paired with a strap, visible stitching adds definition, and signature logos appear at the back and on the tongue. The result is a contemporary sneaker with a substantial silhouette and a clean, considered finish. Made in Italy and described as true to size, it is designed to fit shoppers who normally take their usual size.

    This guide focuses on how to use the pair as a styling foundation, what to consider before selecting it, and how to keep its visual balance in focus when building outfits. Whether worn with relaxed tailoring, denim or a simple day-to-day uniform, the platform profile can act as the defining element of the look.

    Design details that shape the look

    The appeal of MCQUEEN Oversized rubber sneakers lies in the relationship between proportion and restraint. The robust platform sole gives the shoe a grounded, substantial outline, while the low heel keeps the profile within the familiar language of an everyday sneaker. Its rounded toe softens the larger shape, creating a silhouette that feels bold but not sharply angular.

    • Material: smooth 100% calf leather upper, paired with a rubber sole.
    • Colour: WHITE/BLACK/JET, a graphic palette suited to monochrome and contrast styling.
    • Construction: closed round toe, secure laces, strap and visible stitching.
    • Brand signatures: logos are placed at the back and on the tongue for a distinctive finish.
    • Proportion: a platform sole with a listed 3 cm / 1.18 in heel height.
    • Origin: manufactured in Italy.

    The visual weight of the sole is important to the overall impression. It can anchor fluid or oversized clothing, add structure to casual separates, and bring a deliberate edge to otherwise minimal outfits. The WHITE/BLACK/JET combination also makes the sneaker useful when a wardrobe calls for a strong accent without introducing a new colour family.

    Ways to style the platform silhouette

    For a polished everyday outfit, pair the sneakers with straight-leg trousers and a crisp shirt. Allow a little of the trouser line to meet the substantial sole, creating a clean transition between the tailored upper half and the more assertive footwear. A structured coat or neat jacket can reinforce the refined, urban direction without competing with the logos.

    For a relaxed denim look, choose jeans with a straight or generously cut leg. The platform profile gives the outfit a clear focal point, while the black and white palette keeps the combination composed. Add a simple knit, sweatshirt or understated top and let the footwear provide the main graphic contrast.

    The sneakers can also balance softer proportions. Try them with a flowing skirt or an easy, full-length dress to introduce a more grounded counterpoint. The rounded toe and visible stitching keep the pairing connected to everyday dressing, while the robust sole prevents the outfit from feeling too delicate.

    For a monochrome wardrobe, use the pair to echo black, white or neutral pieces rather than adding multiple competing shades. In a more layered outfit, coordinate the shoe with one small detail—such as a black belt, bag or frame—to make the colour story feel intentional. The logos remain a distinctive element, so accessories can stay simple and well spaced.

    These styling ideas suit a range of daily scenarios, from city errands and casual meetings to travel days and weekend dressing. The key is proportion: balance the larger sole with either relaxed volume or clean, structured lines, depending on the mood you want to create.

    What to consider before selecting your pair

    Begin with silhouette. This is an oversized sneaker with a robust platform sole, so it will read as a noticeable component of an outfit rather than a barely-there basic. If you prefer footwear that quietly recedes, a lighter profile may be more appropriate. If you enjoy sculptural proportions and a defined streetwear influence, the shape offers a clear styling direction.

    Next, consider colour coordination. WHITE/BLACK/JET is versatile within monochrome wardrobes and works naturally with denim, tailoring and neutral layers. Think about the clothes you already wear most often: the pair will be particularly easy to use when black, white and understated tones recur across your wardrobe.

    Fit is another practical point. The supplied product information states that the sneakers fit true to size and recommends taking your normal size. Review the available size guide before ordering, especially if you are between sizes or usually need a specific fit preference. Product details, measurements and purchase information should be confirmed on the product page.

    For care, treat the smooth calf leather thoughtfully and keep the pair away from avoidable scuffs, excessive moisture and rough storage conditions. After wear, a gentle dry wipe can help remove surface dust; use only care products suitable for the relevant leather and follow their instructions. Store the sneakers in a clean, dry place with enough room to preserve their shape, and keep the rubber platform free from residue where possible. Always check the product page or specialist care guidance for the most appropriate maintenance approach.

    Finally, consider coordination beyond clothing. Because the sneakers already combine a strong sole, contrast colour and signature logo placement, a restrained bag or minimal jewellery can help the footwear remain the deliberate centre of the outfit.

    Frequently asked questions

    What is the exact product name?
    MCQUEEN Oversized rubber sneakers.

    What are they made from?
    The listed material is 100% calf leather, with a rubber sole.

    What colour are they?
    The listed colour is WHITE/BLACK/JET.

    How high is the heel?
    The product information lists a 3 cm / 1.18 in heel height.

    Do they fit true to size?
    Yes. The supplied information says they fit true to size and recommends taking your normal size. Please consult the size guide before purchase.

    Where are they made?
    The country of manufacture is listed as Italy.

    How can I style the oversized shape?
    Balance the substantial platform with straight-leg denim, relaxed tailoring, monochrome separates or flowing pieces for contrast.

    Please verify current product details, sizing information, care guidance and purchase information on the product page before purchase.

    View MCQUEEN Oversized rubber sneakers at THANKS KAI and consider how their graphic platform silhouette could work within your wardrobe.

    Product: MCQUEEN Oversized rubber sneakers

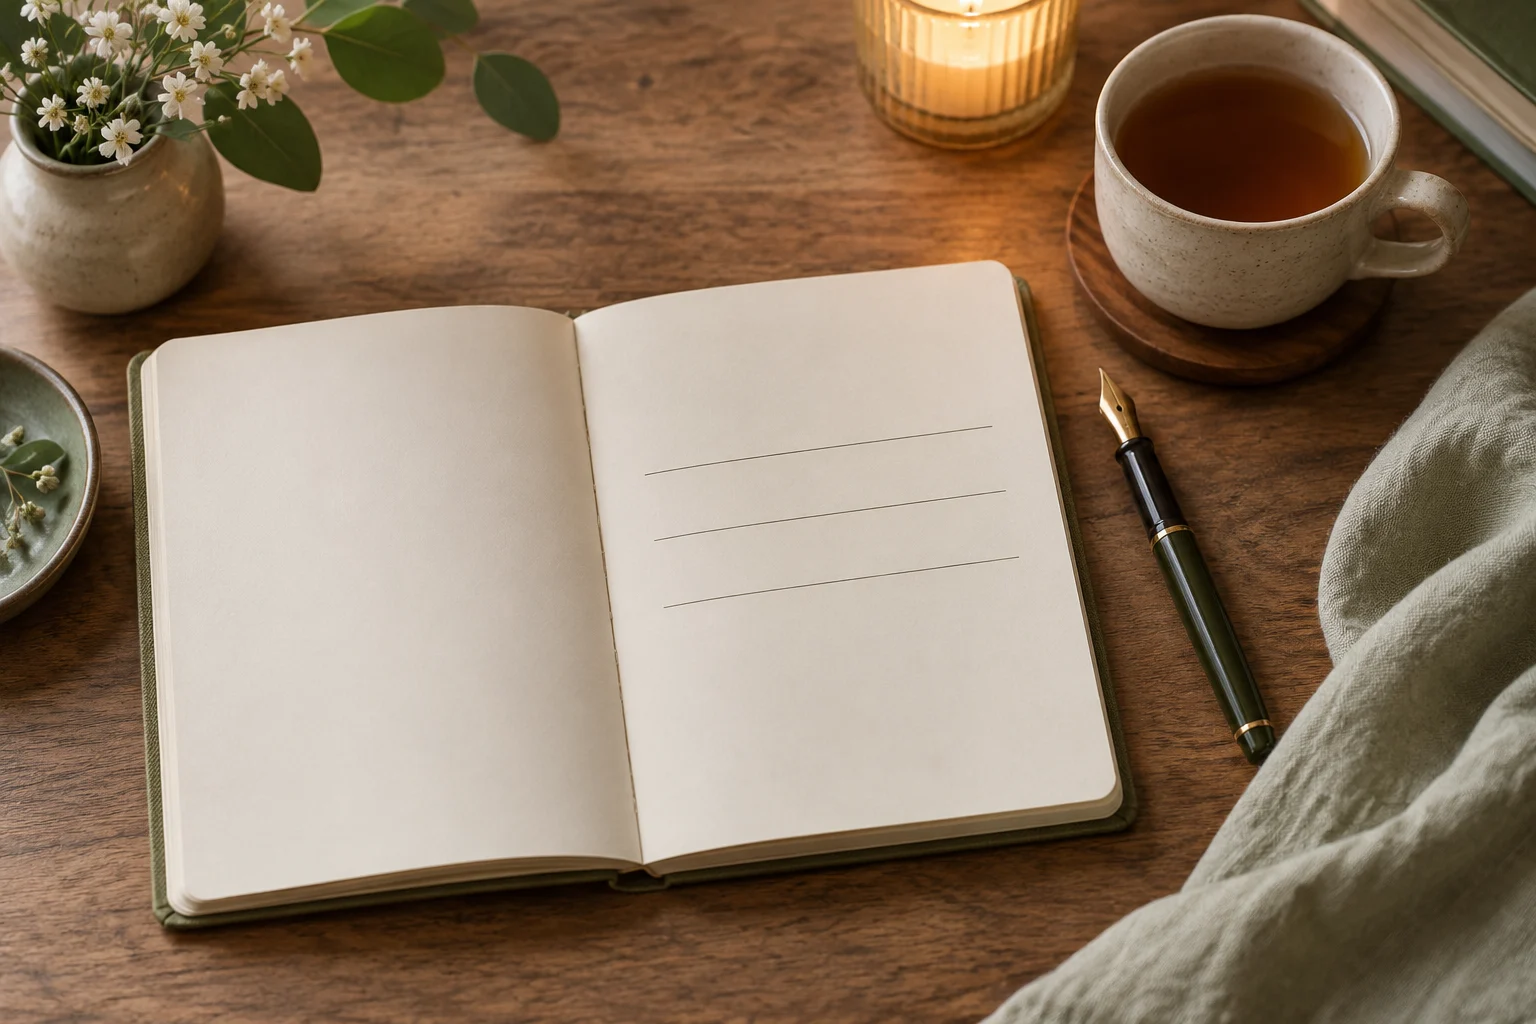
  • A Low-Pressure Three-Line Mood Journal for a 15-Minute Self-Care Routine

    A Low-Pressure Three-Line Mood Journal for a 15-Minute Self-Care Routine

    작성자: Kai Life Editorial Team

    A three-line mood journal can fit into a 15-minute self-care routine without requiring a long reflection session. Write one line for how you feel, one line for what may be affecting you, and one line for the next small action that could make the rest of the day easier. The goal is not to produce a polished diary entry. It is to create a brief pause that helps you notice your current state and choose a realistic next step.

    A simple three-line mood journal with a pen and tea

    This approach is designed for adults who want more room for rest and personal routines but do not want another demanding task on their schedule. You can use it in the evening, during a break, or whenever a transition between activities feels crowded.

    The three-line mood journal template

    Keep the format stable so you do not spend your limited time deciding what to write. Use a notebook, a plain document, or a note on your phone. The tool matters less than having a quick place to record the three lines.

    1. Notice: “Right now, I feel…”
    2. Sort: “One thing influencing this may be…”
    3. Act: “For the next part of my day, I will…”

    The first line names your present experience in ordinary language. A word such as “flat,” “restless,” “relieved,” “busy,” or “uncertain” is enough. The second line adds context without requiring a complete explanation. The third line turns the journal into a practical self-care routine by choosing one modest action, such as drinking water, putting your phone away for ten minutes, preparing tomorrow’s bag, taking a quiet break, or ending a task at a planned point.

    You can change the wording if a prompt feels awkward. For example, “What is taking up space?” may work better than “What is influencing this?” The structure should reduce friction, not create a test you can fail.

    A 15-minute prepare, sort, act, and review routine

    Use the following sequence when you want a little more structure than simply filling in three lines. The time blocks are guides rather than rules. If you have only five minutes, shorten each stage. If writing feels tiring, use keywords instead of sentences.

    1. Prepare: create a small landing place

    Suggested time: 2 minutes.

    Choose a place where the journal can be opened without a search. Put the notebook or note within reach, silence nonessential notifications, and decide whether this is an evening routine or a short break during the day. You do not need to arrange a special setting. A chair, kitchen table, desk corner, or quiet part of a shared room can work.

    Before writing, set a clear boundary for the routine. You might say, “I am giving this fifteen minutes, then I will return to the next part of my day.” This helps keep reflection from expanding into an unplanned review of every problem.

    2. Sort: complete the first two lines

    Suggested time: 5 minutes.

    Write the first line as a direct observation of your current mood or energy. Try not to argue with the feeling or explain it too early. Then write the second line by identifying one possible influence. This could be a full calendar, unfinished chores, a pleasant conversation, poor planning, a noisy environment, or simply the need for a pause.

    Use tentative language when the cause is unclear. Phrases such as “may be connected to,” “I notice,” and “perhaps” leave room for uncertainty. A mood journal is a snapshot, not a final explanation. On some days, the most accurate second line may be, “I am not sure what is affecting this.”

    3. Act: choose one low-pressure response

    Suggested time: 5 minutes.

    Write the third line as one action that is specific enough to begin but small enough to fit the next part of your day. The action can support rest, organization, or a smoother transition. Examples include:

    • Take a ten-minute screen-free break.
    • Put one item back in its usual place.
    • Make a simple drink and sit down while having it.
    • Write tomorrow’s first task on a note.
    • Move one optional task to another day.
    • Stretch gently or change into more comfortable clothes.
    • Finish the current task and stop at the planned time.

    Choose an action you can understand without extra planning. “Fix my whole schedule” is too broad for this routine. “Move the appointment reminder to tomorrow’s list” is easier to begin. The point is not to solve everything in fifteen minutes; it is to create a manageable handoff to what comes next.

    4. Review: close the page

    Suggested time: 3 minutes.

    Read the three lines once. Ask two practical questions: “Is the next action clear?” and “What would make it easier to start?” If the action is still too large, reduce it again. For example, change “organize the desk” to “clear one corner of the desk.”

    Then close the notebook or note. A closing step matters because it separates reflection from the rest of the evening or break. You can mark the routine complete with a simple check, place the notebook back in its spot, and begin the chosen action. You do not need to reread older entries during every session.

    How to keep the routine low pressure

    Journaling can become burdensome when it is treated as a daily performance. The following adjustments keep the practice flexible.

    • Use fragments. “Tired; too many messages; ten quiet minutes” is a valid entry.
    • Skip the backstory. Record enough context to choose a next step, not every detail.
    • Allow neutral entries. “Fine, no clear reason, prepare lunch” is useful information too.
    • Use a shorter version. On a crowded day, write three words instead of three sentences.
    • Change the timing. An evening routine is optional. A midday break may suit your schedule better.
    • Leave gaps without catching up. Missing a day does not create a backlog.
    • Keep the action reversible. Pick something you can adjust if your needs change.

    If writing increases your sense of pressure, replace it with a spoken note, a few keywords, or a simple three-box check-in. The useful part is the pause and the choice, not the appearance of the record.

    Copyable 15-minute checklist

    Copy this checklist into a notebook, document, or notes app. It is intentionally short enough to use during an ordinary break.

    Time Step Prompt Done
    0–2 min Prepare Open the journal and choose a clear stopping point. □
    2–7 min Sort Write how I feel and one possible influence. □
    7–12 min Act Choose one small action for the next part of the day. □
    12–15 min Review Make the action clearer, then close the journal. □

    Examples for different parts of the day

    When the evening feels crowded

    Notice: “I feel wired and ready to keep doing tasks.”
    Sort: “An unfinished list is keeping my attention active.”
    Act: “I will write tomorrow’s first task and stop planning for tonight.”

    During a work or study break

    Notice: “I feel scattered.”
    Sort: “I switched between several messages and tasks.”
    Act: “I will take five quiet minutes, then choose one next task.”

    When the mood is difficult to name

    Notice: “Something feels off.”
    Sort: “I do not know the reason yet; the room is noisy and I have not paused.”
    Act: “I will move somewhere quieter and check in again later.”

    These examples are not diagnoses or fixed interpretations. They show how a journal entry can remain concrete while leaving room for uncertainty.

    Review the pattern without overanalyzing it

    After several entries, you may choose to review them once a week or at another interval that suits you. Look for practical patterns rather than trying to judge yourself. You might notice that transitions are difficult, that late tasks make evenings feel crowded, or that short breaks are easier to take when they are attached to an existing activity.

    Use a three-question review:

    1. Which situations appeared more than once?
    2. Which small actions were easy to begin?
    3. What could I remove, postpone, or prepare earlier?

    Keep the review brief. If an observation is not useful for planning or rest, you can leave it unresolved. If your mood concerns feel intense, persistent, or disruptive, consider speaking with a qualified health professional or another trusted source of support rather than relying on a journaling routine alone.

    FAQ

    Do I need to write every day?

    No. Use the routine when it helps you create a pause or organize a transition. A schedule with occasional entries may be more sustainable than a rigid daily target.

    What if I cannot identify my mood?

    Use a body or activity description instead, such as “low energy,” “rushing,” “quiet,” or “unable to focus.” You can write that the mood is unclear and move to the possible influence and next action.

    Should the three lines be positive?

    No. The purpose is clarity, not forced positivity. A realistic entry can name a difficult moment and still choose a modest action that supports the next part of the day.

    Can I use the routine as an evening routine?

    Yes. It can serve as a transition between activity and rest. Keep the final action gentle and specific, such as putting away the journal, preparing one item for tomorrow, or taking a short screen-free pause.

    What if the journal makes me think about more tasks?

    Return to the time boundary and reduce the action. Write additional tasks on a separate list only if that helps you release them. The mood journal itself can remain limited to three lines.

    Conclusion

    A low-pressure three-line mood journal is a compact self-care routine for noticing your current state and choosing one manageable next step. Prepare the space, sort the moment into two lines, act on one small decision, and review only enough to close the loop. With a flexible 15-minute structure, journaling can support a calmer transition without becoming another demanding project.


THANKS KAI CONTACT

WeChat

위챗에서 QR코드를 스캔해 주세요.
Scan the QR code in WeChat.

Thanks Kai WeChat contact QR code위챗 열기 / Open WeChat